> ## Documentation Index
> Fetch the complete documentation index at: https://gcore.com/docs/llms.txt
> Use this file to discover all available pages before exploring further.
# Network configuration
## **Overview**
After your request is approved, configure your protected network by setting the GRE endpoint and selecting a protection profile.
## **Instructions**
### **1. Log in to the portal**
* Access the [Gcore Customer Portal](https://portal.gcore.com/accounts/reports/dashboard).
* Go to **DDoS Protection** > **Protected networks**.
### **2. Locate your approved network**
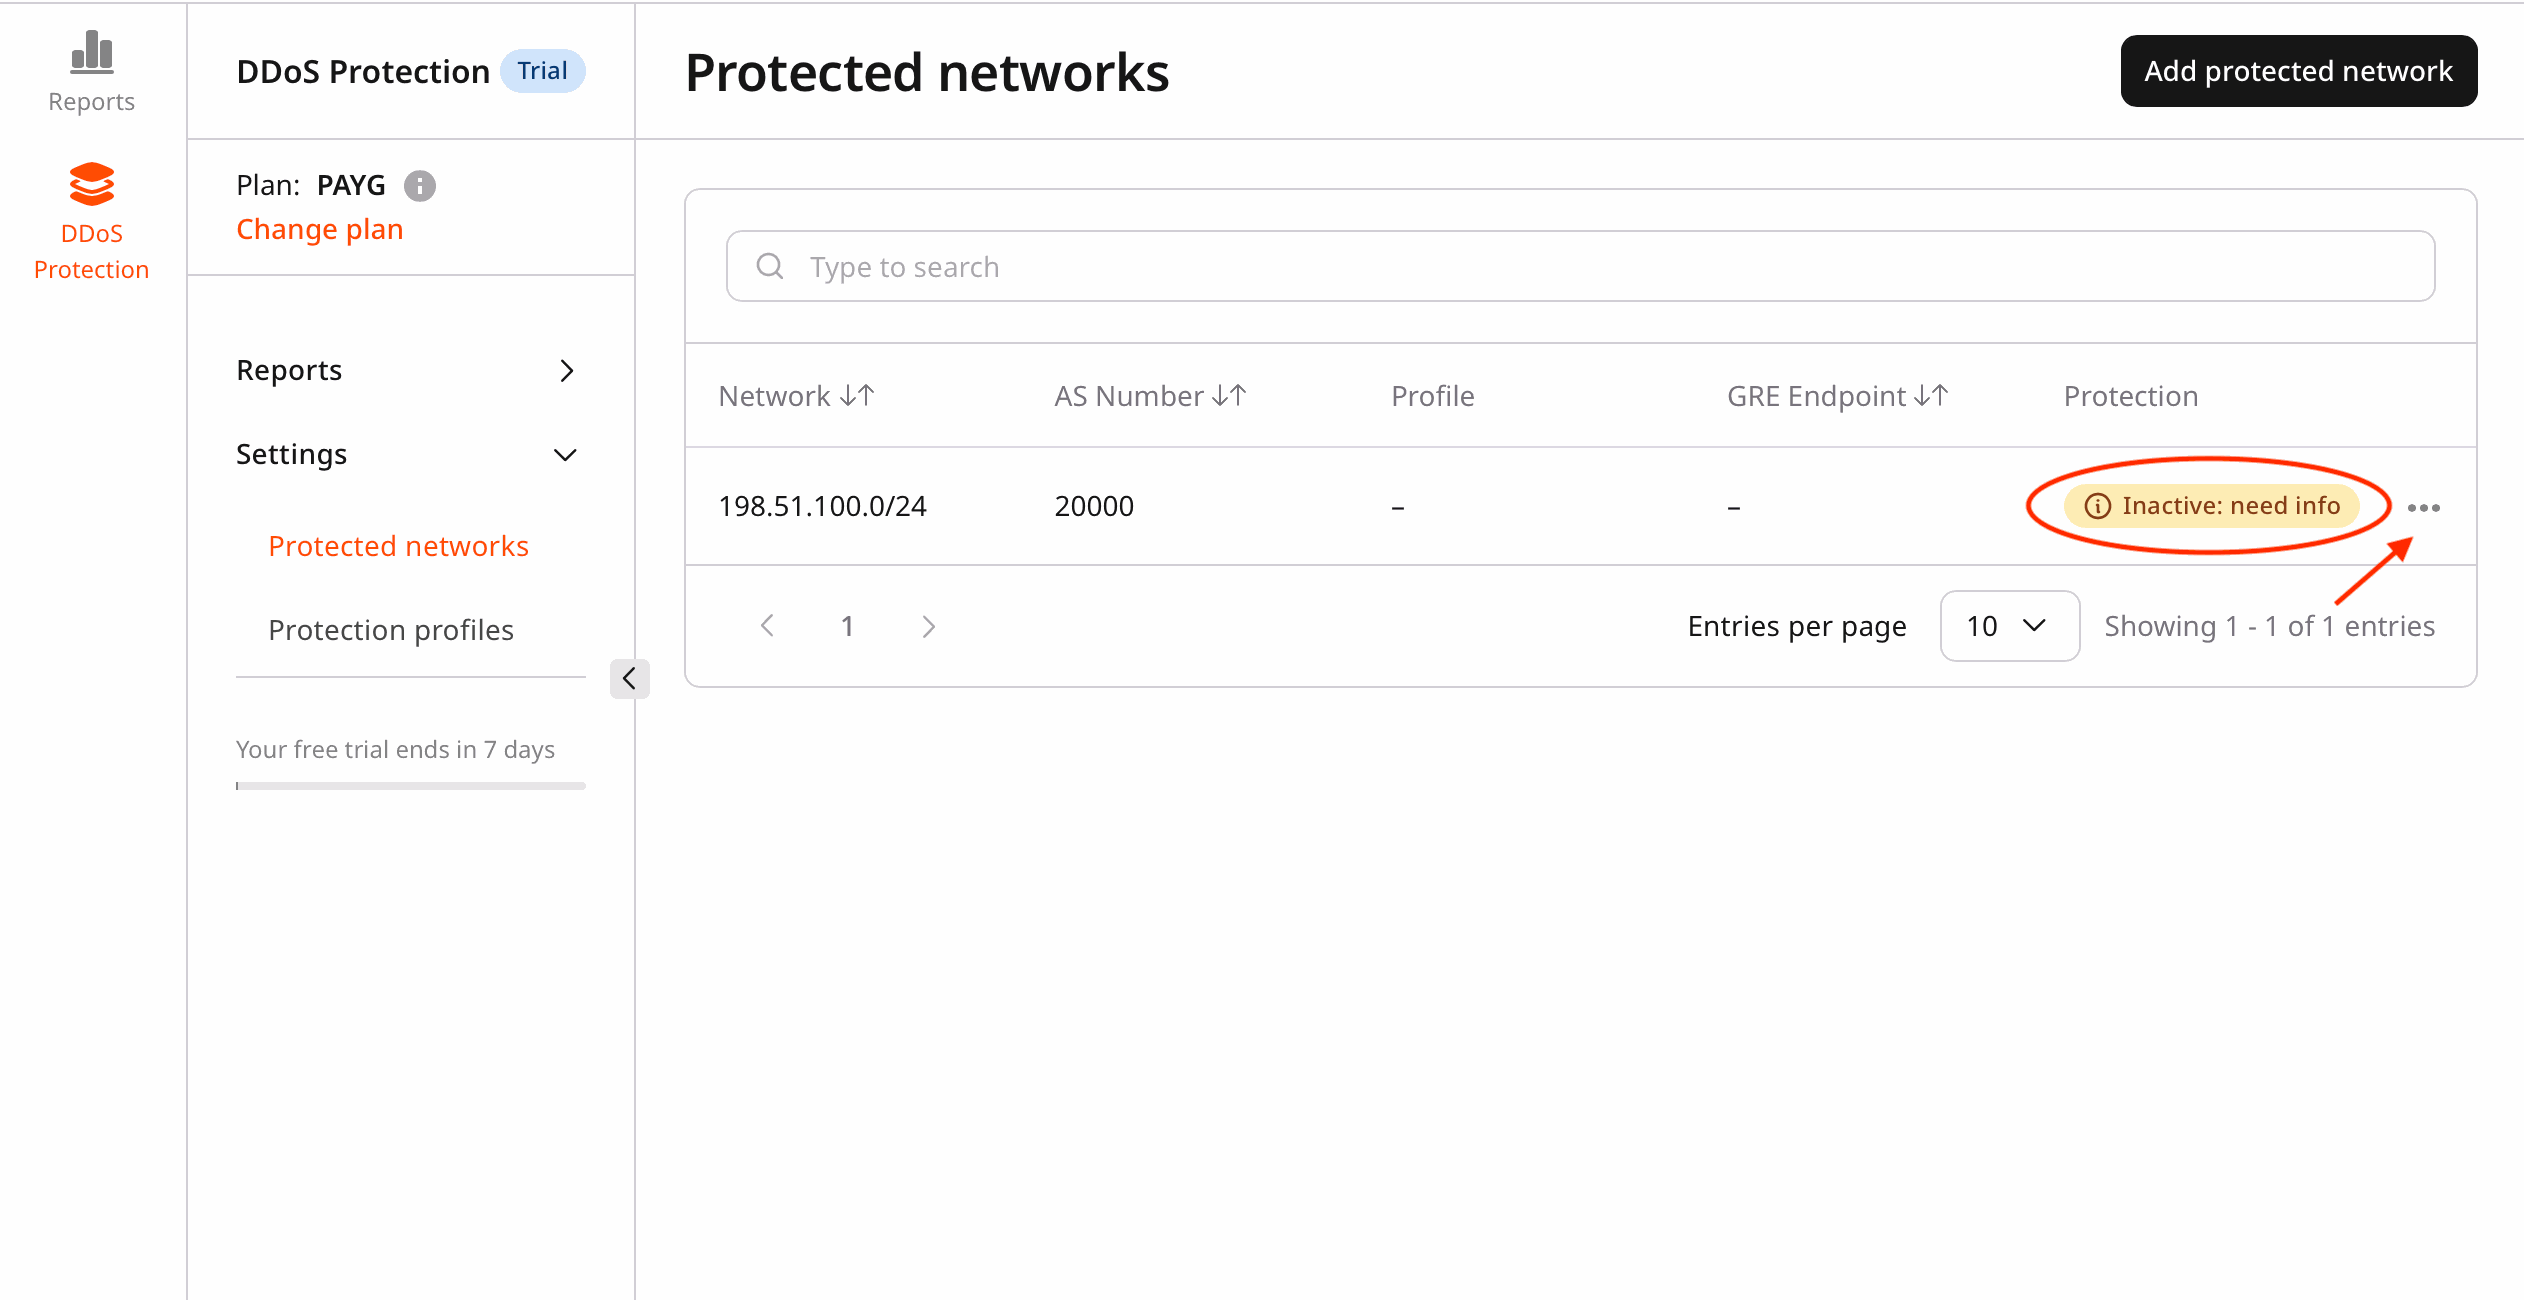
* Find the network with the **Inactive: need info** status.
* Click the **…** (three dots) menu next to the network.
* Select **Edit**.
 ### **3. Configure network settings**
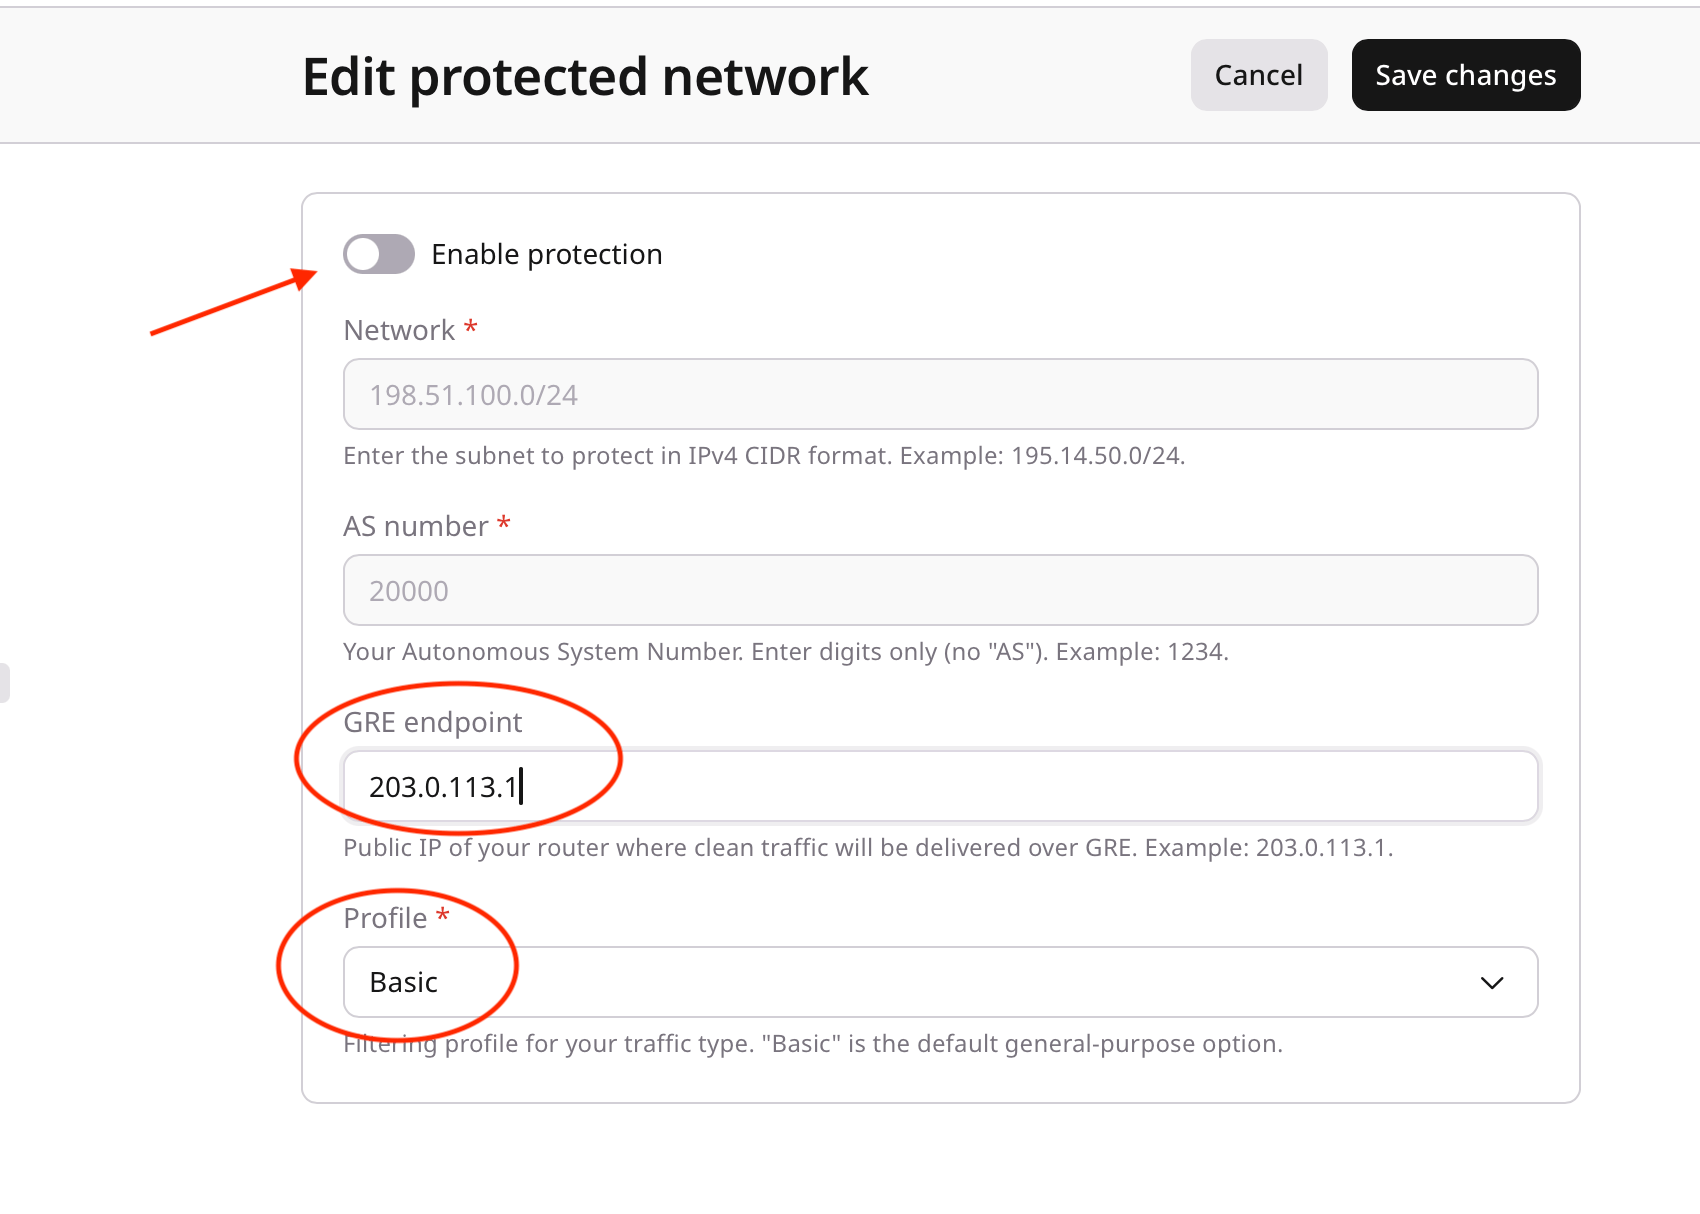
In the **Edit protected network** view, configure the following:
* **GRE endpoint**
* Enter your GRE (generic routing encapsulation) endpoint IP address.
* This is the IP address where traffic will be tunneled.
* Example: `203.0.113.1`
* **Protection profile**
* Select a protection profile from the dropdown list.
* Default option: only the **Basic** protection profile is available initially.
* You can create custom profiles later.
### **4. Save the configuration**
* Review all settings.
* Click **Save changes** to apply the configuration.
Note
* The **Basic** profile provides standard DDoS protection.
* You can create and apply custom protection profiles later.
* Changes take effect immediately after saving.
### **3. Configure network settings**
In the **Edit protected network** view, configure the following:
* **GRE endpoint**
* Enter your GRE (generic routing encapsulation) endpoint IP address.
* This is the IP address where traffic will be tunneled.
* Example: `203.0.113.1`
* **Protection profile**
* Select a protection profile from the dropdown list.
* Default option: only the **Basic** protection profile is available initially.
* You can create custom profiles later.
### **4. Save the configuration**
* Review all settings.
* Click **Save changes** to apply the configuration.
Note
* The **Basic** profile provides standard DDoS protection.
* You can create and apply custom protection profiles later.
* Changes take effect immediately after saving.
 ## **Next steps**
After completing the service activation setup, these are the next steps:
* Monitor the network traffic.
* [Create custom protection profiles](/ddos-protection/onboarding-service/custom-protection-profile-configuration) (if needed).
* Adjust settings as required.
## **Next steps**
After completing the service activation setup, these are the next steps:
* Monitor the network traffic.
* [Create custom protection profiles](/ddos-protection/onboarding-service/custom-protection-profile-configuration) (if needed).
* Adjust settings as required.