> ## Documentation Index
> Fetch the complete documentation index at: https://gcore.com/docs/llms.txt
> Use this file to discover all available pages before exploring further.
# Setup and configuration
## Before you start
Prepare the following information:
* Origin server IP address
* Port number your application uses
* Protocol (TCP or UDP)
* Application type
## Step 1. Open Edge Proxy page
Navigate to the Edge Proxy section in the [Gcore Customer Portal](https://portal.gcore.com/).
* If this is your first proxy, click **Add Your First Protection**
* If you already have proxies, click **Add Protection**
## Step 2. Configure proxy settings
Fill in the configuration form.
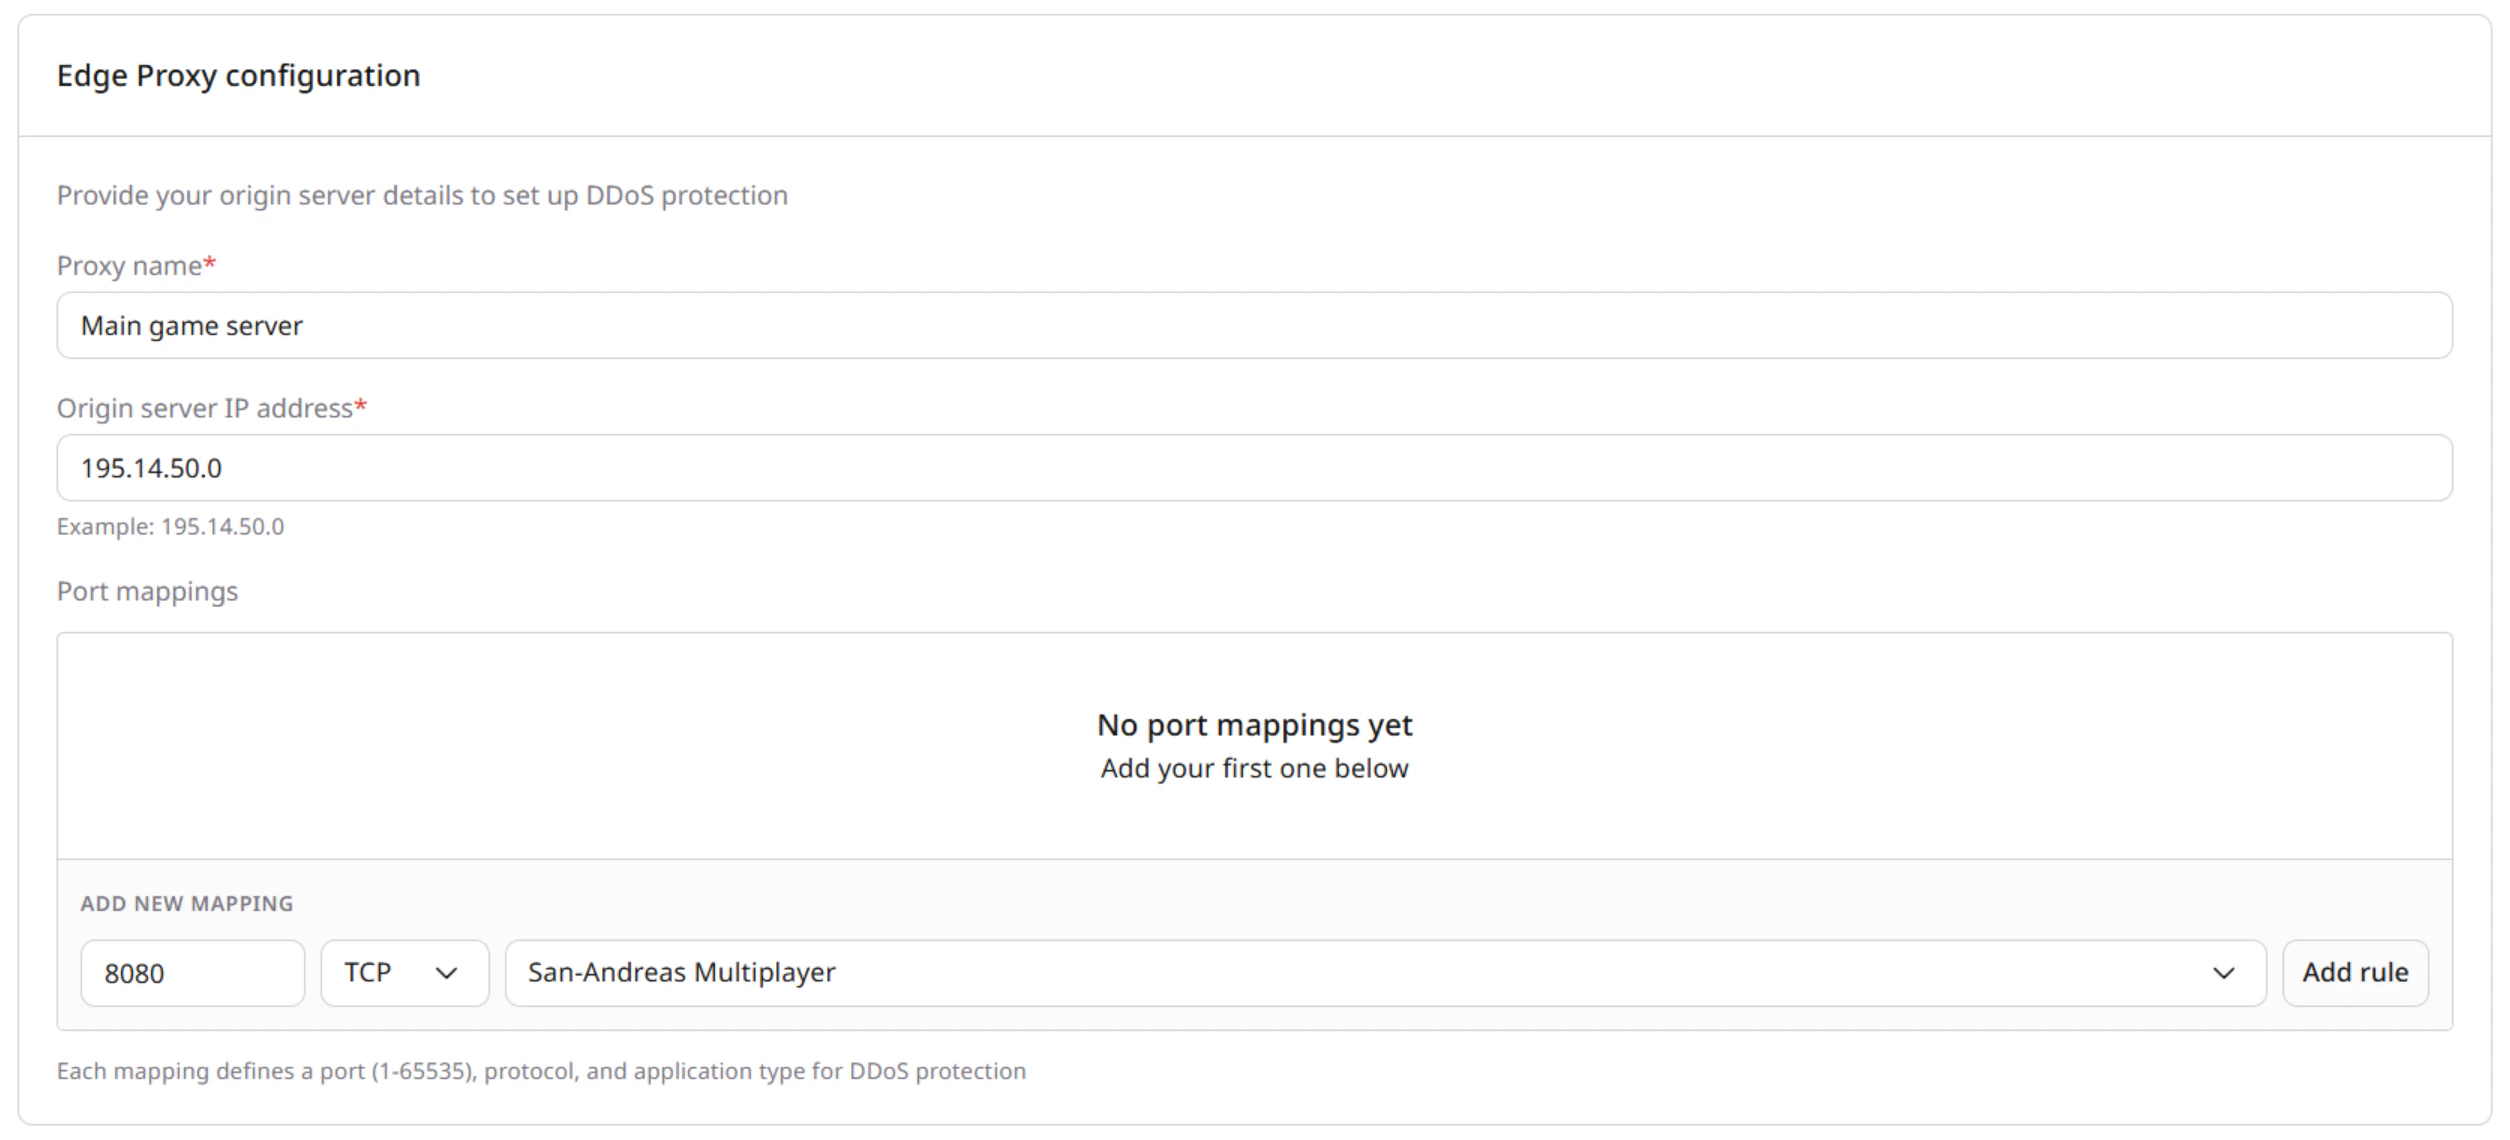 ### Proxy name
Enter a friendly name to identify your proxy.
Example: Main game server.
### Origin IP address
Enter your origin server IP.
* Must be a valid IPv4 or IPv6 address
### Port number
Enter the port your application listens on.
* Range: 1–65535
### Protocol
Select the protocol:
* TCP
* UDP
### Application type
Select the application type from the dropdown.
Examples include:
* Minecraft
* Counter-Strike
* Left 4 Dead 2
* San Andreas Multiplayer
* Rust
* Teamspeak
* Battlefield 2
* Unity
## Step 3. Start protection
* After filling in all required fields, click **Start Protecting**
* The system processes the request (about 20 seconds)
* A progress indicator appears during setup
## Step 4. Get protected endpoint
After activation, you receive:
* Protected IP address with port
* Active status
* Configuration summary
Copy the IP:PORT value.
## Step 5. Update your service
Update your DNS or client configuration:
* Use a CNAME record pointing to the protected endpoint\
or
* Use the provided IP:PORT directly
## Step 6. Verify protection
Check that:
* Traffic flows through the protected IP
* Your service is accessible
* The proxy status is active in the list
If you encounter issues during setup or verification, refer to the [Edge Proxy FAQs and troubleshooting](/edge-proxy/faqs-and-trobleshooting) guide.
## Manage protected IPs
### View proxies
The list shows:
* Proxy name
* Status (active)
* Protected IP and port
* Origin IP
* Protocol
* Application type
* Creation date
### Delete a proxy
Click **Delete** and confirm the action in the dialog.
## Notes and limitations
* You can create multiple translation rules under one protected IP
* Each rule is defined by origin, port, protocol, and application type
* Setup typically takes less than five minutes
## Billing overview
Billing is based on the number of translation rules.
### Proxy name
Enter a friendly name to identify your proxy.
Example: Main game server.
### Origin IP address
Enter your origin server IP.
* Must be a valid IPv4 or IPv6 address
### Port number
Enter the port your application listens on.
* Range: 1–65535
### Protocol
Select the protocol:
* TCP
* UDP
### Application type
Select the application type from the dropdown.
Examples include:
* Minecraft
* Counter-Strike
* Left 4 Dead 2
* San Andreas Multiplayer
* Rust
* Teamspeak
* Battlefield 2
* Unity
## Step 3. Start protection
* After filling in all required fields, click **Start Protecting**
* The system processes the request (about 20 seconds)
* A progress indicator appears during setup
## Step 4. Get protected endpoint
After activation, you receive:
* Protected IP address with port
* Active status
* Configuration summary
Copy the IP:PORT value.
## Step 5. Update your service
Update your DNS or client configuration:
* Use a CNAME record pointing to the protected endpoint\
or
* Use the provided IP:PORT directly
## Step 6. Verify protection
Check that:
* Traffic flows through the protected IP
* Your service is accessible
* The proxy status is active in the list
If you encounter issues during setup or verification, refer to the [Edge Proxy FAQs and troubleshooting](/edge-proxy/faqs-and-trobleshooting) guide.
## Manage protected IPs
### View proxies
The list shows:
* Proxy name
* Status (active)
* Protected IP and port
* Origin IP
* Protocol
* Application type
* Creation date
### Delete a proxy
Click **Delete** and confirm the action in the dialog.
## Notes and limitations
* You can create multiple translation rules under one protected IP
* Each rule is defined by origin, port, protocol, and application type
* Setup typically takes less than five minutes
## Billing overview
Billing is based on the number of translation rules.