Create and configure a load balancer
A load balancer is a tool used to sort incoming requests across your virtual machines to improve your infrastructure's fault tolerance.
Step 1. Initiate load balancer creation
Go to your project, navigate to the "Load Balancers" in the "Networking" section and click Create Load Balancer.
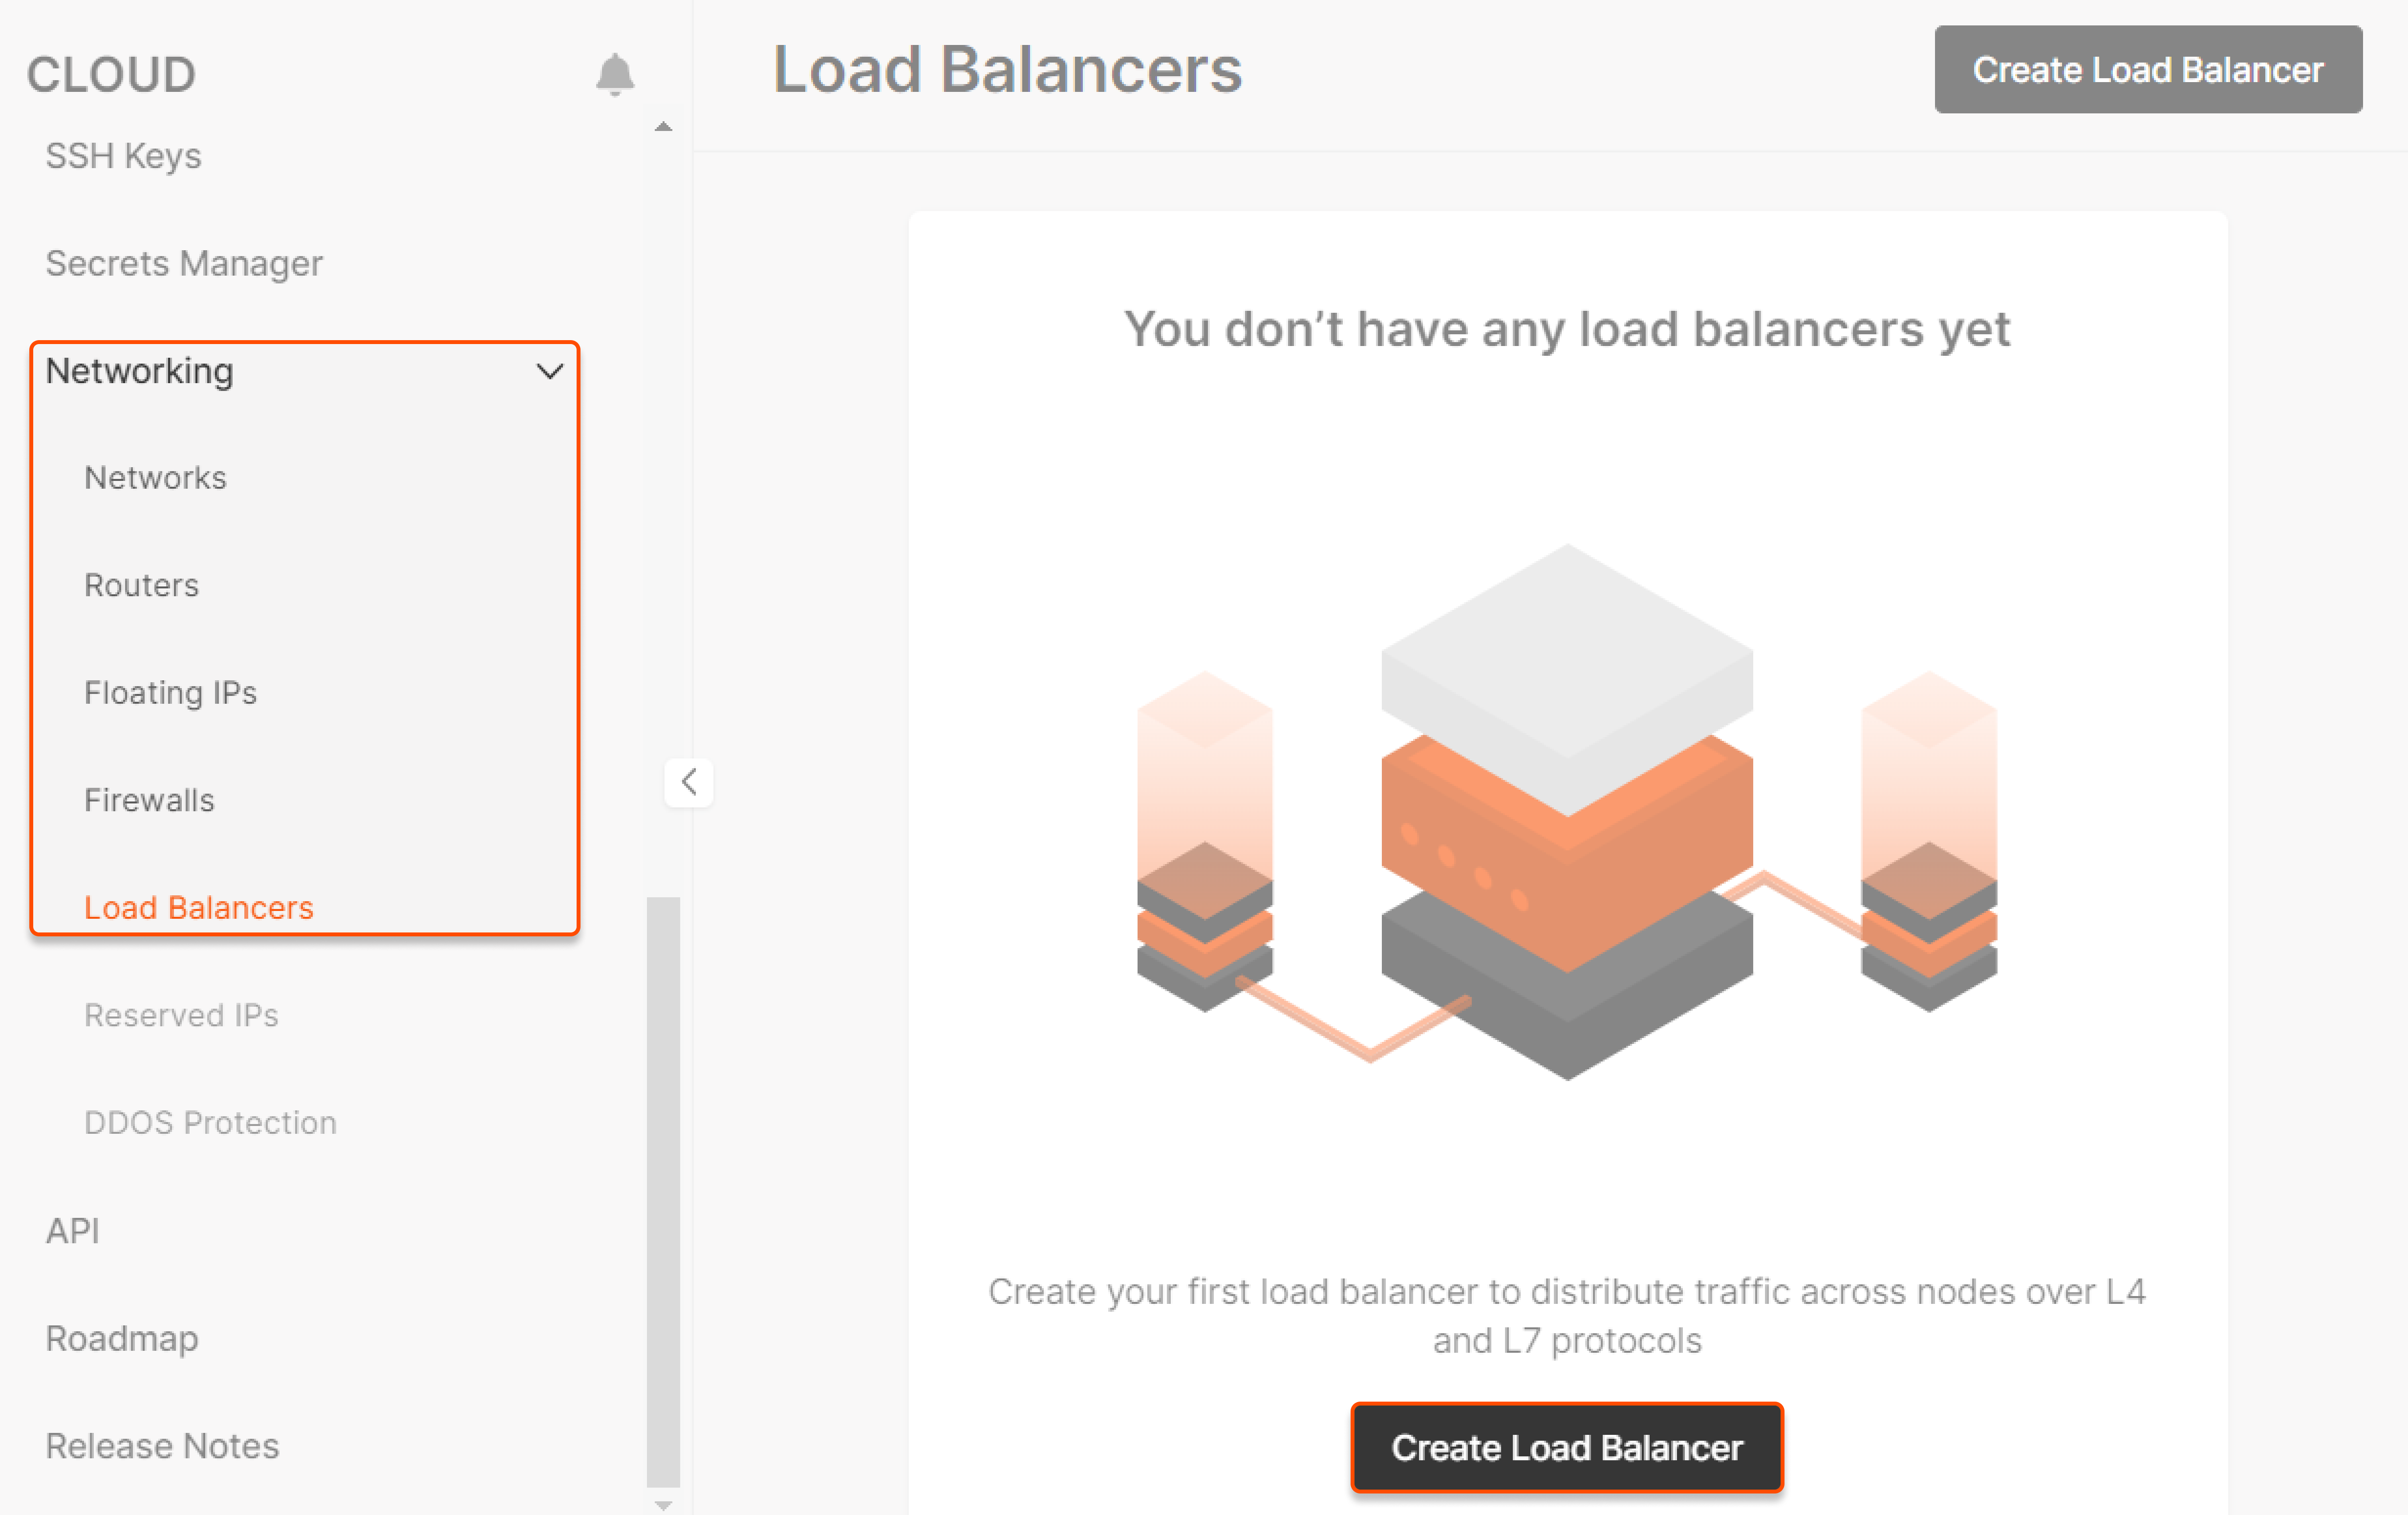
The new page opens. Perform the remaining steps there.
Step 2. Set the region
Select a region for balancing.
You can balance traffic only within a single data center.
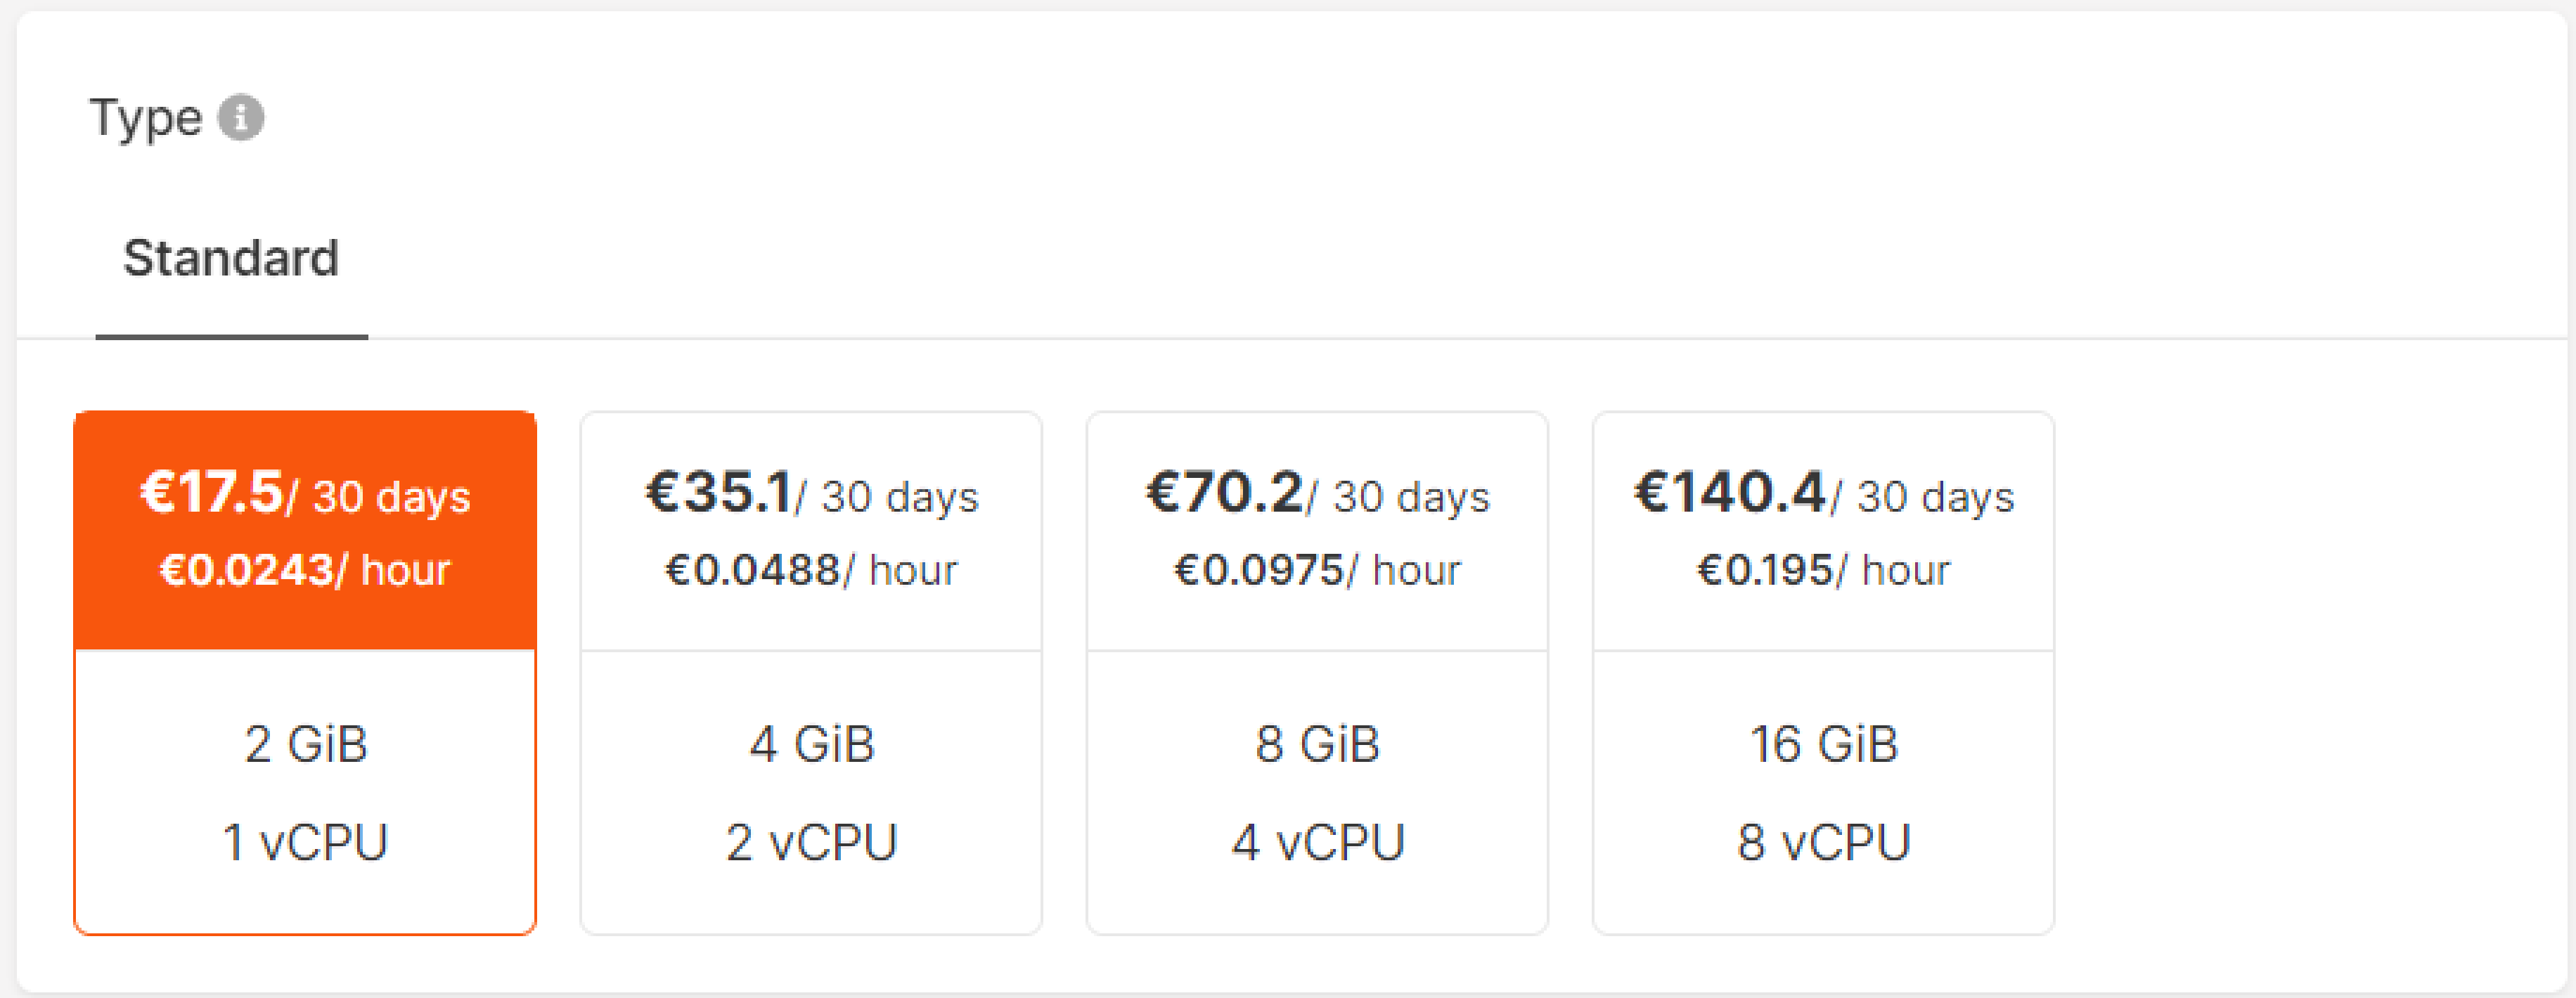
Step 3. Set computing configuration
Select a suitable computing configuration for your load balancer: GiB and vCPU.
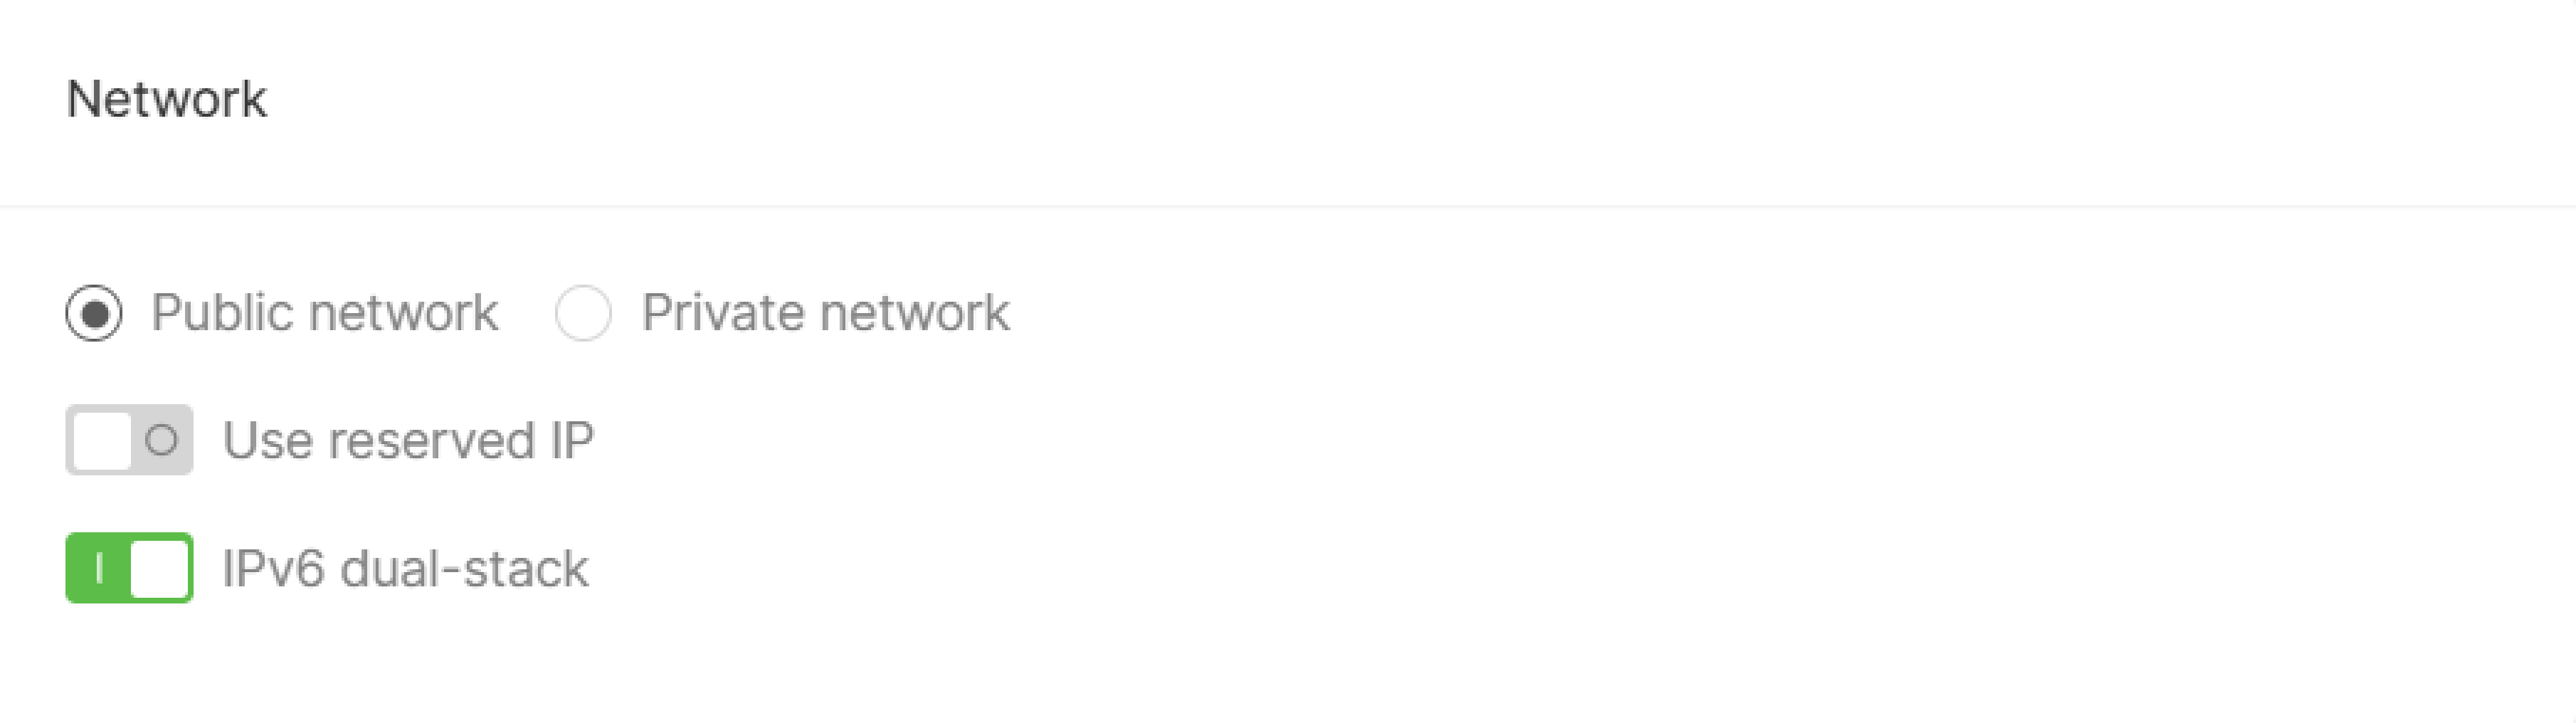
Step 4. Configure network
Select a network, public or private, and enable additional features:
- Reserved IP and IPv6 dual-stack for the public network.
- Floating IP, reserved IP and IPv6 dual-stack for the private network.
Step 5. Configure listeners
Listener
Configure listeners—an option that checks for connection requests using the protocol and port you configure. Click Add listener. You can add more than one listener.

In the pop-up window, specify the needed configuration:
1. Type the listener's name.
2. Select a protocol (TCP, UDP, HTTP, Terminated HTTPS or Prometheus).
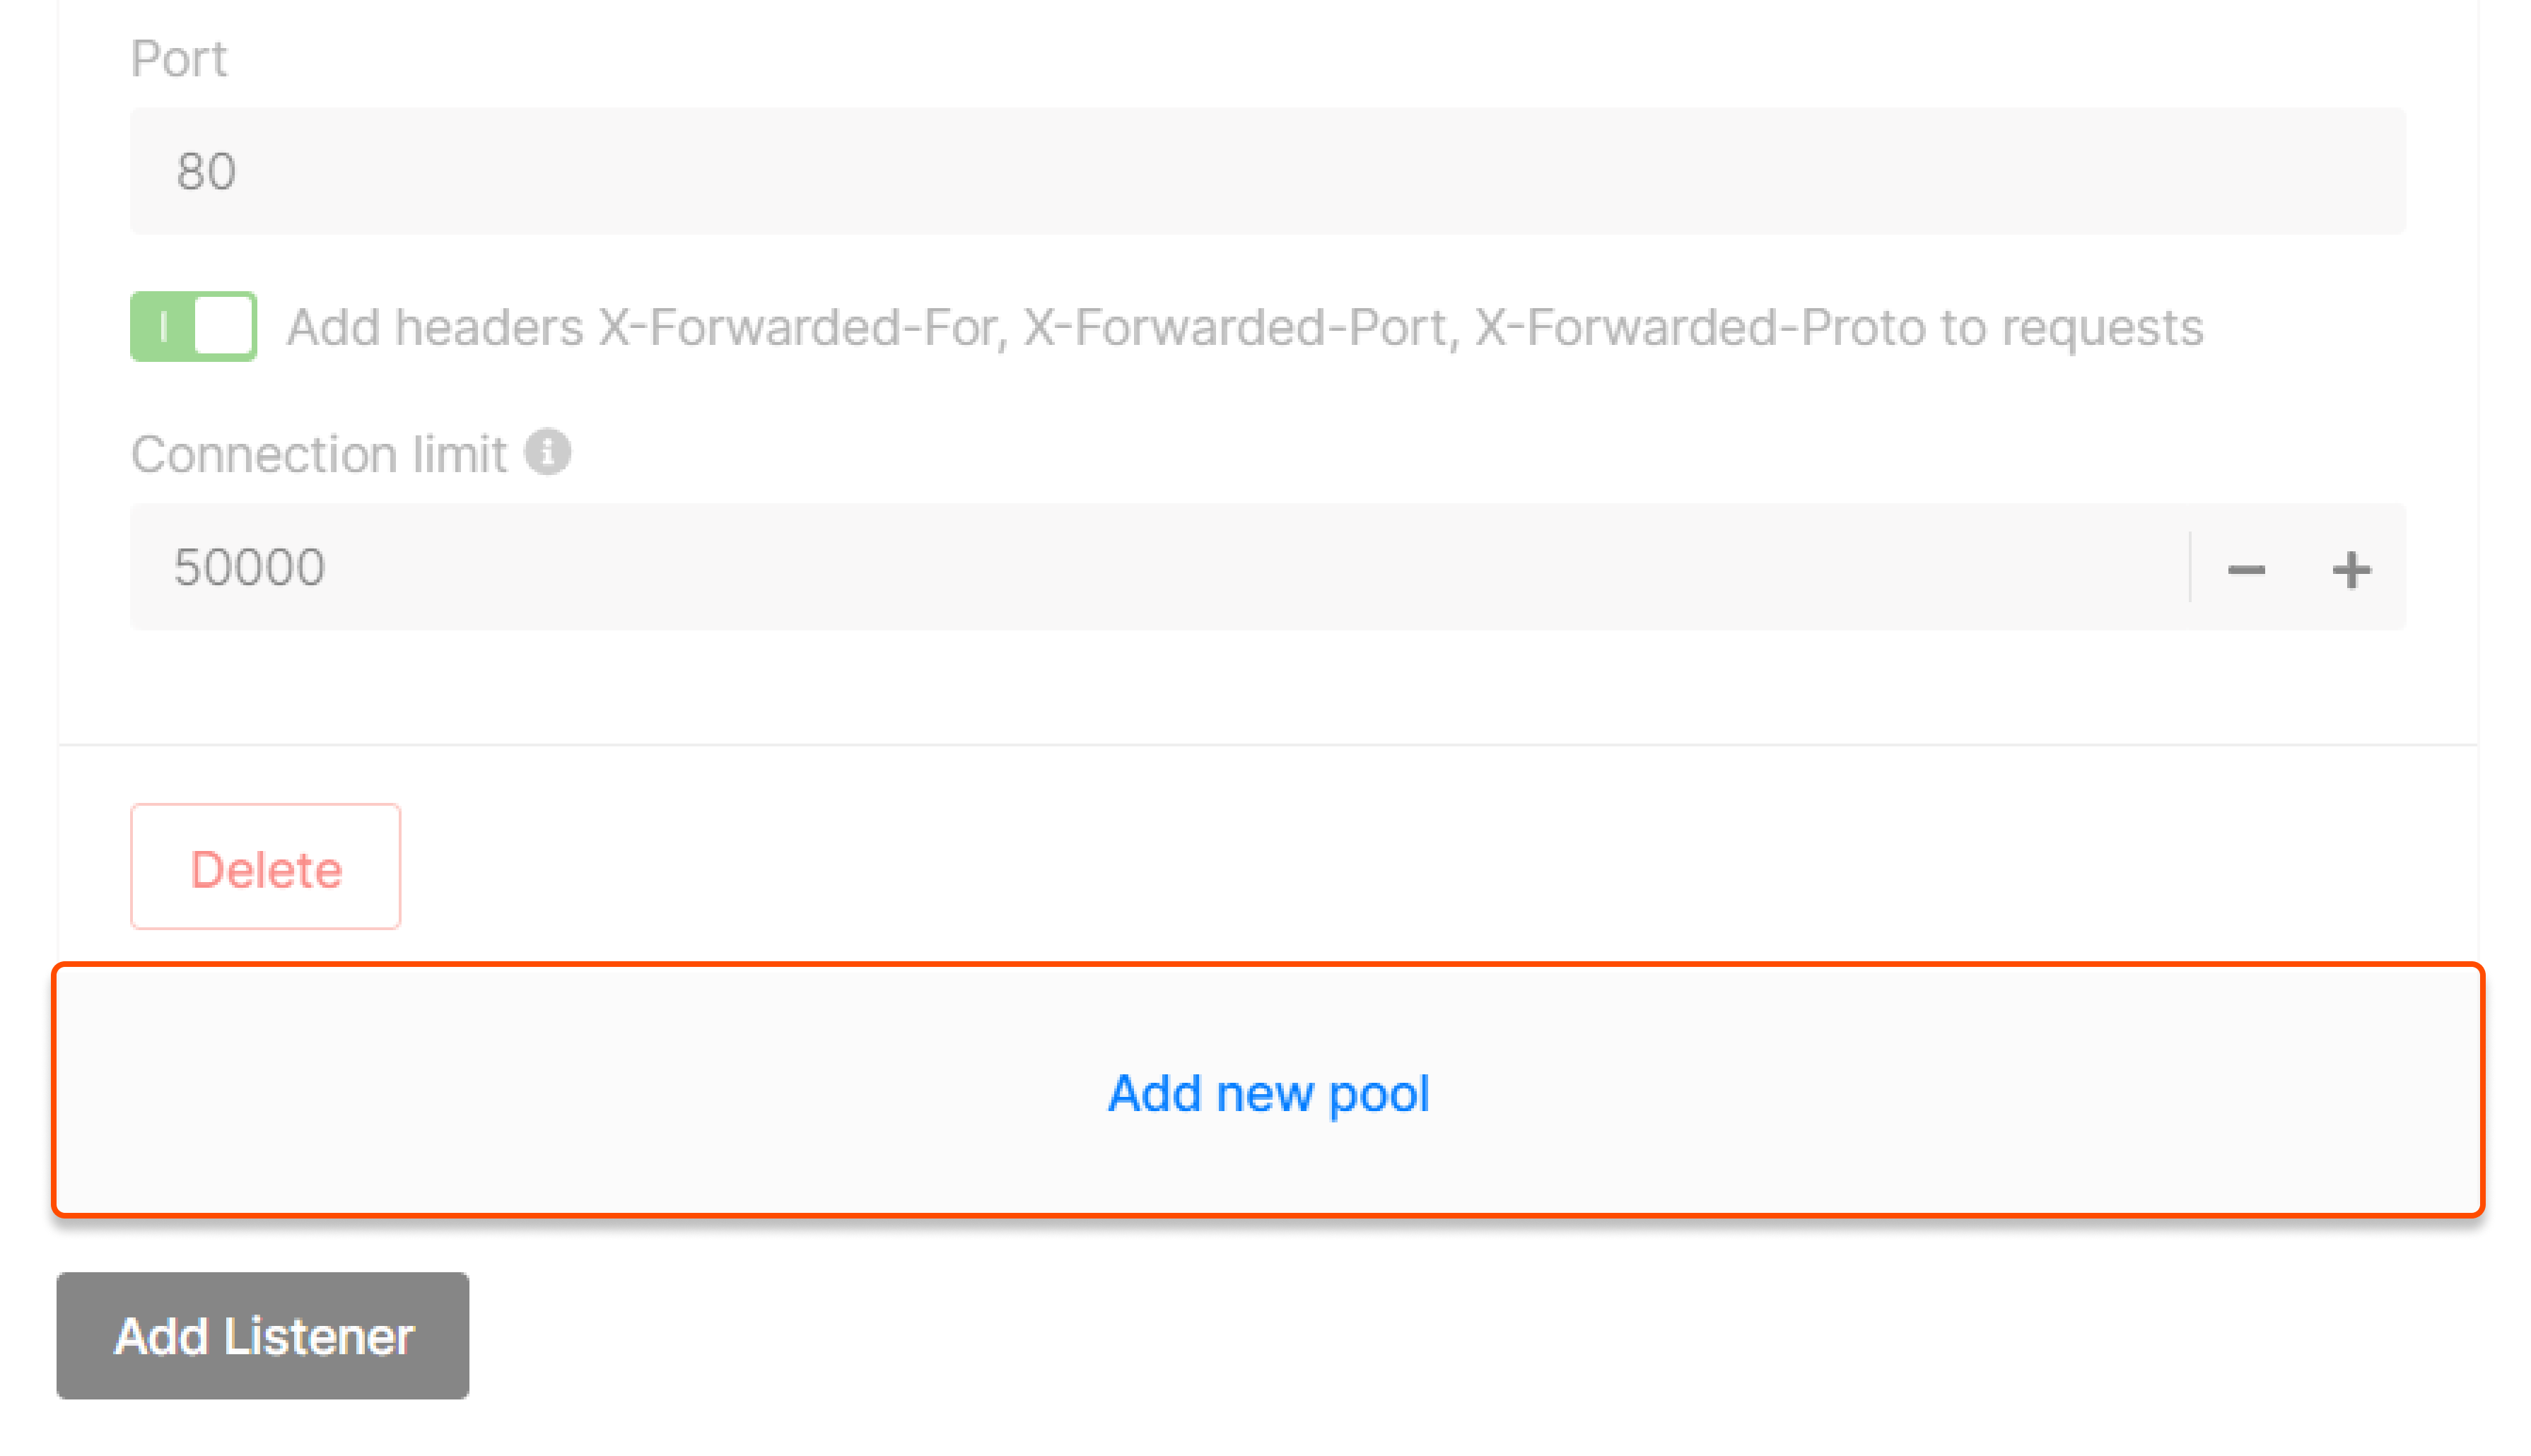
3. Specify the port in the range from 1 to 65535.
4. Enable "Add headers X-Forwarded-For, X-Forwarded-Port, X-Forwarded-Proto to requests" to identify the origin of the user's IP address connecting to a web server via a load balancer.
5. Specify connection limit (number of simultaneous connections).
Click Create Listener.

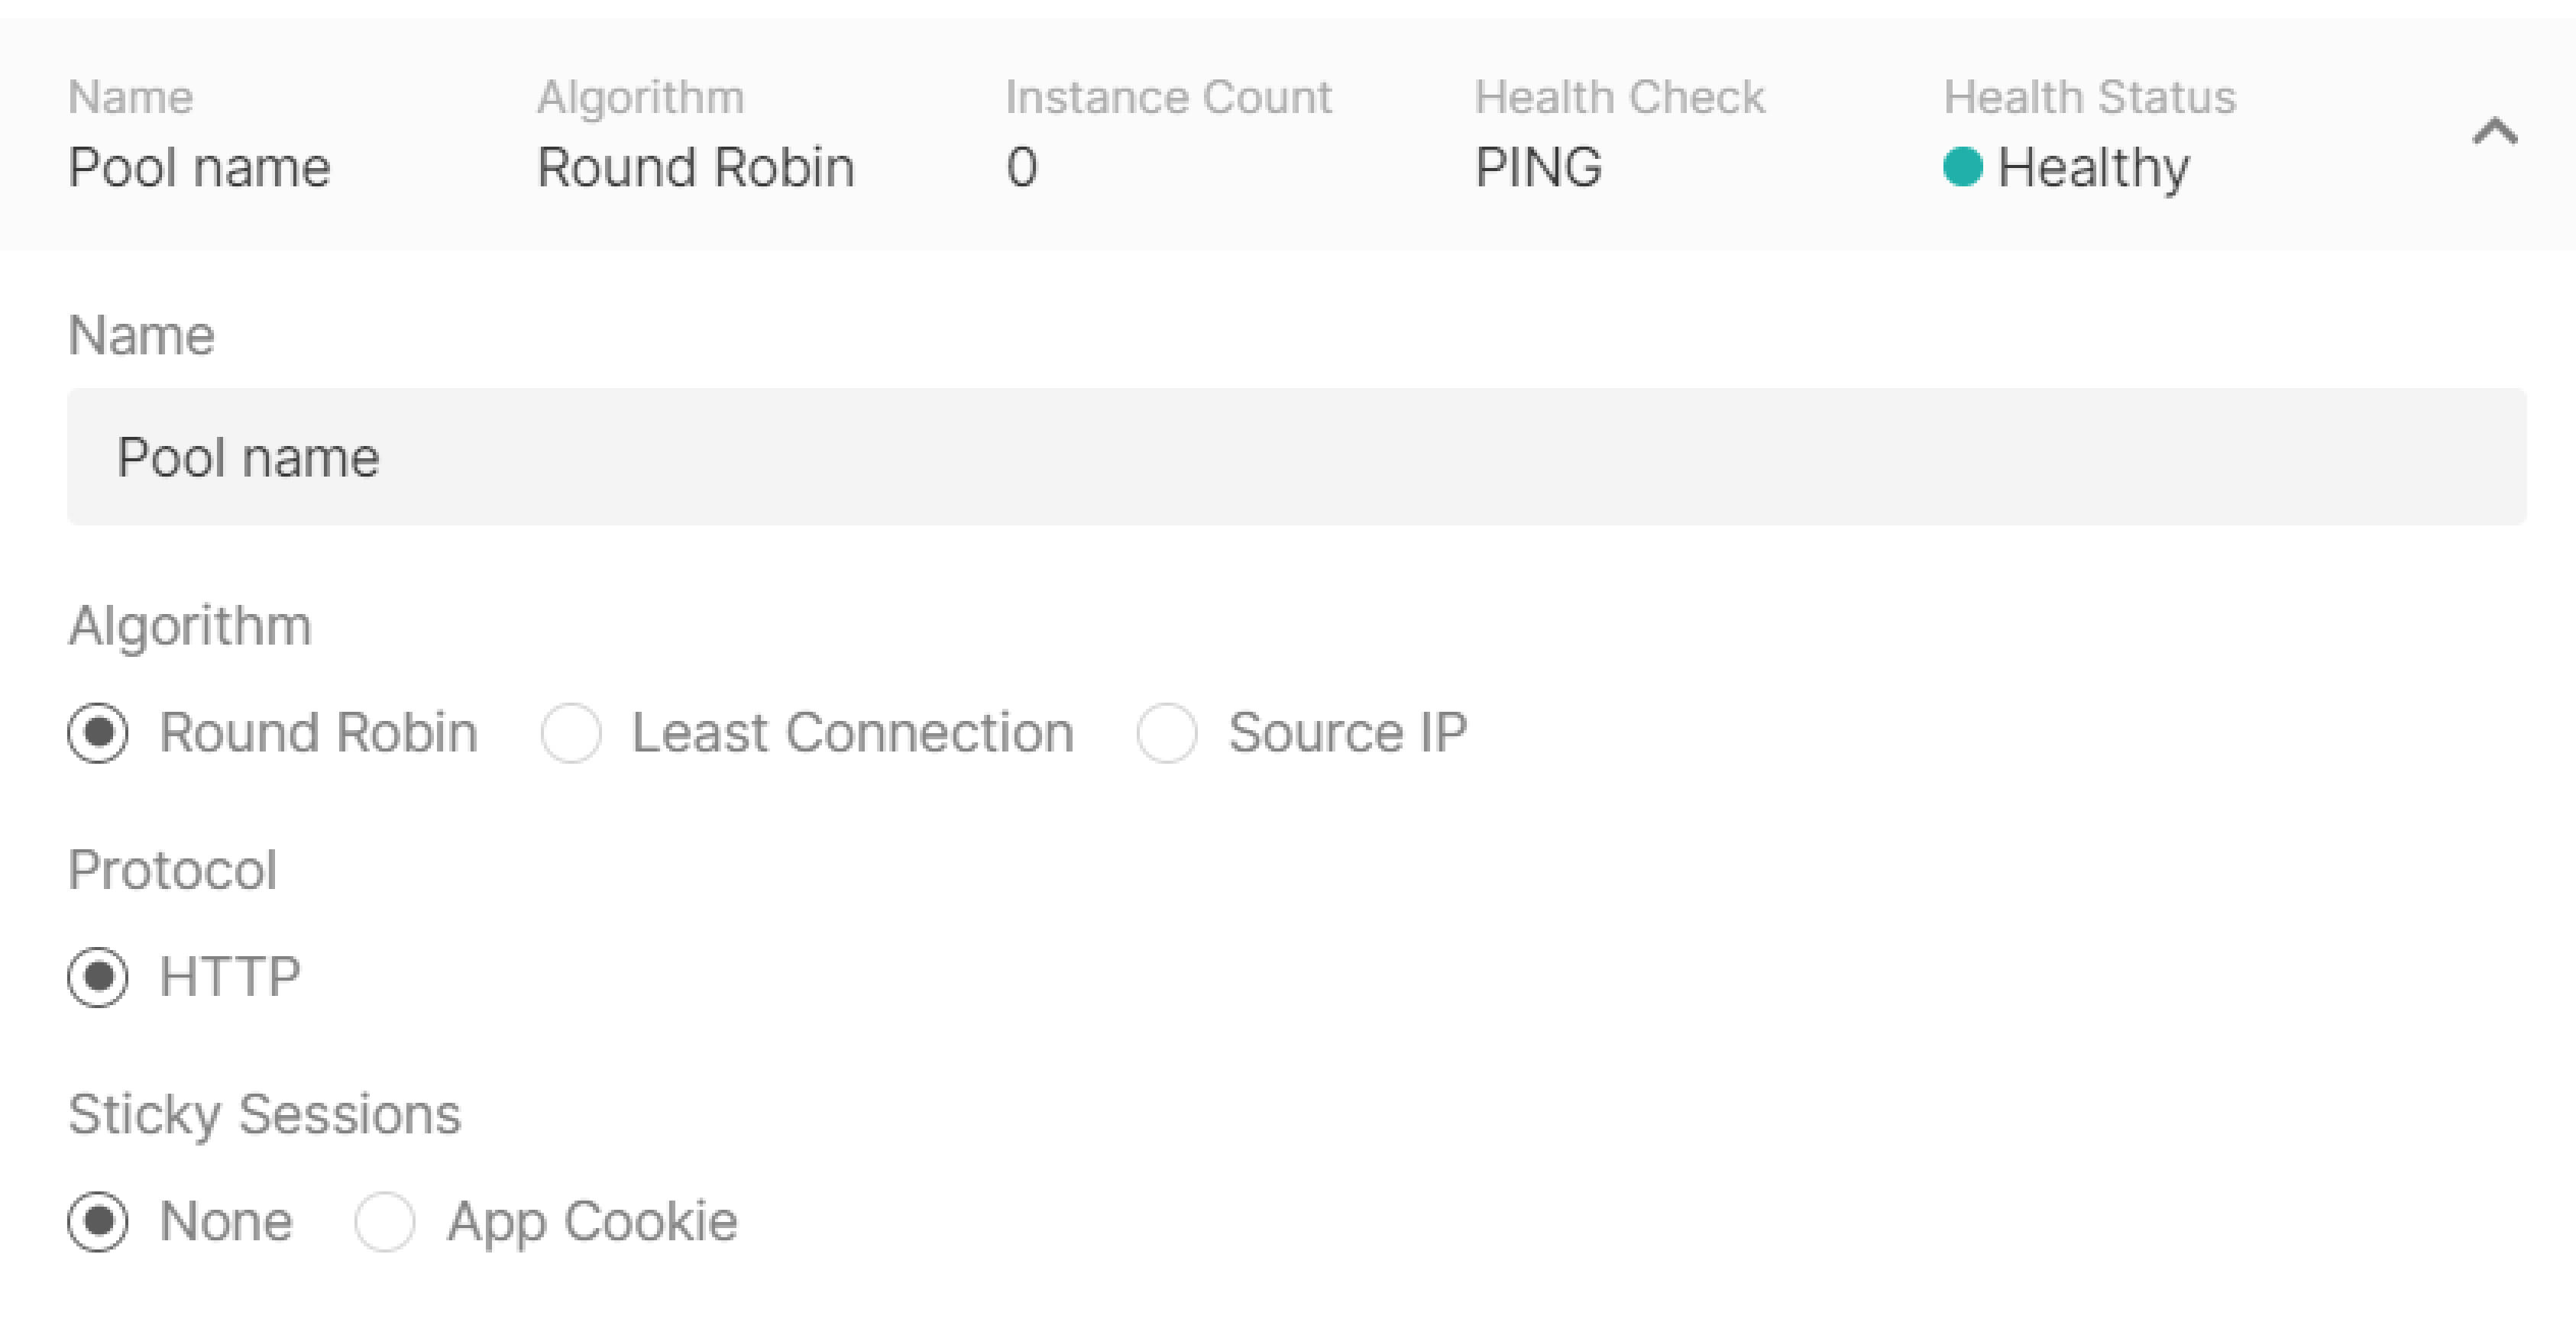
Pool
Configure a pool—a list of virtual machines to which the listener will redirect incoming traffic. Click Add new pool in the "Listeners" block to start configuring.
1. Specify the pool name.
2. Select the balancing algorithm:
- Round robin—requests are distributed across servers within a cluster one by one: the first request is sent to the first server, the second request is sent to the second server, and so on in a circle.
- Least Connection—new requests are sent to a server with the fewest active connections.
- Source IP—a client's IP address is used to determine which server receives the request.
3. A protocol will be automatically selected based on the listener's settings: the HTTP listener can communicate with servers via the HTTP protocol.
4. Select App Cookie and fill in the "Cookie" field. A special module creates a cookie and then uses it to forward requests to the same server.
Instance

Click Add Instance to add virtual machines that will participate in the traffic distribution for the configured listener.
1. Select Custom IP, Instance or Bare Metal and appropriate configurations.
2. Specify its port and weight in the distribution.
Health Сheck
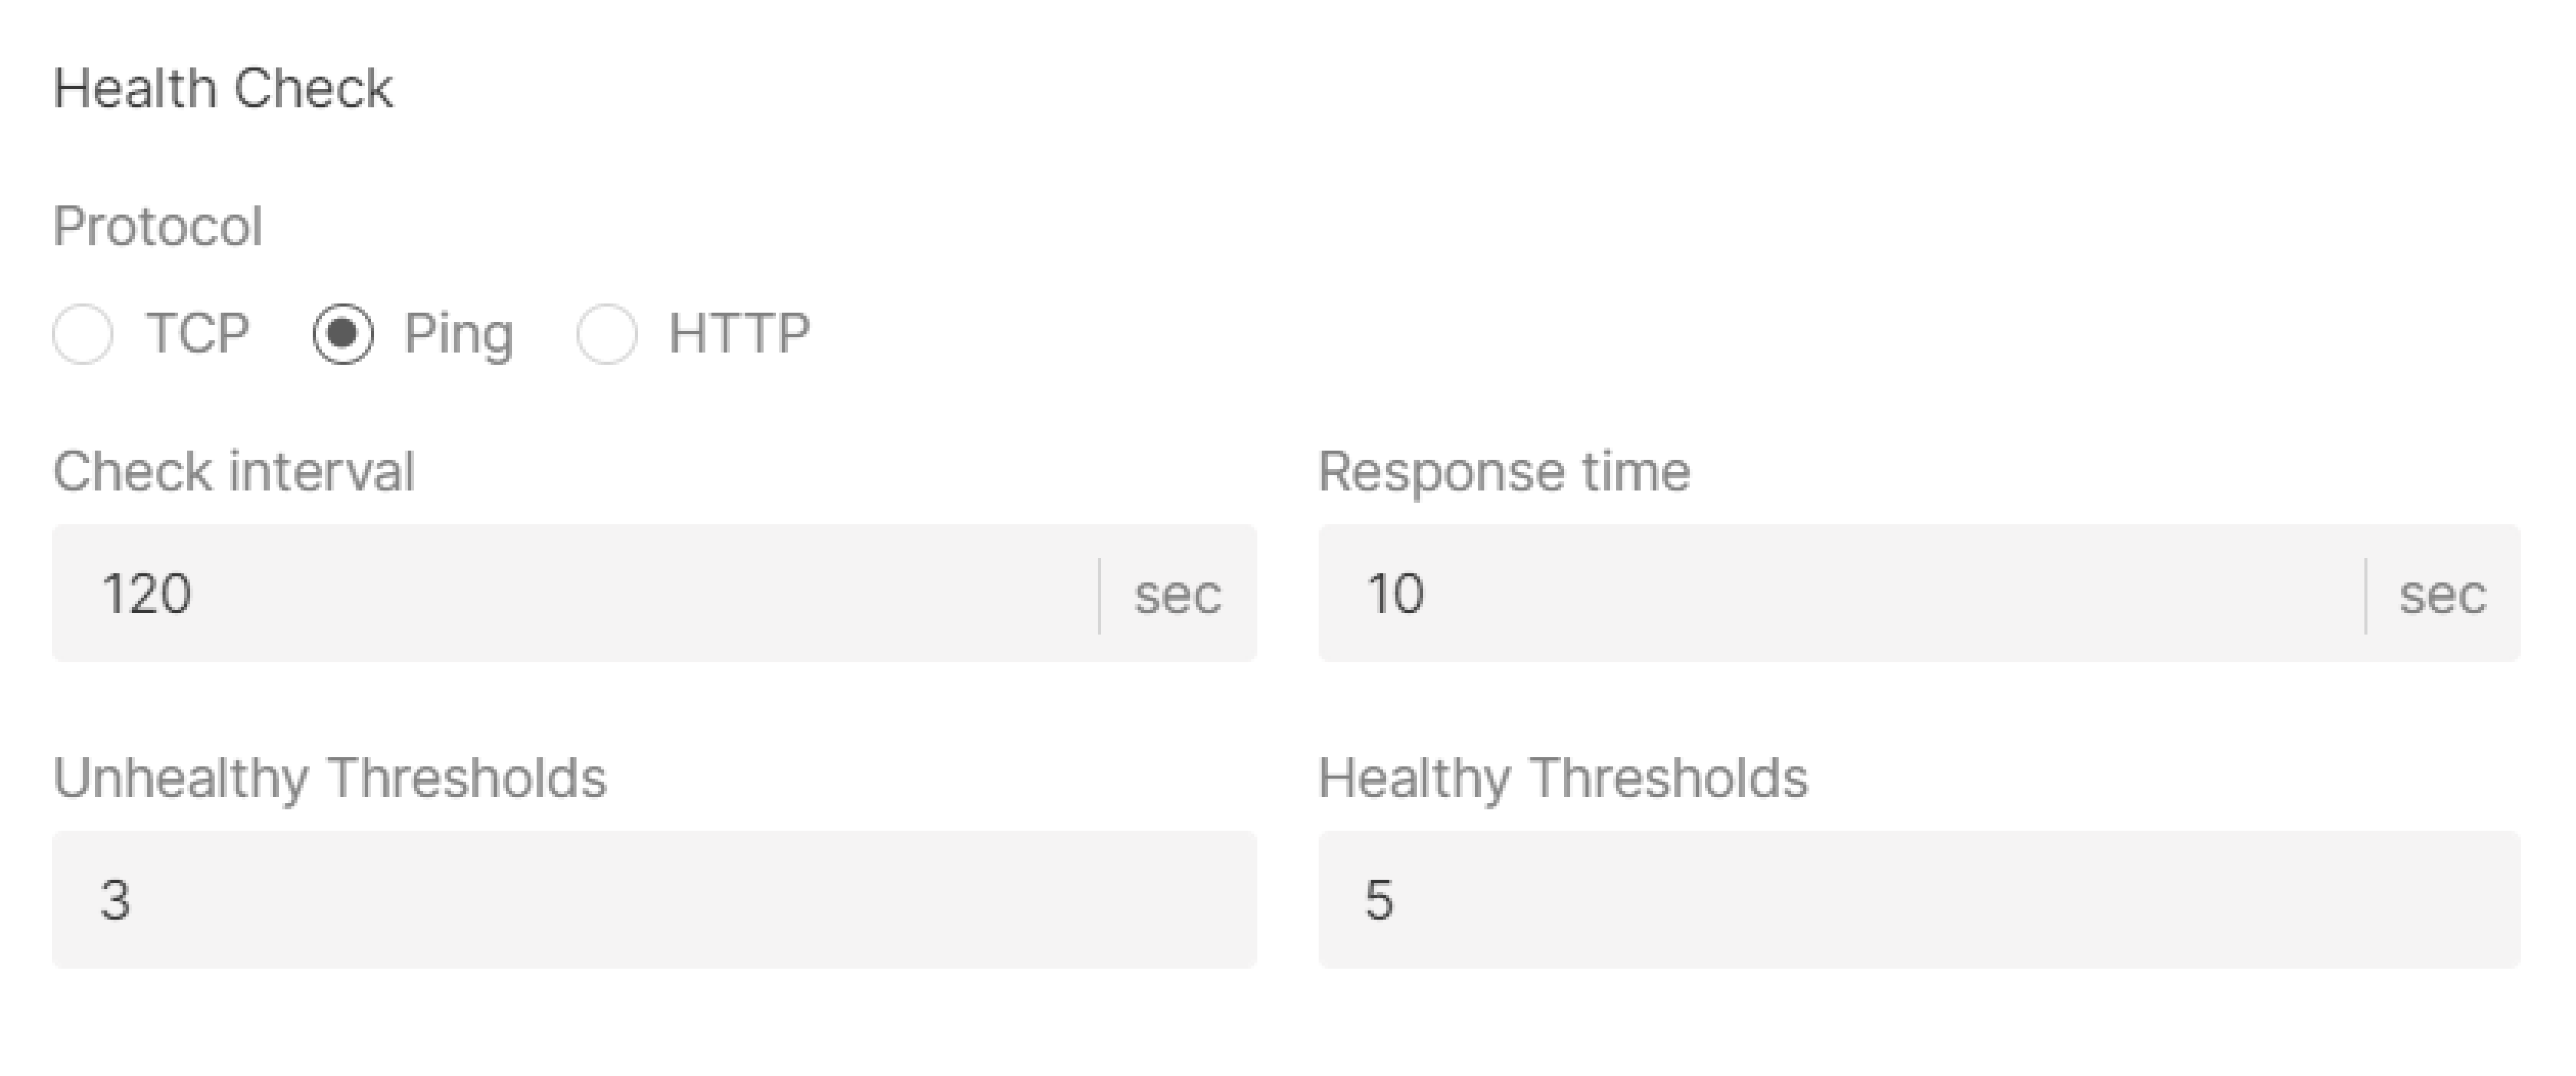
1. Select the protocol for checking: TCP, Ping, HTTP and appropriate configurations.
2. Specify сheck interval (sec)—time between sent requests.
3. Specify response time (sec)—the time to wait for a response from a server.
4. Specify unhealthy threshold—the number of failed requests after which traffic will no longer be sent to the virtual machine.
5. Specify healthy thresholds—the number of successful requests after which the virtual machine will be considered ready to receive traffic.
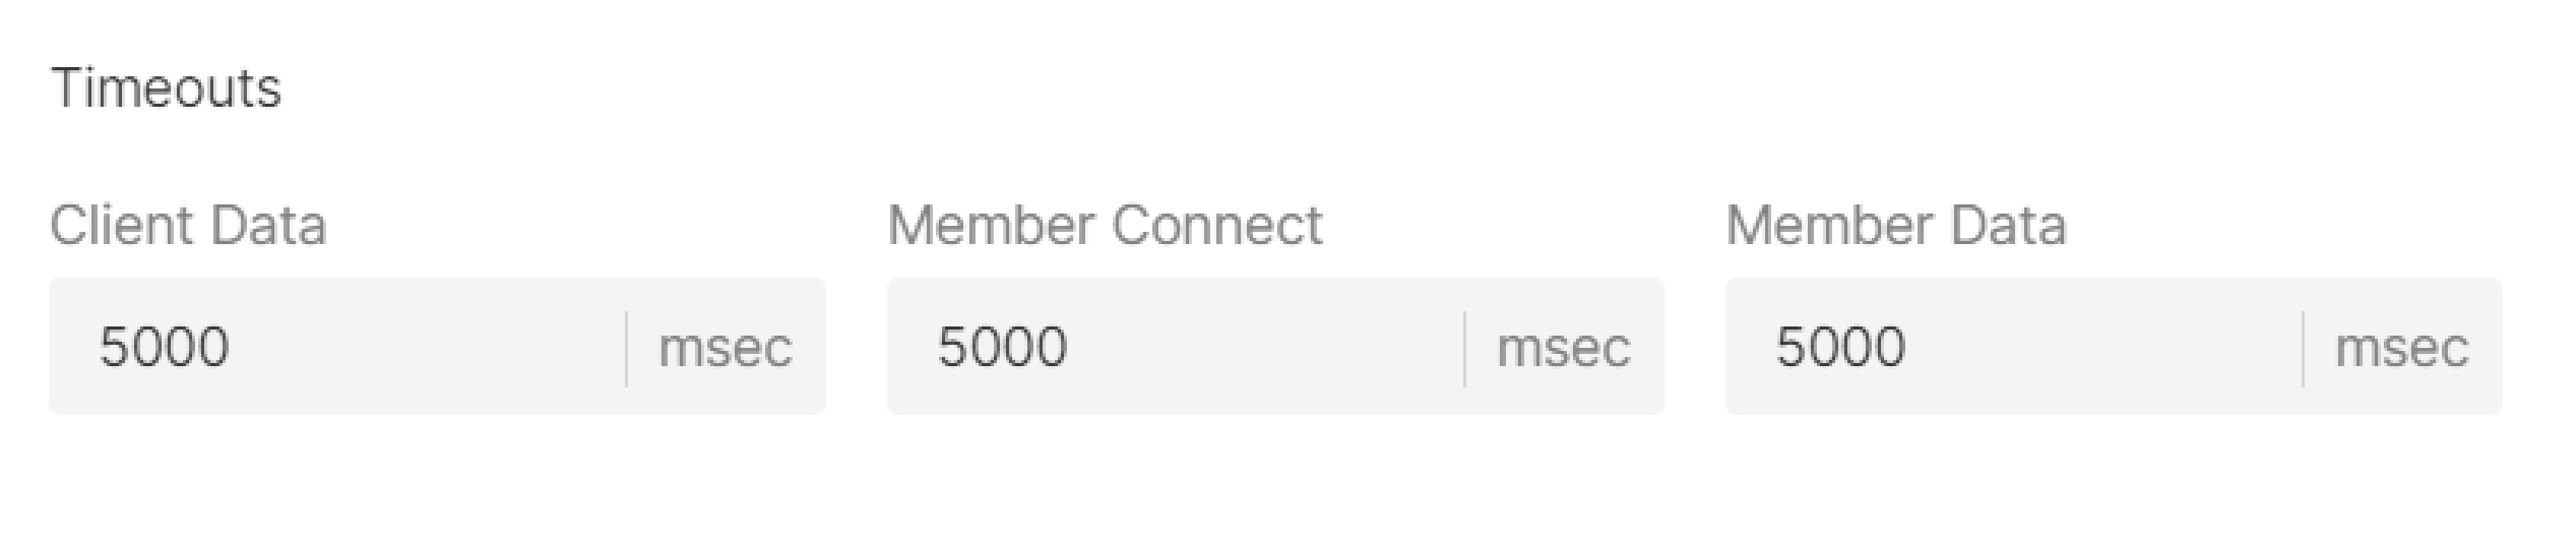
Timeouts
Specify client data, member connect and member data timeouts in msec.
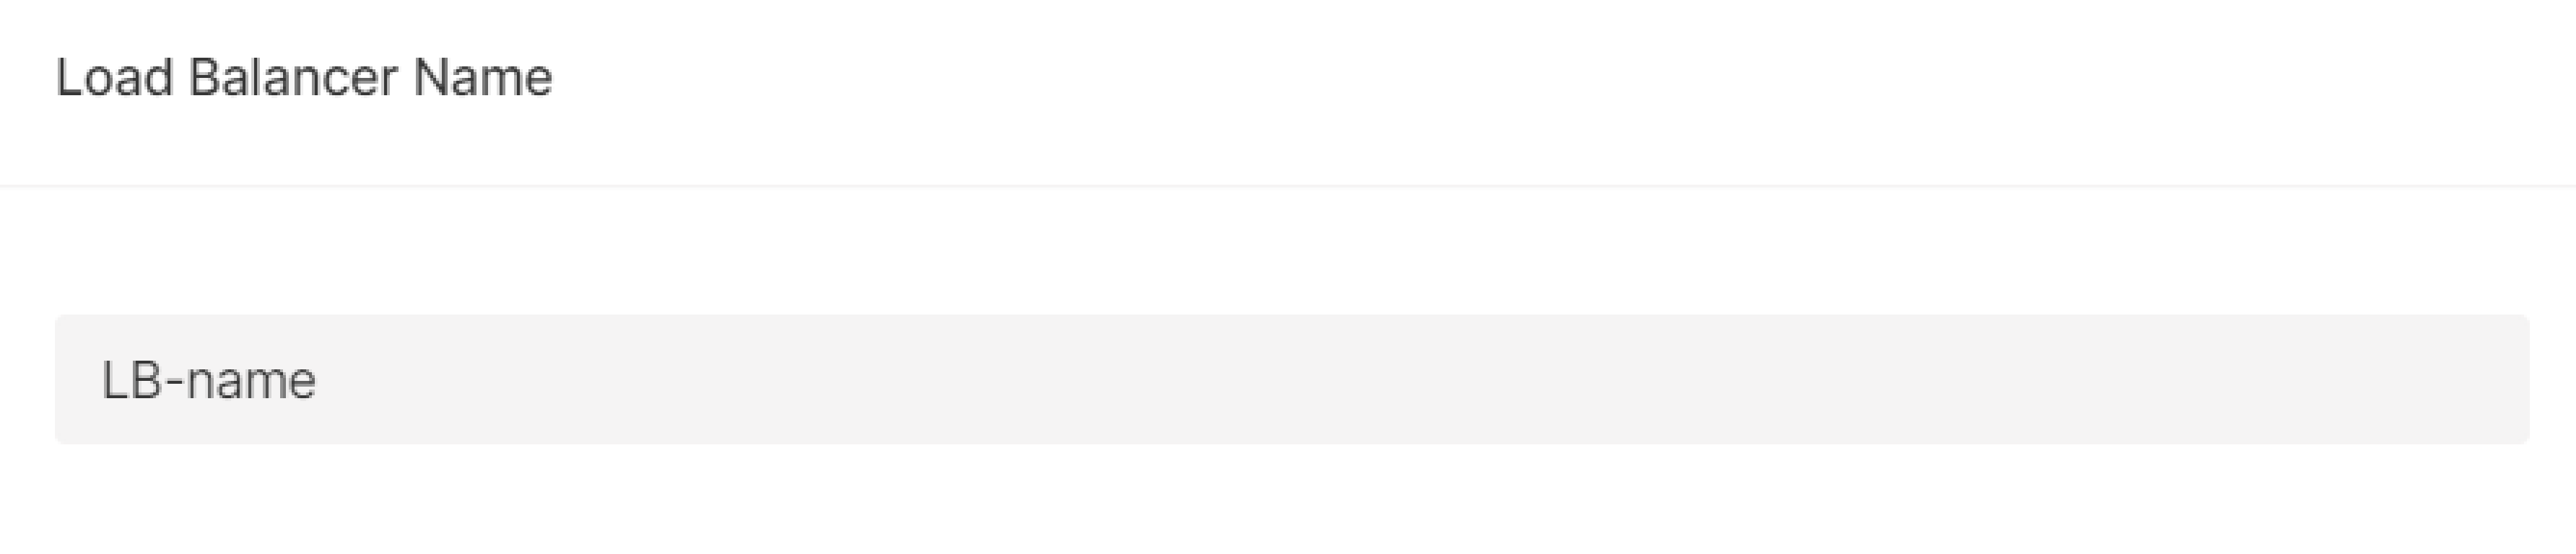
Step 6. Enter the name
Enter a name for the load balancer. It will be displayed in the Customer Portal.
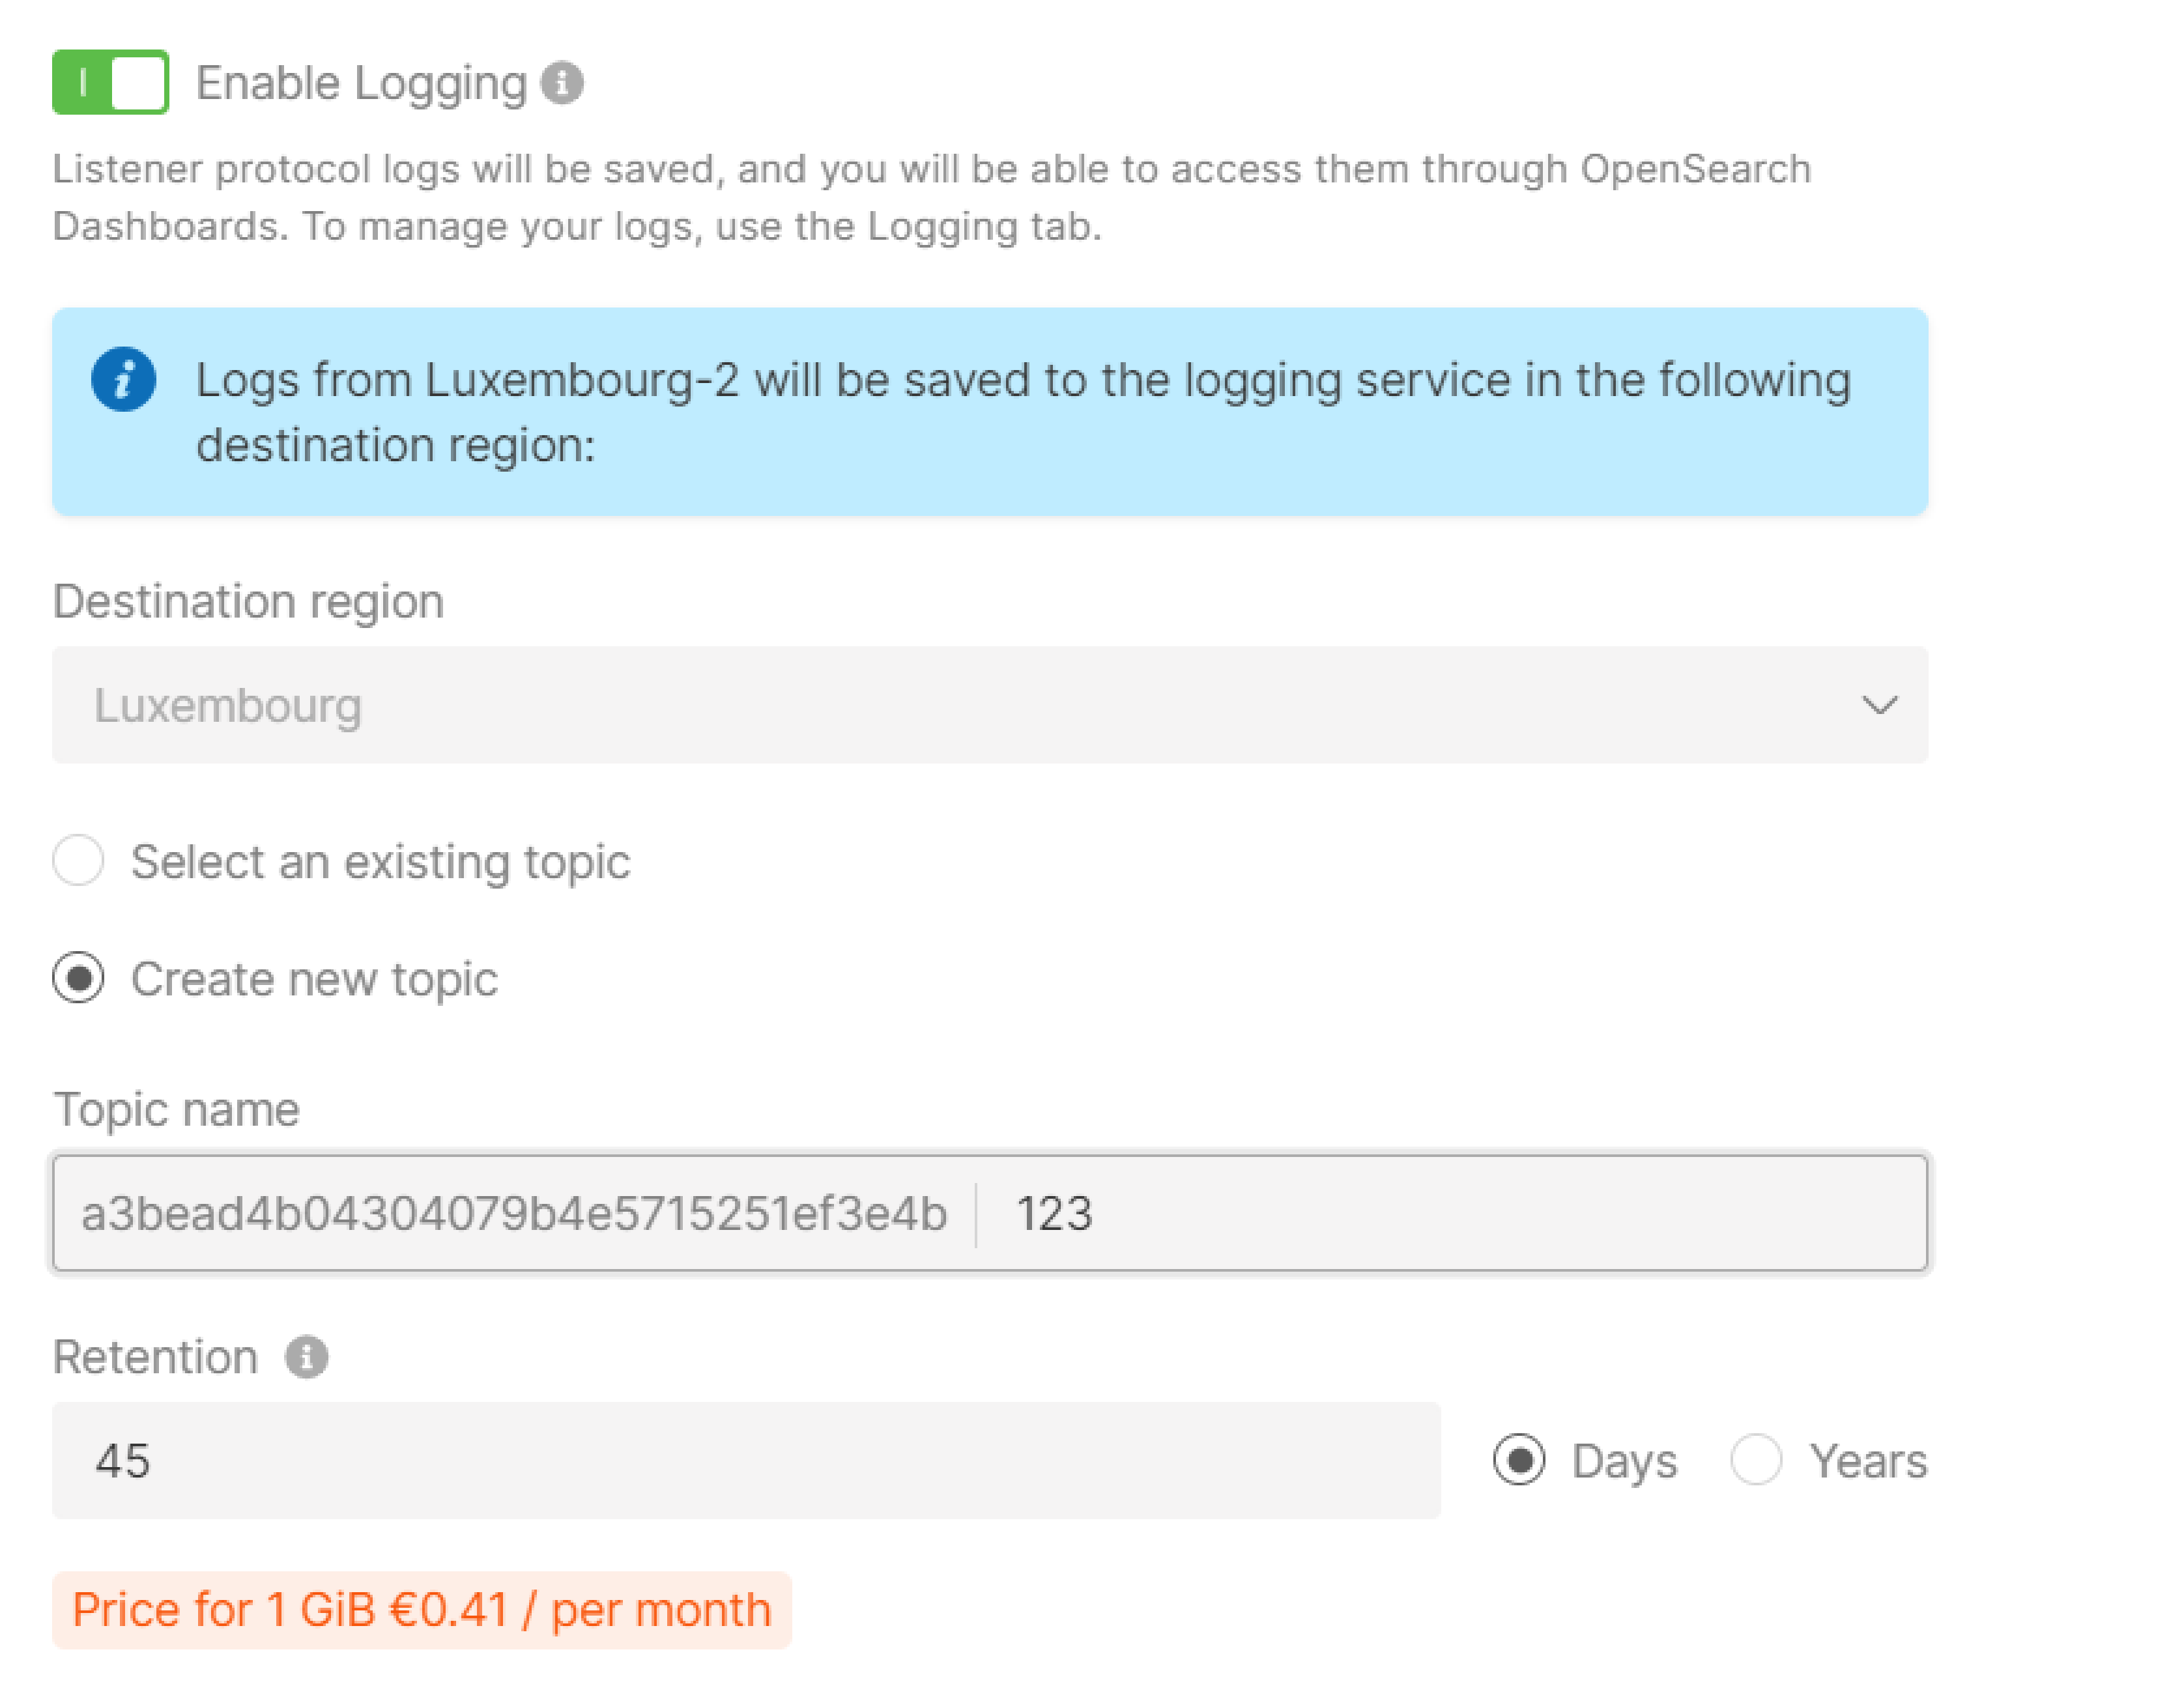
Step 7. (Optional) Enable Logging
The Logging service will be activated to store your logs. To learn how it works and how to configure it, refer to the article about Logging.
Step 8. (Optional) Add tags
Create tags for your load balancer by entering "Key" and "Valu."

Step 9. Finalize creation
Check the settings and click Create Load Balancer on the right.
Step 10. Configure firewall
Configure firewalls for instances in the pool according to the separate guide.
Make sure their ports are open for the load balancer traffic:
- If a balancer and instances are in a public network, set a rule to receive and transmit traffic to the balancer's IP address (specified in the menu) in firewalls settings of the instances.
- If a balancer and instances are in a private subnetwork, set a rule to receive and transmit traffic to the entire private subnetwork or to the balancer's IP address (specified in the menu).
- If a balancer is in a public network and instances are in a private subnetwork, set a rule to receive and transmit traffic to the entire private subnetwork or to the balancer's internal IP address (send a request to the technical support).
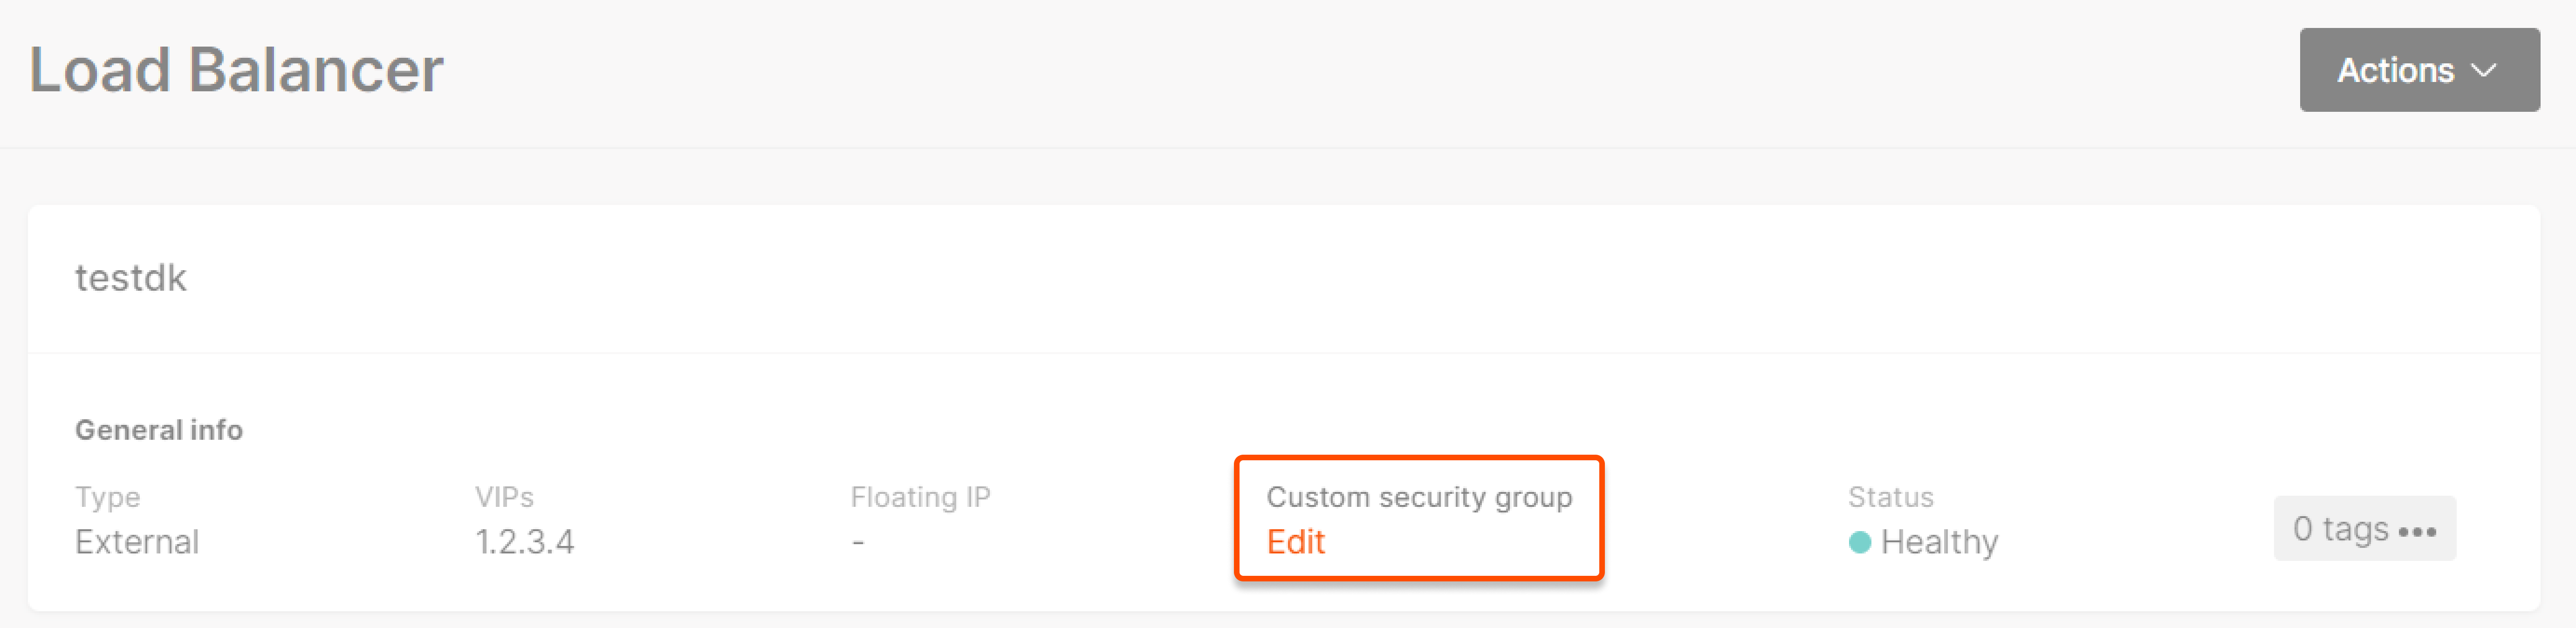
In the Load Balancers section, open the created balancer and click Create or Edit a custom security group (this is the firewall) and edit it: configure the rules for inbound and outbound traffic.
Was this article helpful?
Not a Gcore user yet?
Discover our offerings, including virtual instances starting from 3.7 euro/mo, bare metal servers, AI Infrastructure, load balancers, Managed Kubernetes, Function as a Service, and Centralized Logging solutions.