Create a Kubernetes cluster
Step 1. Initiate the process
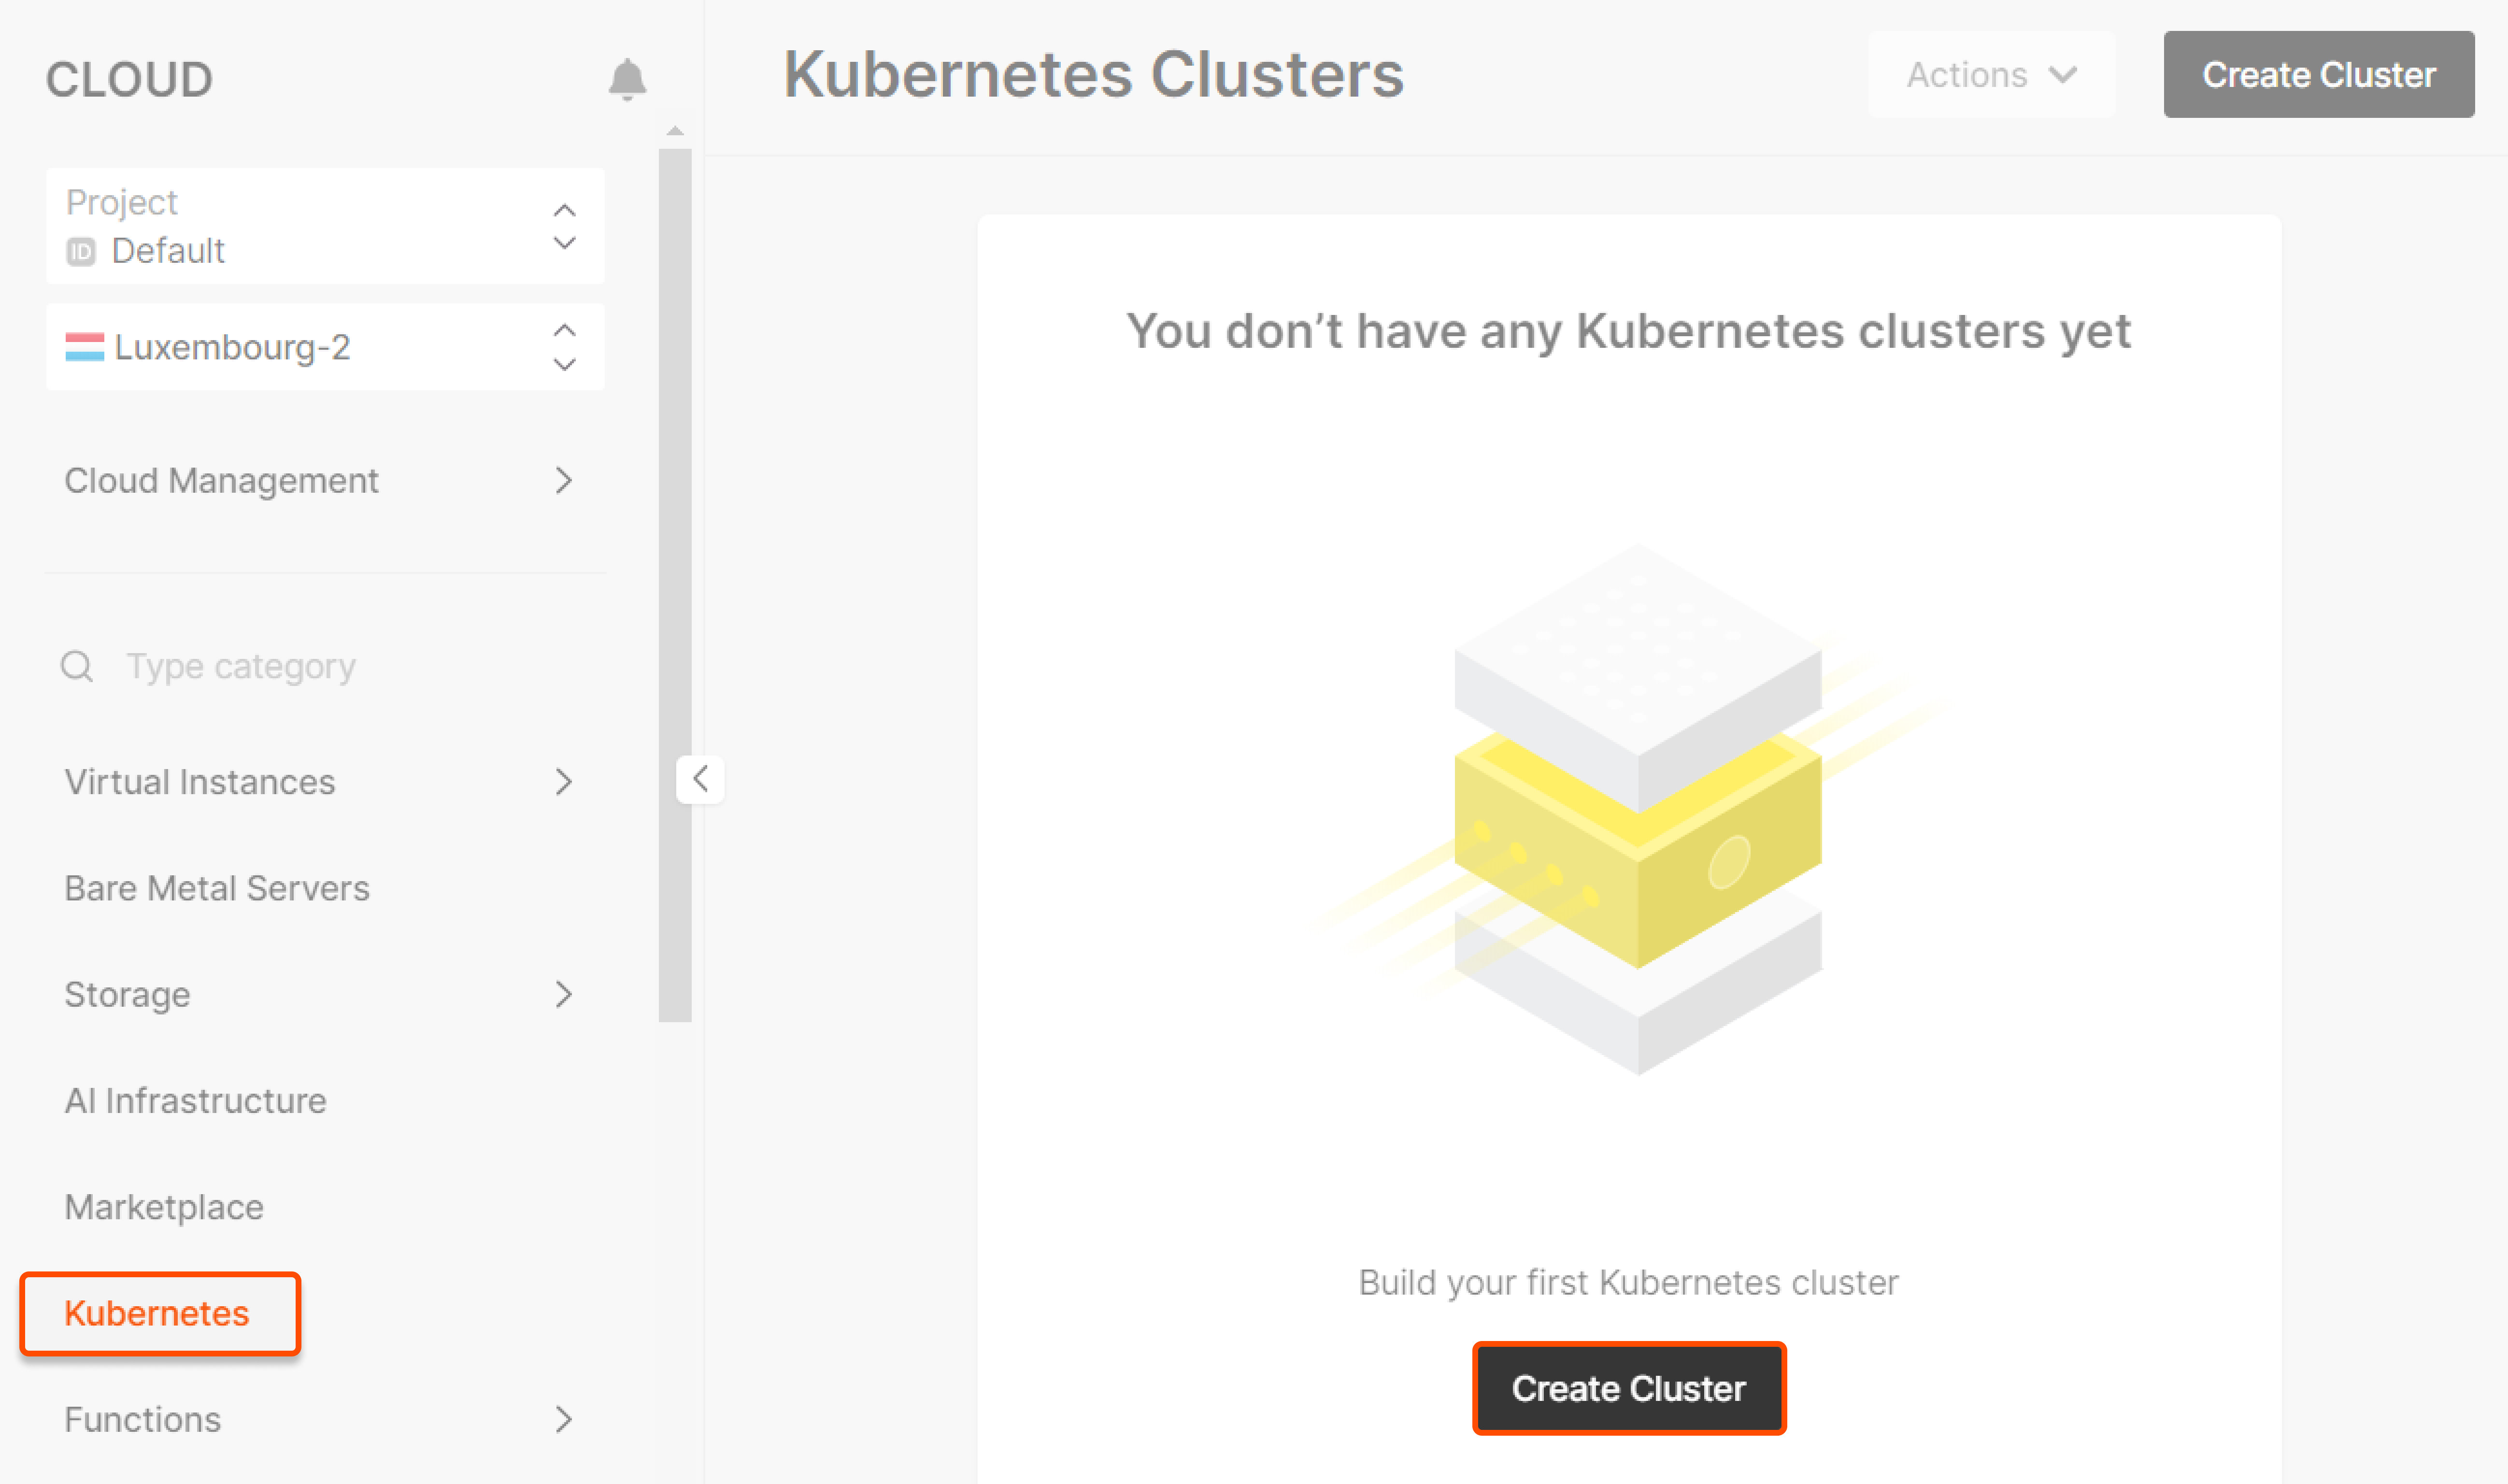
Open the “Kubernetes” tab and click Create Cluster.
A new page will open. Perform the remaining steps there.
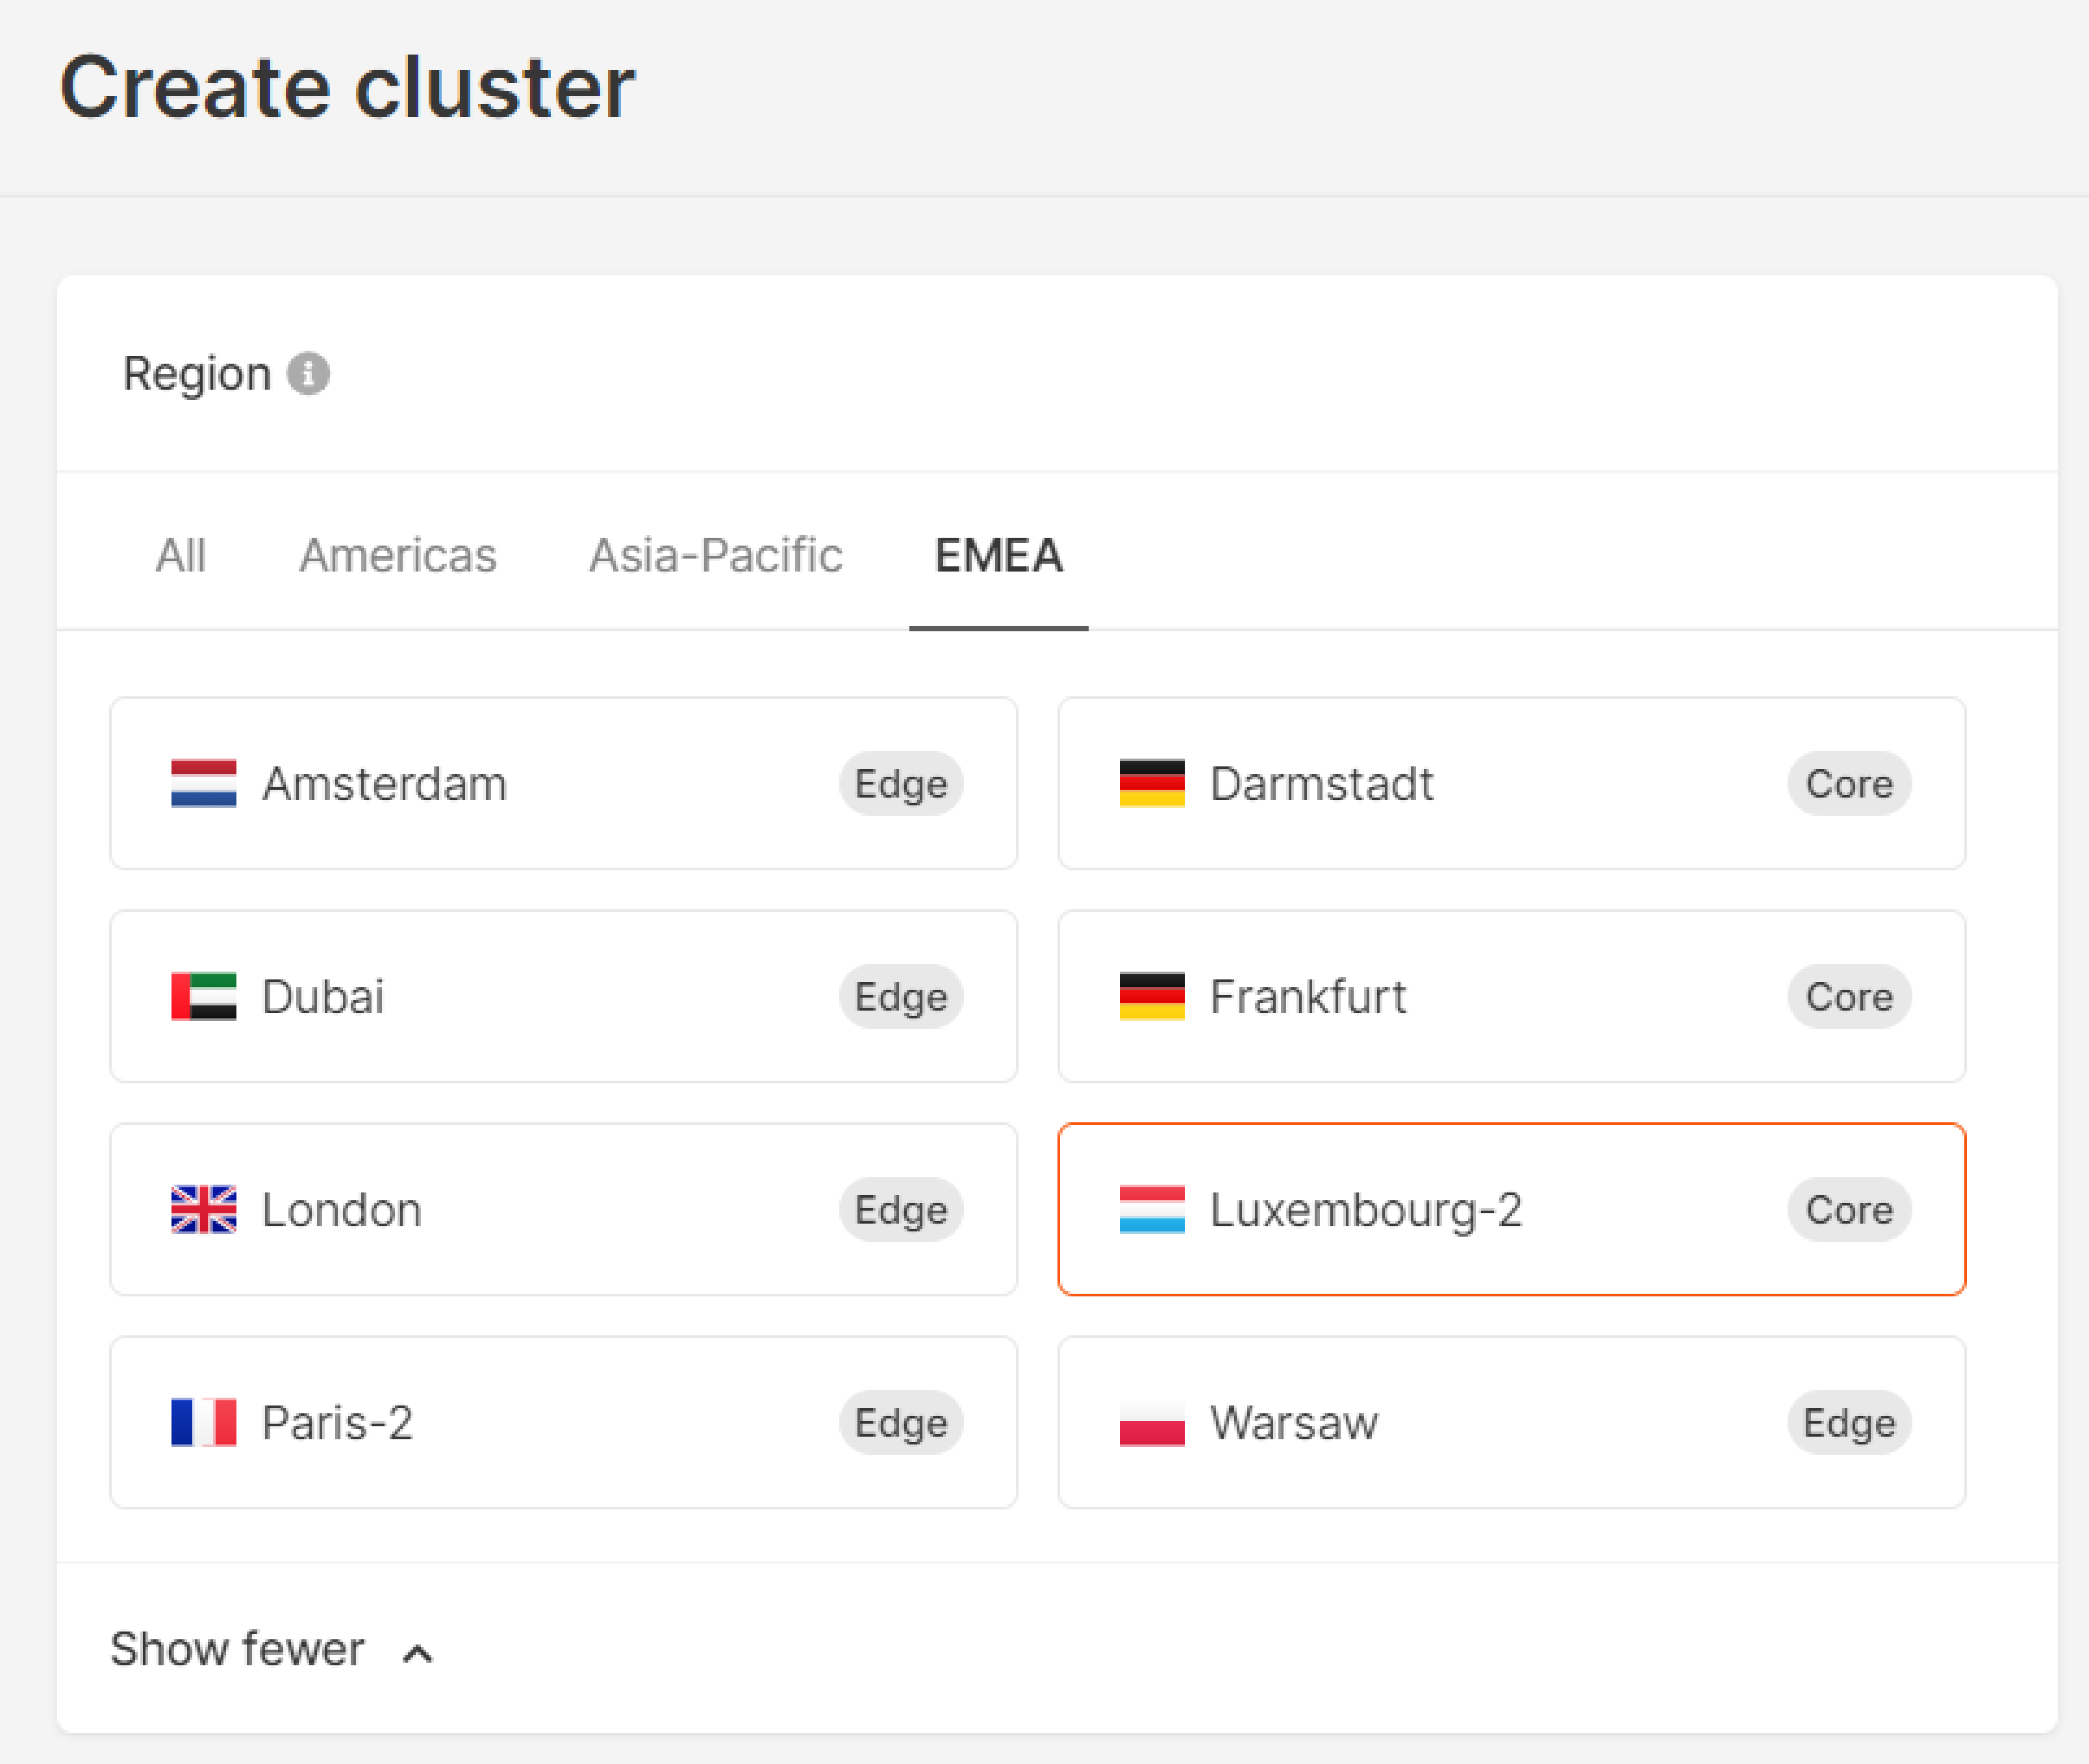
Step 2. Select the region
Select a region—the location of the data center where your cluster will be deployed.
Step 3. Select the version
Select your Kubernetes cluster version from the dropdown menu.

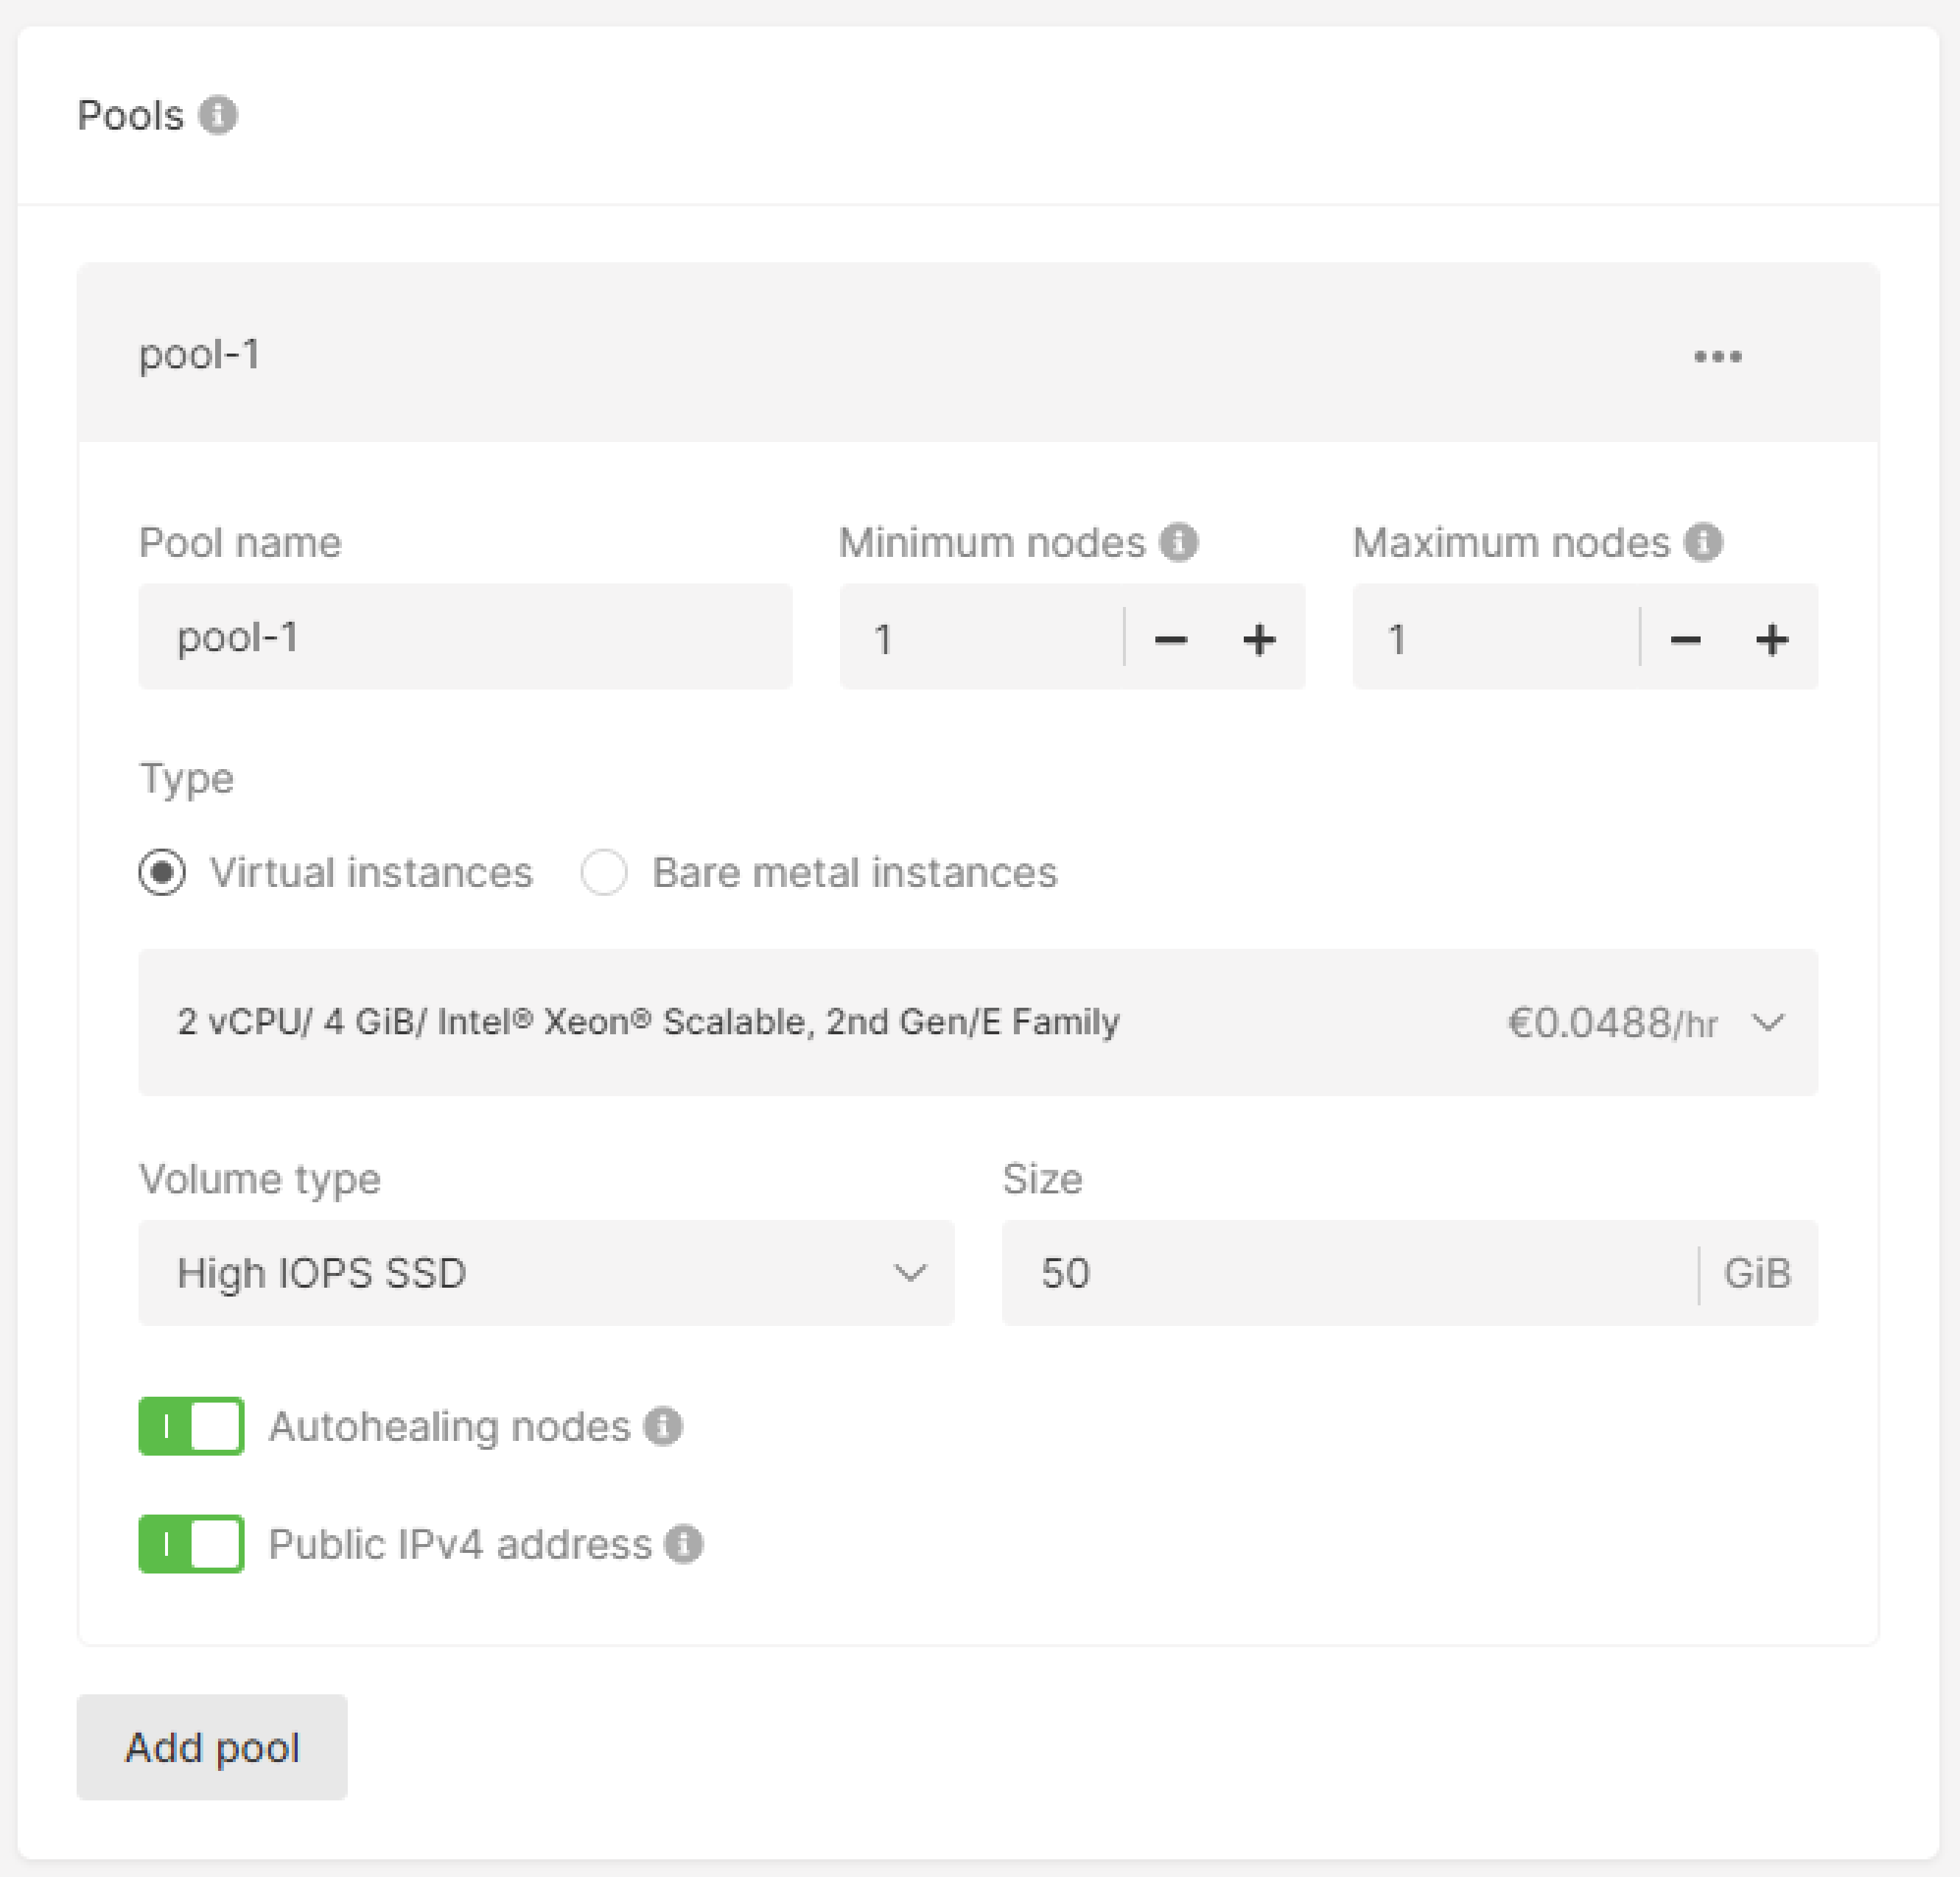
Step 4. Configure pools
Under the Pools block, configure a pool. A pool is a set of cluster nodes with the same specifications.
- Enter the Pool name.
- Set the minimum nodes and maximum nodes for autoscaling.
- Select the type of a worker node: Virtual Instance or Bare Metal.
Virtual Instance
Select the flavor, disk size in GiB, and disk type.
The following Virtual Instance flavors are available:
- Standard. 2–4 times the memory of vCPUs
- vCPU. The number of vCPUs equals the amount of memory in GB
- Memory. Much higher memory than that of vCPUs-up to 8x more
- High Frequency. High CPU clock speed starting at 3.7 GHz in the basic configuration
- SGX. Supports Intel SGX technology
The following disk types are available:
- High IOPS SSD. A high-performance SSD block storage designed for latency-sensitive transactional workloads (60 IOPS per 1 GiB; 2.5 MB/s per 1 GiB.) The IOPS performance limit is 9,000. The bandwidth limit is 500 MB/s.
- Standard. A network SSD disk that provides stable and high random I/O performance and high data reliability (6 IOPS per 1 GiB; 0.4 MB/s per 1 GiB.) The IOPS performance limit is 4,500. The bandwidth limit is 300 MB/s.
- Cold. A network HDD disk suitable for less frequently accessed workloads. The maximum number of IOPS is 1,000. The bandwidth limit is 100 MB/s. Please note that this option is unavailable in Manassas.
- Ultra. The recommended network block storage option for non-critical data and workloads that are accessed less frequently. The maximum number of IOPS is 1,000. The bandwidth limit is 100 MB/s.
- SSD low latency. An SSD block storage designed for applications that require low-latency storage and real-time data processing. The IOPS performance limit is 50,00, with an average latency of 300 µs.
Bare Metal instances
The following Bare Metal flavors are available:
- High-frequency. Single-socket servers equipped with 2288G/2388 CPUs, suitable for hosting applications requiring high processor frequency.
- Infrastructure. Multi-core, multi-socket configurations designed for hosting applications that demand a high number of cores. These servers are optimized for multithreading.
Ensure the Autohealing nodes toggle is on to enable automatic recovery of failed nodes. When toggled on, this feature monitors node statuses. Upon detecting a non-working node, the autohealer initiates its replacement. If one of the machines fails, the application will not stand idle: The node(s) will be replaced on a working machine, and the app will keep working.
(Optional) Enable the Public IPv4 address option to assign public IPv4 addresses to cluster nodes.
If you want to enable an IPv6 dual-stack for your cluster, at least one of the pools must have a public IPv4 address.
- Add as many pools as you need using the Add pool button.
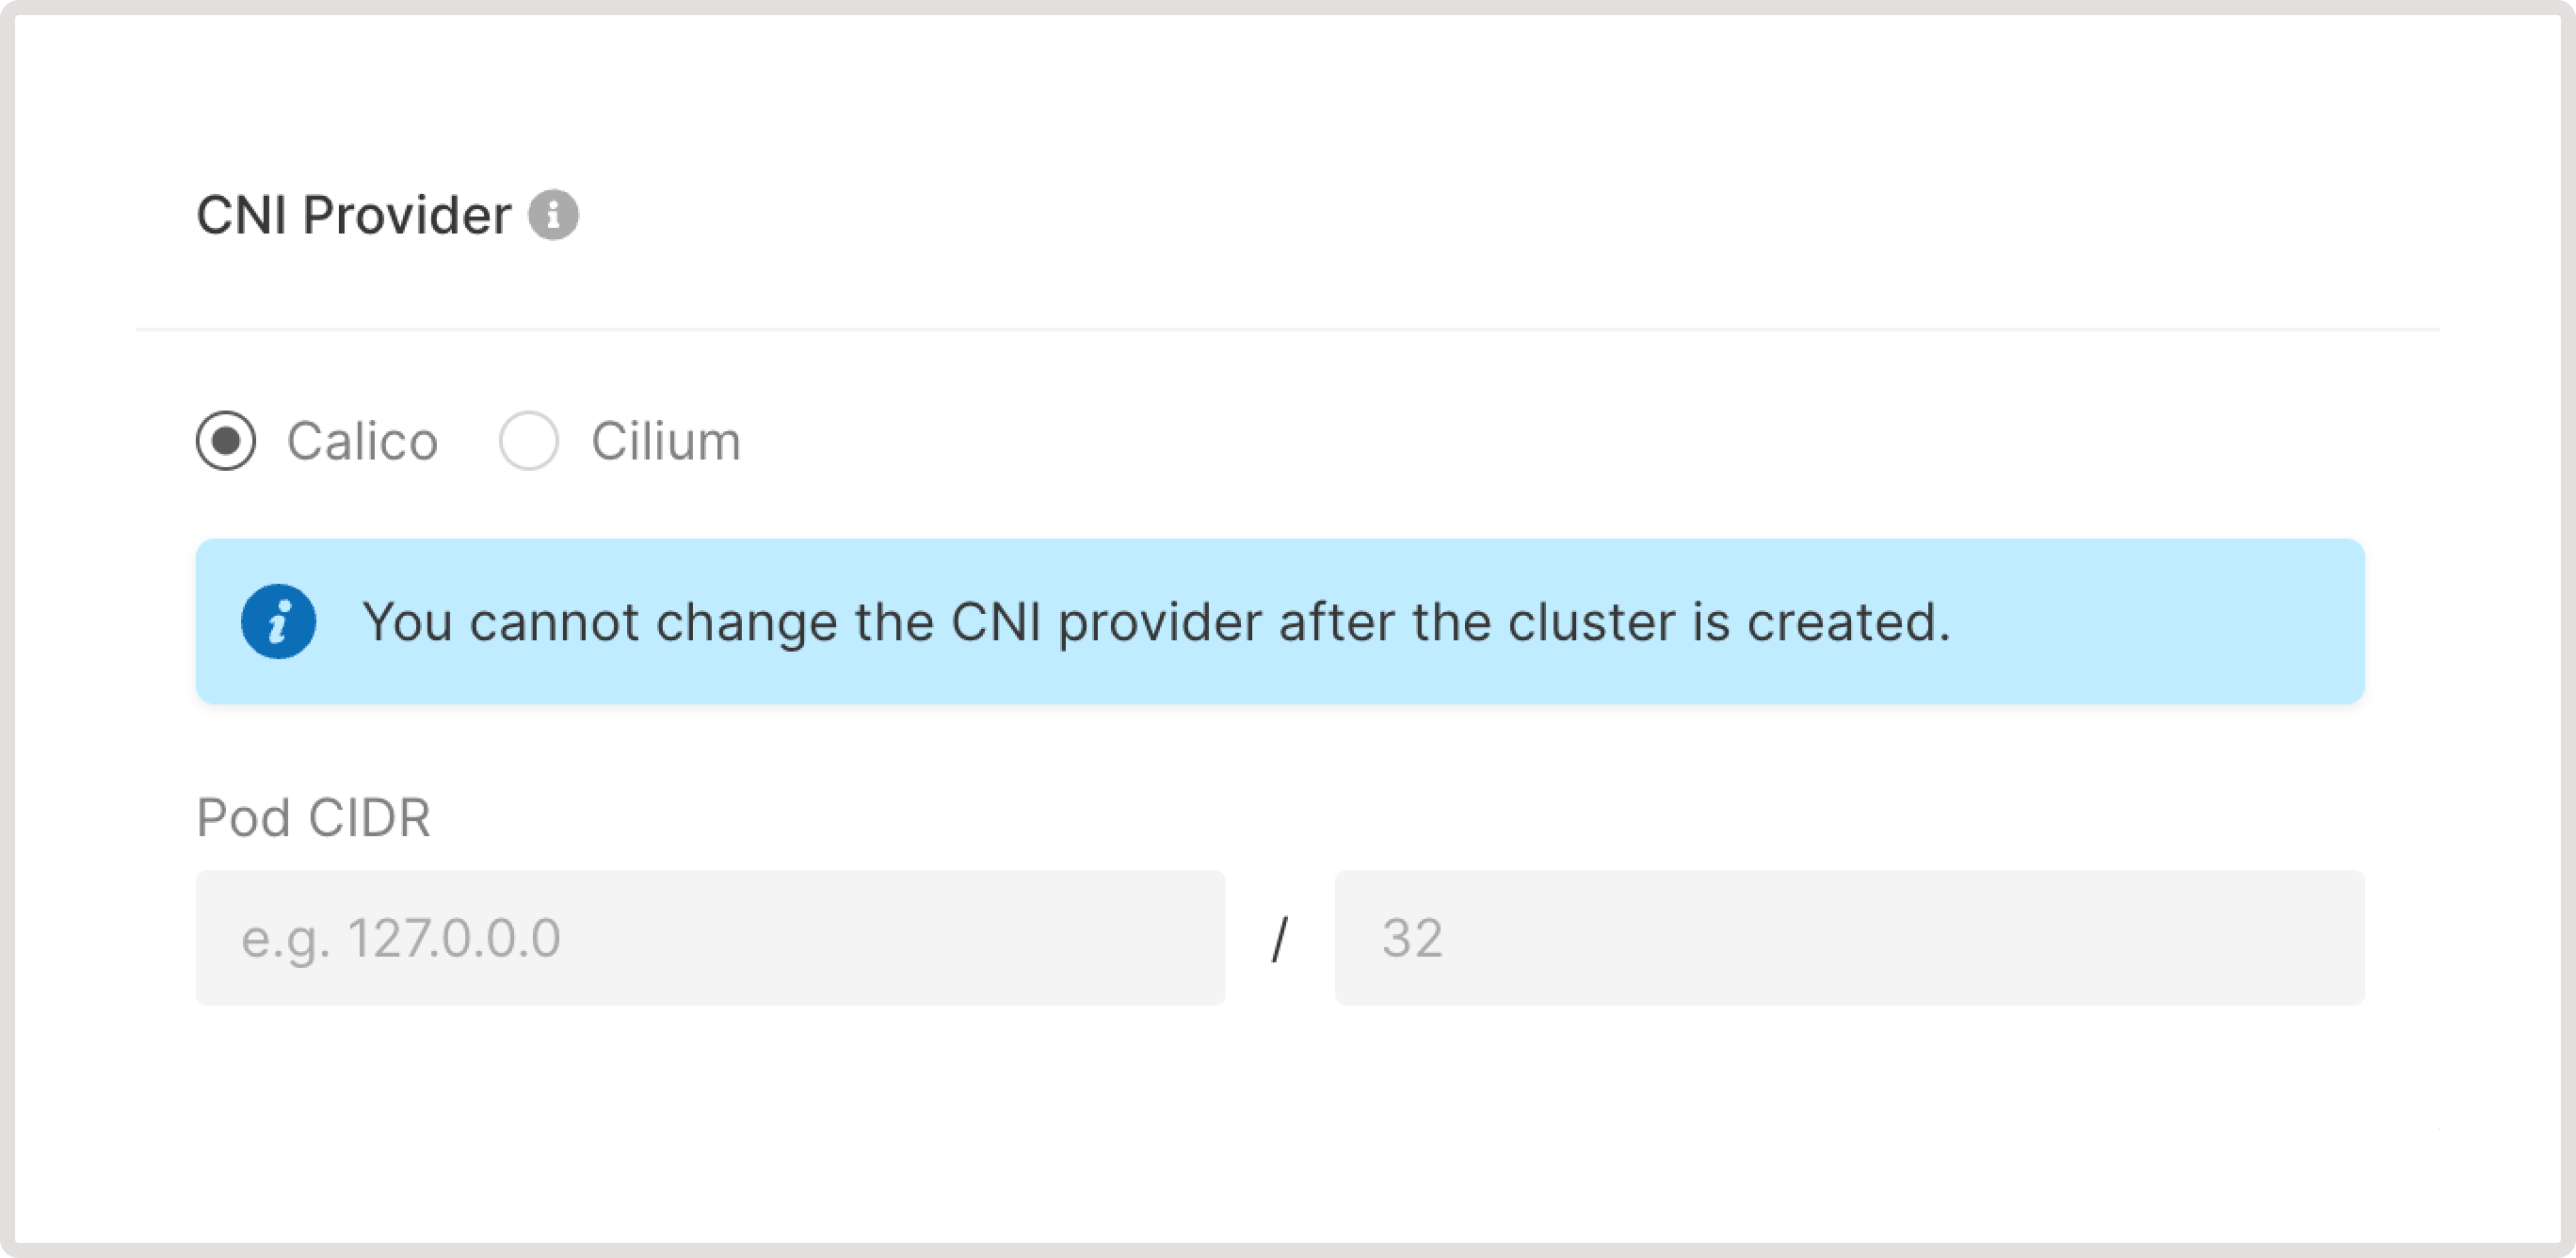
Step 5. Select the CNI Provider
Choose either the Cilium or Calico network stack. These provide networking and network security solutions for containers.
- Cilium uses eBPF to inject functionality into the kernel and provides a broader range of additional features (load balancing, advanced security, failure detection, etc.) than Calico. You can add additional functions as required by checking the relevant box for DSR, tunneling, load balancer acceleration, and encryption.
- Calico uses a more conservative stack based on iptables.
You cannot change the network stack after the cluster has been created.
Step 6. Configure network settings
Select an existing network and subnetwork or create new ones according to the instructions in the following guide: Create and manage a network.
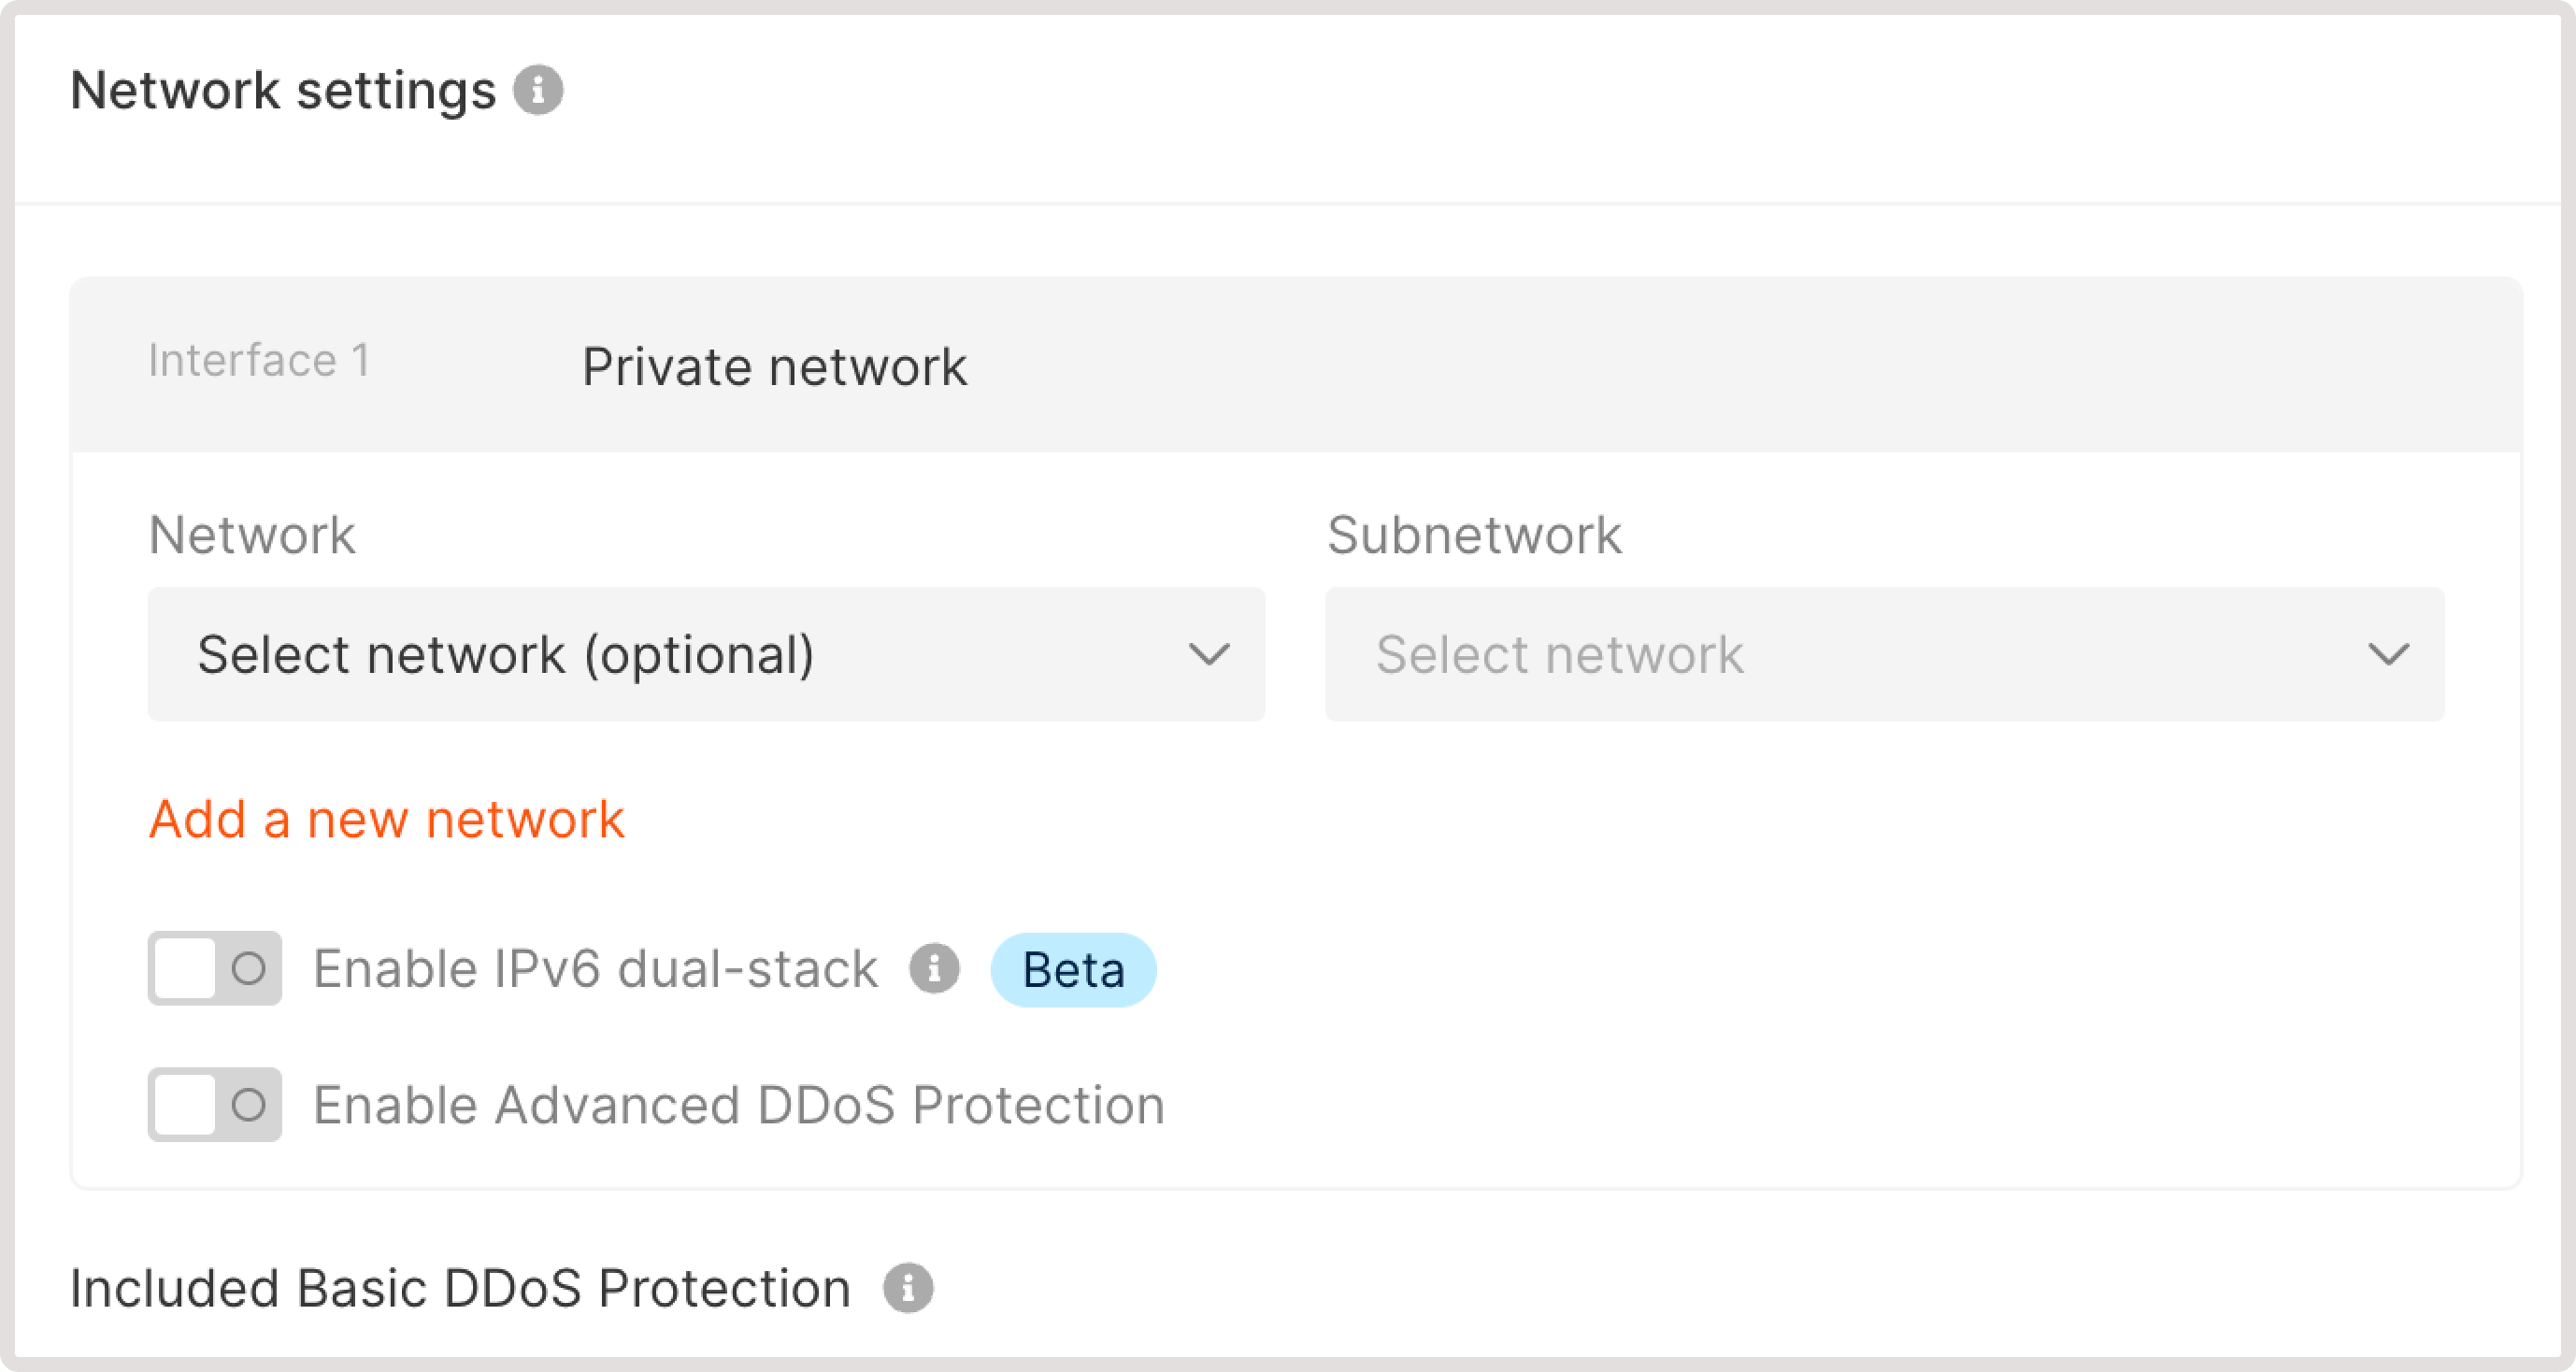
(Optional) Enable IPv6 dual-stack to assign both IPv4 and IPv6 addresses for network interfaces of worker nodes and pods. If the Enable IPv6 dual-stack toggle is not available, make sure that at least one pool from your cluster is in a public network. If your Kubernetes cluster is only connected to a private network, you also need to configure and add an IPv6 subnetwork.
DDoS protection. By default, your container is under Basic DDoS Protection. It can prevent certain attacks by blocking IP addresses that are used by malicious actors. But for a higher level of protection, we recommend enabling Advanced DDoS Protection.
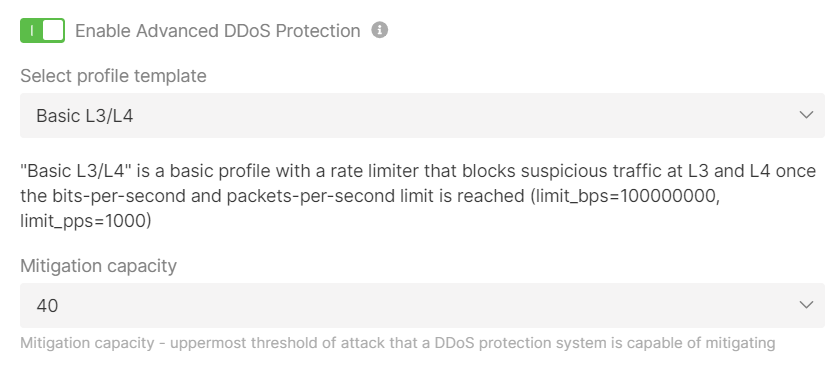
You can enable Advanced DDoS Protection for your private network. To do so, activate the Enable Advanced DDoS Protection toggle, open the drop-down menu, and select the desired template from the list. We currently support the following templates: CS:GO, Rust, ARK, Basic L3/L4, or TCP protection.
The settings offered depend on the selected template. For example, for the Basic L3/L4 specify the uppermost threshold of attack in Gbps that our DDoS Protection can mitigate in the “Mitigation capacity” field.
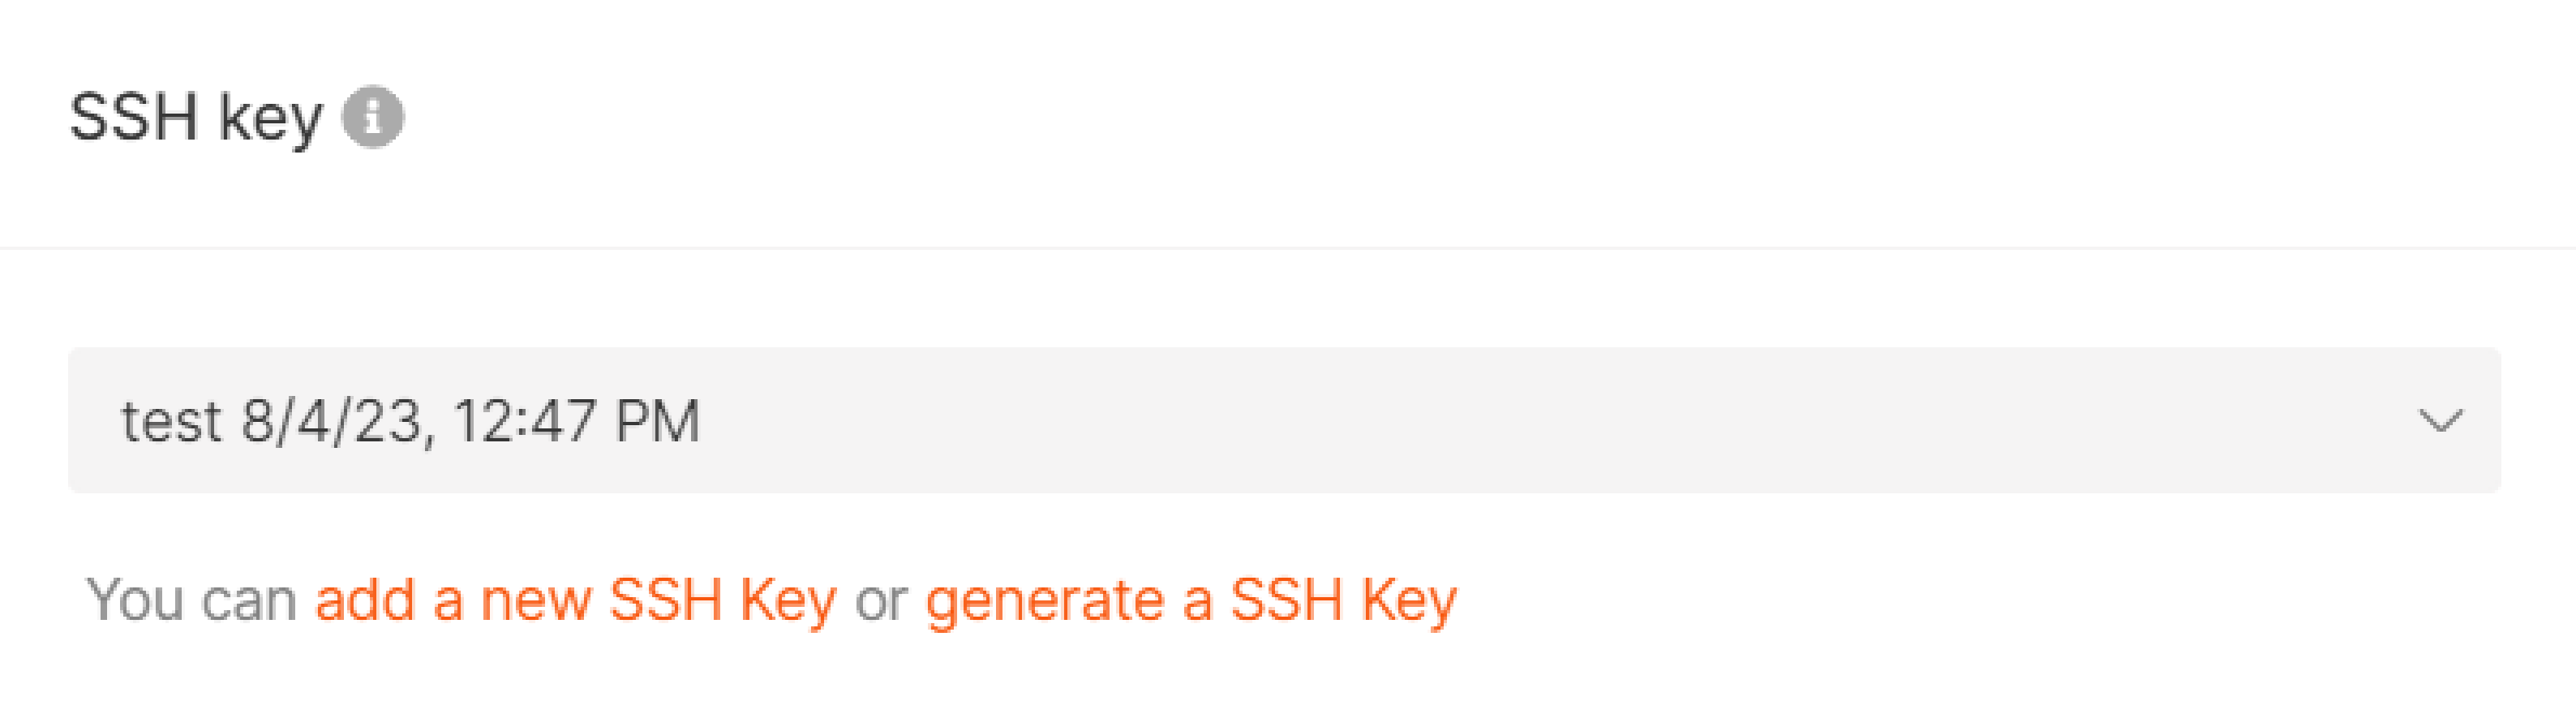
Step 7. Add an SSH key
Configure an SSH key to enable a remote SSH connection to all nodes. Select an existing key or create a new one. For details, consult our article on how to connect to your instance via SSH.
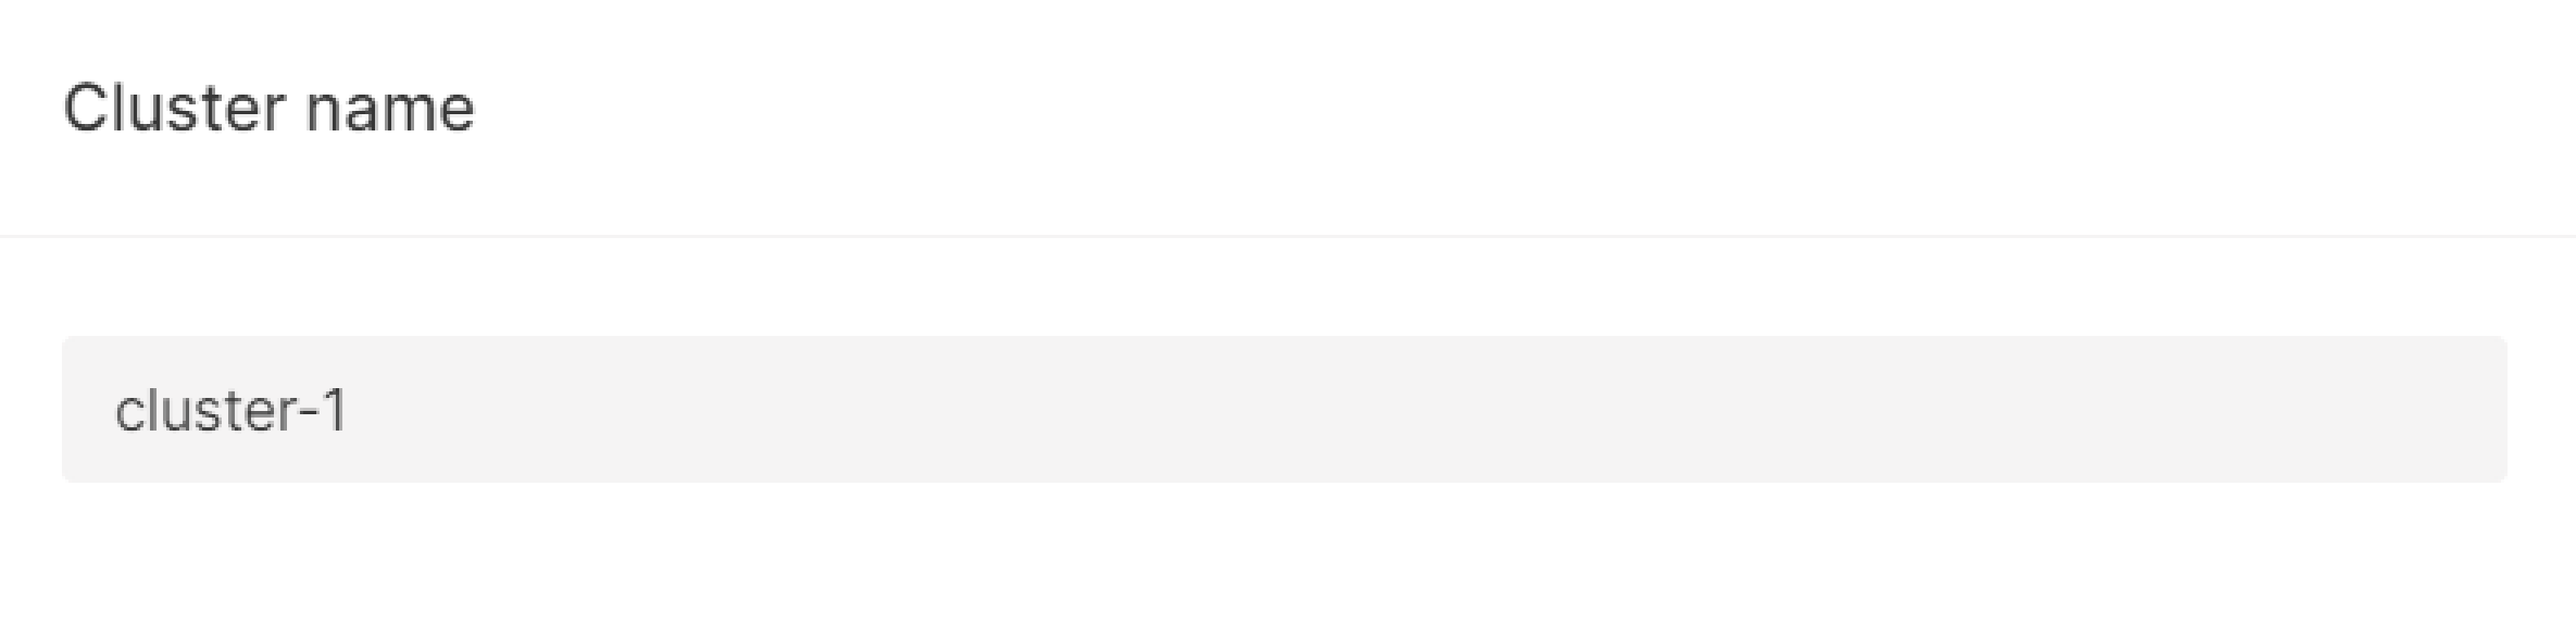
Step 8. Specify a cluster name
Name the cluster in the field as shown below.
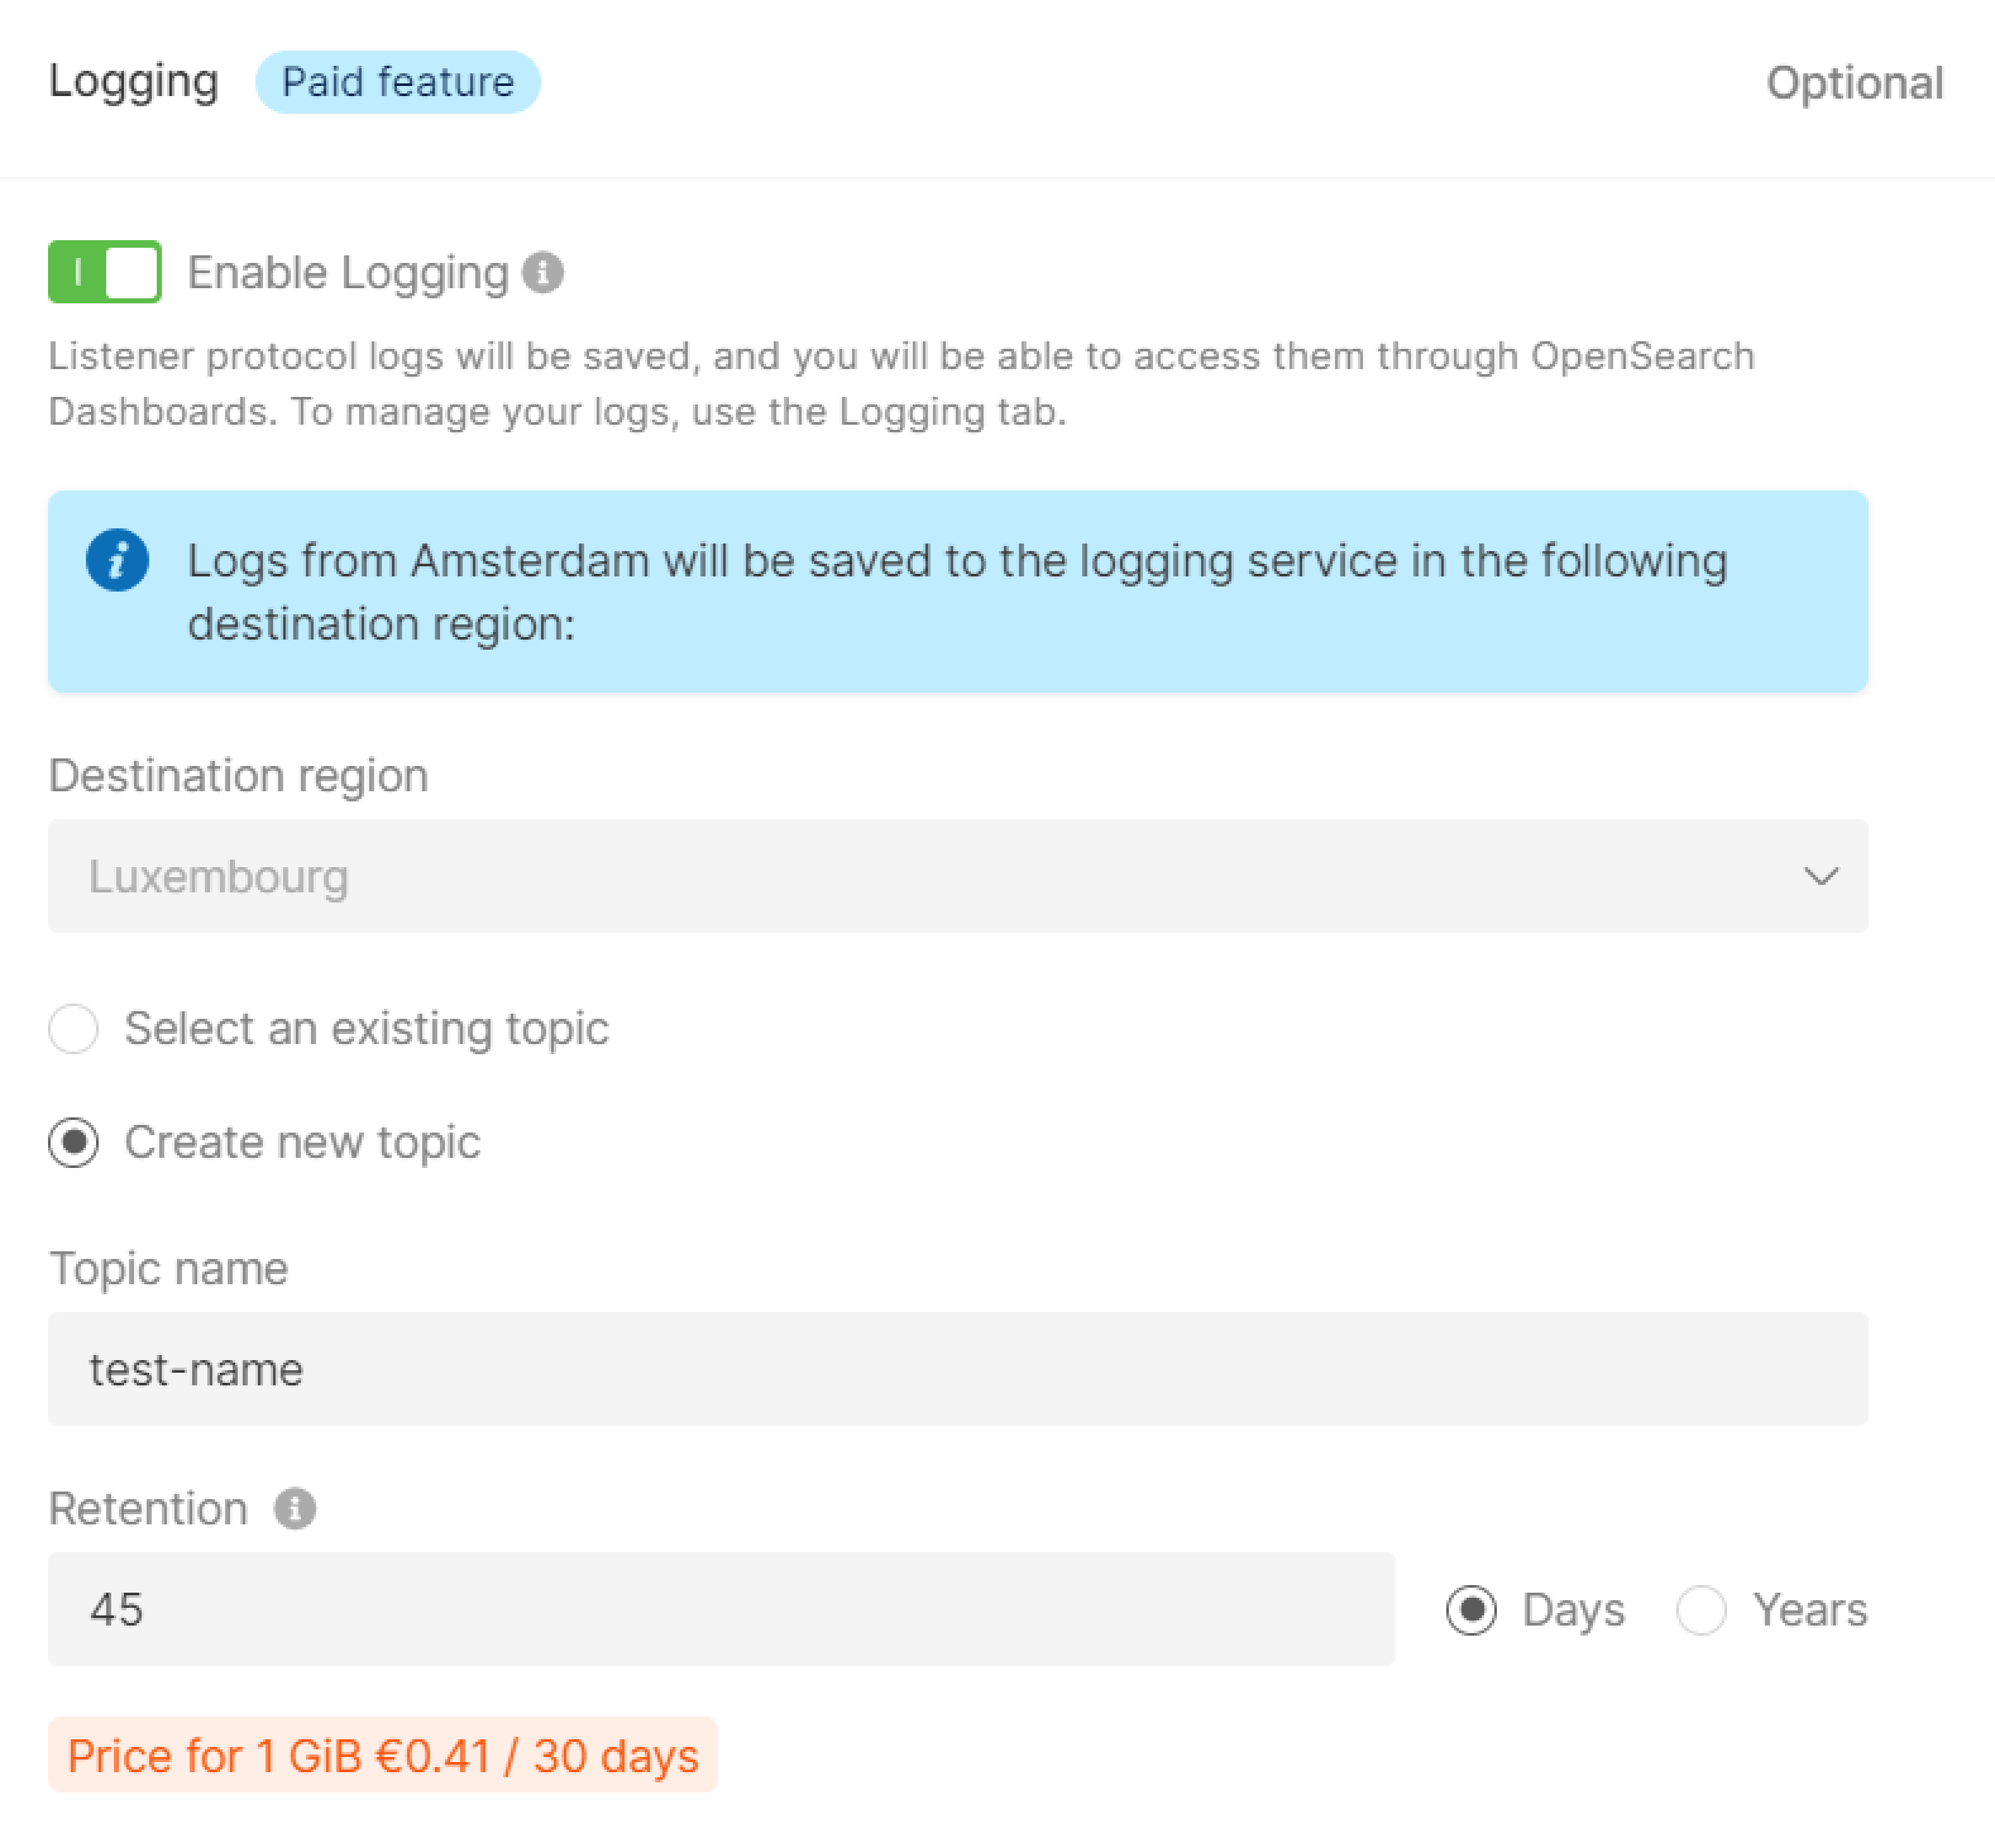
Step 9. (Optional) Configure logging
Managed Logging is a paid feature that allows you to collect and store Kubernetes logs. For more details on Managed Logging, read our dedicated guide. To configure Managed Logging in the Gcore Customer Portal, choose one of two options:
- Select an existing topic. If you already use Managed Logging, select this option.
- Create new topic. If you haven't used Managed Logging before, choose this option and specify the required information.
Step 10. Finalize
Check the cluster settings on the right side of the screen. If everything is correct, click Create cluster.
The cluster will be created in just a few minutes!
Was this article helpful?
Not a Gcore user yet?
Discover our offerings, including virtual instances starting from 3.7 euro/mo, bare metal servers, AI Infrastructure, load balancers, Managed Kubernetes, Function as a Service, and Centralized Logging solutions.