
This is the second part of our series focusing on Kubernetes Operators, and it shows how you can build a Kubernetes Operator based on the Bitnami Apache Helm chart. Note that you can refer to the steps in this tutorial to build an operator for your own applications.
Prerequisites
- We assume you followed the first part of the series. Thus, you should have a Kubernetes cluster (v1.7 or newer) with a control plane and two workers running on your computer. Also, the Operator Lifecycle Manager should be installed on your system. You can enter the following command to verify that everything is set up:
kubectl get all --namespace olmNAME READY STATUS RESTARTS AGEpod/catalog-operator-64b6b59c4f-brck9 1/1 Running 0 3m28spod/olm-operator-844fb69f58-fn57f 1/1 Running 0 3m28spod/operatorhubio-catalog-5s8k2 1/1 Running 0 3m4spod/packageserver-65df5d5cc9-nz26h 1/1 Running 0 3m2spod/packageserver-65df5d5cc9-x7hwc 1/1 Running 0 3m2sNAME TYPE CLUSTER-IP EXTERNAL-IP PORT(S) AGEservice/operatorhubio-catalog ClusterIP 10.103.1.120 <none> 50051/TCP 3m3sservice/v1-packages-operators-coreos-com ClusterIP 10.99.75.171 <none> 443/TCP 3m3sNAME READY UP-TO-DATE AVAILABLE AGEdeployment.apps/catalog-operator 1/1 1 1 3m28sdeployment.apps/olm-operator 1/1 1 1 3m28sdeployment.apps/packageserver 2/2 2 2 3m2sNAME DESIRED CURRENT READY AGEreplicaset.apps/catalog-operator-64b6b59c4f 1 1 1 3m28sreplicaset.apps/olm-operator-844fb69f58 1 1 1 3m28sreplicaset.apps/packageserver-65df5d5cc9 2 2 2 3m2s- The Operator SDK is installed on your machine. For details about installing the Operator SDK, refer to the Install the Operator SDK CLI page.
- Helm CLI is installed on your computer. To install Helm CLI, follow the instructions from the Installing Helm page.
- Docker. For details about installing Docker, refer to the Install Docker page.
- You need a quay.io account.
Set Up The Apache Operator
In this section, we’ll walk you through the process of setting up the Apache Operator using Bitnami’s Helm chart.
- Add the Bitnami Helm repository to your Helm client by running the following command:
helm repo add bitnami https://charts.bitnami.com"bitnami" has been added to your repositories- Create a Helm-based Operator by running the
operator-sdk newcommand, and passing it the following arguments:
- The name of your operator (
apache-operator). - The
--api-versionflag with the Kubernetes apiVersion. The format is$GROUP_NAME/$VERSION. In this tutorial, we’ll be usingappfleet.com/v1alpha1. - The
--kind flagwith the name of the Kubernetes CRD (Apache) - The
--typeflag with the type of operator. We’ll be usinghelm. Other valid types areGoandAnsible - The
helm-chartflag with the name of the Helm chart (bitnami/apache)
operator-sdk new apache-operator --api-version=appfleet.com/v1alpha1 --kind=Apache --type=helm --helm-chart=bitnami/apacheINFO[0000] Creating new Helm operator 'apache-operator'.INFO[0001] Created helm-charts/apacheINFO[0001] Generating RBAC rulesWARN[0001] The RBAC rules generated in deploy/role.yaml are based on the chart's default manifest. Some rules may be missing for resources that are only enabled with custom values, and some existing rules may be overly broad. Double check the rules generated in deploy/role.yaml to ensure they meet the operator's permission requirements.INFO[0001] Created build/DockerfileINFO[0001] Created watches.yamlINFO[0001] Created deploy/service_account.yamlINFO[0001] Created deploy/role.yamlINFO[0001] Created deploy/role_binding.yamlINFO[0001] Created deploy/operator.yamlINFO[0001] Created deploy/crds/appfleet.com_v1alpha1_apache_cr.yamlINFO[0001] Generated CustomResourceDefinition manifests.INFO[0001] Project creation complete.This command creates the following directory structure:
tree apache-operator -L 2apache-operator├── build│ └── Dockerfile├── deploy│ ├── crds│ ├── operator.yaml│ ├── role.yaml│ ├── role_binding.yaml│ └── service_account.yaml├── helm-charts│ └── apache└── watches.yamlThings to note:
- Kubernetes compares the actual state of the cluster with the desired state. Then, it takes action to match these states. The Operators extend this pattern by watching a specific custom resource type and taking actions to match the spec in that resource. In this example, the Operator watches the Apache resource as defined in the
watches.yamlfile:
cat apache-operator/watches.yaml---- version: v1alpha1 group: appfleet.com kind: Apache chart: helm-charts/apache- The
Dockerfileuses thequay.io/operator-framework/helm-operator:v0.15.1image as the base, and then it copieswatches.yamlfile and the Helm charts:
cat apache-operator/build/DockerfileFROM quay.io/operator-framework/helm-operator:v0.15.1COPY watches.yaml ${HOME}/watches.yamlCOPY helm-charts/ ${HOME}/helm-charts/- Now you can build the Apache Operator by moving into the
apache-operatordirectory, and then entering the followingoperator-sdk buildcommand:
operator-sdk build apache-operator:v0.1INFO[0000] Building OCI image apache-operator:v0.1Sending build context to Docker daemon 64.51kBStep 1/3 : FROM quay.io/operator-framework/helm-operator:v0.15.1 ---> 450a3ca2d02dStep 2/3 : COPY watches.yaml ${HOME}/watches.yaml ---> Using cache ---> db5c285c02fbStep 3/3 : COPY helm-charts/ ${HOME}/helm-charts/ ---> 50255ede17deSuccessfully built 50255ede17deSuccessfully tagged apache-operator:v0.1INFO[0003] Operator build complete.- Verify that the Docker image was created with:
docker images | grep apacheapache-operator v0.1 50255ede17de 38 seconds ago 174MBSet Up quay.io with Docker
You can think of Quay as something similar to GitHub, but for Docker images. It’s a registry where you can host images and share them. There are a couple of ways to set up quay.io with Docker. For the sake of simplicity, you’ll use the docker login command. It’s important to note that the docker login command stores the password you enter as plain-text. Thus, you should first generate an encrypted password.
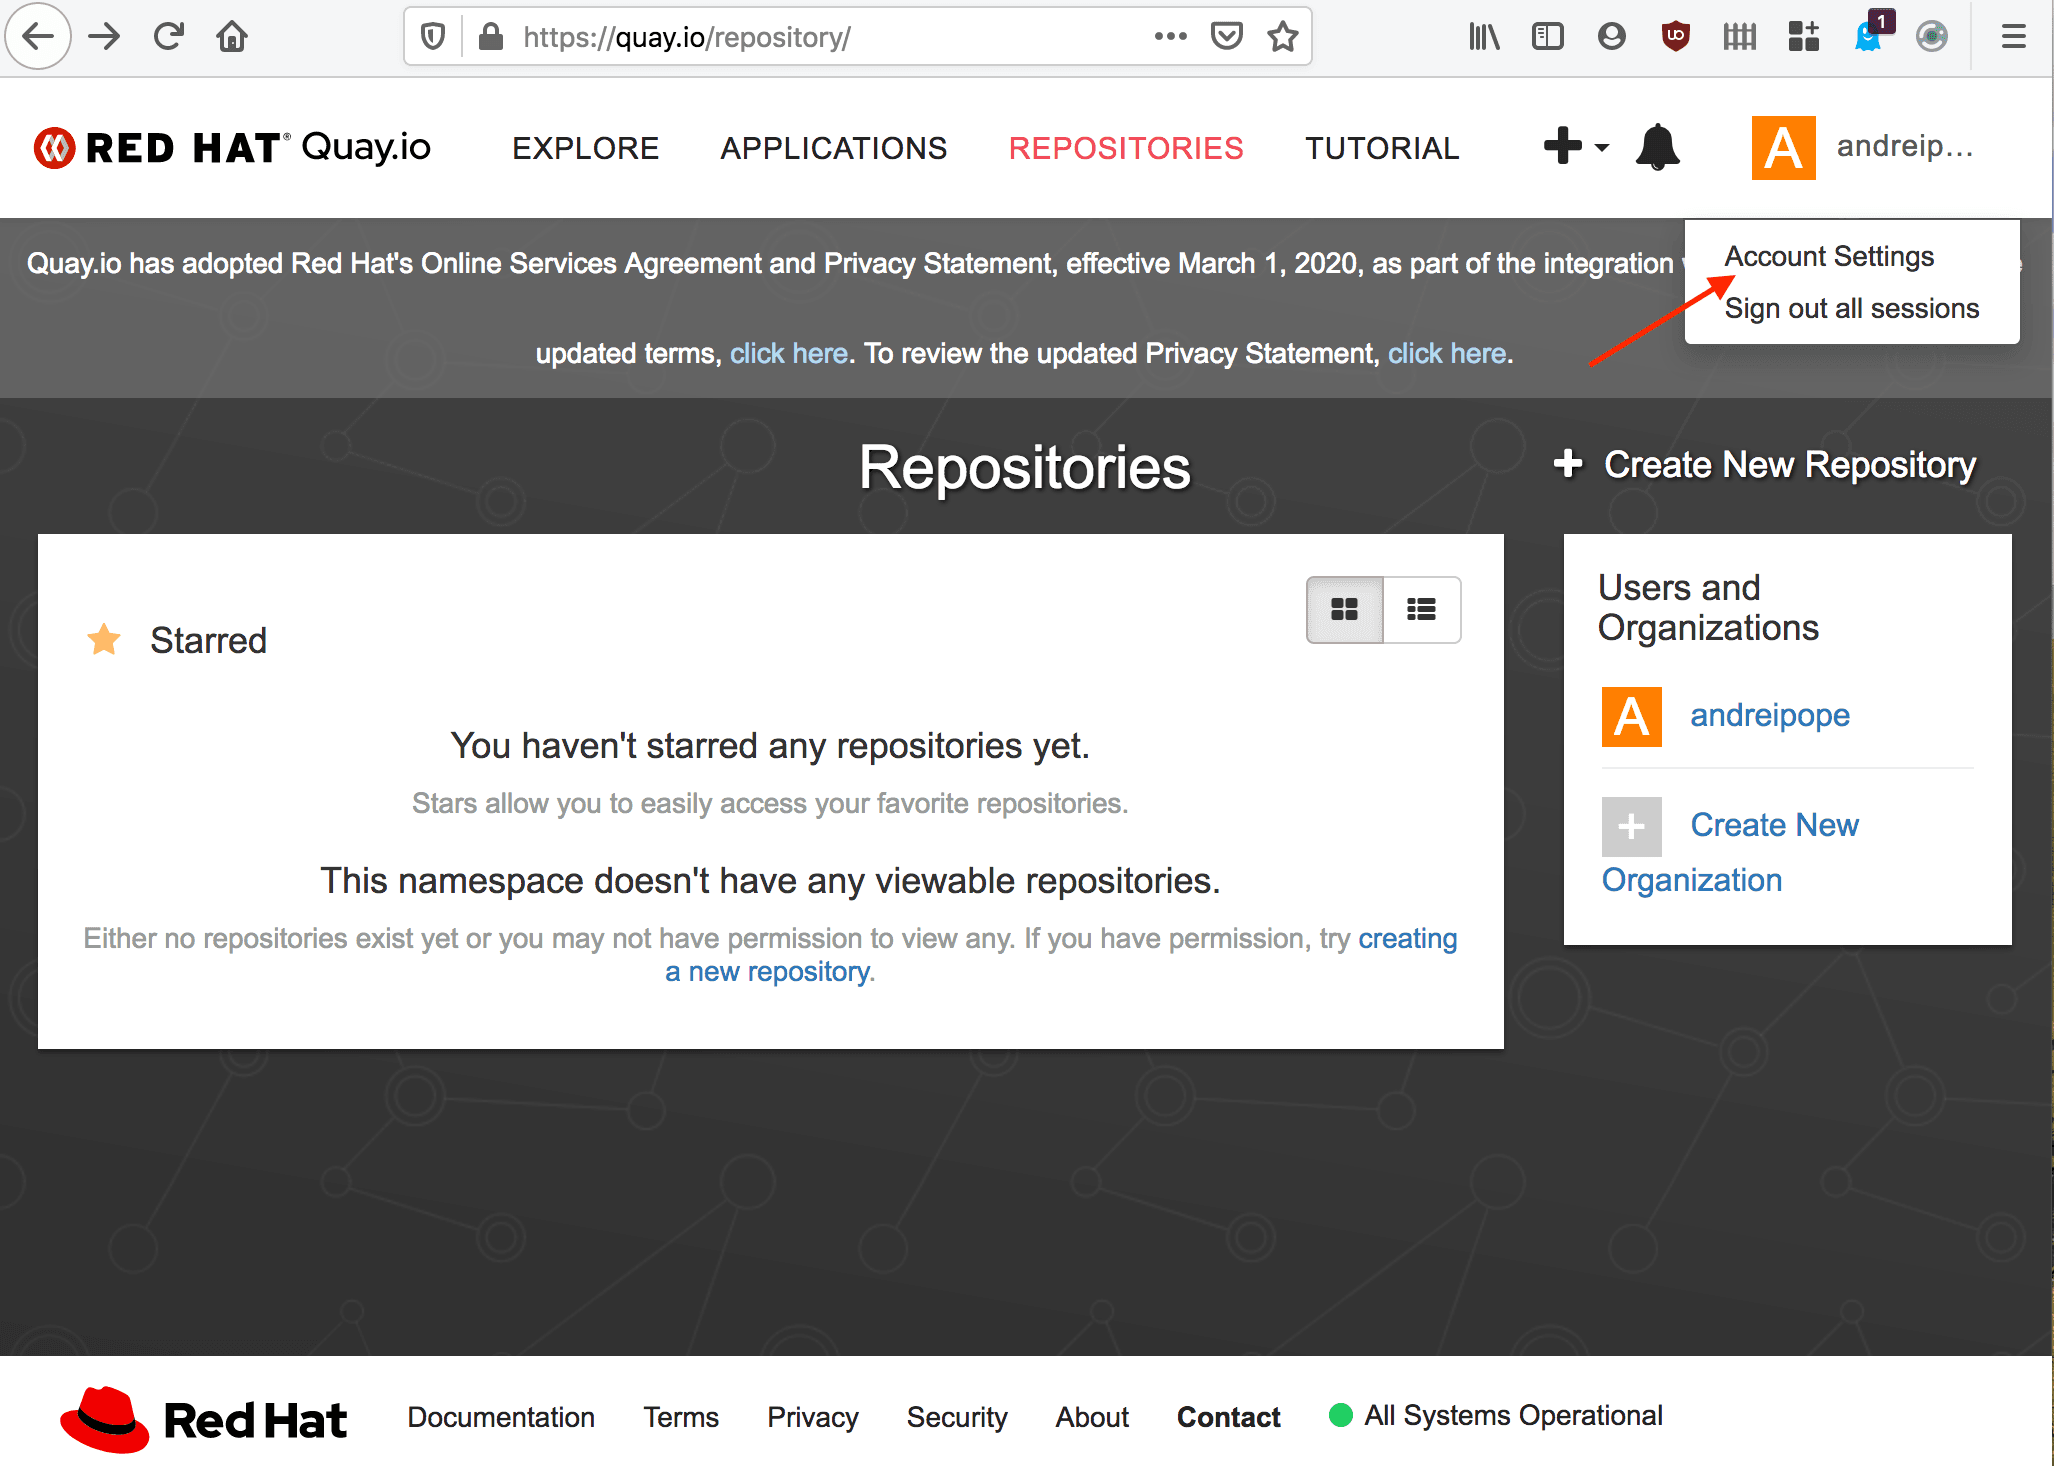
- Point your browser to https://quay.io/, and then navigate to Account Settings:
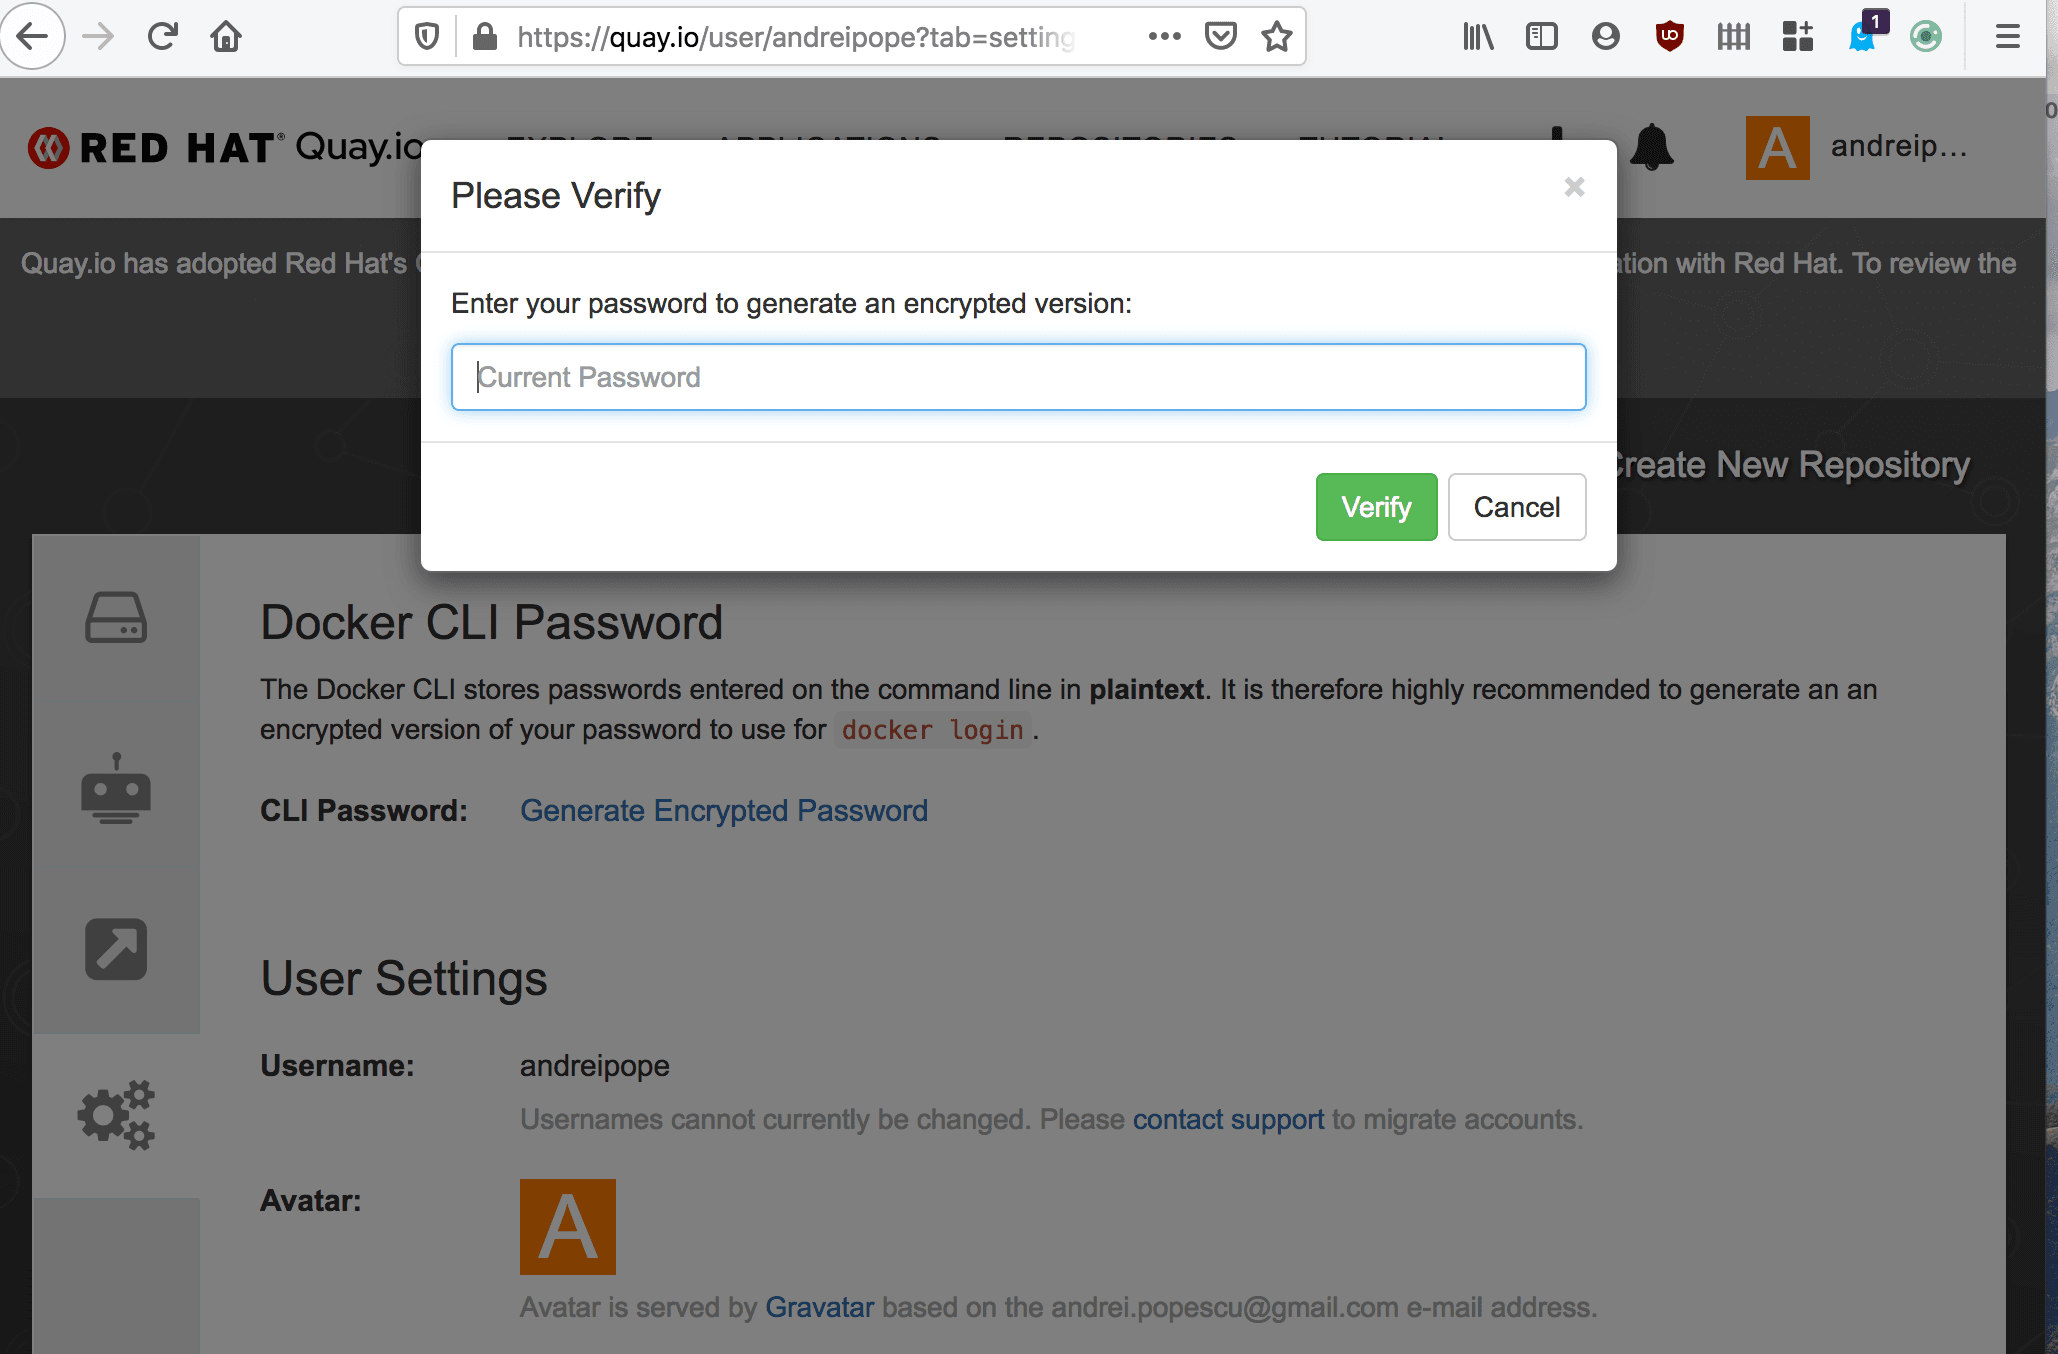
- From the Account Settings page select Generate Encrypted Password:

- You will be prompted to enter your
quay.iopassword:
- Select Docker Login and then copy the command containing your Docker encrypted password:

- In a terminal window, log in to
quay.ioby entering the following command:
docker login -u="<YOUR_USERNAME>" -p="<YOUR_ENCRYPTED_PASSWORD>" quay.ioWARNING! Using --password via the CLI is insecure. Use --password-stdin.Login SucceededPush the Apache Operator Image to quay.io
To do this, you first need to properly tag the image with the hostname of the registry, and the name of your repository. Then, you can push the image.
- Enter the following command to tag the local image named
apache-operatorinto thequay.io/andreipoperepository:
docker tag apache-operator:v0.1 quay.io/andreipope/apache-operator:v0.1Note that the image name is comprised by a slash-separated list of the:
- Registry hostname (
quay.io) - Repository (
andreipope) - Operator name (
apache-version).
☞ The name of our repository is andreipope, but yours will be different.
- To push the image that we created in the previous section, run the following command
docker pushcommand:
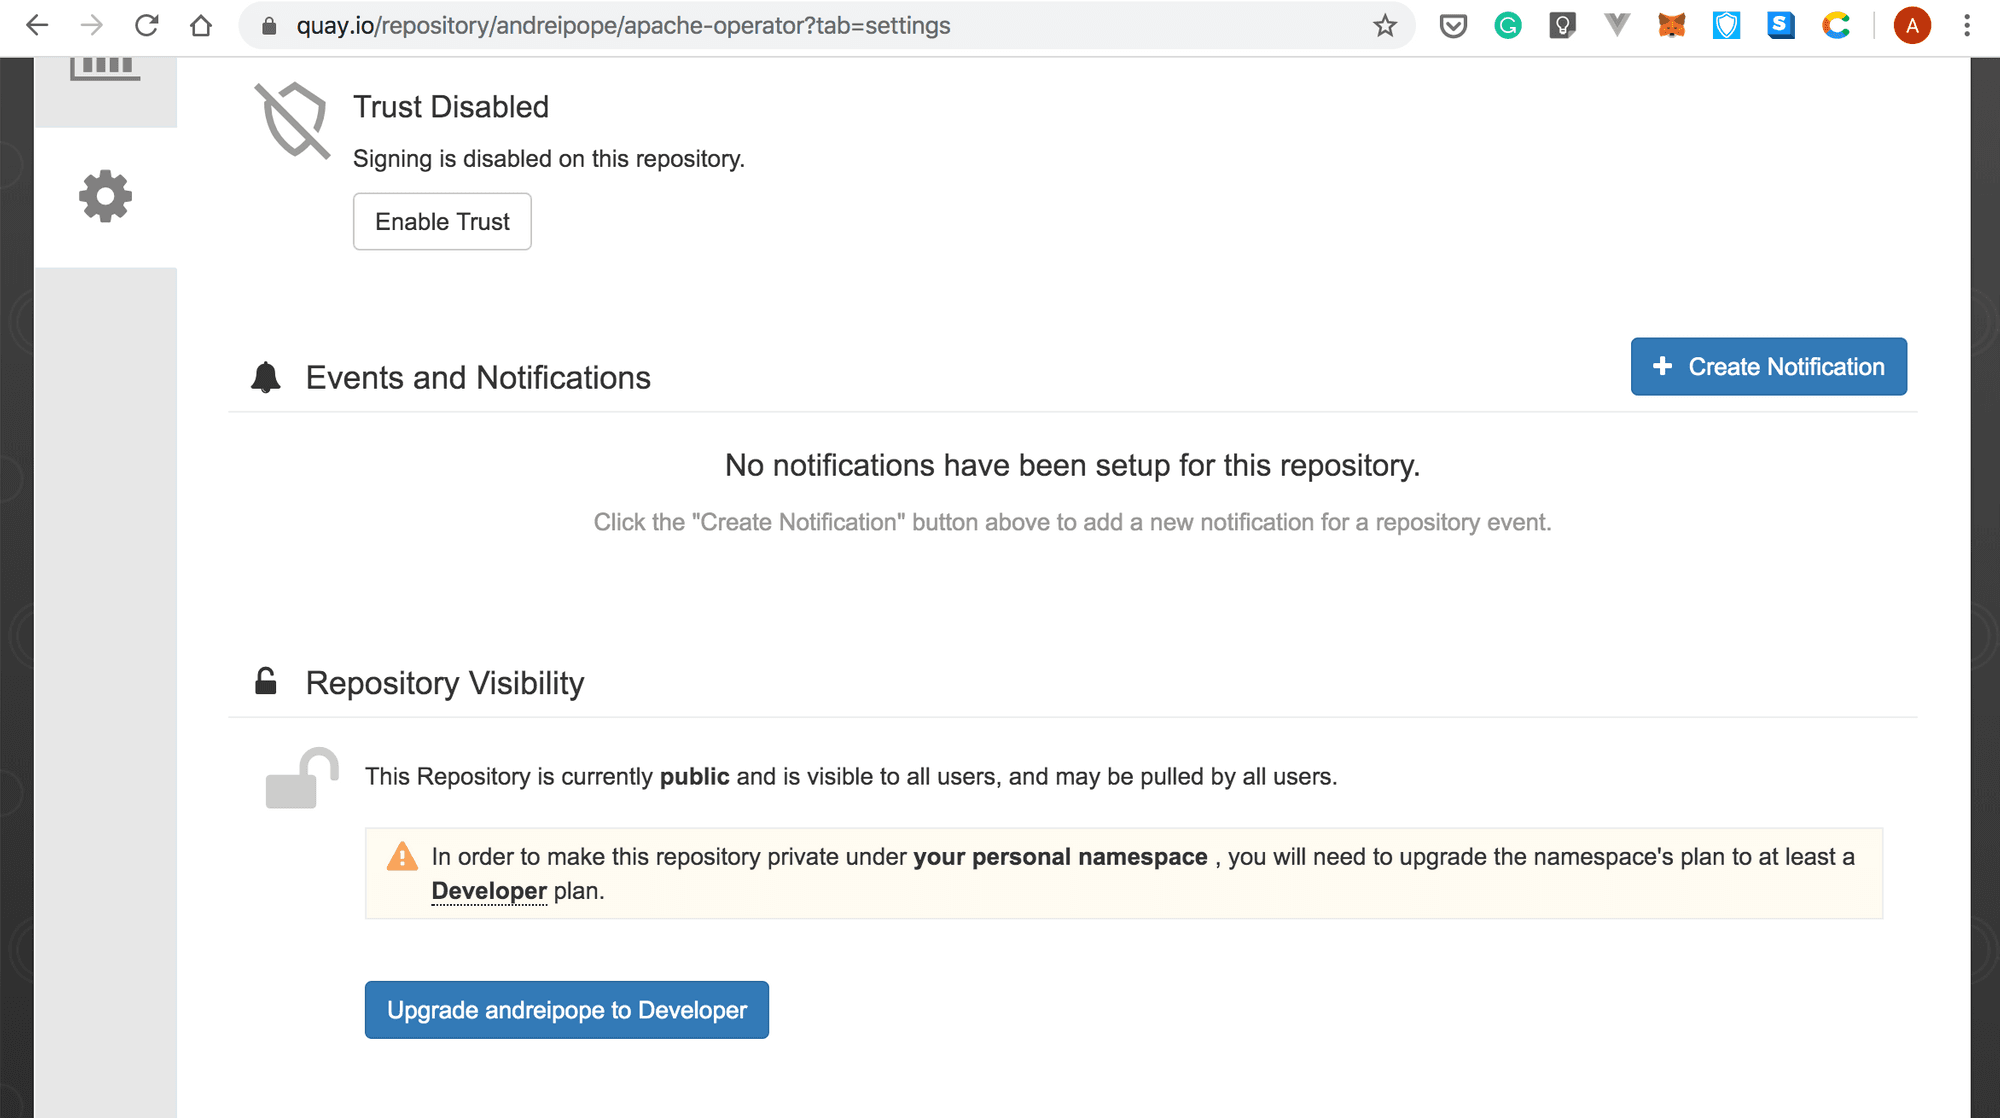
docker push quay.io/andreipope/apache-operator:v0.1b8325e5fabd7: Pushed2f4354fc6a73: Pushedb496b494f6f9: Pushed9fd48ecc1227: Pushed0141daa77f22: Pushed27cd2023d60a: Pushed4b52dfd1f9d9: Pushedv0.1: digest: sha256:7230926984fc3d688e02764748441a74907eeb772e3b51eb06b1bac225ba9f98 size: 1778- Point your browser to https://quay.io/, navigate to the apache-operator repository, and make repository public:
Deploy the Apache Operator
You are now ready to deploy the Apache Operator. Before that, you must customize the specs.
- Open the
deploy/operator.yamlfile in a plain-text editor and update the placeholderimage: REPLACE_IMAGEwith the location of your image (quay.io/andreipope/apache-operator:v0.1)
Your deploy.operator.yaml file should look similar to the following:
apiVersion: apps/v1kind: Deploymentmetadata: name: apache-operatorspec: replicas: 1 selector: matchLabels: name: apache-operator template: metadata: labels: name: apache-operator spec: serviceAccountName: apache-operator containers: - name: apache-operator # Replace this with the built image name image: quay.io/andreipope/apache-operator:v0.1 imagePullPolicy: Always env: - name: WATCH_NAMESPACE valueFrom: fieldRef: fieldPath: metadata.namespace - name: POD_NAME valueFrom: fieldRef: fieldPath: metadata.name - name: OPERATOR_NAME value: "apache-operator"- Enter these
kubectl createcommands to deploy the Apache Operator:
kubectl create -f deploy/service_account.yamlkubectl create -f deploy/role.yamlkubectl create -f deploy/role_binding.yamlkubectl create -f deploy/operator.yamlserviceaccount/expressjs-operator createdrole.rbac.authorization.k8s.io/expressjs-operator createdrolebinding.rbac.authorization.k8s.io/expressjs-operator createddeployment.apps/expressjs-operator created- Check the status of the deployment:
kubectl get deploymentNAME READY UP-TO-DATE AVAILABLE AGEapache-operator 1/1 1 1 24s☞ Note that the deployment doesn’t define the spec for the Apache cluster. You’ll describe the Apache cluster in the next section, once the Operator is running.
- The Operator is a pod running in this deployment. To see it, type the following command:
kubectl get podskubectl get podsNAME READY STATUS RESTARTS AGEapache-operator-6d5795f879-np6pr 1/1 Running 1 38sDeploy the Apache Cluster
In the Set Up the Apache Operator section, you created a CRD defining a new kind of resource, an Apache cluster. Now, you will apply that spec so that the Operator starts watching the Apache resources. Then, you will deploy the Apache cluster itself.
- First, let’s deploy the CRD that defines the resources the Operator will monitor:
kubectl apply -f deploy/crds/appfleet.com_apaches_crd.yamlcustomresourcedefinition.apiextensions.k8s.io/apaches.appfleet.com createdcustomresourcedefinition.apiextensions.k8s.io/apaches.appfleet.com created- At this point, you are ready to deploy the Apache cluster:
kubectl apply -f deploy/crds/appfleet.com_v1alpha1_apache_cr.yamlapache.appfleet.com/example-apache created- The deployment takes a bit of time to complete. Once everything is ready, you should see a new pod running Apache:
kubectl get podsNAME READY STATUS RESTARTS AGEapache-operator-6d5795f879-np6pr 1/1 Running 4 2m53sexample-apache-7cf789fc98-462dr 1/1 Running 0 39s- You can also check that the deployment was created by entering the following command:
kubectl get deploymentNAME READY UP-TO-DATE AVAILABLE AGEapache-operator 1/1 1 1 5m43sexample-apache 2/2 2 2 3m29sScaling Up
At this point, you have a running Apache cluster. To add another instance, you must modify the replicaCount field in the deploy/crds/appfleet.com_v1alpha1_apache_cr.yamlapache.appfleet.com/example-apache file. Then, you need to apply the new spec.
- Open the
deploy/crds/appfleet.com_v1alpha1_apache_cr.yamlapache.appfleet.com/example-apachefile in a plain-text editor, and specifyspec.replicaCount: 2.
The updated file should look similar to the following:
apiVersion: appfleet.com/v1alpha1kind: Apachemetadata: name: example-apachespec: # Default values copied from <project_dir>/helm-charts/apache/values.yaml affinity: {} cloneHtdocsFromGit: enabled: false interval: 60 git: pullPolicy: IfNotPresent registry: docker.io repository: bitnami/git tag: 2.25.0-debian-10-r0 image: debug: false pullPolicy: IfNotPresent registry: docker.io repository: bitnami/apache tag: 2.4.41-debian-10-r0 ingress: annotations: {} certManager: false enabled: false hostname: example.local secrets: null tls: - hosts: - example.local secretName: example.local-tls livenessProbe: enabled: true failureThreshold: 6 initialDelaySeconds: 180 path: / periodSeconds: 20 port: http successThreshold: 1 timeoutSeconds: 5 metrics: enabled: false image: pullPolicy: IfNotPresent registry: docker.io repository: bitnami/apache-exporter tag: 0.7.0-debian-10-r0 podAnnotations: prometheus.io/port: "9117" prometheus.io/scrape: "true" resources: limits: {} requests: {} nodeSelector: {} podAnnotations: {} readinessProbe: enabled: true failureThreshold: 6 initialDelaySeconds: 30 path: / periodSeconds: 10 port: http successThreshold: 1 timeoutSeconds: 5 replicaCount: 2 resources: limits: {} requests: {} service: annotations: {} externalTrafficPolicy: Cluster httpsPort: 443 nodePorts: http: "" https: "" port: 80 type: LoadBalancer tolerations: {}- You can apply the updated spec with:
kubectl apply -f deploy/crds/appfleet.com_v1alpha1_apache_cr.yamlapache.appfleet.com/example-apache configured- After applying the updated spec, the state of the cluster differs from the desired state. The Operator starts a new instance of the Apache webserver to reconcile the two, scaling up the cluster:
kubectl get podsNAME READY STATUS RESTARTS AGEapache-operator-6d5795f879-np6pr 1/1 Running 4 4m10sexample-apache-7cf789fc98-462dr 1/1 Running 0 116sexample-apache-7cf789fc98-fvttm 0/1 ContainerCreating 0 1sWait a bit until the second container is created:
kubectl get podsNAME READY STATUS RESTARTS AGEapache-operator-6d5795f879-np6pr 1/1 Running 0 5m2sexample-apache-7cf789fc98-462dr 1/1 Running 0 2m48sexample-apache-7cf789fc98-fvttm 1/1 Running 0 53sIn the above output, note that two example-apache pods are running.
Verify Your Installation
The Apache Operator creates a Kubernetes service which is basically an endpoint where clients can obtain access to the group of pods running Apache. You will use this service to access your cluster using a web browser.
- Make sure that the service is up with:
kubectl get serviceNAME TYPE CLUSTER-IP EXTERNAL-IP PORT(S) AGEapache-operator-metrics ClusterIP 10.104.41.83 <none> 8686/TCP,8383/TCP 5m46sexample-apache LoadBalancer 10.99.54.115 <pending> 80:31058/TCP,443:30362/TCP 3m51skubernetes ClusterIP 10.96.0.1 <none> 443/TCP- Forward the connections made to http://localhost:80 to the pod running the
service/example-apacheservice:
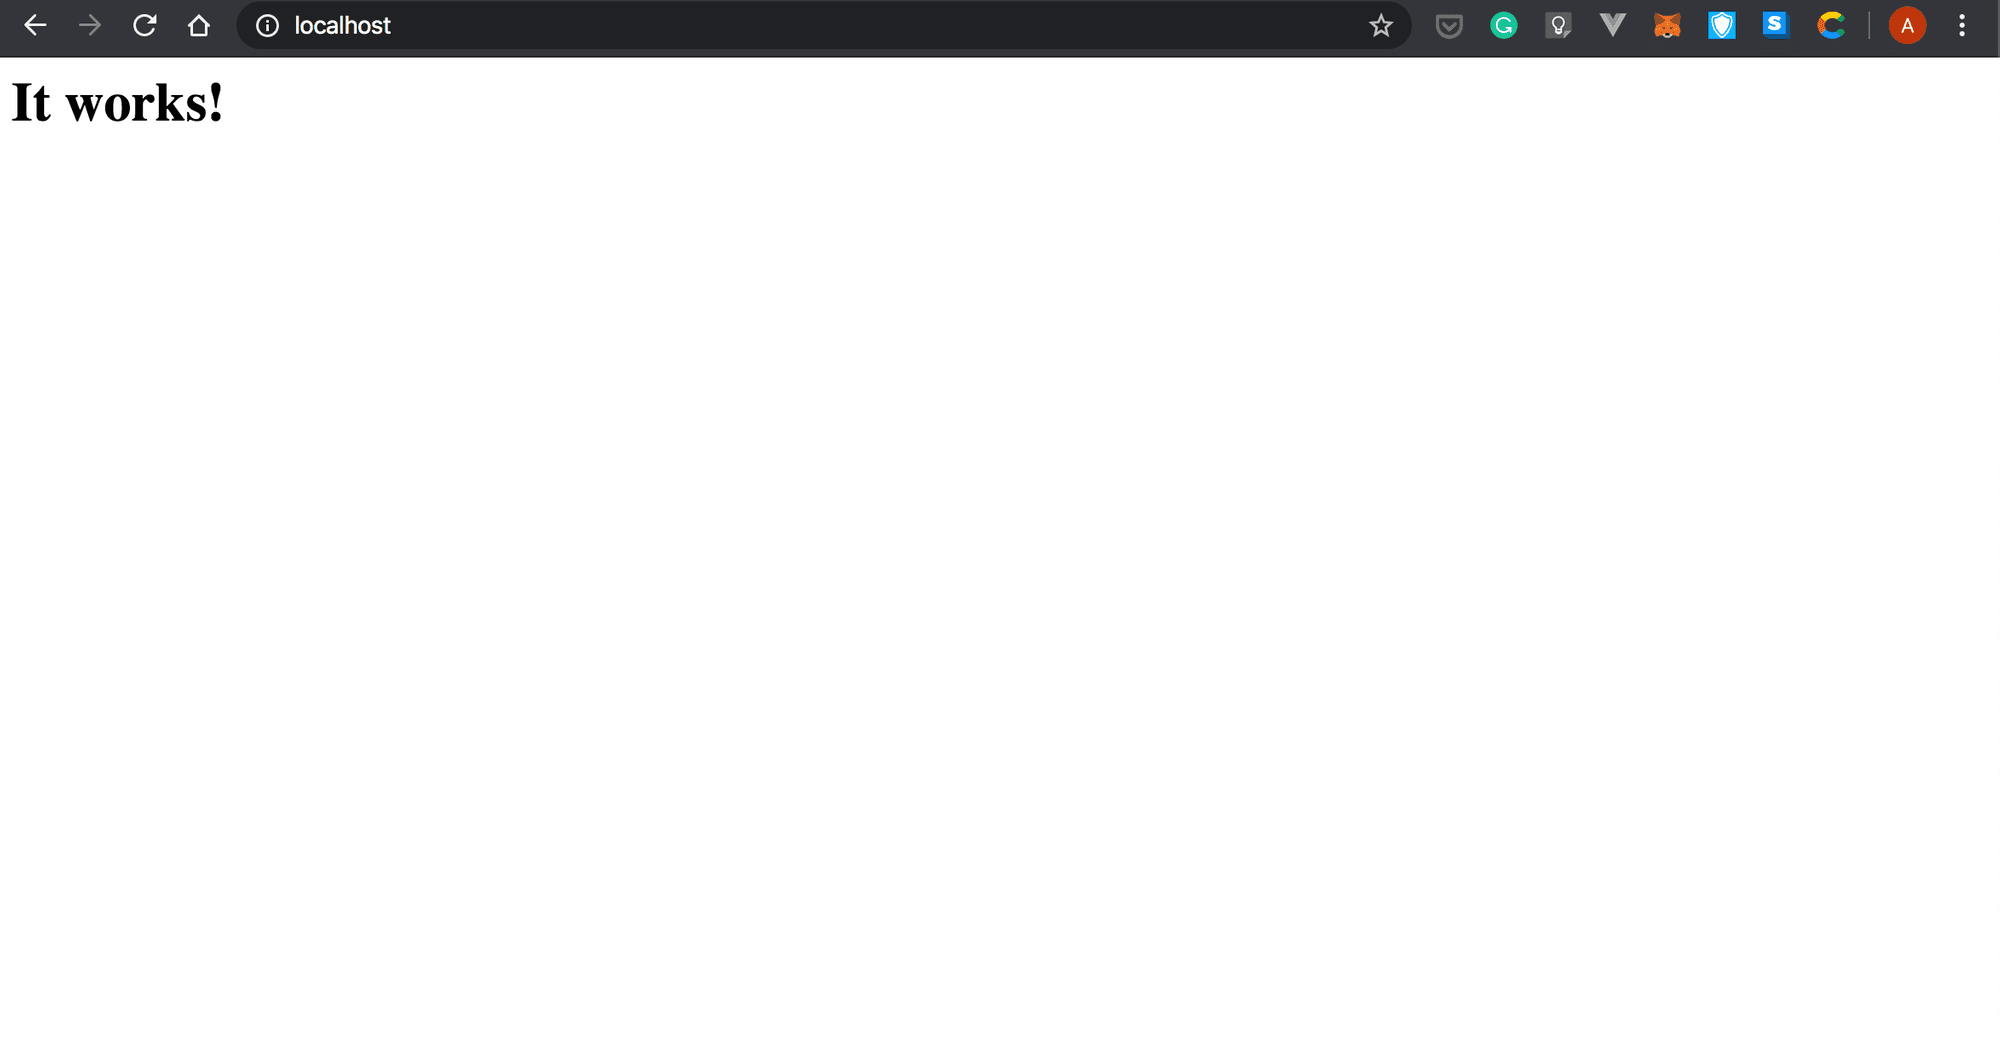
kubectl port-forward service/example-apache 80:80Forwarding from 127.0.0.1:80 -> 8080Forwarding from [::1]:80 -> 8080- Point your browser to http://localhost:80. If everything worked well, you should see something like the following:
Now you should have a good understanding of how Kubernetes Operators work. Furthermore, by completing this tutorial you learned how create an operator for your application using a Helm chart.
Related articles


Imagine discovering that migrating your company's data to a new cloud provider will cost hundreds of thousands of dollars in egress fees alone, before you've even touched the re-engineering work. Or worse, picture being in Synapse Financial

Subscribe to our newsletter
Get the latest industry trends, exclusive insights, and Gcore updates delivered straight to your inbox.