
If you’re new to Ubuntu, installing R may seem overwhelming. However, with the right guidance, it can be a simple process. R is a widely used language for statistical analysis and data visualization, making it a crucial tool for both data professionals and enthusiasts. Regardless of your level of expertise, this guide offers a straightforward approach to installing R on your Ubuntu system.
What is the R programming language?
R is a programming language and free software environment tailored for statistical computing and graphics. Renowned for its rich ecosystem and versatile applications, R offers the following common features:
- Statistical Analysis. Provides extensive tools for regression, hypothesis testing, and data analysis.
- Graphics. Capable of producing high-quality and customizable plots and charts.
- Package Ecosystem. Over 15,000 packages on the Comprehensive R Archive Network (CRAN) extend R’s capabilities.
- Open Source. R is released under the GNU General Public License, meaning it’s free to use, and its codebase can be inspected, modified, and shared.
- Integration. R can integrate with many databases, and languages like C, C++, and Fortran. It can also interface with Python, allowing users to harness tools from both languages.
- Integrated Development Environments (IDEs). While R can be used from the command line, many users prefer using IDEs like RStudio for a more integrated and user-friendly coding experience.
In essence, R serves as a comprehensive toolkit for data analysis, visualization, and software development. In the next section, let’s take a look at how to set it up on Ubuntu.
Installing R on Ubuntu
Installing R on Ubuntu is a straightforward process, especially with the help of the command line. Here’s a step-by-step guide:
#1 Update System Packages
Before starting, it’s a good idea to update your system packages to their latest versions.
sudo apt updatesudo apt upgradeThe output will be a list of packages will be upgraded. After confirmation, ubuntu will upgrade the packages.
#2 Add R Repository
To ensure you get the latest version of R, add the CRAN repository to your sources list.
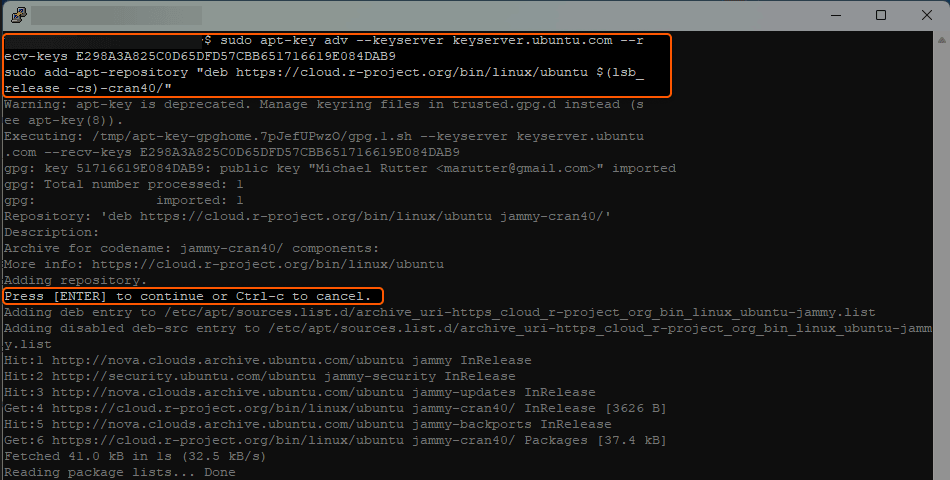
sudo apt-key adv --keyserver keyserver.ubuntu.com --recv-keys E298A3A825C0D65DFD57CBB651716619E084DAB9sudo add-apt-repository "deb https://cloud.r-project.org/bin/linux/ubuntu $(lsb_release -cs)-cran40/"Press Enter to continue. Then, ubuntu will add the CRAN repository to its list of repositories. Here’s a sample output below:
#3 Install R
With the repository added, you can install R.
sudo apt updatesudo apt install r-baseA list of packages that will be installed. Ubuntu will proceed to install R once you give confirmation.
#4 Verify Installation
To check if R was installed successfully, enter the R environment.
RYou will see an introduction message, followed by the R prompt. Exit the R environment by typing q() and pressing Enter.
#5 Optional: Install RStudio
For many, RStudio provides a more user-friendly interface for working with R. To install:
sudo apt install gdebi-corewget https://download1.rstudio.org/desktop/bionic/amd64/rstudio-x.x.x-amd64.debsudo gdebi rstudio-x.x.x-amd64.debUbuntu will install the gdebi-core package first, then download and install RStudio. The version number x.x.x should be replaced with the latest version number from the RStudio website.
Installing R package from CRAN
CRAN, which stands for the Comprehensive R Archive Network, is a network of servers around the world that store identical, up-to-date versions of code and documentation for R, as well as many extensions and related software.
Here’s a step-by-step guide on how to install an R package from CRAN:
#1 Launch R
First, you need to start R. You can do this by typing R in your terminal (for Linux/Unix/Mac) or by opening the R GUI if you’re on Windows.
#2 Use the install.packages Function
Once inside the R environment, use the install.packages function to install your desired package. For example, to install a package named “package_name1”, you’d use:
install.packages("package_name1")Once you run this command, you’ll likely see a series of messages indicating the download and installation progress. This includes the download location, the unpacking of the package, and any additional dependencies that might also be installed.
#3 Load the Package
After installation, you can use the library function to load the package and start using its functions. Using our earlier example:
library(package_name1)#4 Optional: Choose a CRAN Mirror
By default, install.packages might ask you to choose a CRAN mirror. This is essentially a server location from where the package will be downloaded. You can manually specify a mirror by using the repos argument:
install.packages("package_name1", repos="https://cloud.r-project.org/")Choosing the cloud based CRAN mirror as shown above usually provides good speed and reliability.
#5 Verify Installation
To ensure the package has been successfully installed, you can list all installed packages and check if your package is in the list:
installed.packages()[,1]That’s it, you have successfully installed R on Ubuntu. This powerful tool will enable you to perform statistical analysis and visualize data. With its vast libraries and packages, you can explore data in depth, making it a valuable asset whether you are conducting academic research, professional analysis, or personal projects. Kudos and happy coding!
Conclusion
Want to run Ubuntu in a virtual environment? With Gcore Cloud, you can choose from Basic VM, Virtual Instances, or VPS/VDS suitable for Ubuntu:
- Gcore Basic VM offers shared virtual machines from €3.2 per month
- Virtual Instances are virtual machines with a variety of configurations and an application marketplace
- Virtual Dedicated Servers provide outstanding speed of 200+ Mbps in 20+ global locations
Related articles


Subscribe to our newsletter
Get the latest industry trends, exclusive insights, and Gcore updates delivered straight to your inbox.