Explore your network in a new way with Wireshark, a user-friendly, open-source packet analyzer. This comprehensive guide will help you understand what Wireshark is and how to install it on Ubuntu 22.04.
What is Wireshark?
Wireshark, a well-known open-source packet analyzer, is often referred to as a network protocol analyzer. It serves multiple functions such as network troubleshooting, analysis, software and protocol development, and even educational purposes. Wireshark is a multi-platform tool, compatible with Windows, Linux, macOS, and more.
With Wireshark, you can decode live data from a variety of sources, including Ethernet, IEEE 802.11, PPP/HDLC, ATM, Bluetooth, USB, Token Ring, Frame Relay, FDDI, and beyond. Moreover, it has the ability to interpret captured data from files saved in an array of formats, such as tcpdump (PCAP), NAI’s Sniffer (both compressed and uncompressed), Sniffer Pro, NetXray, Network Instruments Observer, NetScreen snoop, Novell LANalyzer, RADCOM WAN/LAN Analyzer, among others.
To put it simply, Wireshark functions as a diagnostic tool for your network, offering you a granular view of your network activities. It has gained significant popularity across industries for network troubleshooting and learning about network protocols.
Install Wireshark on Ubuntu 22.04
1. Establish a connection to your server running Ubuntu.
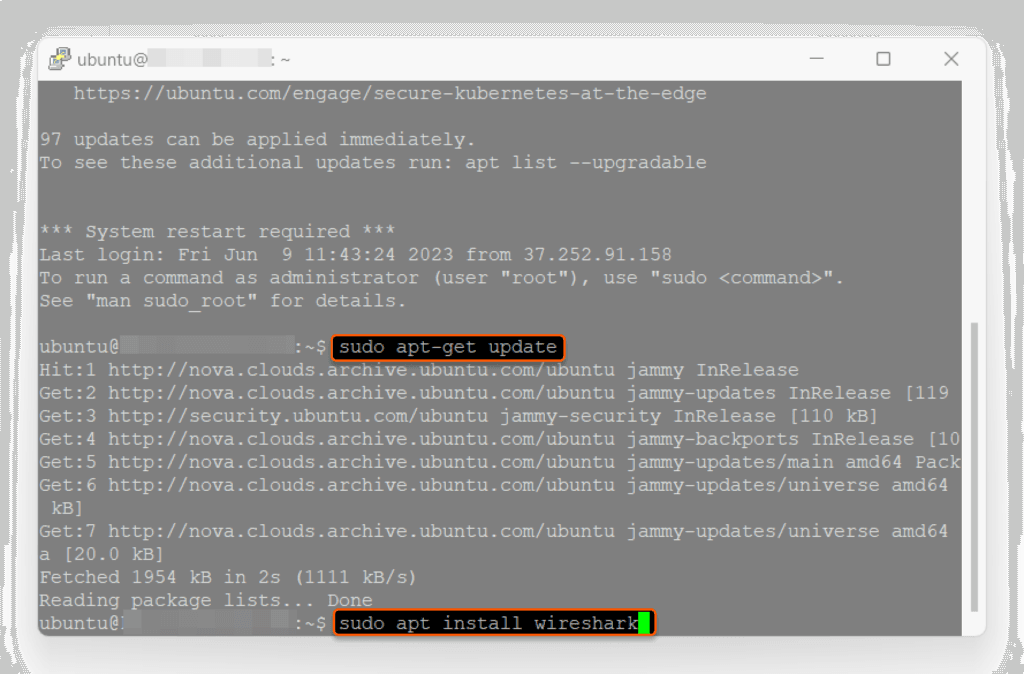
2. Update the repository’s list of packages that are available for installation on Ubuntu:
sudo apt update3. Proceed to install Wireshark from the repositories of Ubuntu:
sudo apt install wireshark
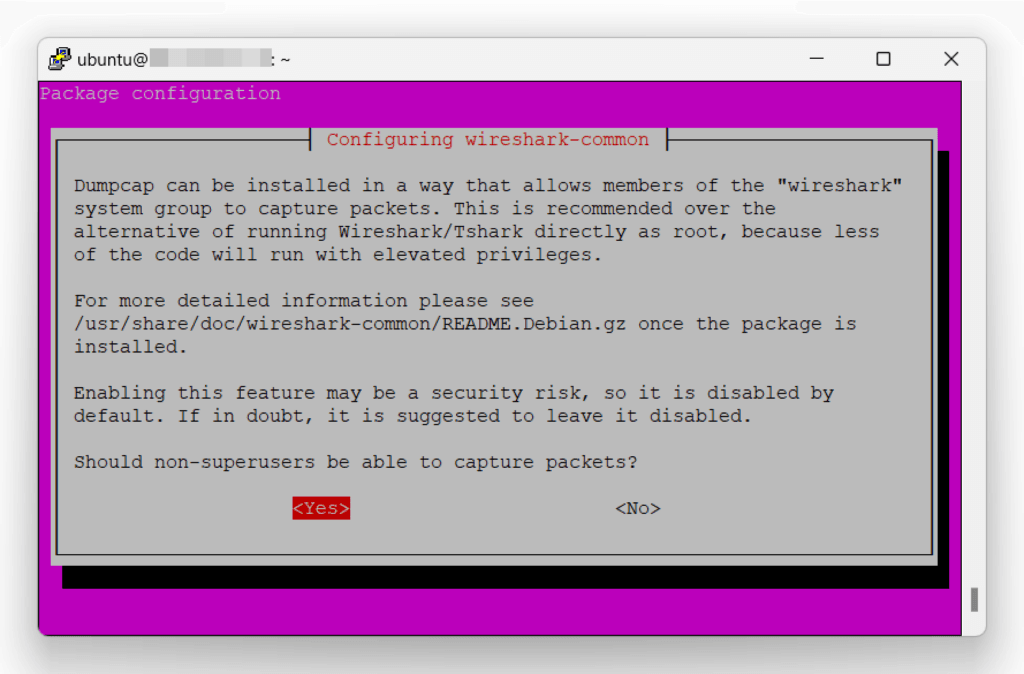
4. During the installation, you’ll be asked whether non-superusers should be permitted to capture packets. If you want to capture packets without needing to run Wireshark as root, you should select ‘Yes’.

5. If ‘No’ was your choice in the previous step or you wish to assign packet capture permissions to a specific user, you can add the user to the Wireshark group by typing in the command line:
sudo usermod -a -G wireshark usernameRemember to replace ‘username’ with the actual username of the person you want to extend permissions to.
You can launch Wireshark by simply typing ‘wireshark’ in the terminal. As an alternative, you can also look for Wireshark in your applications list and initiate it from the GUI.
Conclusion
Want to run Ubuntu in a virtual environment? With Gcore Cloud, you can choose from Basic VM, Virtual Instances, or VPS/VDS suitable for Ubuntu:
- Gcore Basic VM offers shared virtual machines from €3.2 per month
- Virtual Instances are virtual machines with a variety of configurations and an application marketplace
- Virtual Dedicated Servers provide outstanding speed of 200+ Mbps in 20+ global locations
Related articles
Subscribe to our newsletter
Get the latest industry trends, exclusive insights, and Gcore updates delivered straight to your inbox.


