Radar has landed - discover the latest DDoS attack trends. Get ahead, stay protected.Get the report
Under attack?

Products

Solutions

Resources

Partners

Why Gcore

  1. Home
  2. Blog
  3. How to launch real-time communications for iOS/Android

How to launch real-time communications for iOS/Android

  • By Gcore
  • March 13, 2023
  • 9 min read
How to launch real-time communications for iOS/Android

The phrase real-time communications (RTC) refers to any live telecommunications method in which all users can interact in a live capacity, with negligible latency. In other words, a phone or video call. And it can be a valuable feature for an application to provide its users with, even if it’s not the app’s core purpose.

For example, Instagram has interactive broadcasts with guests in Live Rooms, and direct video calling features, despite being a platform for mostly sharing pre-recorded images and video. This way, Instagram keeps users in its app. If interlocutors want to call, they don’t need to navigate to another RTC app—they just need to click a ring button in the Instagram interface.

If you’re considering adding an RTC feature to your application, stick around. We’ll show you step by step how to launch a real-time communication SDK in 15 minutes, for both iOS and Android.

The real-time communication SDK would look like this:

A brief comparison of RTC platforms

Before we begin, let’s do a brief RTC platform comparison. You may already be aware of some of the biggest providers, like Agora, Twilio, and Gcore, but let’s take a closer look at what each of them offer to help narrow which is the best option for RTC.

 GcoreAgoraTwilioZoomJitsi
Ease of integrationPrebuilt SDK with low coding effortCustom SDK requires high coding effortSDK requires manual integration and configuration with high coding effortSDK has two predefined roles; customization is not possibleDevs must manually configure permissions for peers in a call
ScalabilityMax of 100 speakers and 2,000 attendeesMax of 128 hosts and 1,000,000 participants, including hostsMax of 50 hosts and 50 participants, including hostsMax of 1,000 participants including the hostsMax of 100 hosts and 100 participants, including hosts.
PricingFree up to 50K minutesBase price $3.99; complicated pricing plans and policiesHas a free tier and paid tier charged per participant minute starting at $0.0015Free up to 10,000 minutesFree, open-source

Our platform works well for the purposes of this tutorial as we’re focusing on video calls with a simple implementation. Let’s launch the Gcore’s real-time communication SDK in 15 minutes.

Implementing Real-time Video Call for iOS

This article covers implementation for GCoreVideoCallsSDK version 2.5.1.

Before we begin with the iOS part of this tutorial, there are a few requirements you’ll need to make sure you’re up to date on:

You can check out the final iOS demo project on GitHub to further your understanding of this tutorial.

The demo features a production-ready GCore videocall SDK implementation, written in a way that’s easy to read and understand. This demo project should help you gain a deeper understanding of all features of the SDK.

Installing the Gcore SDK

First, you need to install dependencies. Create a podfile and add the following:

pod "mediasoup_ios_client", '1.5.3'

This allows you to use mediasoup which is a framework that will allow you to make video calls on iOS.

Next, launch your terminal and change the directory to your project folder. Enter:

pod install

This installs the library media_ios_client into your project.

Open Xcode and drag the GCoreVideoCallsSDK.xcframework to the root of the project folder.

Make sure Copy items if needed is checked, and then click Finish.

Now, in the project target, navigate to General > Framework, Libraries, and Embedded Content. There, set the Embed value to Embed & Sign for GCoreVideoCallsSDK.xcframework.

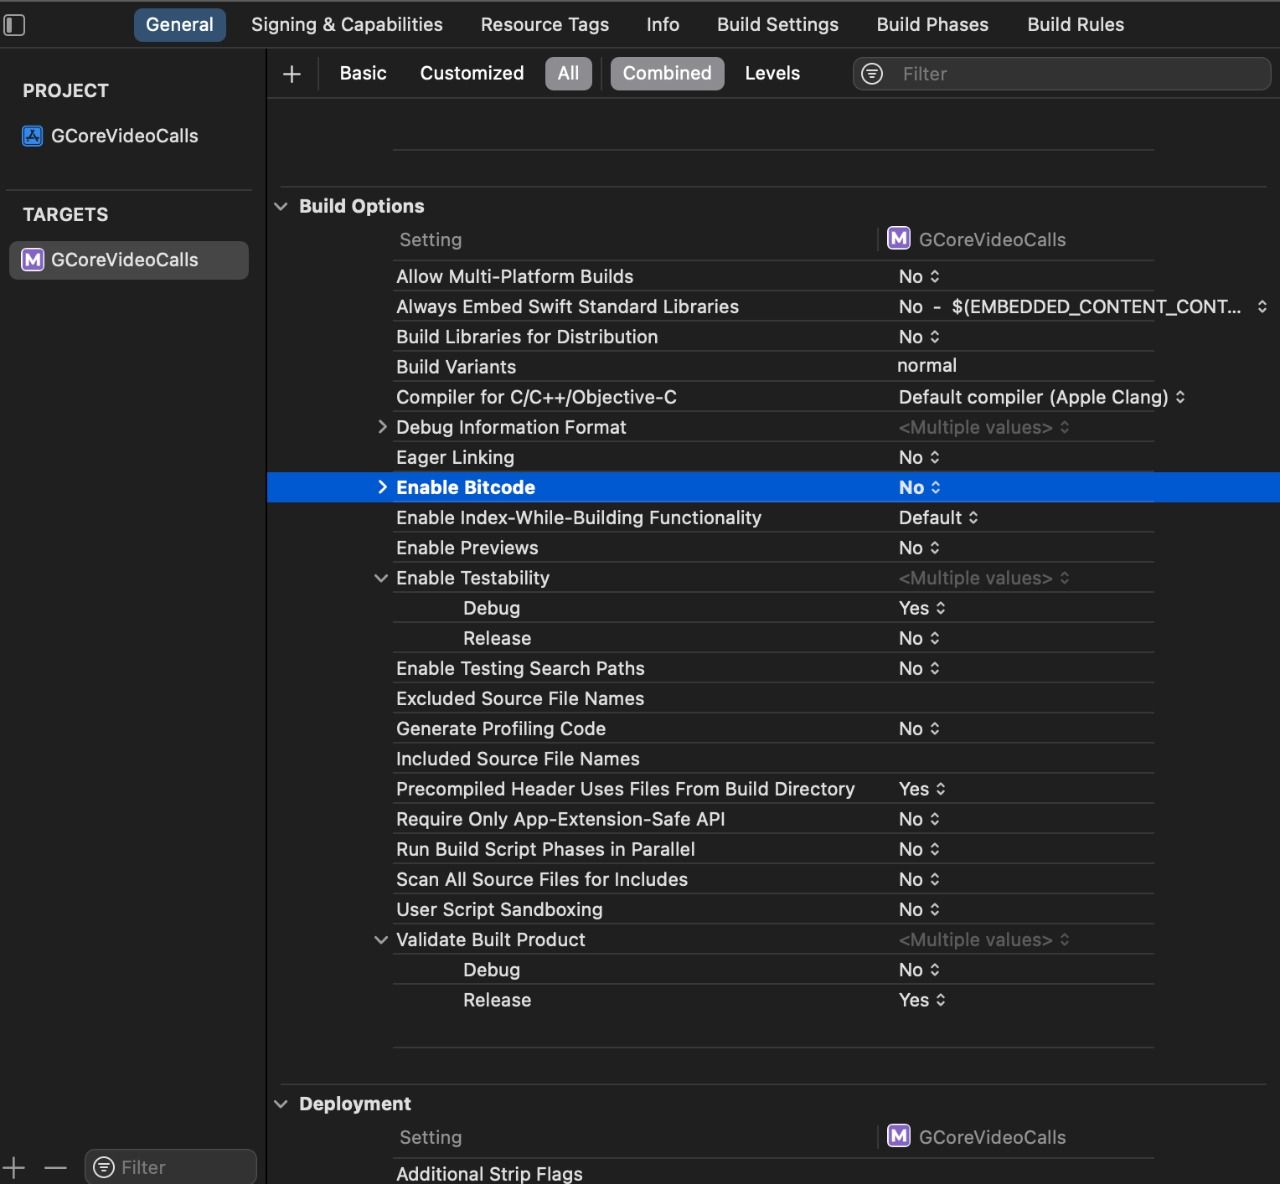
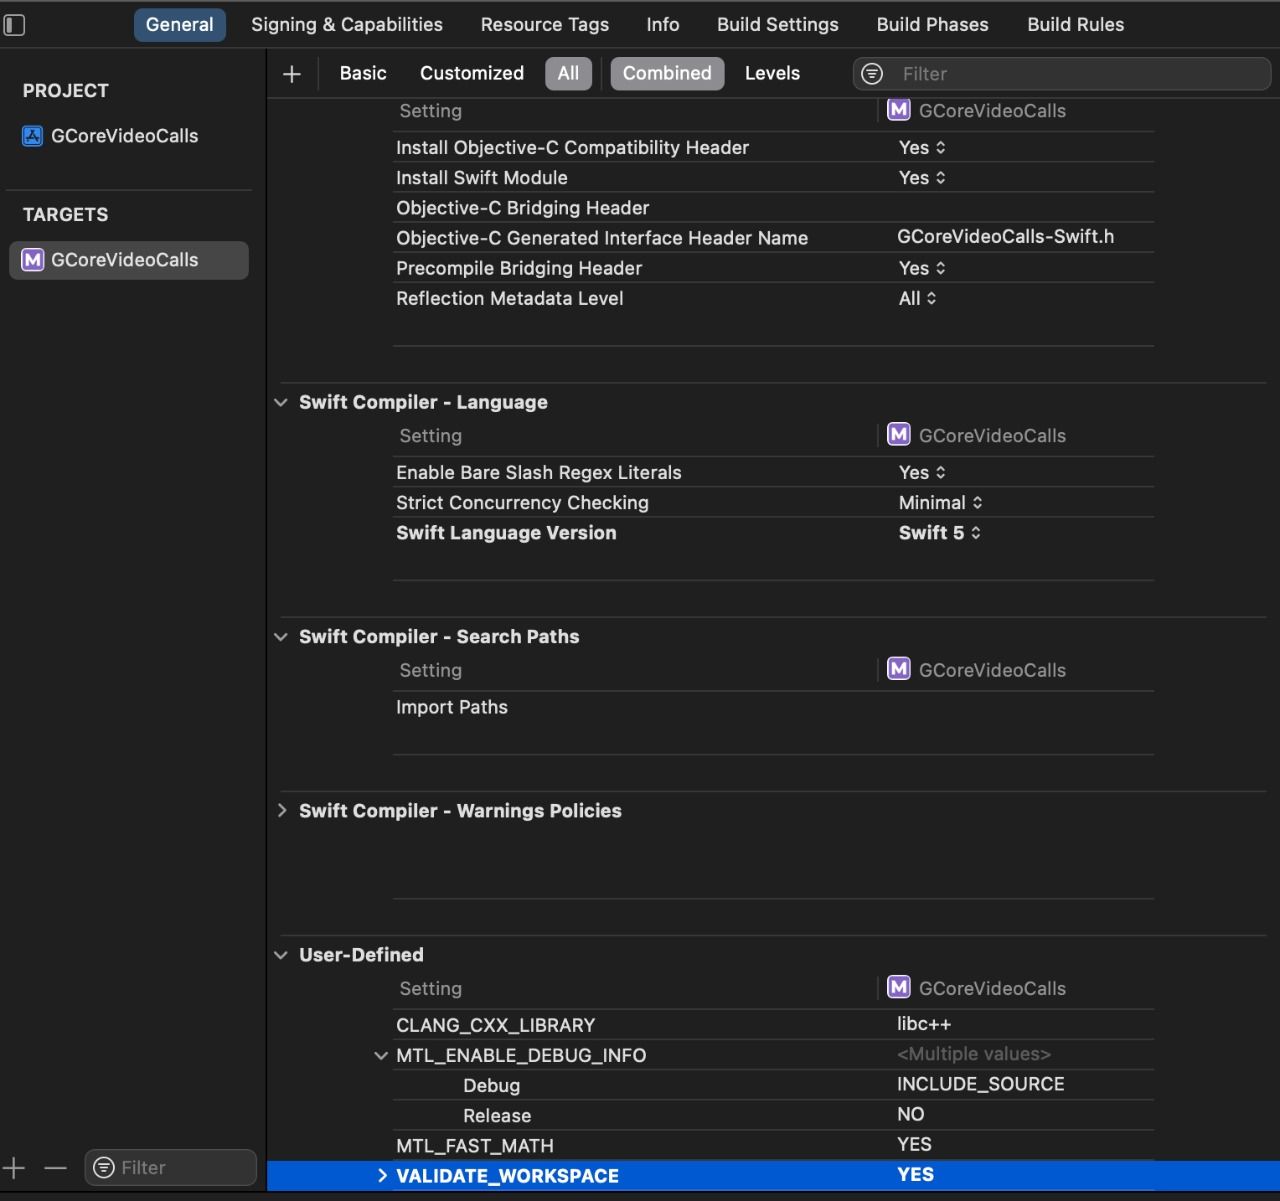
In the Build Settings of the target, set ENABLE_BIT CODE = No and Validate Workspace = Yes.

In Info.plist, add a description for the parameters NSCameraUsageDescription and NSMicrophoneUsageDescription.

Create and join a room

Before you can create or join a room, there are a few steps you have to complete.

First, import dependencies:

	import GCoreVideoCallsSDK	import WebRTC

Activate logger; this code block facilitates communication between the client and the server:

GCoreRoomLogger.activateLogger()

Set the parameters for connecting to the server. The first code block here sets the front camera as the default camera to be used in the video call:

let options = RoomOptions(cameraPosition: .front)
let parameters = MeetRoomParametrs    (	    roomId: "SampleVideoCall0123",	    displayName: "John Smith",	    peerId: "",	    clientHostName: "meet.gcore.com"	)
ParameterTypeDescription
roomIdStringRoom ID to connect to; clients with matching IDs are grouped together. Example: roomId: "SampleVideoCall0123".
displayNameStringSets the display name of the participant. Example: displayName: "Jane Doe".
peerIdString (optional)ID of a participant from your internal system; please specify userID if you have your own. Can be left blank as value will auto-generate. Example: peerId: "user0000000001".
clientHostNameString (optional)Client passes the domain name that it uses to operate the web version of meet. Value: domain only without specifying the protocol. Example: clientHostName: "meet.gcore.com".

Create an instance of the client and connect:

	var client: GCoreRoomClient?		client = GCoreRoomClient(roomOptions: options, requestParameters: parameters, roomListener: self)		try? client?.open()

This creates a room, using the front camera and setting the roomId as SampleVideoCall0123 and the displayName as John Smith, as defined before. John’s device is set as the listener to events happening in the room.

I’ll talk more about events later on.

Now, activate the audio session, which allows the client to listen and speak:

	client?.audioSessionActivate()

Listen to room events

Any real-time communication SDK needs to be able to listen to room events to simulate interaction on a live capacity, such as when someone joins a group discussion, raises their hand to ask a question to introduce themselves and more.

Examples of room events:

  • A peer joining or leaving
  • The moderator admitting or expelling peers
  • The moderator muting everyone
  • Peers interacting with their microphones and cameras
  • Changes in user information, like a new moderator has been assigned

Fortunately, the Gcore SDK comes with a RoomListener delegate class, which you’ll use to listen in on events.

For error events:

func  roomClientHandle(error: RoomError) ///handles errors in the room

For connection events:

func roomClientStartToConnectWithServices()///Initiates connecting the SDKfunc roomClientSuccessfullyConnectWithServices()///Notify that a successful connection has occurredfunc  roomClientDidConnected()///Notify client successfully connects to server/roomfunc  roomClientReconnecting()///Notify client is connecting to the room, eg, after network failurefunc  roomClientReconnectingFailed()///Notify of a reconnection failurefunc  roomClientSocketDidDisconnected(roomClient: GCoreRoomClient)///Notify that connection to the server has been lost

For guests joining or leaving:

func roomClient(roomClient: GCoreRoomClient, handlePeer: PeerObject)///Notify room members that peer joined the roomfunc roomClient(roomClient: GCoreRoomClient, peerClosed: String)//Notify room members that peer left the room

Note that the peerClosed parameter contains the ID of the peer who left the room.

For audio and video events:

func roomClient(roomClient: GCoreRoomClient, produceLocalVideoTrack videoTrack: RTCVideoTrack)///Local client notifies peers that their video is onfunc roomClient(roomClient: GCoreRoomClient, produceLocalAudioTrack audioTrack: RTCAudioTrack)///Local client notifies peers that their audio is onfunc roomClient(roomClient: GCoreRoomClient, didCloseLocalVideoTrack videoTrack: RTCVideoTrack?)//Local client notifies peers that their video is offfunc roomClient(roomClient: GCoreRoomClient, didCloseLocalAudioTrack audioTrack: RTCAudioTrack?)///Local client notifies peers that their audio is offfunc roomClient(roomClient: GCoreRoomClient, handledRemoteVideo videoObject: VideoObject)///Peers notify local clients about the state of their video stream(on/off).func roomClient(roomClient: GCoreRoomClient, produceRemoteAudio audioObject: AudioObject)

Let me break some of that down:

  • roomClient is an instance of the GCoreRoomClient class, which contains information about the room and its participants.
  • videoTrack contains information about the video stream.
  • audioObject contains information about the audio stream.

For changes in user info:

func roomClient(   roomClient: GCoreRoomClient,   updateMeInfo: UpdateMeInfoObject)

This function is called when the user’s information changes. It takes in a parameter of type UpdateMeInfoObject, which contains all of the new information about the user. That includes:

  • peerId: The id of the peer who’s info has changed.
  • displayName: The display name for this peer.
  • isModerator: Whether or not this peer is a moderator.
  • isAudioOnly: Whether or not this peer has audio only enabled.
  • isVideoOnly: Whether or not this peer has video only enabled.
  • isScreenShareOnly: Whether or not this peer has screen share only enabled.

For session info events:

func roomClient(   roomClient: GCoreRoomClient,   captureSession: AVCaptureSession,   captureDevice: AVCaptureDevice)

This is a function that allows you to set the camera and microphone settings. It takes three parameters:

  • roomClient: A reference to an object that implements the GCoreRoomClient protocol. This parameter is required and cannot be nil.
  • captureSession: A reference to an object of type AVCaptureSession, which allows you to configure the camera settings. This parameter is required and cannot be nil.
  • captureDevice: A reference to an object of type AVCaptureDevice, which allows you to configure the microphone settings. Again, this parameter is required and cannot be nil.

Listen to moderator events

Moderator events are actions triggered by the admin of the room, such as:

  • Creating and closing the room
  • Muting and unmuting participants
  • Admitting or expelling participants

For a moderator closing someone else’s video or audio:

func roomClient(roomClient: GCoreRoomClient, didCloseRemoteVideoByModerator byModerator: Bool, videoObject: VideoObject)///Moderator closed peer videofunc roomClient(roomClient: GCoreRoomClient, didCloseRemoteAudioByModerator byModerator: Bool, audioObject: AudioObject)///Moderator closed peer audio

This function takes three parameters:

  • roomClient: The room client contains all the information about the current room.
  • byModerator: A Boolean value that indicates whether it was closed by a moderator or not.
  • videoObject: An object containing all the information about the video stream.
  • audioObject: An object containing all the information about the audio track.

The following function notifies a waiting peer that the moderator has not yet accepted the user’s request to join the room. The peer receives a message that says You are waiting for permission from the moderator.

func roomClientWaitingForModeratorJoinAccept()

This function notifies a waiting peer that the moderator has rejected their request to enter the room. The peer receives a message that says You have been rejected by the moderator.

func roomClientModeratorRejectedJoinRequest()

This function notifies a moderator of a request to join a room:

func roomClient(   roomClient: GCoreRoomClient,   moderatorIsAskedToJoin: ModeratorIsAskedToJoin)

This function notifies a peer that a moderator has removed them. The function itself doesn’t do anything, but you can use it to add custom functionality, like displaying an alert message to the user that they’ve been removed from the room.

func roomClientRemovedByModerator()

Toggle a user’s mic and cam

Use the following code to set the user video:

   func roomClientDidConnected()    {		DispatchQueue.main.asyncAfter(deadline: .now() + 1) 		{			self.client?.toggleVideo(isOn: true)			self.client?.toggleAudio(isOn: true)		}   }

This is called when the client connects to a room. After one second, the video and audio turn on. Set the Boolean value in (isOn: true) to false to turn off the corresponding feature.

Display remote user video

If the connection is successful, a method is called that returns all the participants in the room, saves them, and draws elements to display the participants:

func joinWithPeersInRoom(_ peers: [PeerObject]) {	peers.forEach { peer in		let remoteItem = GCLRemoteItem(peerObject: peer)		remoteItems.insert(remoteItem)		mainScrollView.addSubview(remoteItem.view)	}}

When a new participant enters a room, this adds them to the array of connected participants and to the ScrollView, respectively:

func handledPeer(_ peer: PeerObject) {	let remoteItem = GCLRemoteItem(peerObject: peer)	remoteItems.insert(remoteItem)	mainScrollView.addSubview(remoteItem.view)}

When a participant disconnects, this removes them from the array:

func peerClosed(_ peer: String) {	if let remoteItem = remoteItems.first(where: { $0.peerId == peer }) {		remoteItem.view.removeFromSuperview()		remoteItems.remove(remoteItem)	}}

Implementing real-time video call for Android

Before we begin with the Android part of this tutorial, there are a few requirements you’ll need to make sure you’re up to date on:

You can check out the Android demo project on GitHub if you want to follow along with it for this tutorial.

As with the iOS version of the tutorial, this demo features a production-ready GCore videocall SDK implementation, written in a way that’s easy to read and understand. Through this demo project, you’ll get a better understanding of the features of the SDK. The SDK’s simplicity makes it perfect for rapid prototyping and experimentation.

Installing the Gcore SDK

Copy GCoreVideoCallsSDK and mediasoup-android-client to the root of your project folder.

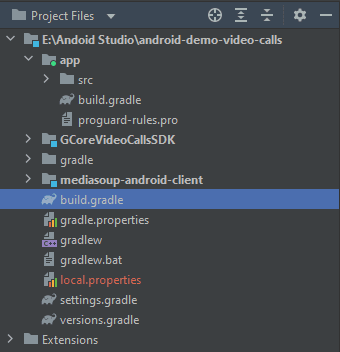
Add them both to your app/build.gradle file in the dependencies section:

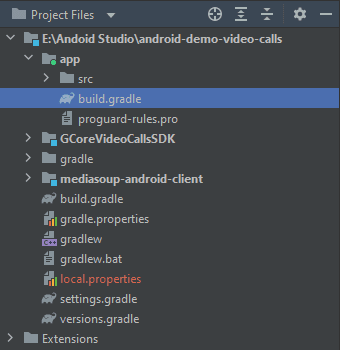
implementation project(':GCoreVideoCallsSDK')implementation project(':mediasoup-android-client')

Include them in settings.gradle as follows:

include ':mediasoup-android-client'include ':GCoreVideoCallsSDK'

Import the dependencies from the SDK archive, but go ahead and add the following in the dependencies section of app/build.gradle as well:

implementation 'androidx.core:core-ktx:1.7.0'implementation 'androidx.appcompat:appcompat:1.4.1'implementation 'com.google.android.material:material:1.5.0'implementation 'androidx.constraintlayout:constraintlayout:2.1.3'testImplementation 'junit:junit:4.13.2'androidTestImplementation 'androidx.test.ext:junit:1.1.3'androidTestImplementation 'androidx.test.espresso:espresso-core:3.4.0'implementation("androidx.fragment:fragment-ktx:1.4.1")implementation("androidx.navigation:navigation-fragment-ktx:2.4.2")implementation("androidx.navigation:navigation-ui-ktx:2.4.2")implementation "androidx.lifecycle:lifecycle-extensions:$LIFECYCLE_VERSION"implementation "com.google.dagger:dagger:$DAGGER_VERSION"kapt "com.google.dagger:dagger-compiler:$DAGGER_VERSION"implementation "com.jakewharton.timber:timber:$TIMBER_VERSION"implementation("io.reactivex.rxjava2:rxjava:$RX_JAVA_VERSION")implementation("io.reactivex.rxjava2:rxandroid:$RX_VERSION")implementation "org.protoojs.droid:protoo-client:$PROTO_VERSION"implementation("com.squareup.okhttp3:okhttp:$OKHTTP_VERSION")implementation("com.squareup.okhttp3:logging-interceptor:$OKHTTP_VERSION")def camerax_version = "1.1.0-rc01"implementation("androidx.camera:camera-core:${camerax_version}")implementation("androidx.camera:camera-camera2:${camerax_version}")implementation("androidx.camera:camera-lifecycle:${camerax_version}")implementation("androidx.camera:camera-view:${camerax_version}")

In the plugins section in app/build.gradle, include:
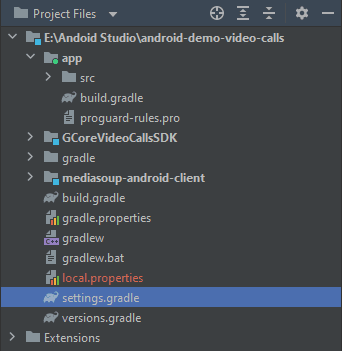
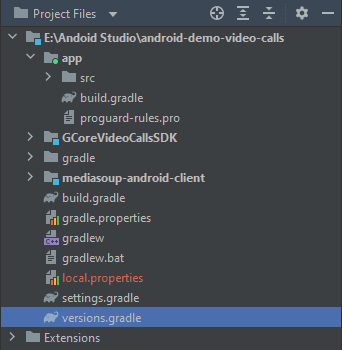
id 'kotlin-kapt'

Create a new file in the root directory of the project and name it versions.gradle. Go ahead and add the following:

ext {    KOTLIN_VERSION = "1.5.30"    CORE_KTX_VERSION = "1.6.0"    ANDROID_GRADLE_PLUGIN_VERSION = '4.0.0'    PROTO_VERSION = "4.0.3"    DRIOD_VERSION = "3.0.8-beta-3"    LIFECYCLE_VERSION = "2.2.0"    COROUTINE_VERSION = "1.5.0"    DAGGER_VERSION = '2.37'    RX_JAVA_VERSION = "2.2.17"    RX_VERSION = "2.1.1"    TIMBER_VERSION = "4.7.1"    LOGGING_INTERCEPTOR_VERSION = '4.9.0'    OKHTTP_VERSION = '4.9.0'}

In the build.gradle file, add:

buildscript {    apply from: 'versions.gradle'}

In the settings.gradle file, add the following pluginManagement{} and dependencyResolutionManagement{}:

maven {url ' https://jitpack.io '}jcenter()

It should look something like this:

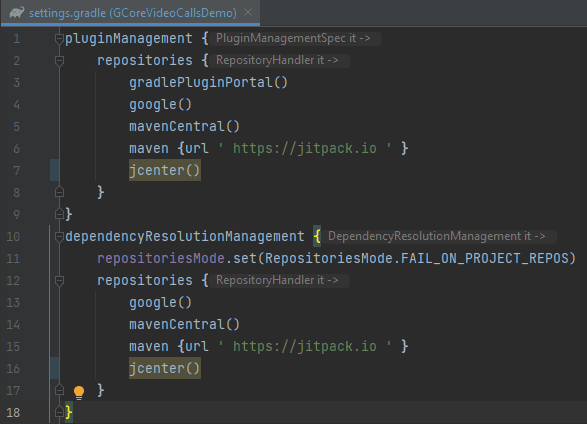
Now, resync the project!

Set user permissions

The Gcore SDK requires internet connection and access to microphone and camera. Requesting those permissions takes just a couple steps.

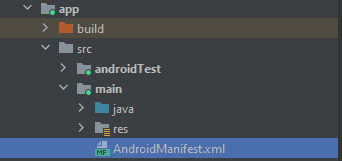
First, to declare the permissions, navigate to AndroidManifest.xml in app/src/main and add the following:

<uses-permission android:name="android.permission.INTERNET"/><uses-permission android:name="android.permission.CALL_PHONE"/><uses-permission android:name="android.permission.ACCESS_NETWORK_STATE"/>

And finally, request the permissions:

if (!allPermissionGranted()) {            requestPermissions.launch(REQUIRED_PERMISSIONS)        }companion object {    private val REQUIRED_PERMISSIONS = arrayOF(    Manifest.permission.CAMERA, Manifest.permision.RECORD_AUDIO)}

Create and join a room

Creating or joining a room requires a few steps. First, initialize the Gcore SDK:

GCoreMeet.instance.init( applicationContext: Application, logger: null, enableLogs: false)

Then define the parameters for connecting to the server:

GCoreMeet.instance.clientHostName = "meet.gcore.com"GCoreMeet.instance.roomManager.displayName = "Jane Doe"GCoreMeet.instance.setRoomId("SampleVideoCall1234")GCoreMeet.instance.roomManager.peerId = ""GCoreMeet.instance.roomManager.isModer = true
MethodTypeDescription
setRoomIdStringRoom ID to connect to. Example: roomId: "SampleVideoCall1234".
ParameterTypeDescription
displayNameStringSet display name of participant. Example: displayName: "Jane Doe".
peerIdString (optional)ID of a participant from your internal system. Please specify userID, if you have your own or leave it blank to autogenerate. Example: peerId:"user0000000001".
clientHostNameString (optional)Client passes the domain name used to operate the web version of the meet. Value: domain only, no protocol specified. Example: clientHostName: "meet.gcore.com".
isModerBooleanIf true, then the user will be a moderator, with access to additional functionality.

Next, set audio and video:

GCoreMeet.instance.roomManager.options.startWithCam = trueGCoreMeet.instance.roomManager.options.startWithMic = true

And establish a connection to the server:

GCoreMeet.instance.startConnection(getApplication())

Finally, join the room:

if GCoreMeet.instance.roomManager.isClosed()) {    GCoreMeet.instance.roomManager.join()}

At the end of a session, go ahead and close the room for all participants:

GCoreMeet.instance.roomManager.destroyRoom()

Display room members

To properly display the members of a room, this function observes the number of peers present in a room and changes the layout manager span count accordingly.

private val _layoutManagerSpanCount = MutableLiveData<Int>()val layoutManagerSpanCount: LiveData<Int> = _layoutManagerSpanCountprivate fun connect() {        GCoreMeet.instance.getPeers().observeForever { peers: Peers? ->            val peersCount = peers?.allPeers?.size ?: 0            if (peersCount > 1) {                _layoutManagerSpanCount.value = 2            } else {                _layoutManagerSpanCount.value = 1            }        }    }

Enable and disable user mic and cam

To enable and disable a microphone, respectively:

GCoreMeet.instance.roomManager.enableMic()GCoreMeet.instance.roomManager.disableMic()

To enable and disable a camera, respectively:

GCoreMeet.instance.roomManager.enableCam() GCoreMeet.instance.roomManager.disableCam()

Subscribe to room changes

The following functions provide notifications regarding changes to the room.

The state of the connection:

GCoreMeet.instance.roomManager.roomProvider.connected

What peers or members are in the room:

GCoreMeet.instance.roomManager.roomProvider.peers GCoreMeet.instance.getPeers()

What speakers are active:

GCoreMeet.instance.roomManager.roomProvider.roomInfo.observeForever{ roomInfo->   roomInfo.activeSpeakerIds    roomInfo.connectionState}

In the previous function, room.ConnectionState can have the following states:

  • DISCONNECTED: No data is received from the server and no requests are sent to it.
  • CONNECTING: The connection with the server is established, but there is no information about other participants in the room yet.
  • CONNECTED: Connected to a room and receiving data from other participants in it.
  • RECONNECTING: The connection with the server was interrupted for some reason (for example, due to a network failure).

To be informed of changes in local user state:

roomManager.roomProvider.me.observeForever { localState: LocalState ->}

The following are possible returns for user state:

  • localState.isAudioMuted: Checks whether a user’s microphone is muted or not.
  • localState.isVideoMuted: Checks whether a user’s camera is on or not.
  • localState.isScreenSharingEnabled: Checks whether demonstration is enabled or not.

For changes in entry request state:

roomManager.roomProvider.waitingState.observeForever{state: WaitingState -> }

This function checks for changes to a join request with the following possible states:

  • NOTHING
  • IN_WAITING: Waiting for moderator response.
  • ACCEPTED: A moderator allowed a user entry.
  • REJECTED: A moderator denied a user entry.

For when a moderator kicks out a peer:

roomManager.roomProvider.closedByModerator.observeForever{}

For changes in a room’s permissions:

roomManager.roomProvider.micAllowed.observeForever{allowet: Boolean -> } roomManager.roomProvider.camAllowed.observeForever{allowet: Boolean -> } roomManager.roomProvider.acceptedAudioPermission.observeForever{}///Audio use is permitted in the room roomManager.roomProvider.acceptedVideoPermission.observeForever{}///Video use is permitted in the room

For a moderator’s response to peer:

roomManager.roomProvider.acceptedAudioPermissionFromModerator.observeForever{}///Mod allows use of audio in the roomroomManager.roomProvider.acceptedVideoPermissionFromModerator.observeForever{}///Mod allows use of video in the room

For changes in blocked user states, for example, if a user has a microphone or camera blocked, but wants to turn them on:

roomManager.askUserConfirmMic.observeForever{}roomManager.askUserConfirmCam.observeForever{}

For peer requests to moderator:

roomManager.roomProvider.requestToModerator.observeForever { data: RequestPeerData ->}

In the previous function, RequestPeerData contains userName, peerId, requestType. requestType can be AUDIO, VIDEO, and SHARE requests for microphone, camera, and demonstration, respectively.

Conclusion

With Gcore’s SDK, you’ve created and joined RTC rooms for both iOS and Android platforms. You’ve walked through enabling and disabling the microphone and camera, setting the client as moderator, and listening to changes in a meeting. You’re now equipped to implement video call features in your application, with an SDK that’s easy to integrate, easy to scale with, and affordable.

If you want to experiment further with Gcore’s SDK, remember that you can check out the iOS demo project and the Android demo project on Gcore’s GitHub.

Written by Michael Simiyu

Related articles

How to choose the right CDN provider in a turbulent marketplace

In a CDN marketplace marked by provider shutdowns, price hikes, and shifting priorities, reliability is survival. If your current provider folds, you're not just facing downtime—you're losing revenue and customer trust. For the world’s top 2,000 companies, the total annual downtime cost is $400 billion, eroding 9% of profits. Choosing the right CDN partner isn’t just about performance, it’s about protecting your business from disruption.In this guide, we show you how to identify early warning signs, evaluate providers, and switch before your business takes the hit.Red flags: signs that it’s time to consider a new CDN providerIf you’re experiencing any of the following issues with your current CDN provider, it might be time to reconsider your current setup.Slower load times: If you’ve noticed lagging performance, your CDN provider may be running on outdated infrastructure or not investing in upgrades.Rising costs: Increasing prices without additional value? A higher bill and the same service is a major red flag.Uncertainty about long-term service: Look for clear communication and a demonstrated commitment to infrastructure investment, essential a market where providers frequently consolidate and shift focus.Your CDN should scale with you, not hold you back. Prioritize a partner who can evolve with your needs and support your long-term success.5 must-haves when choosing a CDN partnerNot all CDNs are created equal. Before switching, compare providers across these five key factors.Performance: Check real-world performance benchmarks and global coverage maps to understand how a CDN will serve your audience in key regions. Throughput (the amount of data that can be successfully delivered from a server to an end user over a specific period of time) and low latency are non-negotiable when choosing a CDN provider.Pricing: Before signing up, it’s essential to know what is and isn’t included in the price in case there are hidden fees. Look for predictable billing, volume-based tiers, and transparent overage charges to avoid surprise costs. Avoid vendors who lure you in with low rates, then add hidden overage fees.Security: Choose a CDN that offers built-in protection out of the box: DDoS mitigation, TLS, WAF, and API security. Bonus points for customizable policies that fit your stack. Strong security features should be standard for CDNs to combat advanced cyber threats.Edge computing: When it comes to Edge computing, understanding the power of this strategic CDN add-on can give you a significant advantage. Look for CDN providers that offer flexible edge compute capabilities, so you can process data closer to users, reduce latency, and improve response times.Future-proofing: The CDN market’s volatility makes partnering with providers with long-term stability vital. Pick a provider that’s financially solid, tech-forward, and committed to innovation—not just sticking around to get acquired.Choosing a new provider may feel like a challenge, but the long-term payoff—improved performance, lower risk, and a future-ready infrastructure—makes it well worth it. By picking a CDN partner that meets your needs now and for the future, you’ll receive fast, personalized, and secure experiences that truly stand out.What makes Gcore CDN different?Gcore CDN isn’t just another CDN, we’re your long-term performance partner. Here’s what we offer:Global scale, blazing speed: Our network spans 180+ edge locations across 6 continents, optimized for low-latency delivery no matter where your users are.Transparent, flexible pricing: No hidden fees. No lock-in. Just fair, flexible pricing models designed to scale with your growth.A stable partner in a shaky market: While others pivot or fold, Gcore is doubling down. We’re investing in infrastructure, expanding globally, and building for the next wave of content and edge use cases.If you’re ready to make the switch, we’re here to help. Get in touch for a free consultation to discuss your specific needs and tailor a transition plan that suits your business. For more insights about choosing the right CDN for your business, download our free CDN buyer's guide for a more in-depth look at the CDN landscape.Get your free CDN buyers guide now

How gaming studios can use technology to safeguard players

Online gaming can be an enjoyable and rewarding pastime, providing a sense of community and even improving cognitive skills. During the pandemic, for example, online gaming was proven to boost many players’ mental health and provided a vital social outlet at a time of great isolation. However, despite the overall benefits of gaming, there are two factors that can seriously spoil the gaming experience for players: toxic behavior and cyber attacks.Both toxic behavior and cyberattacks can lead to players abandoning games in order to protect themselves. While it’s impossible to eradicate harmful behaviors completely, robust technology can swiftly detect and ban bullies as well as defend against targeted cyberattacks that can ruin the gaming experience.This article explores how gaming studios can leverage technology to detect toxic behavior, defend against cyber threats, and deliver a safer, more engaging experience for players.Moderating toxic behavior with AI-driven technologyToxic behavior—including harassment, abusive messages, and cheating—has long been a problem in the world of gaming. Toxic behavior not only affects players emotionally but can also damage a studio’s reputation, drive churn, and generate negative reviews.The online disinhibition effect leads some players to behave in ways they may not in real life. But even when it takes place in a virtual world, this negative behavior has real long-term detrimental effects on its targets.While you can’t control how players behave, you can control how quickly you respond.Gaming studios can implement technology that makes dealing with toxic incidents easier and makes gaming a safer environment for everyone. While in the past it may have taken days to verify a complaint about a player’s behavior, today, with AI-driven security and content moderation, toxic behavior can be detected in real time, and automated bans can be enforced. The tool can detect inappropriate images and content and includes speech recognition to detect derogatory or hateful language.In gaming, AI content moderation analyzes player interactions in real time to detect toxic behavior, harmful content, and policy violations. Machine learning models assess chat, voice, and in-game media against predefined rules, flagging or blocking inappropriate content. For example, let’s say a player is struggling with in-game harassment and cheating. With AI-powered moderation tools, chat logs and gameplay behavior are analyzed in real time, identifying toxic players for automated bans. This results in healthier in-game communities, improved player retention, and a more pleasant user experience.Stopping cybercriminals from ruining the gaming experienceAnother factor negatively impacting the gaming experience on a larger scale is cyberattacks. Our recent Radar Report showed that the gaming industry experienced the highest number of DDoS attacks in the last quarter of 2024. The sector is also vulnerable to bot abuse, API attacks, data theft, and account hijacking.Prolonged downtime damages a studio’s reputation—something hackers know all too well. As a result, gaming platforms are prime targets for ransomware, extortion, and data breaches. Cybercriminals target both servers and individual players’ personal information. This naturally leads to a drop in player engagement and widespread frustration.Luckily, security solutions can be put in place to protect gamers from this kind of intrusion:DDoS protection shields game servers from volumetric and targeted attacks, guaranteeing uptime even during high-profile launches. In the event of an attack, malicious traffic is mitigated in real-time, preventing zero downtime and guaranteeing seamless player experiences.WAAP secures game APIs and web services from bot abuse, credential stuffing, and data breaches. It protects against in-game fraud, exploits, and API vulnerabilities.Edge security solutions reduce latency, protecting players without affecting game performance. The Gcore security stack helps ensure fair play, protecting revenue and player retention.Take the first steps to protecting your customersGaming should be a positive and fun experience, not fraught with harassment, bullying, and the threat of cybercrime. Harmful and disruptive behaviors can make it feel unsafe for everyone to play as they wish. That’s why gaming studios should consider how to implement the right technology to help players feel protected.Gcore was founded in 2014 with a focus on the gaming industry. Over the years, we have thwarted many large DDoS attacks and continue to offer robust protection for companies such as Nitrado, Saber, and Wargaming. Our gaming specialization has also led us to develop game-specific countermeasures. If you’d like to learn more about how our cybersecurity solutions for gaming can help you, get in touch.Speak to our gaming solutions experts today

How to choose the right technology tools to combat digital piracy

One of the biggest challenges facing the media and entertainment industry is digital piracy, where stolen content is redistributed without authorization. This issue causes significant revenue and reputational losses for media companies. Consumers who use these unregulated services also face potential threats from malware and other security risks.Governments, regulatory bodies, and private organizations are increasingly taking the ramifications of digital piracy seriously. In the US, new legislation has been proposed that would significantly crack down on this type of activity, while in Europe, cloud providers are being held liable by the courts for enabling piracy. Interpol and authorities in South Korea have also teamed up to stop piracy in its tracks.In the meantime, you can use technology to help stop digital piracy and safeguard your company’s assets. This article explains anti-piracy technology tools that can help content providers, streaming services, and website owners safeguard their proprietary media: geo-blocking, digital rights management (DRM), secure tokens, and referrer validation.Geo-blockingGeo-blocking (or country access policy) restricts access to content based on a user’s geographic location, preventing unauthorized access and limiting content distribution to specific regions. It involves setting rules to allow or deny access based on the user’s IP address and location in order to comply with regional laws or licensing agreements.Pros:Controls access by region so that content is only available in authorized marketsHelps comply with licensing agreementsCons:Can be bypassed with VPNs or proxiesRequires additional security measures to be fully effectiveTypical use cases: Geo-blocking is used by streaming platforms to restrict access to content, such as sports events or film premieres, based on location and licensing agreements. It’s also helpful for blocking services in high-risk areas but should be used alongside other anti-piracy tools for better and more comprehensive protection.Referrer validationReferrer validation is a technique that checks where a content request is coming from and prevents unauthorized websites from directly linking to and using content. It works by checking the “referrer” header sent by the browser to determine the source of the request. If the referrer is from an unauthorized domain, the request is blocked or redirected. This allows only trusted sources to access your content.Pros:Protects bandwidth by preventing unauthorized access and misuse of resourcesGuarantees content is only accessed by trusted sources, preventing piracy or abuseCons:Can accidentally block legitimate requests if referrer headers are not correctly sentMay not work as intended if users access content via privacy-focused methods that strip referrer data, leading to false positivesTypical use cases: Content providers commonly use referrer validation to prevent unauthorized streaming or hotlinking, which involves linking to media from another website or server without the owner’s permission. It’s especially useful for streamers who want to make sure their content is only accessed through their official platforms. However, it should be combined with other security measures for more substantial protection.Secure tokensSecure tokens and protected temporary links provide enhanced security by granting temporary access to specific resources so only authorized users can access sensitive content. Secure tokens are unique identifiers that, when linked to a user’s account, allow them to access protected resources for a limited time. Protected temporary links further restrict access by setting expiration dates, meaning the link becomes invalid after a set time.Pros:Provides a high level of security by allowing only authorized users to access contentTokens are time-sensitive, which prevents unauthorized access after they expireHarder to circumvent compared to traditional password protection methodsCons:Risk of token theft if they’re not managed or stored securelyRequires ongoing management and rotation of tokens, adding complexityCan be challenging to implement properly, especially in high-traffic environmentsTypical use cases: Streaming platforms use secure tokens and protected temporary links so only authenticated users can access premium content, like movies or live streams. They are also useful for secure file downloads or limiting access to exclusive resources, making them effective for protecting digital content and preventing unauthorized sharing or piracy.Digital rights managementDigital rights management (DRM) refers to a set of technologies designed to protect digital content from unauthorized use so that only authorized users can access, copy, or share it, according to licensing agreements. DRM uses encryption, licensing, and authentication mechanisms to control access to digital resources so that only authorized users can view or interact with the content. While DRM offers strong protection against piracy, it comes with higher complexity and setup costs than other security methods.Pros:Robust protection against unauthorized copying, sharing, and piracyHelps safeguard intellectual property and revenue streamsEnforces compliance with licensing agreementsCons:Can be complex and expensive to implementMay cause inconvenience for users, such as limiting playback on unauthorized devices or restricting sharingPotential system vulnerabilities or compatibility issuesTypical use cases: DRM is commonly used by streaming services to protect movies, TV shows, and music from piracy. It can also be used for e-books, software, and video games, ensuring that content is only used by licensed users according to the terms of the agreement. DRM solutions can vary, from software-based solutions for media files to hardware-based or cloud-based DRM for more secure distribution.Protect your content from digital piracy with GcoreDigital piracy remains a significant challenge for the media and entertainment industry as it poses risks in terms of both revenue and security. To combat this, partnering with a cloud provider that can actively monitor and protect your digital assets through advanced multi-layer security measures is essential.At Gcore, our CDN and streaming solutions give rights holders peace of mind that their assets are protected, offering the features mentioned in this article and many more besides. We also offer advanced cybersecurity tools, including WAAP (web application and API protection) and DDoS protection, which further integrate with and enhance these security measures. We provide trial limitations for streamers to curb piracy attempts and respond swiftly to takedown requests from rights holders and authorities, so you can rest assured that your assets are in safe hands.Get in touch to learn more about combatting digital piracy

The latest updates for Gcore Video Streaming: lower latency, smarter AI, and seamless scaling

At Gcore, we’re committed to continuous innovation in video streaming. This month, we’re introducing significant advancements in low-latency streaming, AI-driven enhancements, and infrastructure upgrades, helping you deliver seamless, high-quality content at scale.Game-changing low-latency streamingOur latest low-latency live streaming solutions are now fully available in production, delivering real-time engagement with unmatched precision:WebRTC to HLS/DASH: Now in production, enabling real-time transcoding and delivery for WebRTC streams using HTTP-based LL-HLS and LL-DASH.LL-DASH with two-second latency: Optimized for ultra-fast content delivery via our global CDN, enabling minimal delay for seamless streaming.LL-HLS with three-second latency: Designed to deliver an uninterrupted and near-real-time live streaming experience.Gcore’s live streaming dashboard with OBS Studio integration, enabling real-time transcoding and delivery with low-latency HLS/DASHWhat this means for youWith glass-to-glass latency as low as 2–3 seconds, these advancements unlock new possibilities for real-time engagement. Whether you’re hosting live auctions, powering interactive gaming experiences, or enabling seamless live shopping, Gcore Video Streaming’s low-latency options keep your viewers connected without delay.Our solution integrates effortlessly with hls.js, dash.js, native Safari support, and our HTML web player, guaranteeing smooth playback across devices. Backed by our global CDN infrastructure, you can count on reliable, high-performance streaming at scale, no matter where your audience is.Exciting enhancements: AI and live streaming featuresWe’re making live streaming smarter with cutting-edge AI capabilities:Live stream recording with overlays: Record live streams while adding dynamic overlays such as webcam pop-ups, chat, alerts, advertisement banners, and time or weather widgets. This feature allows you to create professional, branded content without post-production delays. Whether you’re broadcasting events, tutorials, or live commerce streams, overlays help maintain a polished and engaging viewer experience.AI-powered VOD subtitles: Advanced AI automatically generates and translates subtitles into more than 100 languages, helping you expand your content’s reach to global audiences. This ensures accessibility while improving engagement across different regions.Deliver seamless live experiences with GcoreOur commitment to innovation continues, bringing advancements to enhance performance, efficiency, and streaming quality. Stay tuned for even lower latency and more AI-driven enhancements coming soon!Gcore Video Streaming empowers you to deliver seamless live experiences for auctions, gaming, live shopping, and other real-time applications. Get reliable, high-performance content delivery—whether you’re scaling to reach global audiences or delivering unique experiences to niche communities.Try Gcore Video Streaming today

How we optimized our CDN infrastructure for paid and free plans

At Gcore, we’re dedicated to delivering top-tier performance and reliability. To further enhance performance for all our customers, we recently made a significant change: we moved our CDN free-tier customers to a separate, physically isolated infrastructure. By isolating free-tier traffic, customers on paid plans receive uninterrupted, premium-grade service, while free users benefit from an environment tailored to their needs.Why we’ve separated free and paid plan infrastructureThis optimization has been driven by three key factors: performance, stability and scalability, and improved reporting.Providing optimal performanceFree-tier users are essential to our ecosystem, helping to stress-test our systems and extend our reach. However, their traffic can be unpredictable. By isolating free traffic, we provide premium customers with consistently high performance, minimizing disruption risks.Enhancing stability and scalabilityWith separate infrastructures, we can better manage traffic spikes and load balancing without impacting premium services. This improves overall platform stability and scalability, guaranteeing that both customer groups will enjoy a reliable experience.Improving reporting and performance insightsAlongside infrastructure enhancements, we’ve upgraded our reports page to offer clearer visibility into traffic and performance:New 95th percentile bandwidth graph: Helps users analyze traffic patterns more effectively.Improved aggregated bandwidth view: Makes it easier to assess usage trends at a glance.These tools empower you to make more informed decisions with accurate and accessible data.95th percentile bandwidth usage over the last three months, highlighting a significant increase in January 2025Strengthening content delivery with query string forwardingWe’ve also introduced a standardized query string forwarding feature to boost content delivery stability. By replacing our previous custom approach, we achieved the following:Increased stability: Reducing the risk of disruptionsLower maintenance requirements: Freeing up engineering resourcesSmoother content delivery: Enhancing experiences for streaming and content-heavy applicationsQuery string forwarding settings allow seamless parameter transfer for media deliveryWhat this means for our customersFor customers on paid plans: You can expect a more stable, high-performance service without the disruptions caused by fluctuating free-tier activity. Enhanced reporting and streamlined content delivery also empower you to make better, data-driven decisions.For free-tier customers: You will continue to have access to our services on a dedicated infrastructure that has been specifically optimized for your needs. This setup allows us to innovate and improve performance without compromising service quality.Strengthening Gcore CDN for long-term growthAt Gcore, we continuously refine our CDN to enable top-tier performance, reliability, and scalability. The recent separation of free-tier traffic, improved reporting capabilities, and optimized content delivery are key to strengthening our infrastructure. These updates enhance service quality for all users, minimizing disruptions and improving traffic management.We remain committed to pushing the boundaries of CDN efficiency, delivering faster load times, robust security, and seamless scalability. Stay tuned for more enhancements as we continue evolving our platform to meet the growing demands of businesses worldwide.Explore Gcore CDN

Introducing low-latency live streams with LL-HLS and LL-DASH

We are thrilled to introduce low-latency live streams for Gcore Video Streaming using LL-HLS and LL-DASH protocols. With a groundbreaking glass-to-glass delay of just 2.2–3.0 seconds, this improvement brings unparalleled speed to your viewers’ live-streaming experience.Alt: Video illustrating the workflow of low-latency live streaming using LL-HLS and LL-DASH protocolsThis demonstration shows the minimal latency of our live streaming solution—just three seconds between the original broadcast (left) and what viewers see online (right).Key use cases and benefits of low-latency streamingOur low-latency streaming solutions address the specific needs of content providers, broadcasters, and developers, enabling seamless experiences for diverse use cases.Ultra-fast live streamingGet real-time delivery with glass-to-glass latency of ±2.2 seconds for LL-DASH and ±3.0 seconds for LL-HLS.Deliver immediate viewer engagement, ideal for industries such as live sports, e-sports tournaments, and news broadcasting.Meet the expectations of audiences who demand instant access to live events without noticeable delays.Enhanced viewer interactionReduce the delay between live actions and audience reactions, fostering a more immersive viewing experience.Support real-time interaction for use cases like virtual conferences, live auctions, Q&A sessions, and live shopping platforms.Flexible player supportSeamlessly integrate with your existing player setups, including popular options like hls.js, dash.js, and native Safari support.Use our new HTML web player for effortless integration or maintain your current custom player workflows.Global scalability and reliabilityLeverage our robust CDN network with 200+ Tbps capacity and 180+ PoPs to enable low-latency streams worldwide.Deliver a consistent, high-quality experience for global audiences, even during peak traffic events.Cost-efficiencyMinimize operational overhead with a streamlined solution that combines advanced encoding, efficient packaging, and reliable delivery.How it worksOur real-time transcoder and JIT packager generate streaming manifests and chunks optimized for low latency:For LL-HLS: The HLS manifest (.m3u8) and chunks comply with the latest standards. Tags like #EXT-X-PART, #EXT-X-PRELOAD-HINT, and others are dynamically generated with best-in-class parameters. Chunks are loaded instantaneously as they appear at the origin.For LL-DASH: The DASH manifest (.mpd) leverages advanced MPEG-DASH features. Chunks are transmitted to viewers as soon as encoding begins, with caching finalized once the chunk is fully fetched.Combined with our fast and reliable CDN delivery, live streams are accessible globally with minimal delay. Our CDN network has an extensive capacity and 180+ PoPs to deliver exceptional performance, even for high-traffic events.See a live demo in action!Try WebRTC to HLS/DASH todayWe’re also excited to remind you about our WebRTC to HLS/DASH delivery functionality. This innovative feature allows streams created in a standard browser via WebRTC to be:Transcoded on our servers.Delivered with low latency to viewers using HTTP-based LL-HLS and LL-DASH protocols through our CDN.Try it now in the Gcore Customer Portal.Shaping the future of streamingBy nearly halving the glass-to-glass delivery time compared to our previous solution, Gcore Video Streaming enables you to deliver a seamless experience for live events, real-time interactions, and other latency-sensitive applications. Whether you’re broadcasting to a global audience or engaging niche communities, our platform provides the tools you need to thrive in today’s dynamic streaming landscape.Watch our demo to see the difference and explore how this solution fits into your workflows.Visit our demo player

Subscribe to our newsletter

Get the latest industry trends, exclusive insights, and Gcore updates delivered straight to your inbox.