
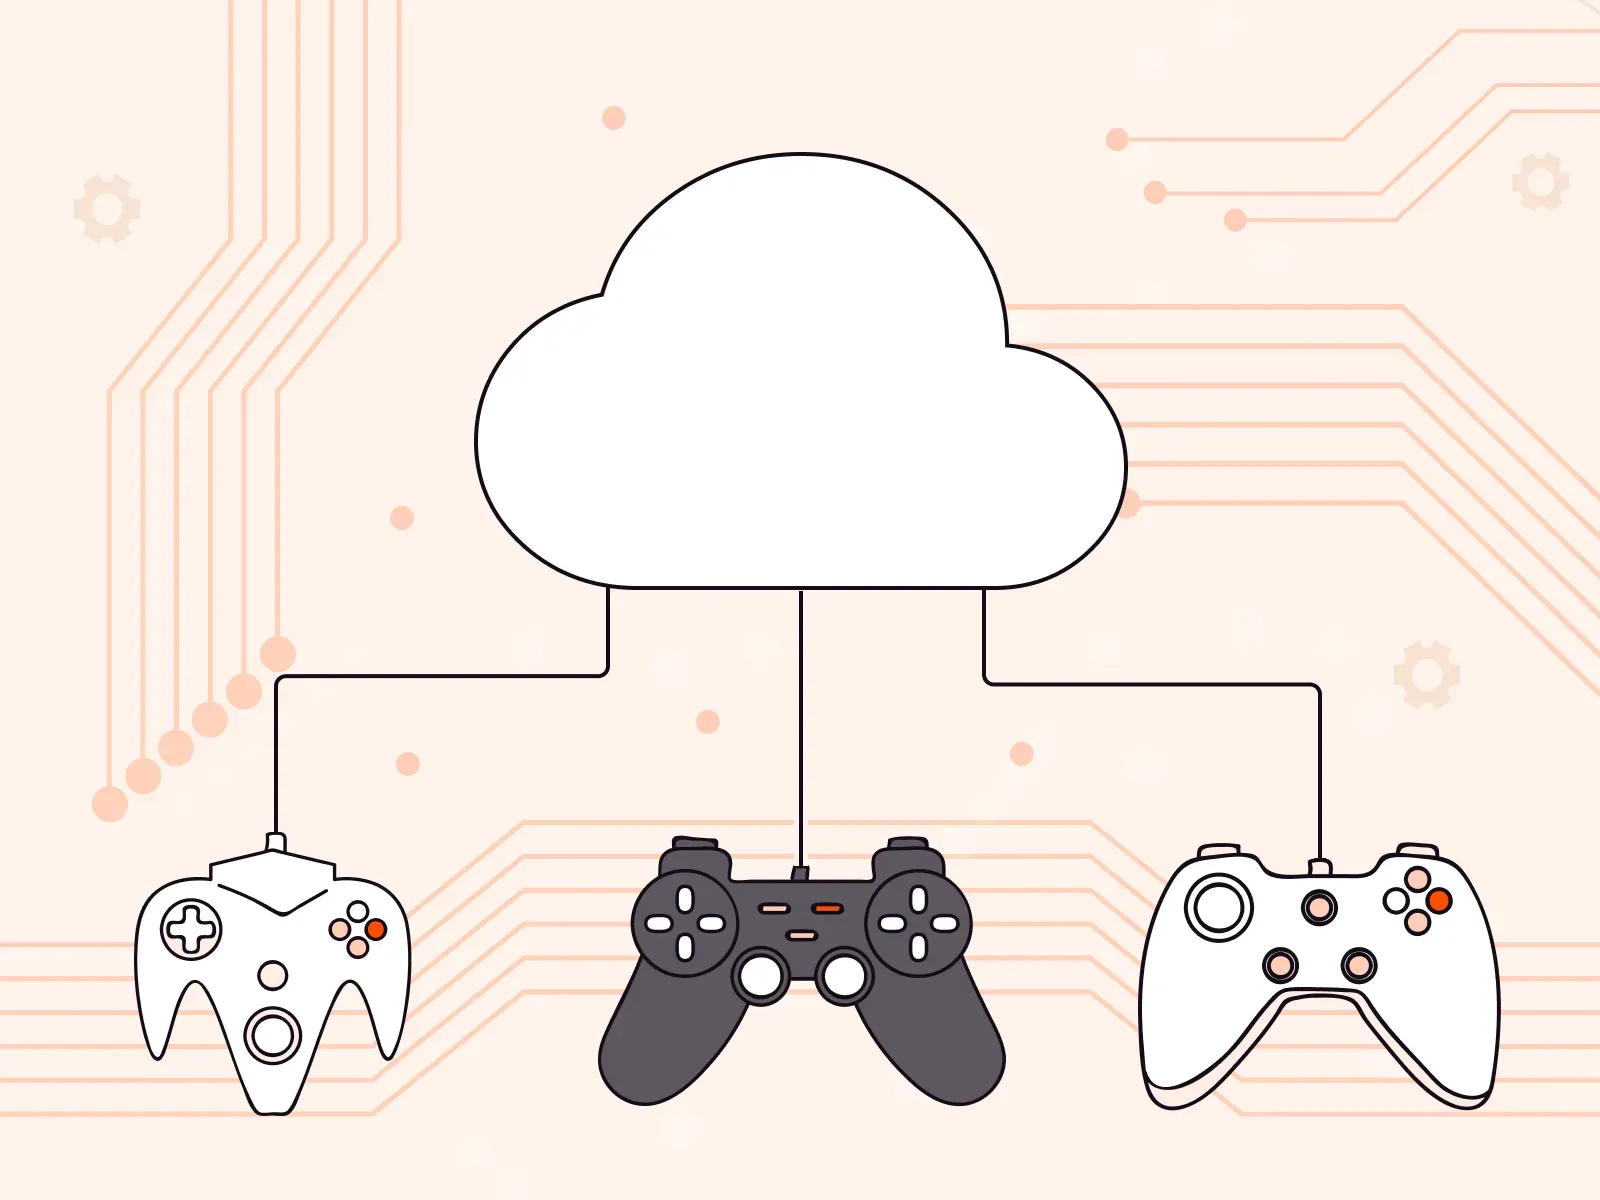
This guide offers a step by step tutorial on how to install macOS in a Docker container on a Gcore bare metal server. The main benefit of going with bare metal over a virtual machine is that bare metal doesn’t require virtualization software, but rather uses hardware resources directly. As a result, you can get better performance from a Gcore bare-metal server than from a Gcore virtual machine.
You don’t need much experience with bare metal and Docker administration to install macOS on bare metal with Ubuntu successfully. Just follow the recommendations and CLI commands we provide here!
When Should You Use macOS on Bare Metal with Ubuntu?
Installing macOS in a Docker container is a great way to run macOS on non-Apple hardware. It can be a great solution for developers who need to test their applications on macOS, but don’t have access to an Apple computer. By following the steps in this guide, you can easily set up a macOS environment in Docker and start testing your applications.
How to Run Bare Metal and Install macOS
Step 1. Provision a Bare Metal Instance
First, you need to provision a bare metal instance by following a few simple steps:
- Log in to your Gcore Cloud account. If you don’t have it yet, sign up.
- Go to Cloud and select Projects.
- Click Create project; fill in the Name field. Projects are groups of separate Cloud resources, and these groups are isolated from each other. The isolation gives you the ability to set user rights for each project.
- In your project, select Baremetal and click Create Baremetal Server.
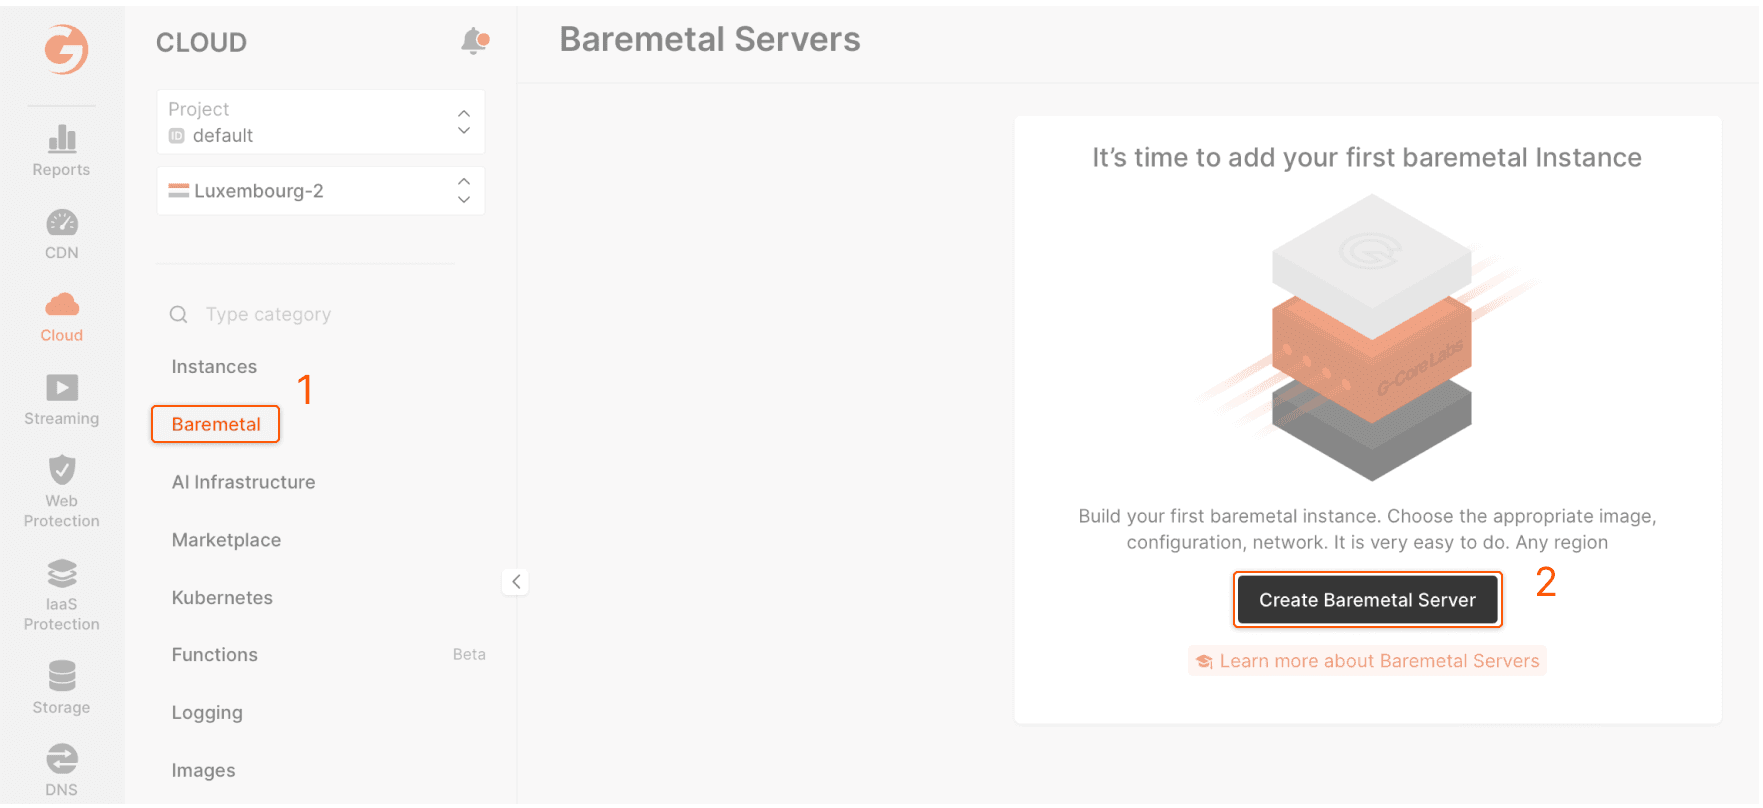
- Set the following parameters when creating a new bare-metal instance:
- Region: Luxembourg-2.
- Image: Ubuntu 22.04.
- Flavor: 1x Intel Xeon E-2388 8C/16T 3.2 GHz / 64 GB / 2x 480GB SSD / 2x 1GbE.
- Network interfaces: Public IP.
- SSH Key: upload your public SSH key or generate a new one.
- Name: macos-server (or whatever you want.)
- Now you’ve completed the set up, click Create Server. The server will appear in the “Baremetal Servers” section. Wait until its “Creating” status changes to “Power on.”

Step 2. Connect to the Server and Update Ubuntu
Before installing macOS in Docker, make sure that the Ubuntu OS is up to date.
- Log in to the server by SSH using the following command:
ssh ubuntu@<your_public_ip_address>For example:
ssh ubuntu@45.82.30.25- Update Ubuntu:
ubuntu@macos-server:~$ sudo suroot@macos-server:/home/ubuntu# apt updateStep 3. Install Necessary Components before Running the macOS Image
Before running the macOS image, you need to install the following additional components that will enable CPU virtualization on the Ubuntu server:
- qemu
- qemu-kvm
- libvirt-clients
- libvirt-daemon-system
- bridge-utils
- virt-manager
- docker.io
- xfce4
- xfce4-goodies
- tightvncserver
- To install these components, use the following command:
root@macos-server:/home/ubuntu# sudo apt install qemu qemu-kvm libvirt-clients libvirt-daemon-system bridge-utils virt-manager docker.io xfce4 xfce4-goodies tightvncserver- Now you need to initialize the X11 display, also known as X. This is the software framework that provides a graphical user interface for Linux and other Unix-like operating systems.
Run VNCServer to initialize the X11 display:
root@macos-server:/home/ubuntu# vncserver :0You will require a password to access your desktops.Password:- If you experience an error with the “fixed” font, use the following command:
root@macos-server:/home/ubuntu# apt-get --reinstall install xfonts-baseroot@macos-server:/home/ubuntu# vncserver :0Here’s what you should see:
root@macos-server:/home/ubuntu# vncserver :0 New 'X' desktop is macos-server:0Creating default startup script /root/.vnc/xstartupStarting applications specified in /root/.vnc/xstartupLog file is /root/.vnc/macos-server:0.log- Add X11 display to env:
root@macos-server:/home/ubuntu# export DISPLAY=:0root@macos-server:/home/ubuntu# xhost +access control disabled, clients can connect from any host- Enable libvirt and load the KVM kernel module:
root@macos-server:/home/ubuntu# sudo systemctl enable --now libvirtdroot@macos-server:/home/ubuntu# sudo systemctl enable --now virtlogdroot@macos-server:/home/ubuntu# echo 1 | sudo tee /sys/module/kvm/parameters/ignore_msrsroot@macos-server:/home/ubuntu# sudo modprobe kvmroot@macos-server:/home/ubuntu# sudo usermod -aG docker "${USER}"root@macos-server:/home/ubuntu# sudo usermod -aG libvirt "${USER}"root@macos-server:/home/ubuntu# sudo usermod -aG kvm "${USER}"Step 4. Run the macOS Image in Docker
- Run the following command to launch the macOS image in a Docker container:
root@macos-server:/home/ubuntu# docker run -it --device /dev/kvm -p 50922:10022 -v /tmp/.X11-unix:/tmp/.X11-unix -e "DISPLAY=${DISPLAY:-:0.0}" -e GENERATE_UNIQUE=true sickcodes/docker-osx:autoHere’s what you’ll see:
Warning: Permanently added '[127.0.0.1]:10022' (ED25519) to the list of known hosts.Host 127.0.0.1 User user Port 10022 IdentityFile ~/.ssh/id_docker_osx StrictHostKeyChecking no UserKnownHostsFile=/dev/nullDefault username: userDefault password: alpineChange it immediately using the command: passwdWarning: Permanently added '[127.0.0.1]:10022' (ED25519) to the list of known hosts.Last login: Sun Apr 9 17:37:35 2023- Download and install a VNC client, such as TightVNC or RealVNC. A VNC client allows you to interact with the remote macOS.
- Run VNC client and start the new VNC Session with the following VNC Server:
VNC Server: <your_public_ip_address>:5900For example:
VNC Server: 45.82.30.25:5900
Click OK and enter a username and password:
# username is user# password is alpine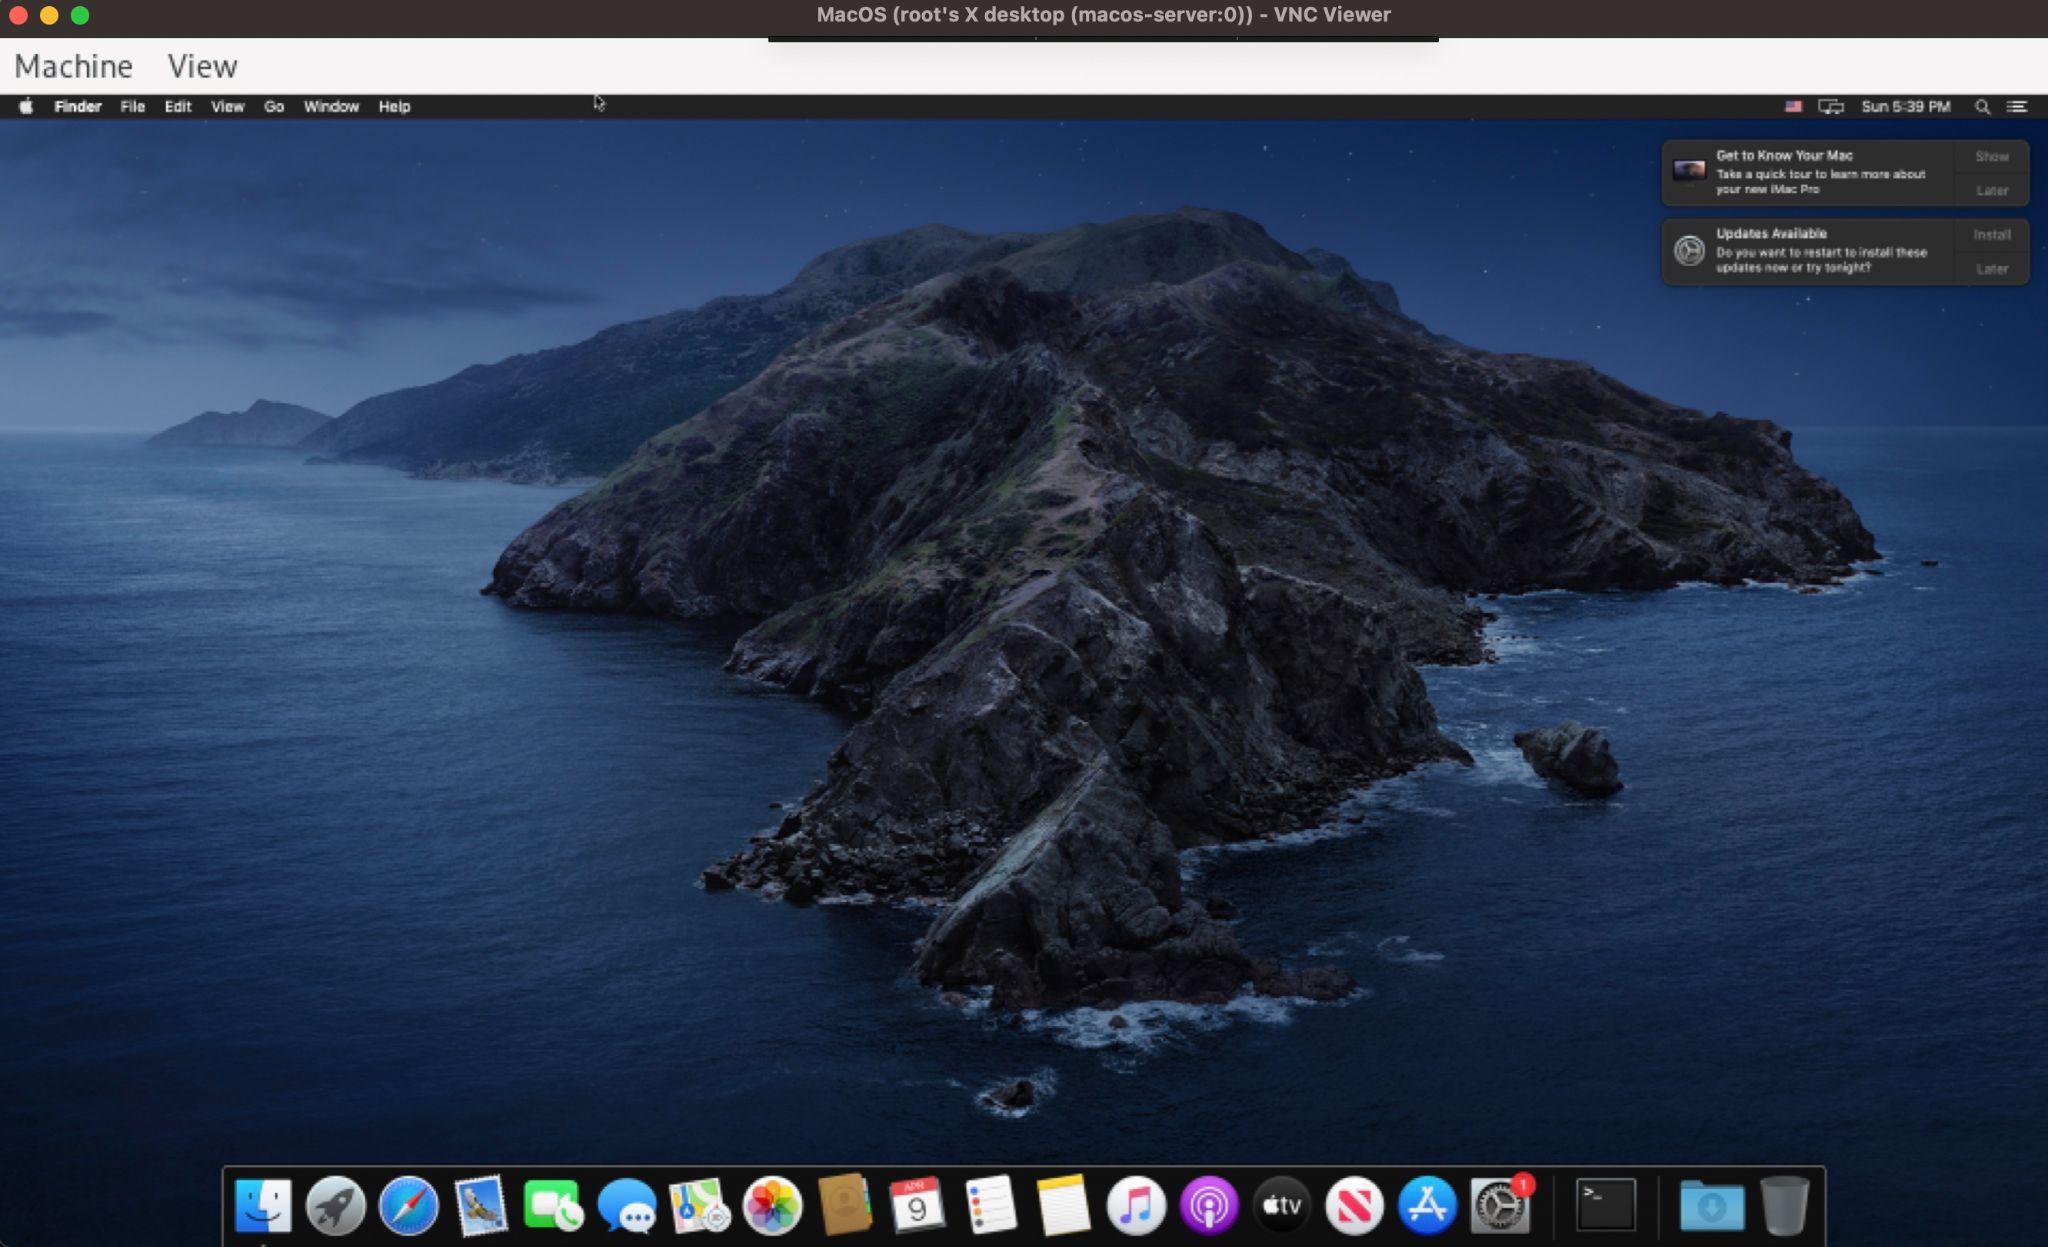
That’s it! You have successfully installed macOS in Docker on a bare metal server with Ubuntu.
Conclusion
In this tutorial, we explained how to install macOS on bare metal with Ubuntu using Docker. Check out our other articles dedicated to setting up different types of software on Gcore Cloud instances:
Related articles
Outpacing cloud‑native threats: How to secure distributed workloads at scale
The cloud never stops. Neither do the threats.Every shift toward containers, microservices, and hybrid clouds creates new opportunities for innovation…and for attackers. Legacy security, built for static systems, crumbles under the speed, scale, and complexity of modern cloud-native environments.To survive, organizations need a new approach: one that’s dynamic, AI-driven, automated, and rooted in zero trust.In this article, we break down the hidden risks of cloud-native architectures and show how intelligent, automated security can outpace threats, protect distributed workloads, and power secure growth at scale.The challenges of cloud-native environmentsCloud-native architectures are designed for maximum flexibility and speed. Applications run in containers that can scale in seconds. Microservices split large applications into smaller, independent parts. Hybrid and multi-cloud deployments stretch workloads across public clouds, private clouds, and on-premises infrastructure.But this agility comes at a cost. It expands the attack surface dramatically, and traditional perimeter-based security can’t keep up.Containers share host resources, which means if one container is breached, attackers may gain access to others on the same system. Microservices rely heavily on APIs to communicate, and every exposed API is a potential attack vector. Hybrid cloud environments create inconsistent security controls across platforms, making gaps easier for attackers to exploit.Legacy security tools, built for unchanging, centralized environments, lack the real-time visibility, scalability, and automated response needed to secure today’s dynamic systems. Organizations must rethink cloud security from the ground up, prioritizing speed, automation, and continuous monitoring.Solution #1: AI-powered threat detection forsmarter defensesModern threats evolve faster than any manual security process can track. Rule-based defenses simply can’t adapt fast enough.The solution? AI-driven threat detection.Instead of relying on static rules, AI models monitor massive volumes of data in real time, spotting subtle anomalies that signal an attack before real damage is done. For example, an AI-based platform can detect an unauthorized process in a container trying to access confidential data, flag it as suspicious, and isolate the threat within milliseconds before attackers can move laterally or exfiltrate information.This proactive approach learns, adapts, and neutralizes new attack vectors before they become widespread. By continuously monitoring system behavior and automatically responding to abnormal activity, AI closes the gap between detection and action, critical in cloud-native, regulated environments where even milliseconds matter.Solution #2: Zero trust as the new security baseline“Trust but verify” no longer cuts it. In a cloud-native world, the new rule is “trust nothing, verify everything”.Zero-trust security assumes that threats exist both inside and outside the network perimeter. Every request—whether from a user, device, or application—must be authenticated, authorized, and validated.In distributed architectures, zero trust isolates workloads, meaning even if attackers breach one component, they can’t easily pivot across systems. Strict identity and access management controls limit the blast radius, minimizing potential damage.Combined with AI-driven monitoring, zero trust provides deep, continuous verification, blocking insider threats, compromised credentials, and advanced persistent threats before they escalate.Solution #3: Automated security policies for scalingprotectionManual security management is impossible in dynamic environments where thousands of containers and microservices are spun up and down in real time.Automation is the way forward. AI-powered security policies can continuously analyze system behavior, detect deviations, and adjust defenses automatically, without human intervention.This eliminates the lag between detection and response, shrinks the attack window, and drastically reduces the risk of human error. It also ensures consistent security enforcement across all environments: public cloud, private cloud, and on-premises.For example, if a system detects an unusual spike in API calls, an automated security policy can immediately apply rate limiting or restrict access, shutting down the threat without impacting overall performance.Automation doesn’t just respond faster. It maintains resilience and operational continuity even in the face of complex, distributed threats.Unifying security across cloud environmentsSecuring distributed workloads isn’t just about having smarter tools, it’s about making them work together. Different cloud platforms, technologies, and management protocols create fragmentation, opening cracks that attackers can exploit. Security gaps between systems are as dangerous as the threats themselves.Modern cloud-native security demands a unified approach. Organizations need centralized platforms that pull real-time data from every endpoint, regardless of platform or location, and present it through a single management dashboard. This gives IT and security teams full, end-to-end visibility over threats, system health, and compliance posture. It also allows security policies to be deployed, updated, and enforced consistently across every environment, without relying on multiple, siloed tools.Unification strengthens security, simplifies operations, and dramatically reduces overhead, critical for scaling securely at cloud-native speeds. That’s why at Gcore, our integrated suite of products includes security for cloud, network, and AI workloads, all managed in a single, intuitive interface.Why choose Gcore for cloud-native security?Securing cloud-native workloads requires more than legacy firewalls and patchwork solutions. It demands dynamic, intelligent protection that moves as fast as your business does.Gcore Edge Security delivers robust, AI-driven security built for the cloud-native era. By combining real-time AI threat detection, zero-trust enforcement, automated responses, and compliance-first design, Gcore security solutions protect distributed applications without slowing down development cycles.Discover why WAAP is essential for cloud security in 2025
Edge Cloud news: more regions and volume options available
At Gcore, we’re committed to delivering high-performance, globally distributed infrastructure that adapts to your workloads—wherever they run. This month, we’re excited to share major updates to our Edge Cloud platform: two new cloud IaaS regions in Europe and expanded storage options in São Paulo.New IaaS regions in Luxembourg and Portugal available nowLuxembourg‑3 and Sines‑2 mark the next step in the Gcore mission to bring compute closer to users. From compliance-focused deployments in Central Europe to GPU‑powered workloads in the Iberian Peninsula, these new regions are built to support diverse infrastructure needs at scale.Luxembourg‑3: expanding connectivity in Central EuropeWe’re expanding our European footprint by opening an additional IaaS point of presence (PoP) in Luxembourg. Strategically located in the heart of Europe, this region offers low-latency connectivity across the EU and is a strong compliance choice for data residency requirements.Here’s what’s available in Luxembourg‑3:Virtual Machines: High-performance, reliable, and scalable compute power for a wide range of workloads - with free egress traffic and pay-as-you-go billing for active instances only.Volumes: Standard, High IOPS, and Low Latency block storage for any workload profile.Load Balancers: Distribute traffic intelligently across instances to boost availability, performance, and fault tolerance.Managed Kubernetes: Fully managed Kubernetes clusters with automated provisioning, scaling, and updates optimized for production-ready deployments.Sines‑2, Portugal: a new hub for Southern Europe and a boost for AI workloadsWe’re also opening a brand-new location: Sines‑2, Portugal. This location enhances coverage across Southern Europe and boosts our AI and compute capabilities with more GPU availability.In addition to offering the same IaaS services as Luxembourg‑3, Sines‑2 also includes:H100 NVIDIA GPUs for AI/ML, high-performance computing, and rendering workloads.New VAST NFS Fileshare support for scalable, high-throughput file storage.This new region is ideal for organizations looking to deploy close to the Iberian Peninsula, reducing latency for regional users while gaining access to powerful GPU resources.Enhanced volume types in São PauloVolumes are the backbone of any cloud workload. They store the OS, applications, and essential data for your virtual machines. Developers and businesses building latency-sensitive or I/O-intensive applications now have more options in the São Paulo-2 region, thanks to two newly added volume types optimized for speed and responsiveness:Low-latency volumesDesigned for applications where every millisecond matters, Low Latency Volumes are non-redundant block storage ideal for:ETCD clustersTransactional databasesOther real-time, latency-critical workloadsBy minimizing overhead and focusing on speed, this volume type delivers faster response times for performance-sensitive use cases. This block storage offers IOPS up to 5000 and an average latency of 300 microseconds.High-IOPS volumesFor applications that demand both speed and resilience, High IOPS Volumes offer a faster alternative to our Standard Volumes:Higher IOPS and increased throughputSuitable for high-traffic web apps, analytics engines, and demanding databasesThis volume type accelerates data-heavy workloads and keeps performance consistent under peak demand by delivering significantly higher throughput and IOPS. The block storage offers IOPS up to 9,000 and a 500 MB/s bandwidth limit.Ready to deploy with Gcore?These new additions help to fine-tune your performance strategy, whether you're optimizing for throughput, latency, or both.From scaling in LATAM to expanding into the EU or pushing performance at the edge, Gcore continues to evolve with your needs. Explore our new capabilities in Luxembourg‑3, Sines‑2, and São Paulo‑2.Discover more about Gcore Cloud Edge Services

5 ways to keep gaming customers engaged with optimal performance
Nothing frustrates a gamer more than lag, stuttering, or server crashes. When technical issues interfere with gameplay, it can be a deal breaker. Players know that the difference between winning and losing should be down to a player’s skill, not lag, latency issues, or slow connection speed—and they want gaming companies to make that possible every time they play.And gamers aren’t shy about expressing their opinion if a game hasn’t met their expectations. A game can live or die by word-of-mouth, and, in a highly competitive industry, gamers are more than happy to spend their time and money elsewhere. A huge 78% of gamers have “rage-quit” a game due to latency issues.That’s why reliable infrastructure is crucial for your gaming offering. A solid foundation is good for your bottom line and your reputation and, most importantly, provides a great gaming experience for customers, keeping them happy, loyal, and engaged. This article suggests five technologies to boost player engagement in real-world gaming scenarios.The technology powering seamless gaming experiencesHaving the right technology behind the scenes is essential to deliver a smooth, high-performance gaming experience. From optimizing game deployment and content delivery to enabling seamless multiplayer scalability, these technologies work together to reduce latency, prevent server overloads, and guarantee fast, reliable connections.Bare Metal Servers provide dedicated compute power for high-performing massive multiplayer games without virtualization overhead.CDN solutions reduce download times and minimize patch distribution delays, allowing players to get into the action faster.Managed Kubernetes simplifies multiplayer game scaling, handling sudden spikes in player activity.Load Balancers distribute traffic intelligently, preventing server overload during peak times.Edge Cloud reduces latency for real-time interactions, improving responsiveness for multiplayer gaming.Let’s look at five real-world scenarios illustrating how the right infrastructure can significantly enhance customer experience—leading to smooth, high-performance gaming, even during peak demand.#1 Running massive multiplayer games with bare metal serversImagine a multiplayer FPS (first-person shooter gaming) game studio that’s preparing for launch and needs low-latency, high-performance infrastructure to handle real-time player interactions. They can strategically deploy Gcore Bare Metal servers across global locations, reducing ping times and providing smooth gameplay.Benefit: Dedicated bare metal resources deliver consistent performance, eliminating lag spikes and server crashes during peak hours. Stable connections and seamless playing are assured for precision gameplay.#2 Seamless game updates and patch delivery with CDN integrationLet’s say you have a game that regularly pushes extensive updates to millions of players worldwide. Instead of overwhelming origin servers, they can use Gcore CDN to cache and distribute patches, reducing download times and preventing bottlenecks.Benefit: Faster updates for players, reduced server tension, and seamless game launches and updates.#3 Scaling multiplayer games with Managed KubernetesAfter a big update, a game may experience a sudden spike in the number of players. With Gcore Managed Kubernetes, the game autoscales its infrastructure, dynamically adjusting resources to meet player demand without downtime.Benefit: Elastic, cost-efficient scaling keeps matchmaking fast and smooth, even under heavy loads.#4 Load balancing for high-availability game serversAn online multiplayer game with a global base requires low latency and high availability. Gcore Load Balancers distribute traffic across multiple regional server clusters, reducing ping times and preventing server congestion during peak hours.Benefit: Consistent, lag-free gameplay with improved regional connectivity and failover protection.#5 Supporting live events and seasonal game launchesIn the case of a gaming company hosting a global in-game event, attracting millions of players simultaneously, leveraging Gcore CDN, Load Balancers, and autoscaling cloud infrastructure can prevent crashes and provide a seamless and uninterrupted experience.Benefit: Players enjoy smooth, real-time participation while the infrastructure is stable under extreme load.Building customer loyalty with reliable gaming infrastructureIn a challenging climate, focusing on maintaining customer happiness and loyalty is vital. The most foolproof way to deliver this is by investing in reliable and secure infrastructure behind the scenes. With infrastructure that’s both scalable and high-performing, you can deliver uninterrupted, seamless experiences that keep players engaged and satisfied.Since its foundation in 2014, Gcore has been a reliable partner for game studios looking to deliver seamless, high-performance gaming experiences worldwide, including Nitrado, Saber, and Wargaming. If you’d like to learn more about our global infrastructure and how it provides a scalable, high-performance solution for game distribution and real-time games, get in touch.Talk to our gaming infrastructure experts
How cloud infrastructure maximizes efficiency in the gaming industry
The gaming industry is currently facing several challenges, with many companies having laid off staff over the past year due to rising development costs and a fall in product demand post-pandemic. These difficult circumstances mean it’s more important than ever for gaming firms of all sizes to maximize efficiency and keep costs down. One way companies can do this is by implementing reliable infrastructure that supports the speedy development of new games.This article explores how dependable cloud infrastructure at the edge—including virtual machines, bare metal, and GPUs—helps gaming companies work more efficiently. Edge computing allows developers to build, test, and deploy games faster while minimizing latency, reducing server costs, and handling complex rendering and AI workloads.The key benefits of edge cloud infrastructure for gamingReliable cloud infrastructure benefits gaming companies in a variety of ways. It’s a replacement for relying on outdated arrangements such as proprietary on-premises data centers, which lack flexibility, have limited scalability, require significant upfront investment, and need teams that are fully dedicated to their maintenance and management. Cloud compute resources, including virtual machines, bare metal servers, and GPUs, can support your game development and testing more cost-effectively, keeping your gaming company competitive in the market and cost efficient.Here’s how reliable cloud infrastructure can benefit your business:Speeds up development cycles: Cloud-based infrastructure accelerates game builds, testing, and deployment by providing on-demand access to high-performance compute resources. Developers can run several testing environments and collaborate from anywhere.Scales on demand: From indie studios launching a first title to major AAA developers handling millions of players, cloud solutions can scale resources instantly. Storage options and load balancing enable infrastructure to adapt to player demand, preventing performance issues during peak times while optimizing costs during off-peak periods.Offers low-latency performance: Cloud solutions reduce lag, optimize the experience for developers and end-users by deploying servers close to players, and improve their in-game experience.Delivers high-performance compute: Bare Metal servers and GPU instances deliver the power required for game development by providing dedicated resources. This enables faster rendering, complex simulations, and seamless real-time processing for graphics-intensive applications, leading to smooth gameplay experiences and faster iteration cycles.Maximizes cost efficiency: Flexible pricing models help studios optimize costs while maintaining high performance. Pay-as-you-go plans mean companies only pay for the resources used. Commitment plans that give discounts for use cases that require consistent/planned capacity are also available.How Gcore cloud infrastructure works: real-life examplesGcore cloud infrastructure can be helpful in many common scenarios for developers. Here are some real-world examples demonstrating how Gcore virtual machines and GPUs can help:Example 1: Faster game building and testing with scalable virtual machinesLet’s say a game studio developing a cross-platform game needs to compile large amounts of code and assets quickly. By leveraging Gcore’s Virtual Machines, they can create automated CI/CD pipelines that speed up game builds and testing across different environments, reducing wait times. Scalable virtual machines allow developers to spin up multiple test environments on demand, running compatibility and performance tests simultaneously.Example 2: High-performance graphics rendering with GPU computeVisually rich games (like open-world role-playing games) need to render complex 3D environments efficiently. Instead of investing in expensive local hardware, they can use Gcore’s GPU infrastructure to accelerate rendering and AI-powered animation workflows. Access to powerful GPUs without upfront investment enables faster iteration of visual assets and machine-learning-driven game enhancements.If your business faces rendering challenges, one of our experts can advise you on the most suitable cloud infrastructure package.Partnering for success: why gaming companies choose GcoreIn a challenging gaming industry climate, it’s vital to have the right tools and solutions at your disposal. Cloud infrastructure at the edge can significantly enhance game development efficiency for gaming businesses of all sizes.Gcore was founded in 2014 for gamers, by gamers, and we have been a trusted partner to global gaming companies including Nitrado, Saber, and Wargaming since day one. If you’d like to learn more about our gaming industry expertise and how our cloud infrastructure can help you operate in a more efficient and cost effective way, get in touch.Talk to us about your gaming cloud infrastructure needs
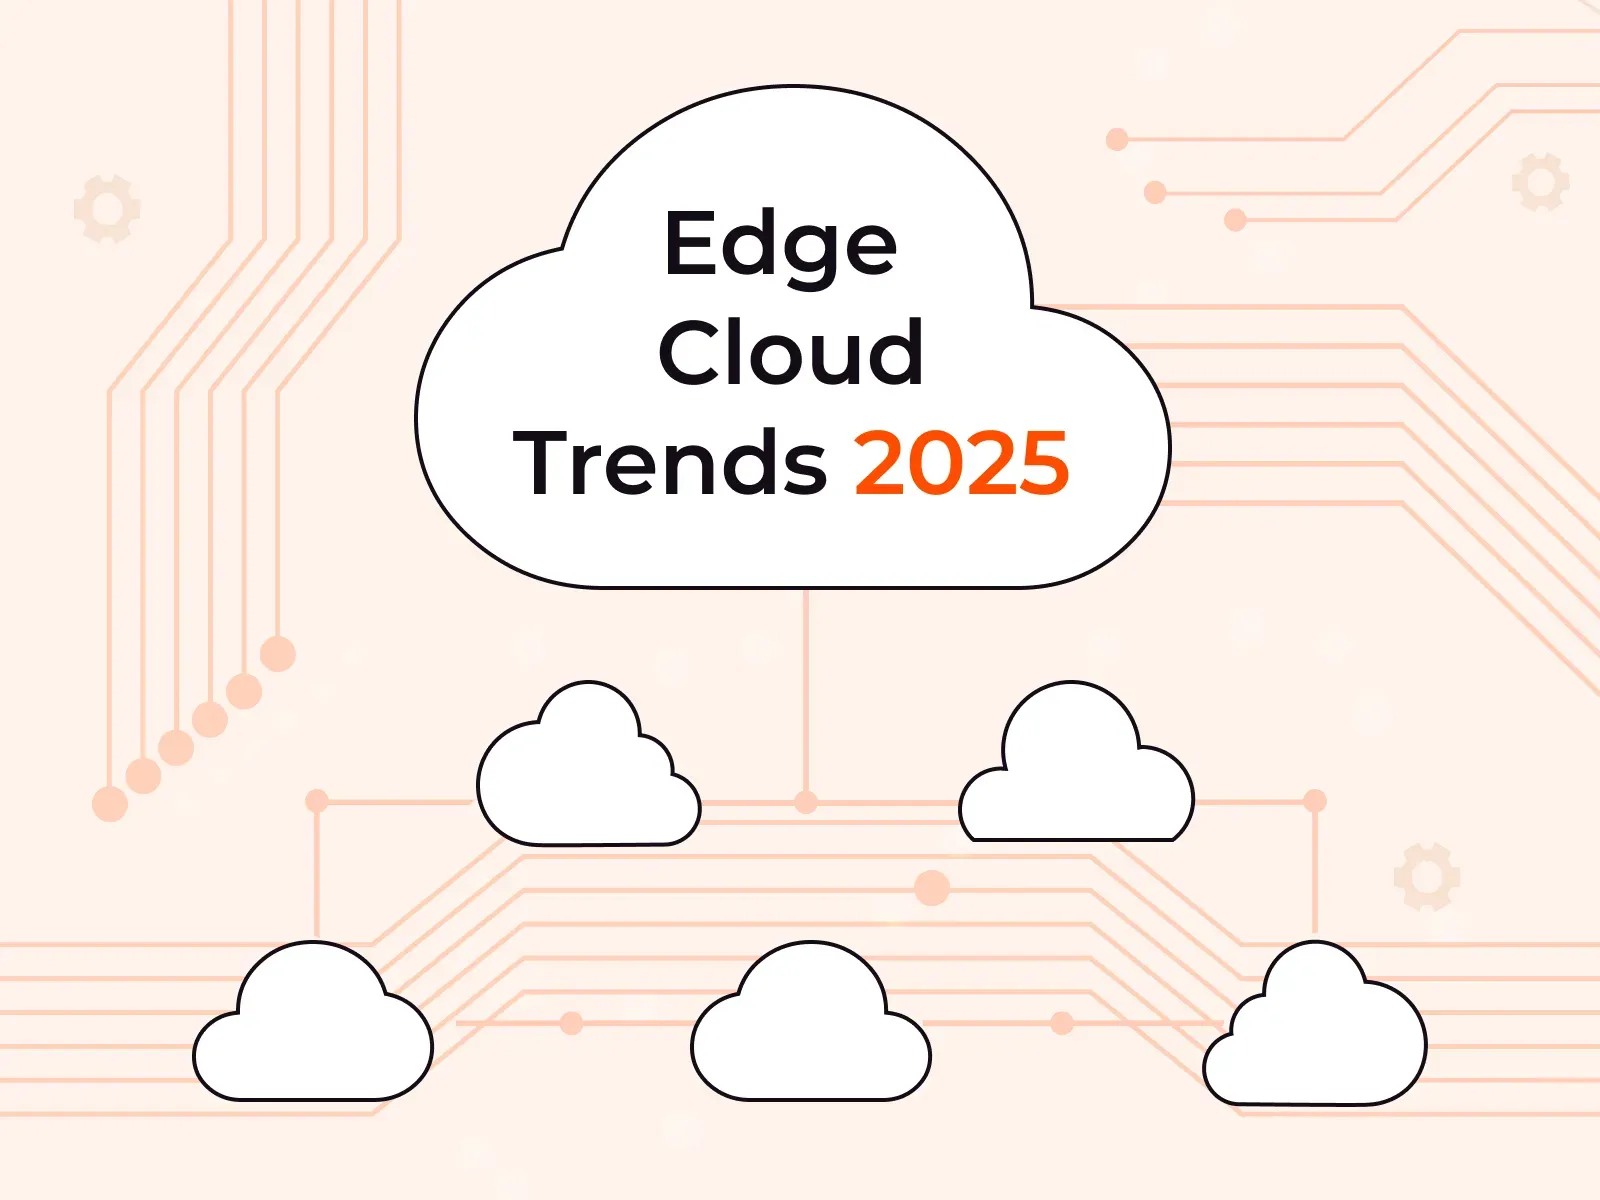
Edge cloud trends 2025: AI, big data, and security
Edge cloud is a distributed computing model that brings cloud resources like compute, storage, and networking closer to end users and devices. Instead of relying on centralized data centers, edge cloud infrastructure processes data at the network’s edge, reducing latency and improving performance for real-time applications.In 2025, the edge cloud landscape will evolve even further, shaping industries from gaming and finance to healthcare and manufacturing. But what are the key trends driving this transformation? In this article, we’ll explore five key trends in edge computing for 2025 and explain how the technology helps with pressing issues in key industries. Read on to discover whether it’s time for your company to adopt edge cloud computing.#1 Edge computing is integral to modern infrastructureEdge computing is on the rise and is set to become an indispensable technology across industries. By the end of this year, at least 40% of larger enterprises are expected to have adopted edge computing as part of their IT infrastructure. And this trend shows no signs of slowing. By the end of 2028, worldwide spending for edge computing is anticipated to reach $378 billion. That’s almost a 50% increase from 2024. There’s no question that edge computing is rapidly becoming integral to modern businesses.#2 Edge computing will power AI-driven, real-time workloadsAs real-time digital experiences become the norm, the demand for edge computing is accelerating. From video streaming and immersive XR applications to AI-powered gaming and financial trading, industries are pushing the limits of latency-sensitive workloads. Edge cloud computing provides the necessary infrastructure to process data closer to users, meeting their demands for performance and responsiveness. AI inference will become part of all kinds of applications, and edge computing will deliver faster responses to users than ever before.New AI-powered features in mobile gaming are driving greater demand for edge computing. While game streaming services haven’t yet gained widespread adoption, the high computational demands of AI inference could change that. Since running a large language model (LLM) efficiently on a smartphone is still impractical, these games require high-performance support from edge infrastructure to deliver a smooth experience.Multiplayer games require ultra-low latency for a smooth, real-time experience. With edge computing, game providers can deploy servers closer to players, reducing lag and ensuring high-performance gameplay. Because edge computing is decentralized, it also makes it easier to scale gaming platforms as player demand grows.The same advantage applies to high-frequency trading, where milliseconds can determine profitability. Traders have long benefited from placing servers near financial markets, and edge computing further simplifies deploying infrastructure close to preferred exchanges, optimizing trade execution speeds.#3 Edge computing will handle big dataEmerging real-time applications generate massive volumes of data. IoT devices, stock exchanges, and GenAI models all produce and rely on vast datasets, requiring efficient processing solutions.Traditionally, organizations have managed large-scale data ingestion through horizontal scaling in cloud computing. Edge computing is the next logical step, enabling big data workloads to be processed closer to their source. This distributed approach accelerates data processing, delivering faster insights and improved performance even when handling huge quantities of data.#4 Edge computing will simplify data sovereigntyThe concept of data sovereignty states that data is subject to the same laws and regulations as the user who created it. For example, the GDPR in Europe requires organizations to store their citizens’ and residents’ data on servers subject to European laws. This can cause headaches for companies working with a centralized cloud, since they may have to comply with a complex web of fast-changing data sovereignty laws. Put simply: cloud location matters.With data privacy regulations on the rise, edge computing is emerging as a key technology to simplify compliance. Edge cloud means allows running distributed server networks and geofencing data to servers in specific countries. The result is that companies can scale globally without worrying about compliance, since edge cloud companies like Gcore automate most of the regulatory requirement processes.#5 Edge computing will improve securityEdge computing is crucial to solving the issues of a globally connected world, but its security story has until now been a double-edged sword. On the one hand, the edge ensures data doesn’t need to travel great distances on public networks, where it can be exposed to malicious attacks. On the other hand, central data centers are much easier to secure than a distributed server network. More servers mean a higher potential for one to be compromised, making it a potentially risky choice for privacy-sensitive workloads in healthcare and finance.However, cloud providers are starting to add features to their solutions that bring edge security into line with traditional cloud resources. Secure hardware enclaves and encrypted data transmissions deliver end-to-end security, so data will never be accessible in cleartext to an edge location provider or other third parties. If, for any reason, these encryption mechanisms should fail, AI-driven threat scanners can detect and notify quickly.If your business is looking to adopt edge cloud while prioritizing security, look for a provider that specializes in both. Avoid solutions where security is an afterthought or a bolt-on. Gcore cloud servers integrate seamlessly with Gcore Edge Security solutions, so your servers are protected to the highest levels at the click of a button.Unlock the next wave of edge computing with GcoreThe trend is clear: Internet-enabled devices are rapidly entering every part of our lives. This raises the bar for performance and security, and edge cloud computing delivers solutions to meet these new requirements. Distributed data processing means GenAI models can scale efficiently, and location-independent deployments enable high-performance real-time workloads from high-frequency trading to XR gaming to IoT.At Gcore, we provide a global edge cloud platform designed to meet the performance, scalability, and security demands of modern businesses. With over 180 points of presence worldwide, our infrastructure ensures ultra-low latency for AI-powered applications, real-time gaming, big data workloads, and more. Our edge solutions help businesses navigate evolving data sovereignty regulations by enabling localized data processing for global operations. And with built-in security features like DDoS protection, WAAP, and AI-driven threat detection, you leverage the full potential of edge computing without compromising on security.Ready to learn more about why edge cloud matters? Dive into our blogs on cloud data sovereignty.Get in touch to discuss your edge cloud 2025 goals

Gcore 2024 round-up: 10 highlights from our 10th year
It’s been a busy and exciting year here at Gcore, not least because we celebrated our 10th anniversary back in February. Starting in 2014 with a focus on gaming, Gcore is now a global edge AI, cloud, network, and security solutions provider, supporting businesses from a wide range of industries worldwide.As we start to look forward to the new year, we took some time to reflect on ten of our highlights from 2024.1. WAAP launchIn September, we launched our WAAP security solution (web application and API protection) following the acquisition of Stackpath’s edge WAAP. Gcore WAAP is a genuinely innovative product that offers customers DDoS protection, bot management, and a web application firewall, helping protect businesses from the ever-increasing threat of cyber attacks. It brings next-gen AI features to customers while remaining intuitive to use, meaning businesses of all sizes can futureproof their web app and API protection against even the most sophisticated threats.My highlight of the year was the Stackpath WAAP acquisition, which enabled us to successfully deliver an enterprise-grade web security solution at the edge to our customers in a very short time.Itamar Eshet, Senior Product Manager, Security2. Fundraising round: investing in the futureIn July, we raised $60m in Series A funding, reflecting investors’ confidence in the continued growth and future of Gcore. Next year will be huge for us in terms of AI development, and this funding will accelerate our growth in this area and allow us to bring even more innovative solutions to our customers.3. Innovations in AIIn 2024, we upped our AI offerings, including improved AI services for Gcore Video Streaming: AI ASR for transcription and translation, and AI content moderation. As AI is at the forefront of our products and services, we also provided insights into how regulations are changing worldwide and how AI will likely affect all aspects of digital experiences. We already have many new AI developments in the pipeline for 2025, so watch this space…4. Global expansionsWe had some exciting expansions in terms of new cloud capabilities. We expanded our Edge Cloud offerings in new locations, including Vietnam and South Korea, and in Finland, we boosted our Edge AI capabilities with a new AI cluster and two cutting-edge GPUs. Our AI expansion was further bolstered when we introduced the H200 and GB200 in Luxembourg. We also added new PoPs worldwide in locations such as Munich, Riyadh, and Casablanca, demonstrating our dedication to providing reliable and fast content delivery globally.5. FastEdge launchWe kicked off the year with the launch of FastEdge. This lightweight edge computing solution runs on our global Edge Network and delivers exceptional performance for serverless apps and scripts. This new solution makes handling dynamic content even faster and smoother. We ran an AI image recognition model on FastEdge in an innovative experiment. The Gcore team volunteered their pets to test FastEdge’s performance. Check out the white paper and discover our pets and our technological edge.6. PartnershipsWe formed some exciting global partnerships in 2024. In November, we launched a joint venture with Ezditek, an innovator in data center and digital infrastructure services in Saudi Arabia. The joint venture will build, train, and deploy generative AI solutions locally and globally. We also established some important strategic partnerships. Together with Sesterce, a leading European provider of AI infrastructure, we can help more businesses meet the rising challenges of scaling from AI pilot projects to full-scale implementation. We also partnered with LetzAI, a Luxembourg-based AI startup, to accelerate its mission of developing one of the world’s most comprehensive generative AI platforms.7. EventsIt wasn’t all online. We also ventured out into the real world, making new connections at global technology events, including the WAICF AI conference and Viva Tech in Cannes and Paris, respectively; Mobile World Congress in Barcelona; Gamescom in Cologne in August; IBC (the International Broadcasting Convention) in Amsterdam; and Connected World KSA in Saudi Arabia just last month. We look forward to meeting even more of you next year. Here are a few snapshots from 2024.GamescomIBC8. New container registry solutionSeptember kicked off with the beta launch of Gcore Container Registry, one of the backbones of our cloud offering. It streamlines your image storage and management, keeping your applications running smoothly and consistently across various environments.9. GigaOm recognitionBeing recognized by outside influences is always a moment to remember. In August, we were thrilled to receive recognition from tech analyst GigaOm, which noted Gcore as an outperformer in its field. The prestigious accolade highlights Gcore as a leader in platform capability, innovation, and market impact, as assessed by GigaOm’s rigorous criteria.10. New customer success storiesWe were delighted to share some of the work we’ve done for our customers this year: gaming company Fawkes Games and Austrian sports broadcaster and streaming platform fan.at, helping them with mitigating DDoS attacks and providing the infrastructure for their sports technology offering respectively.And as a bonus number 11, if you’re looking for something to read in the new year lull, download our informative long reads on topics including selecting a modern content delivery network, cyber attack trends, and using Kubernetes to enhance AI. Download the ebook of your choice below.The essential guide to selecting a modern CDN eBookGcore Radar: DDoS attack trends in Q1-Q2 2024 reportAccelerating AI with KubernetesHere’s to 2025!And that’s it for our 2024 highlights. It’s been a truly remarkable year, and we thank you for being a part of it. We’ll leave you with some words from our CEO and see you in 2025.2024 has been a year of highs, from our tenth anniversary celebrations to the launch of various new products, and from expansion into new markets to connecting with customers (new and old) at events worldwide. Happy New Year to all our readers who are celebrating, and see you for an even bigger and better 2025!Andre Reitenbach, CEOChat with us about your 2025 needs
Subscribe to our newsletter
Get the latest industry trends, exclusive insights, and Gcore updates delivered straight to your inbox.