Install nginx on Kubernetes Using Gcore Managed Kubernetes and Helm
- May 4, 2023
- 3 min read

In this tutorial, we’ll explore how to install nginx in a Kubernetes cluster using the Gcore Managed Kubernetes service and a Helm chart. The main advantage of Gcore Managed Kubernetes is that you get a ready-made Kubernetes cluster in just a few minutes. You don’t have to worry about managing the underlying infrastructure and a master node; simply run worker nodes and deploy applications on them.
You also don’t need much experience with Kubernetes administration to install nginx using our managed service. This tutorial is based on GUI (graphical user interface) tools, so no manual manipulations are required in the command line.
What Is nginx?
nginx is an open-source web server used to deliver static and dynamic content over the internet. The solution offers various features such as reverse proxying, load balancing, caching, and SSL/TLS encryption. nginx is often used as a front-end proxy server for web applications to improve performance and distribute traffic across multiple servers.
nginx installation on Kubernetes can be a great way to scale your web applications and achieve high availability. In this tutorial, we’ll use nginx as a sample deployment and won’t go into detailed nginx configuration. However, you can use the tutorial to install any web service on Kubernetes, similar to the nginx installation described here.
What Is Helm?
Helm is a package manager for Kubernetes that allows you to install, update, and manage applications in a Kubernetes cluster. Using a Helm chart is one of the easiest ways to install an application, such as nginx, on Kubernetes. A Helm chart describes the data set required to create an application instance in a Kubernetes cluster. In other words, a Helm chart is a template that you can use repeatedly to install an application, saving time in the build and deployment process.
How to Install nginx in a Gcore Kubernetes Cluster
Step 1. Create a Kubernetes Cluster
First, let’s create a Kubernetes cluster in Gcore Cloud:
- Log in to your Gcore Cloud account. If you don’t yet have a GCore Cloud account, sign up.
- Go to Cloud and select Projects.
- Click Create project; fill in the Name field. Projects are groups of separate Cloud resources, and these groups are isolated from one another. The isolation gives you the ability to set user rights for each project.
- In your project, select the “Kubernetes” category. Click Create Cluster:
Here’s what you’ll see:
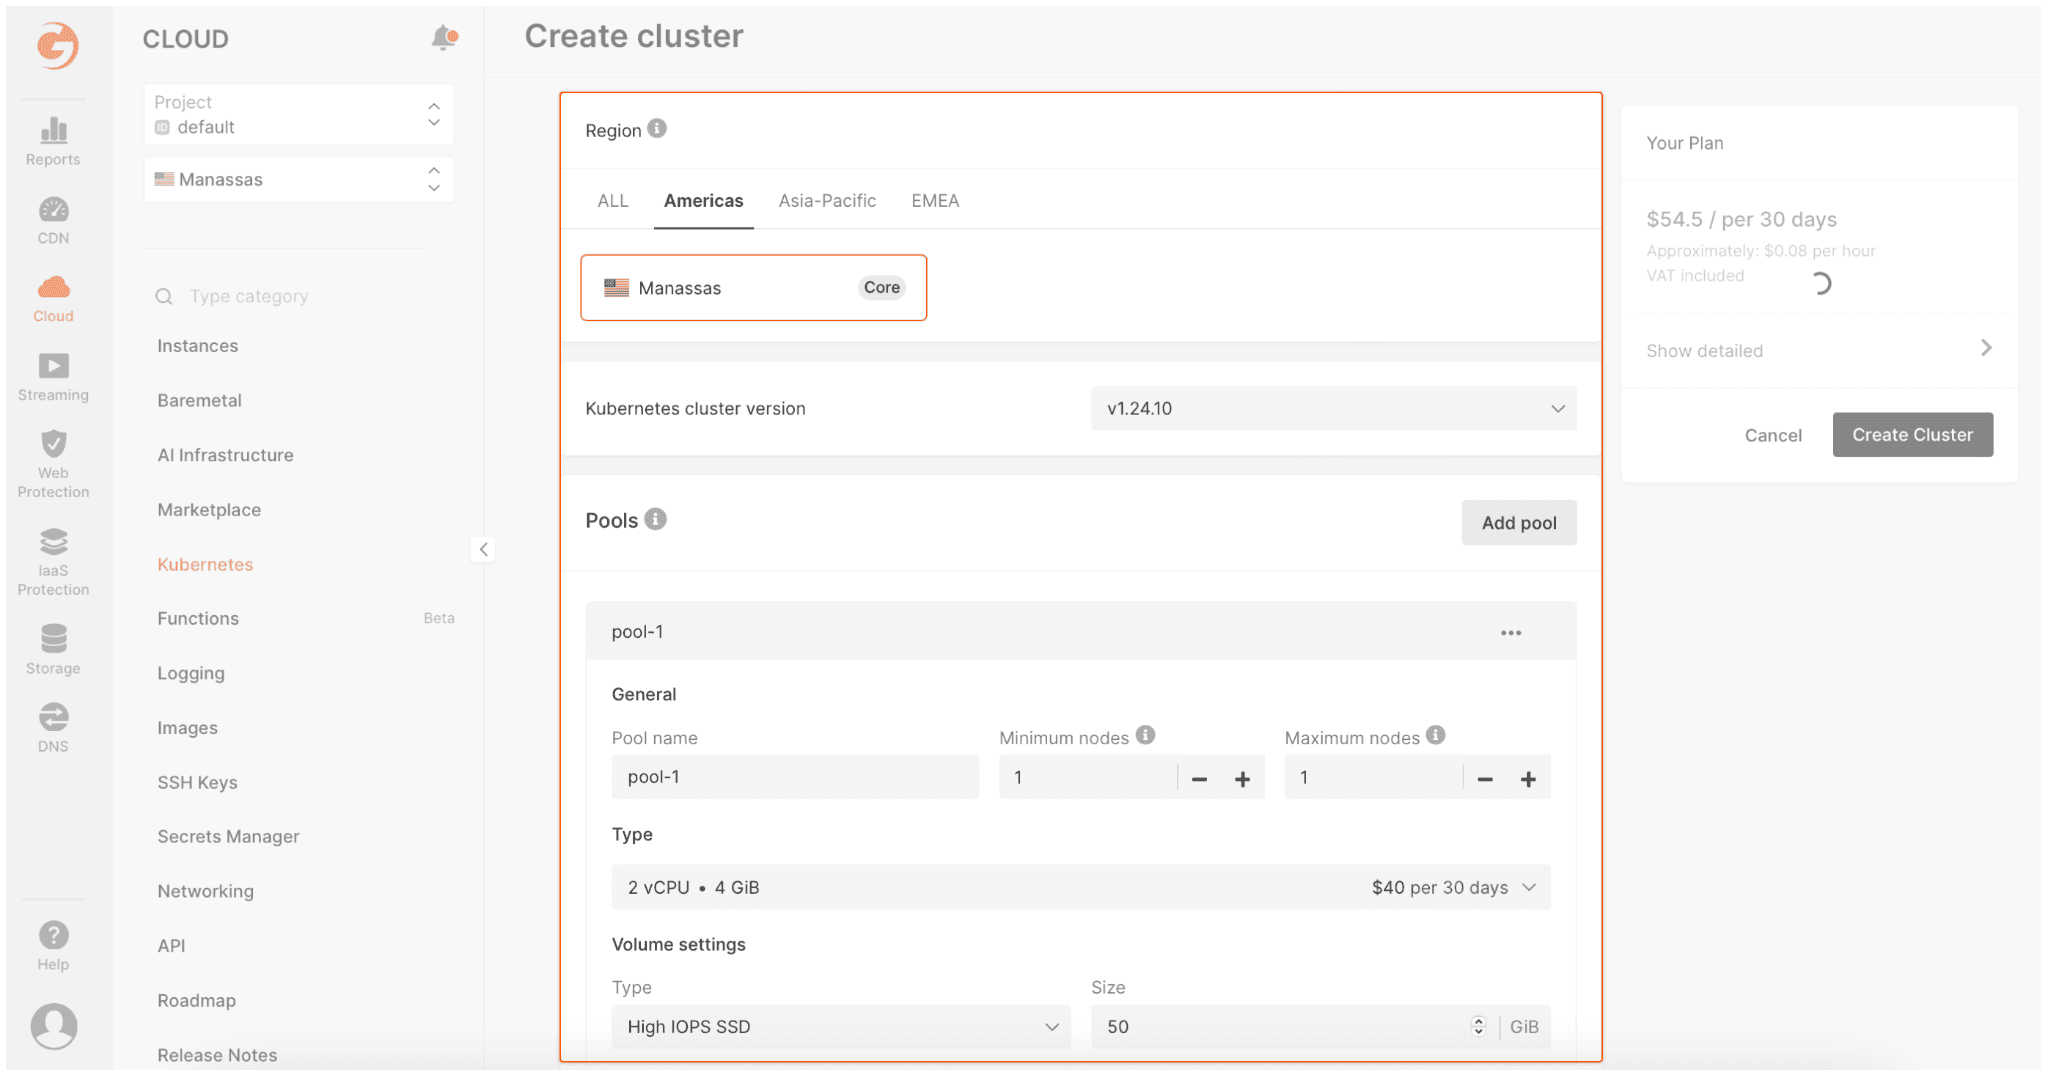
- Set the cluster parameters:
- Region: Manassas
- Minimum/Maximum nodes node: 1/1
- Type: 2 vCPU / 4GB RAM
- Volume settings: High IOPS 50GB
- Network settings: select your network and subnetwork
- SH Key: choose your public SSH key or generate a new one
- Cluster name: cluster-1 (or whatever you want)
- Now that you’ve completed the set up steps, click Create Cluster. The cluster will appear in the “Kubernetes Cluster” section. Wait until the cluster “Creating” status changes to “Provisioned”.

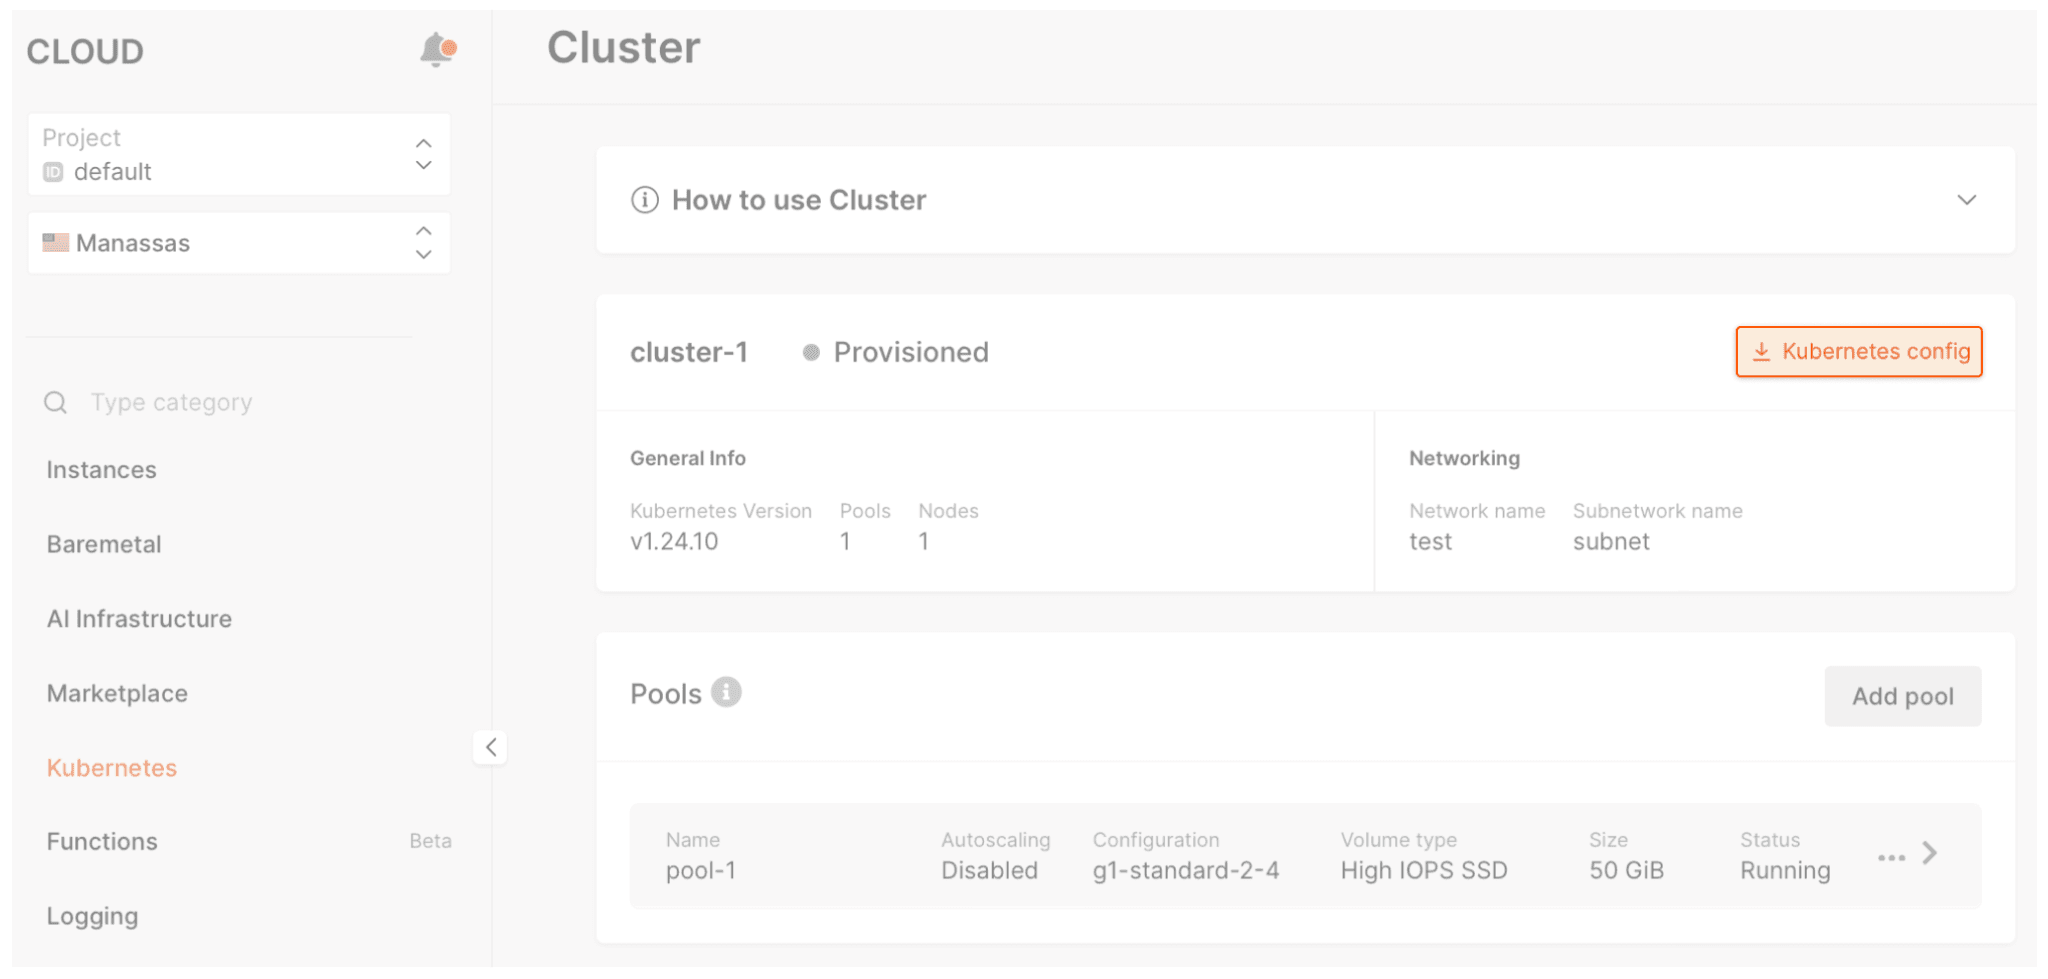
Step 2. Download the Kubeconfig File
Now you need to download the kubeconfig file. It organizes information about clusters, users, namespaces, and authentication mechanisms. You will use this file later to connect to your cluster via OpenLens.
To download the kubeconfig file, select your cluster and click Kubernetes config:
Step 3. Install OpenLens to your Local Machine and Upload Kubeconfig
To install nginx via Helm chart, we’ll use OpenLens, an open-source IDE (integrated development environment) for Kubernetes. It allows you to manage a Kubernetes cluster in a GUI without using the command line.
- To download OpenLens to your machine, navigate to the OpenLens page Releases, select the appropriate installer for your operating system, and follow the installation instructions.
- Run OpenLens on your machine.
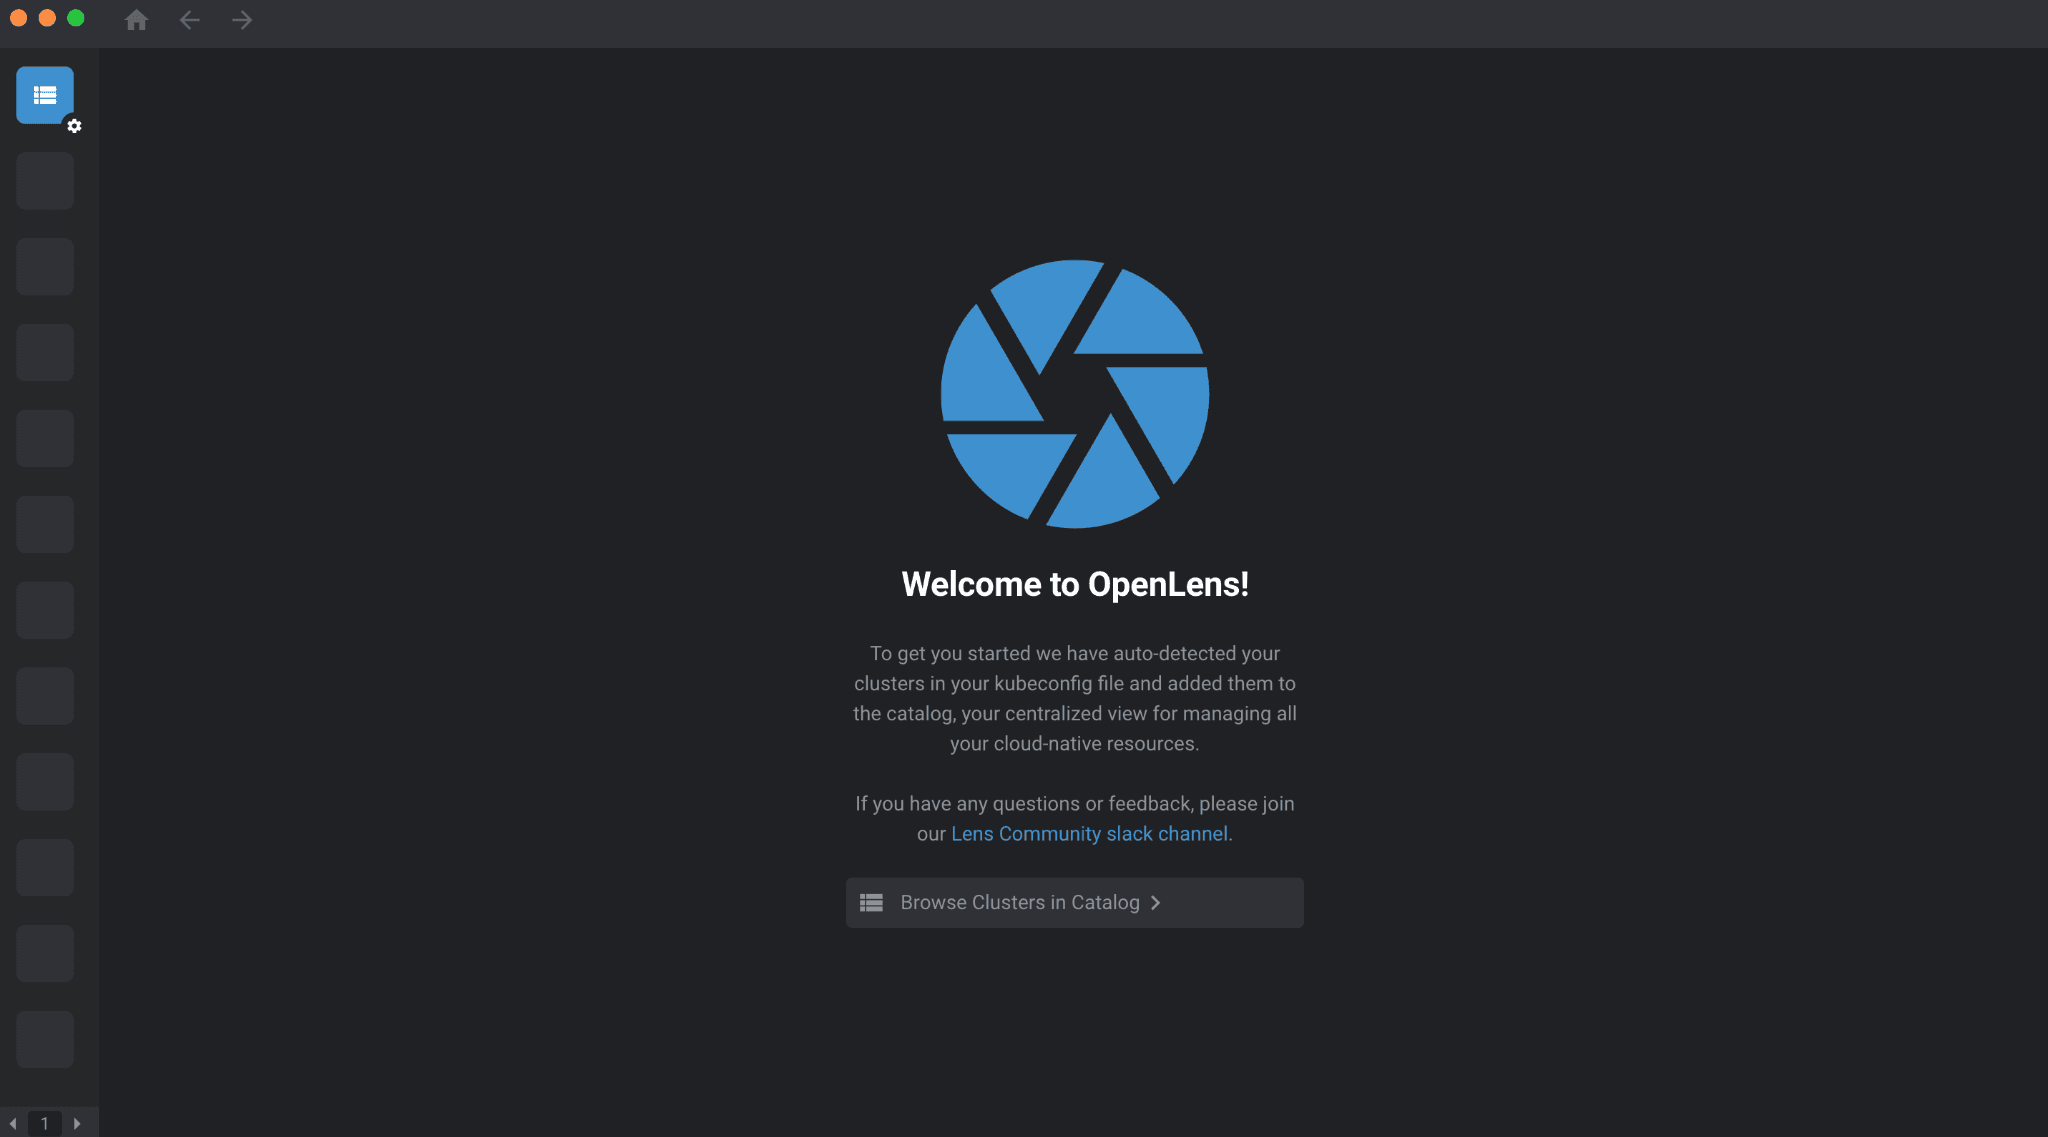
- Click Catalog → Cluster and add the kubeconfig file you downloaded in Step 2.
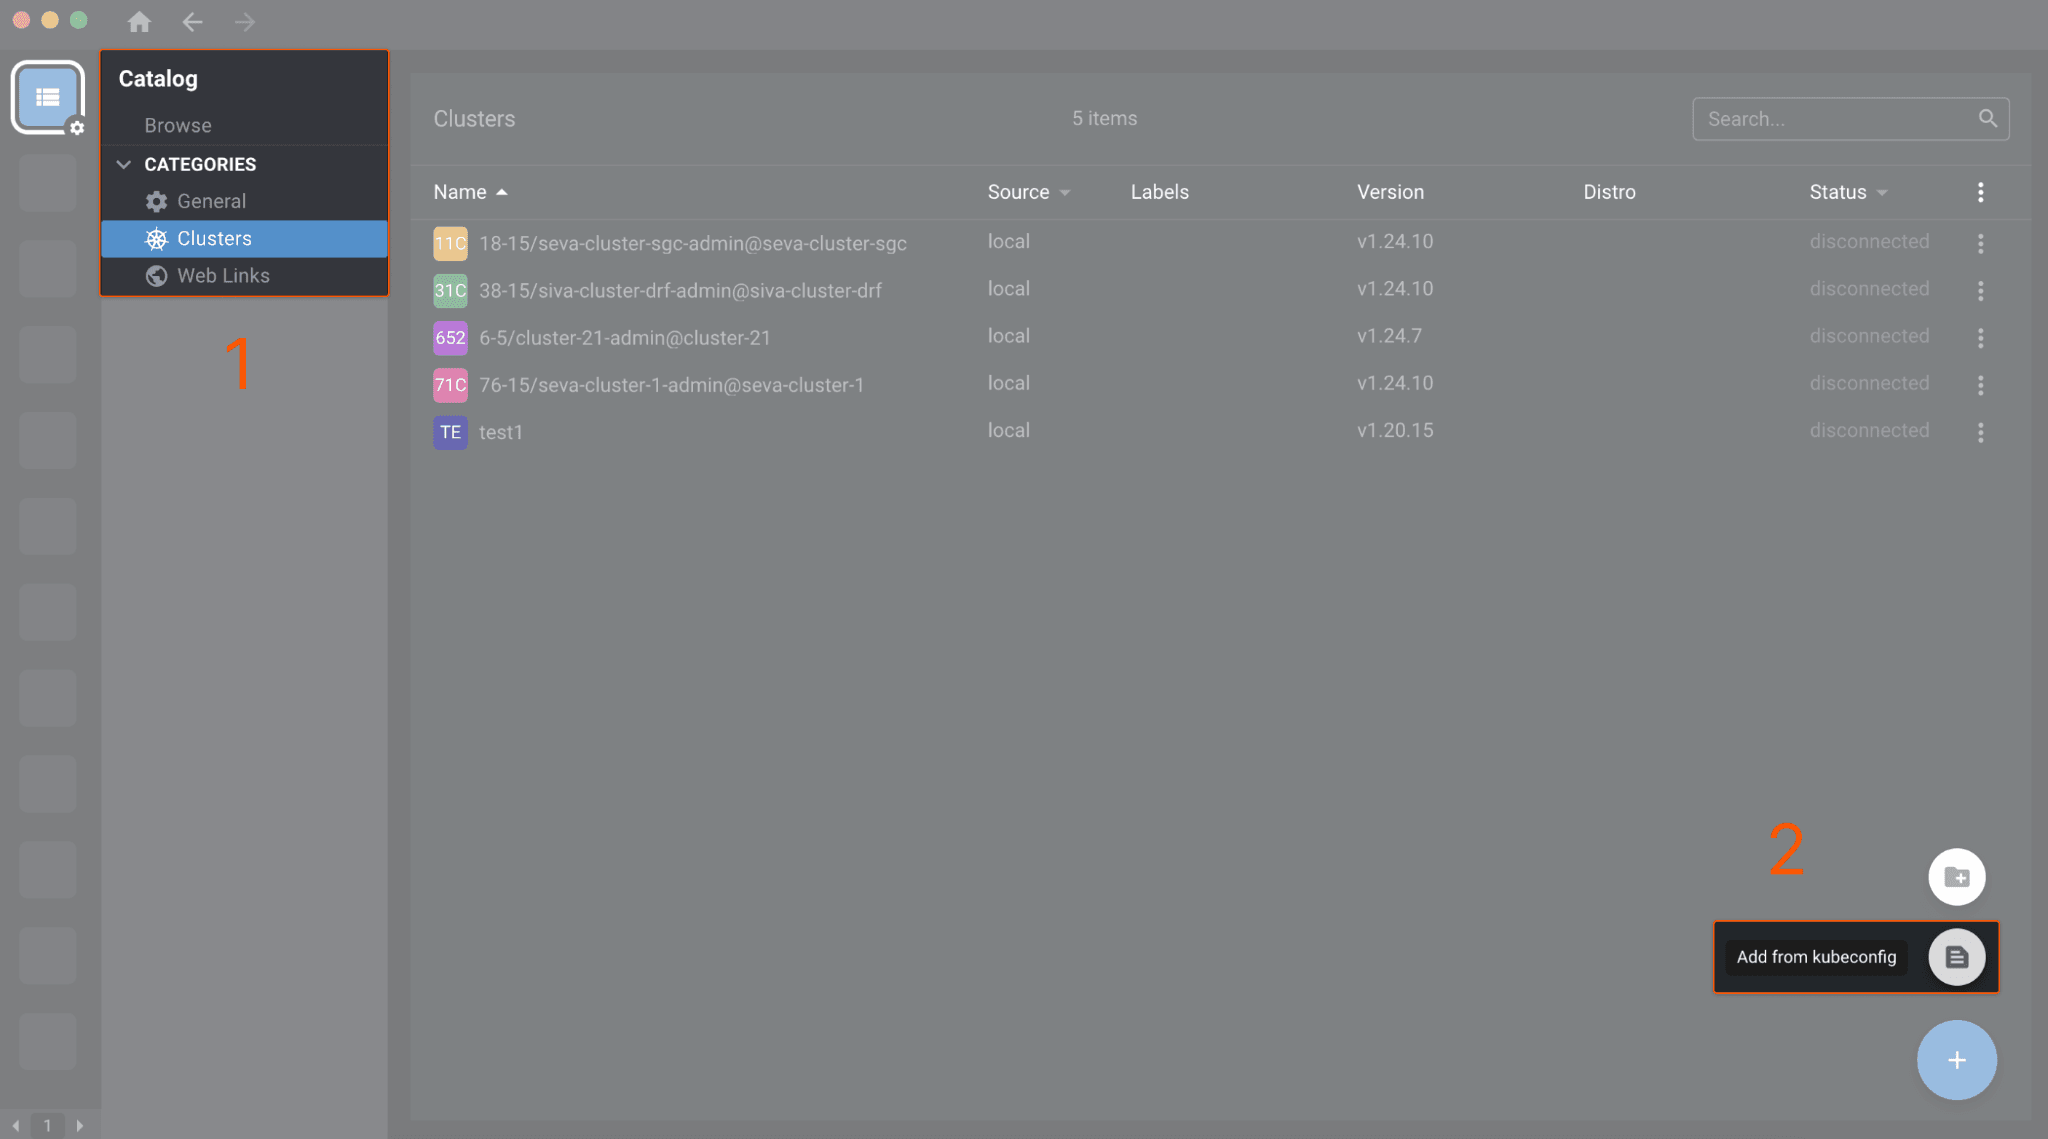
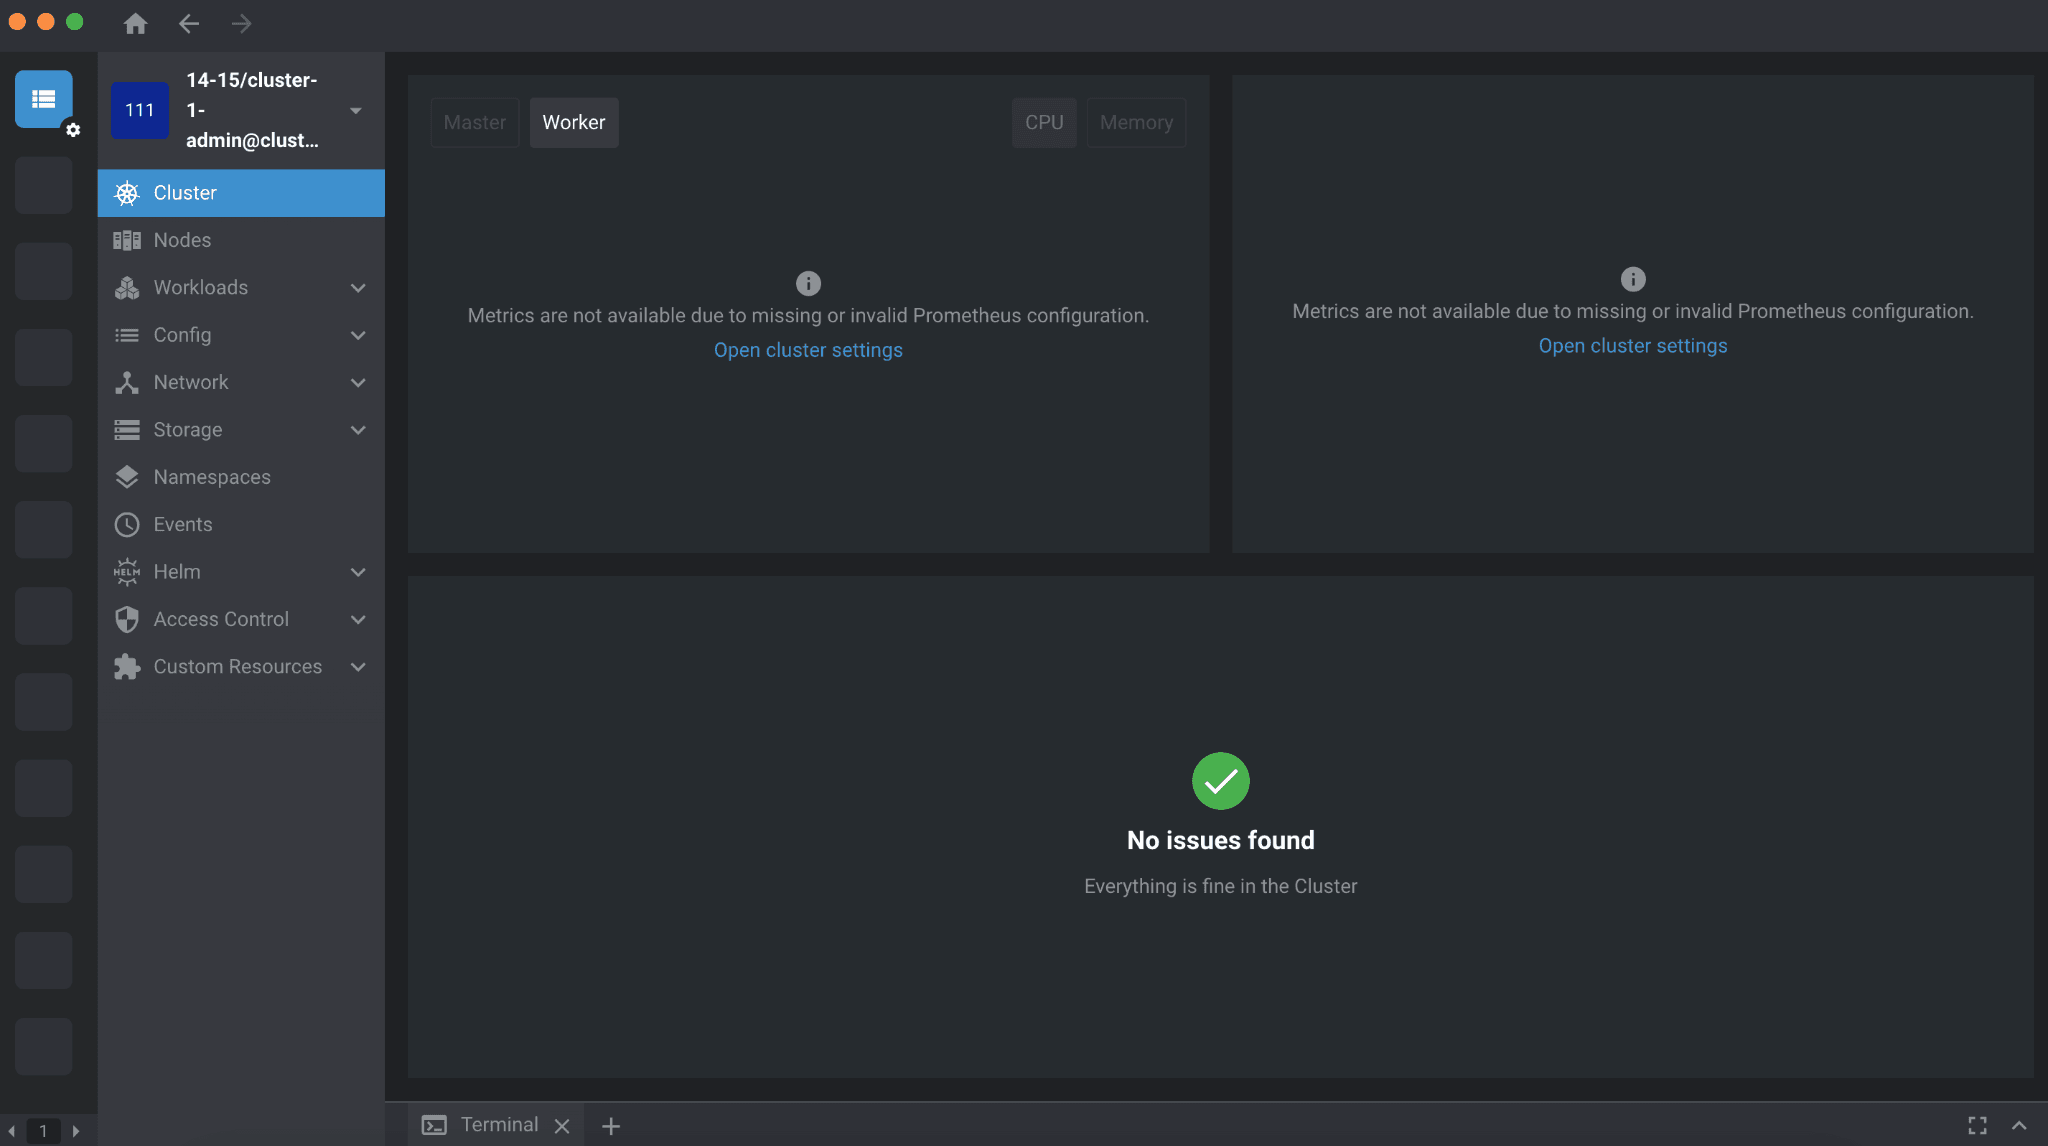
- After that, you connect to your cluster. Here’s what you’ll see:
Step 4. Install nginx via a Helm chart
- In OpenLens, click Helm → Charts.
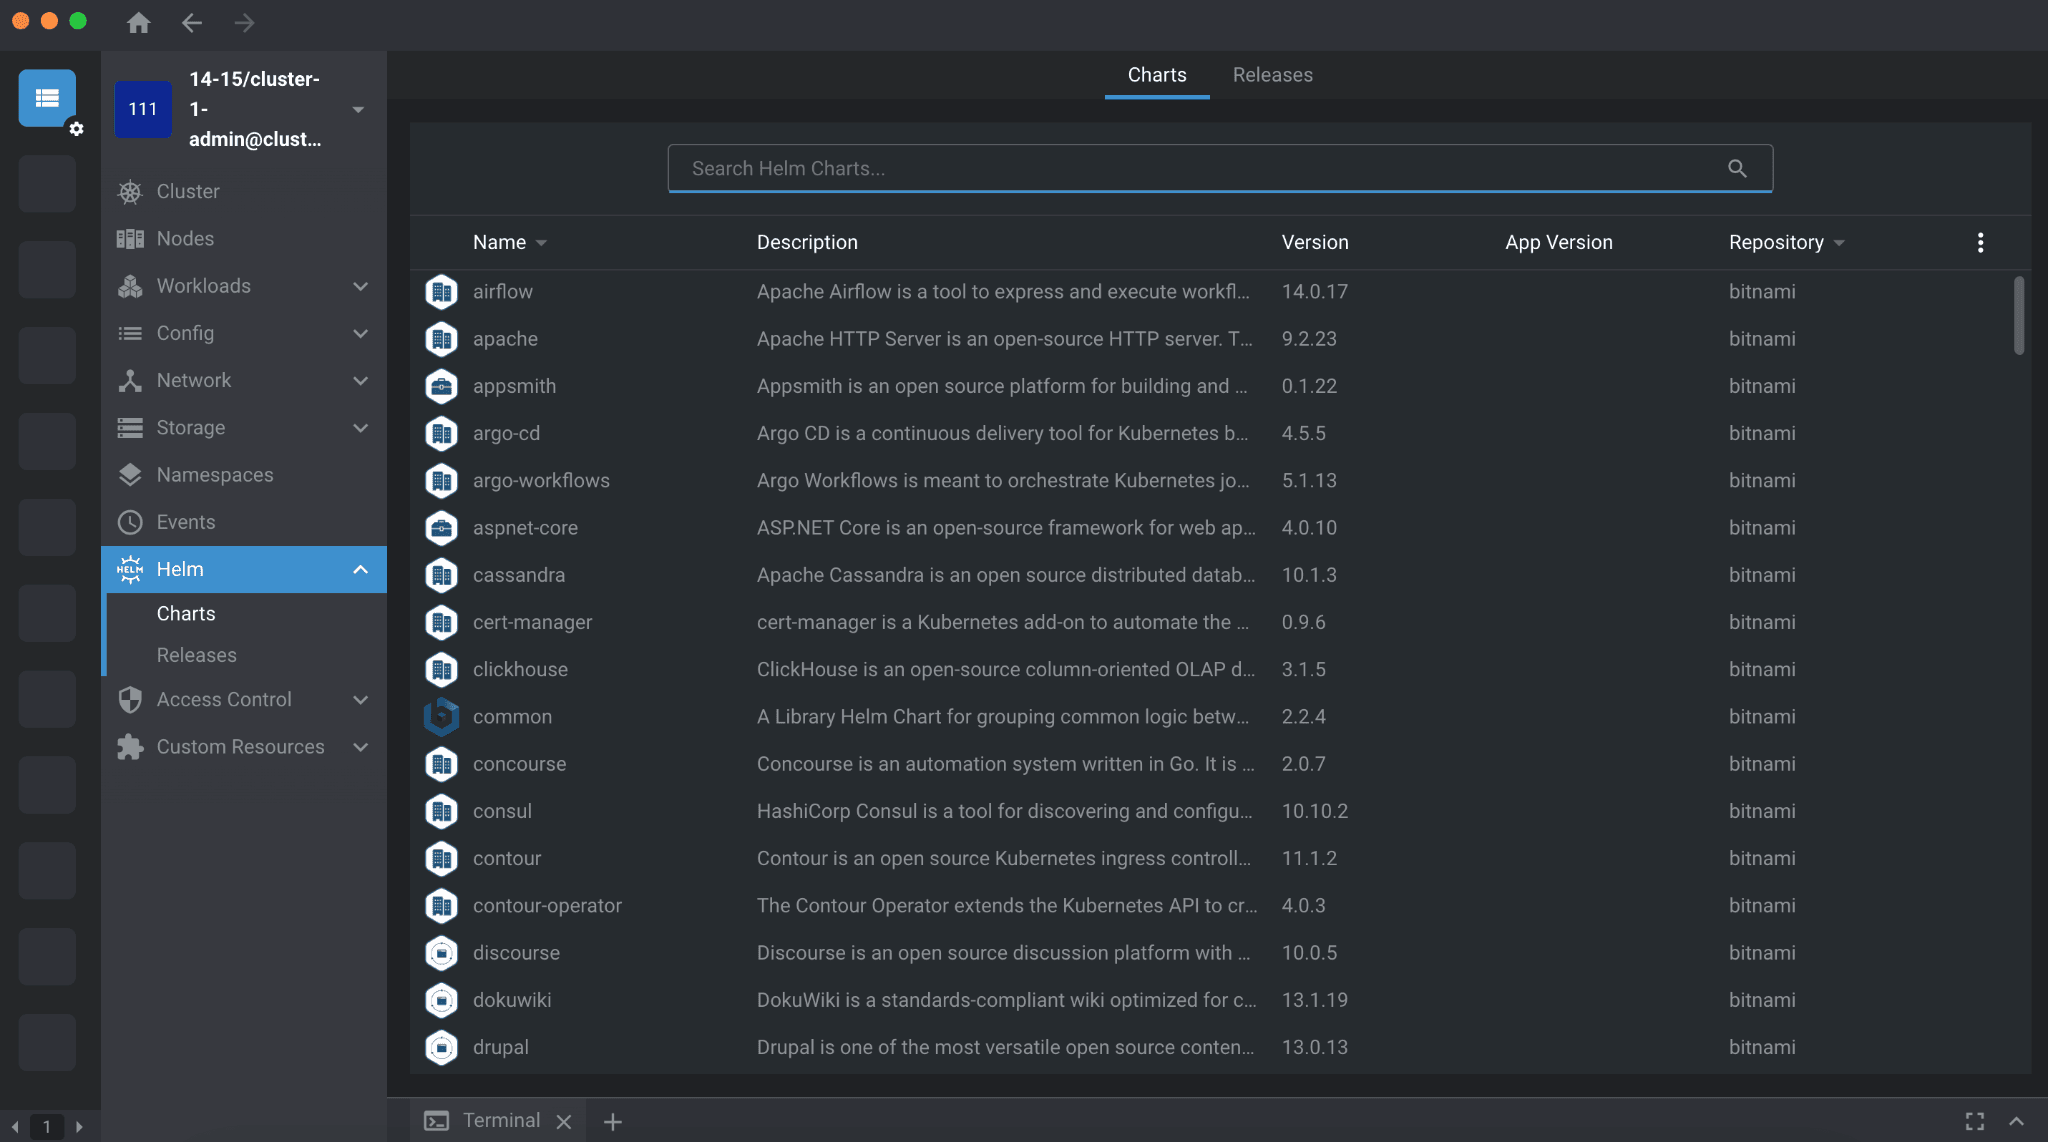
- In the Search bar, type “nginx” and find the nginx chart.
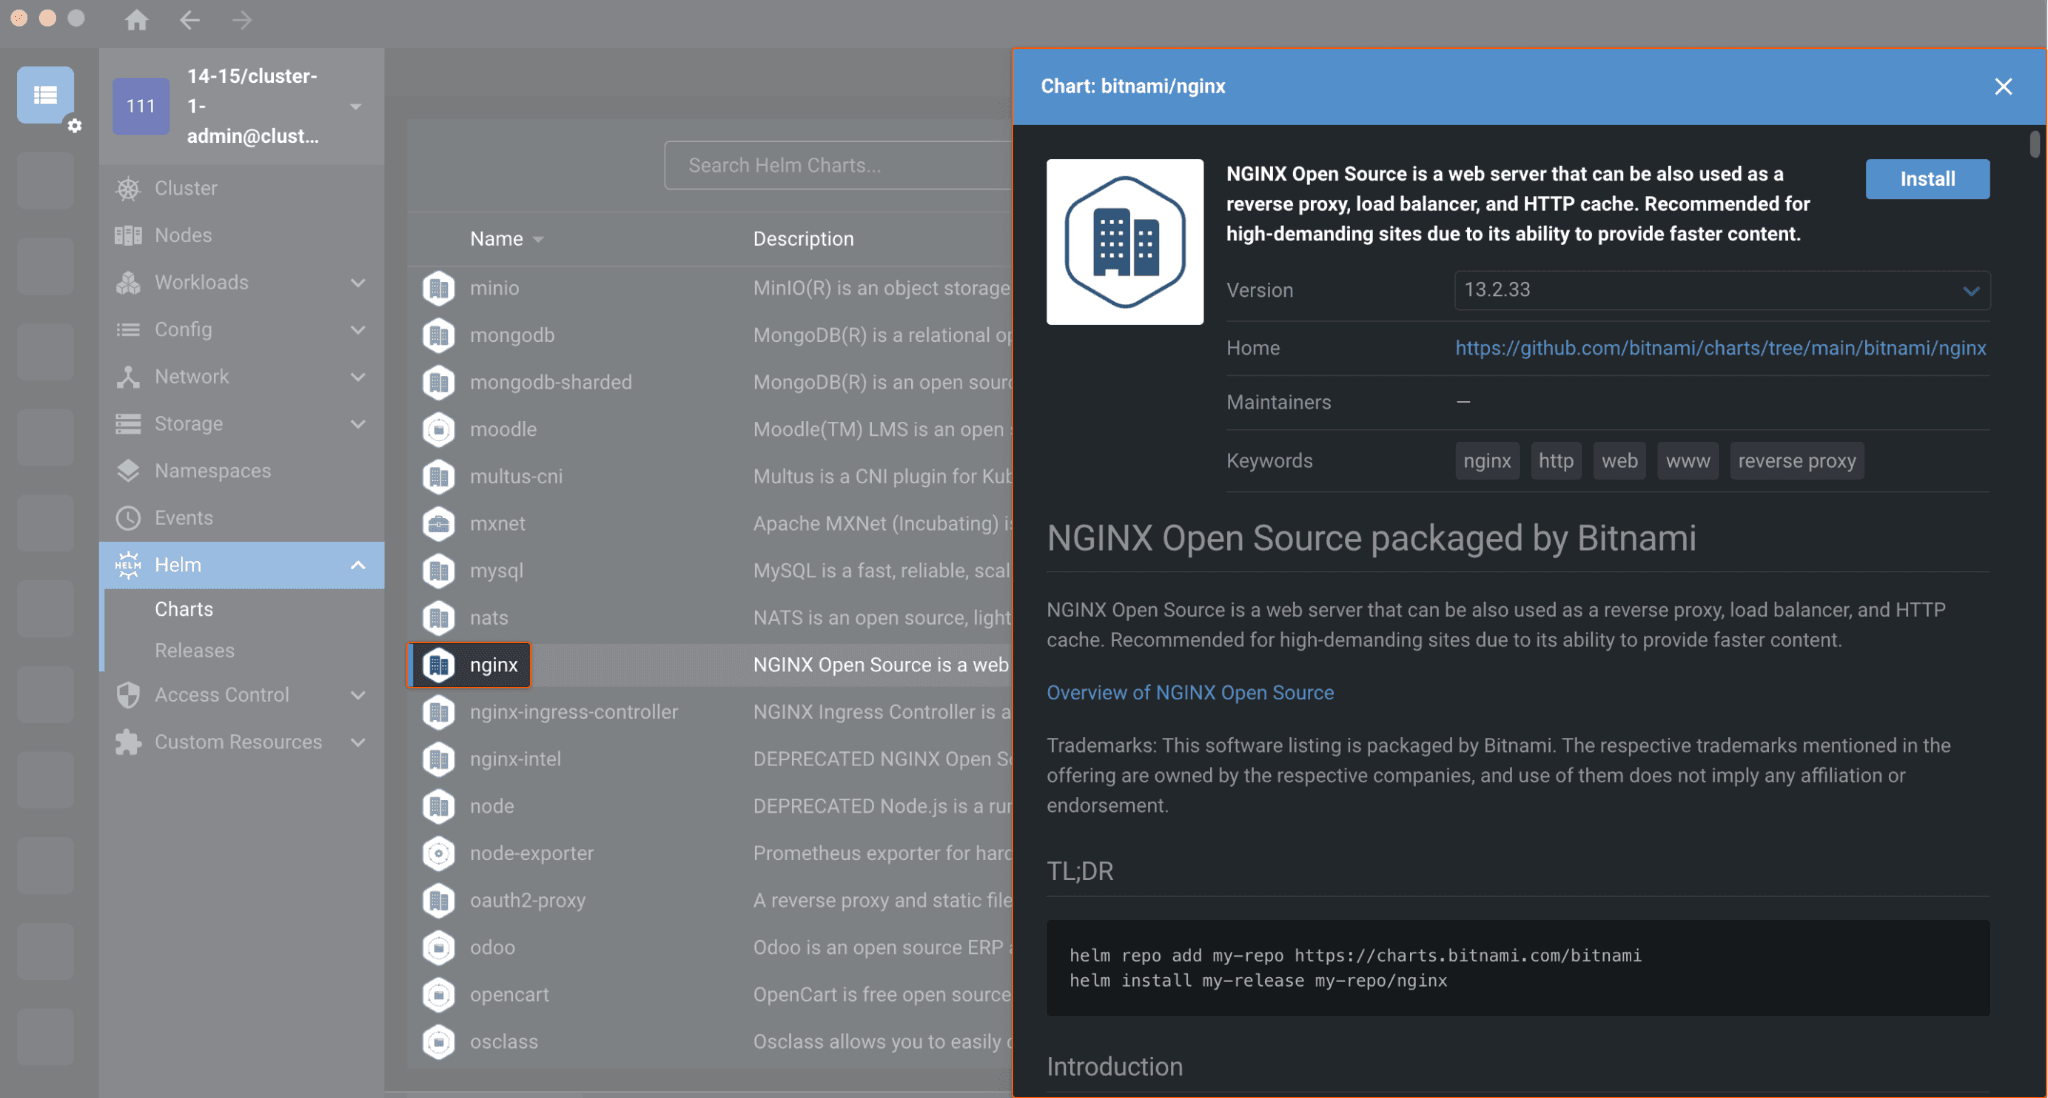
Click Install.
- In this editor window you can opt to change the chart’s parameters. This stage is optional; you can also simply use the default parameters.
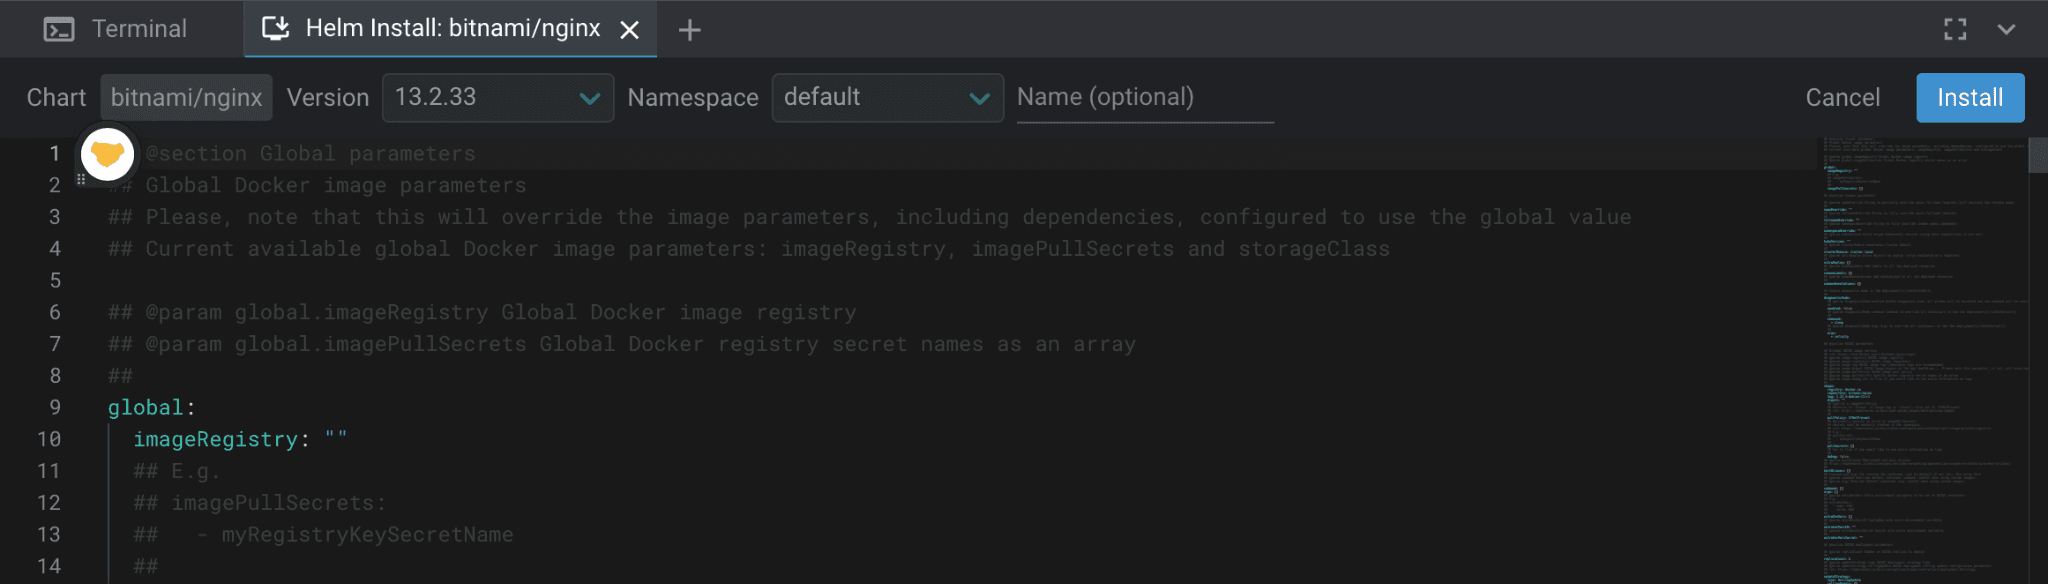
In the right corner of the window, click Install.
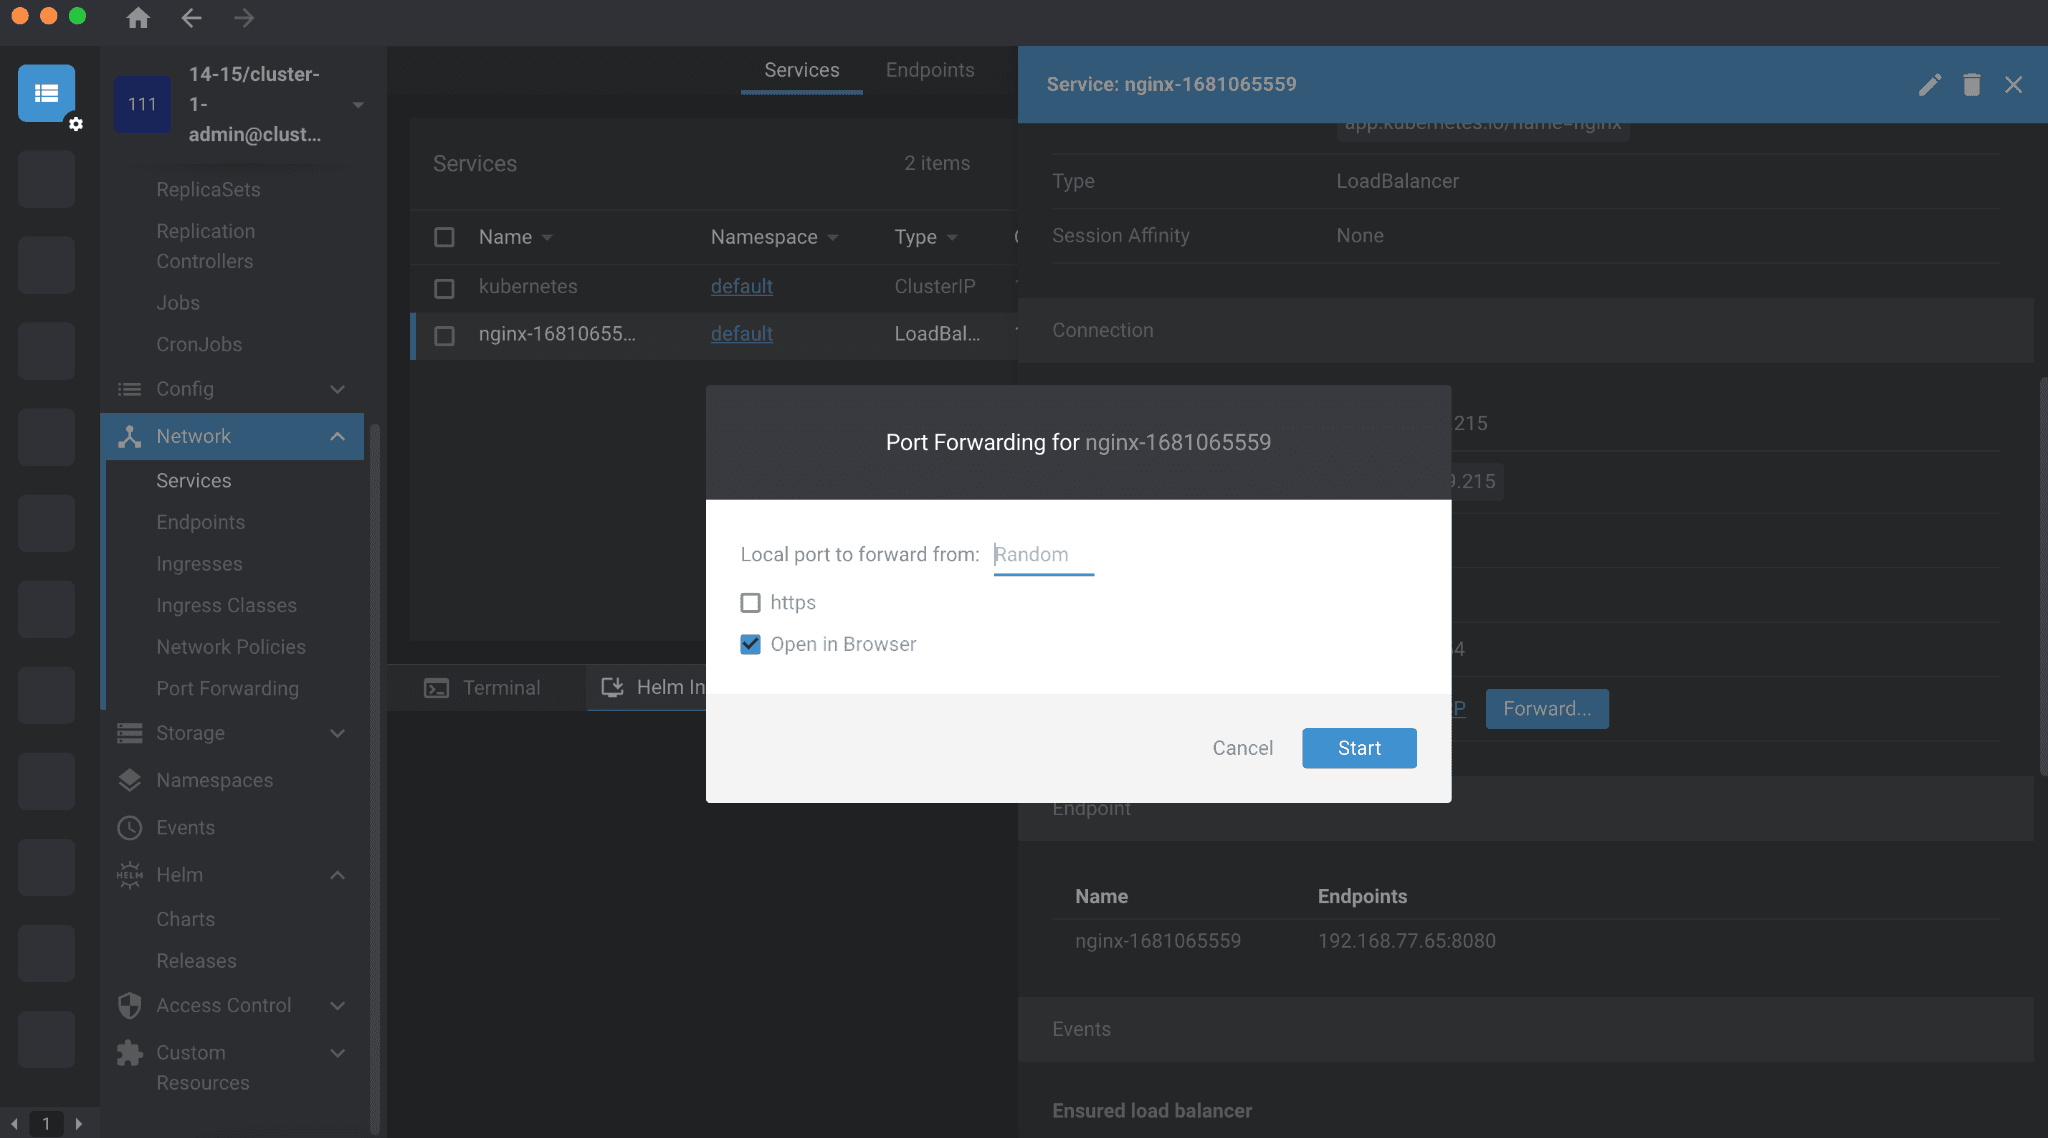
- You can also enable the load balancer to improve external connectivity and the fault tolerance of your nginx. In the “Network Services” page, go to the “Connection” section:
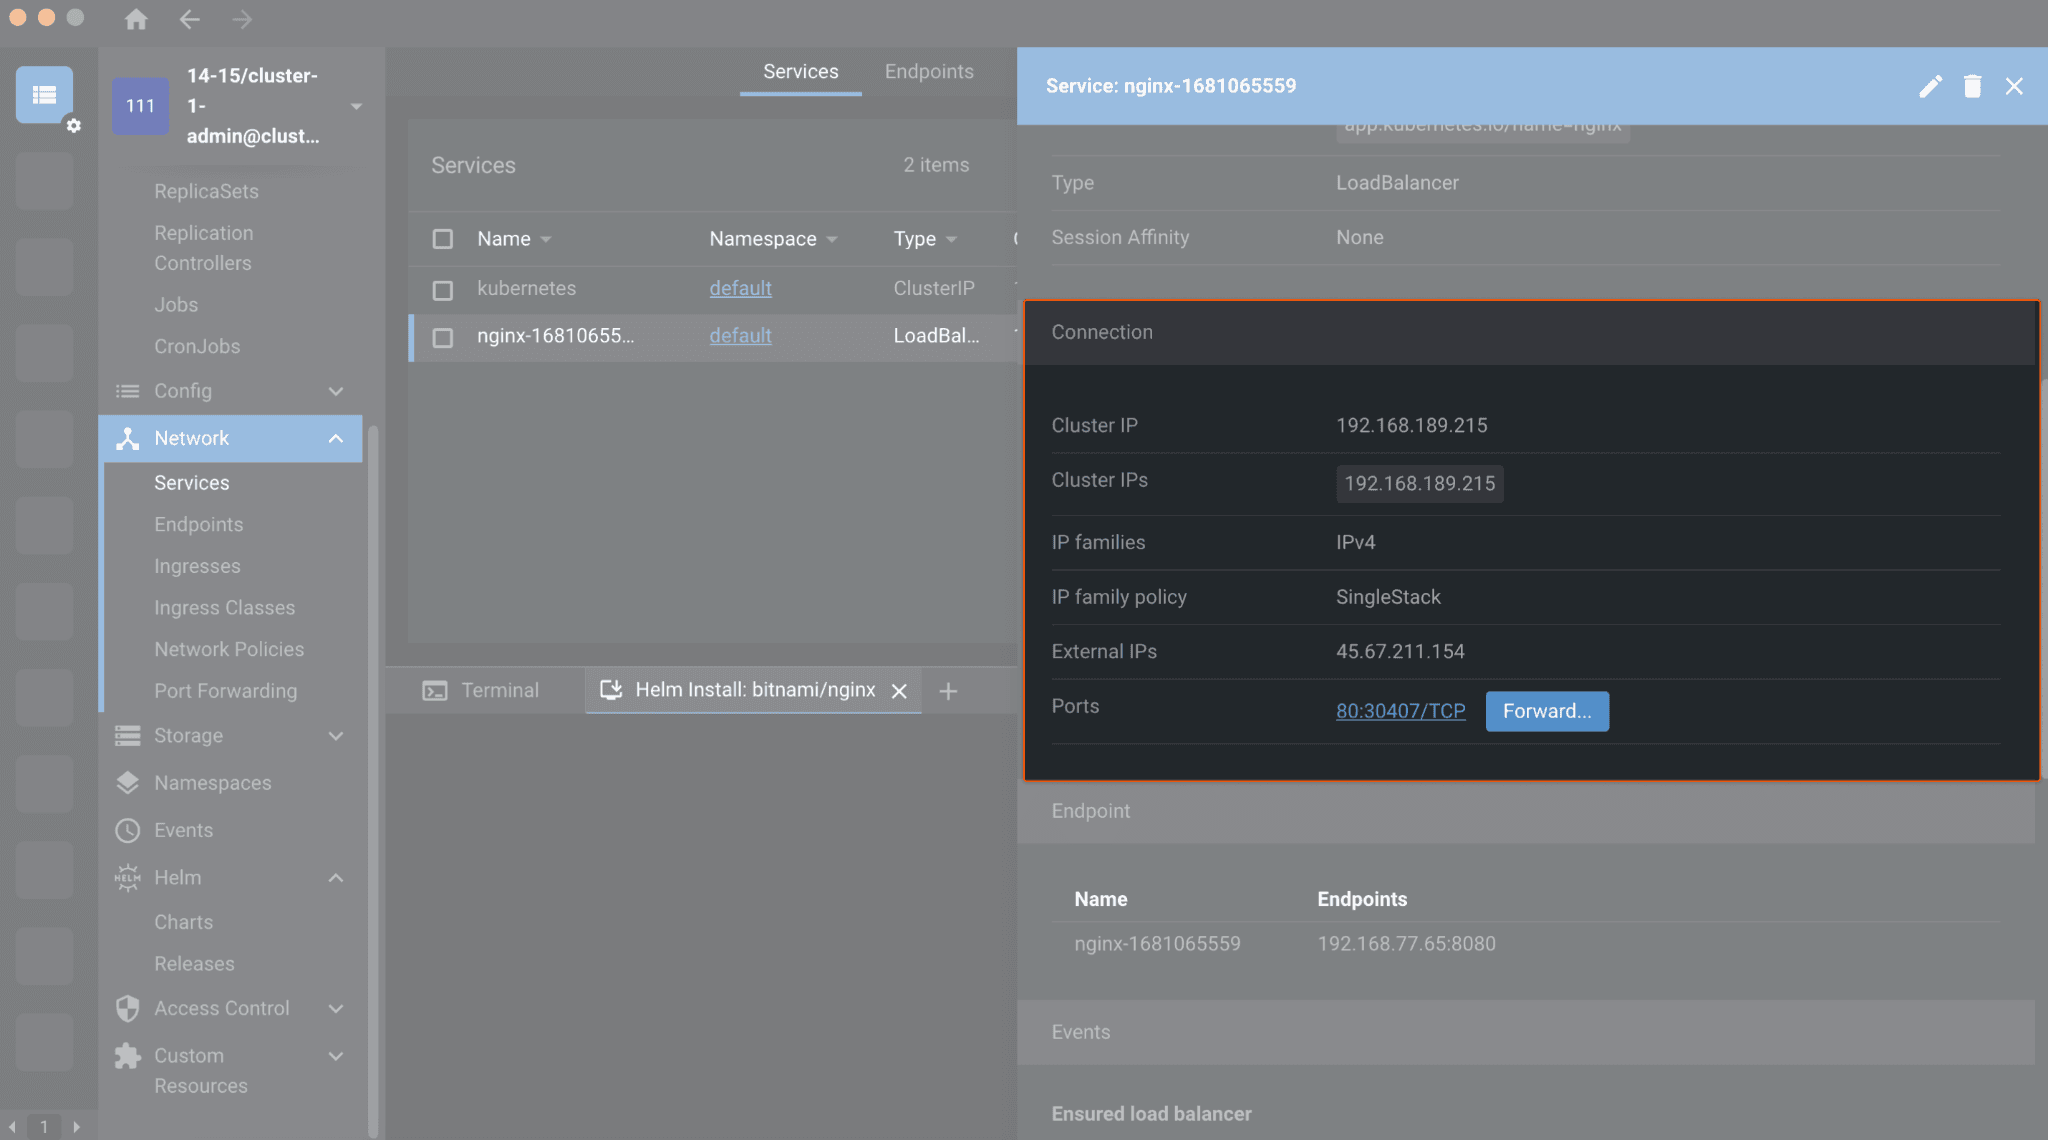
In the “Ports” field, click Forward to activate port forwarding and then click Start.
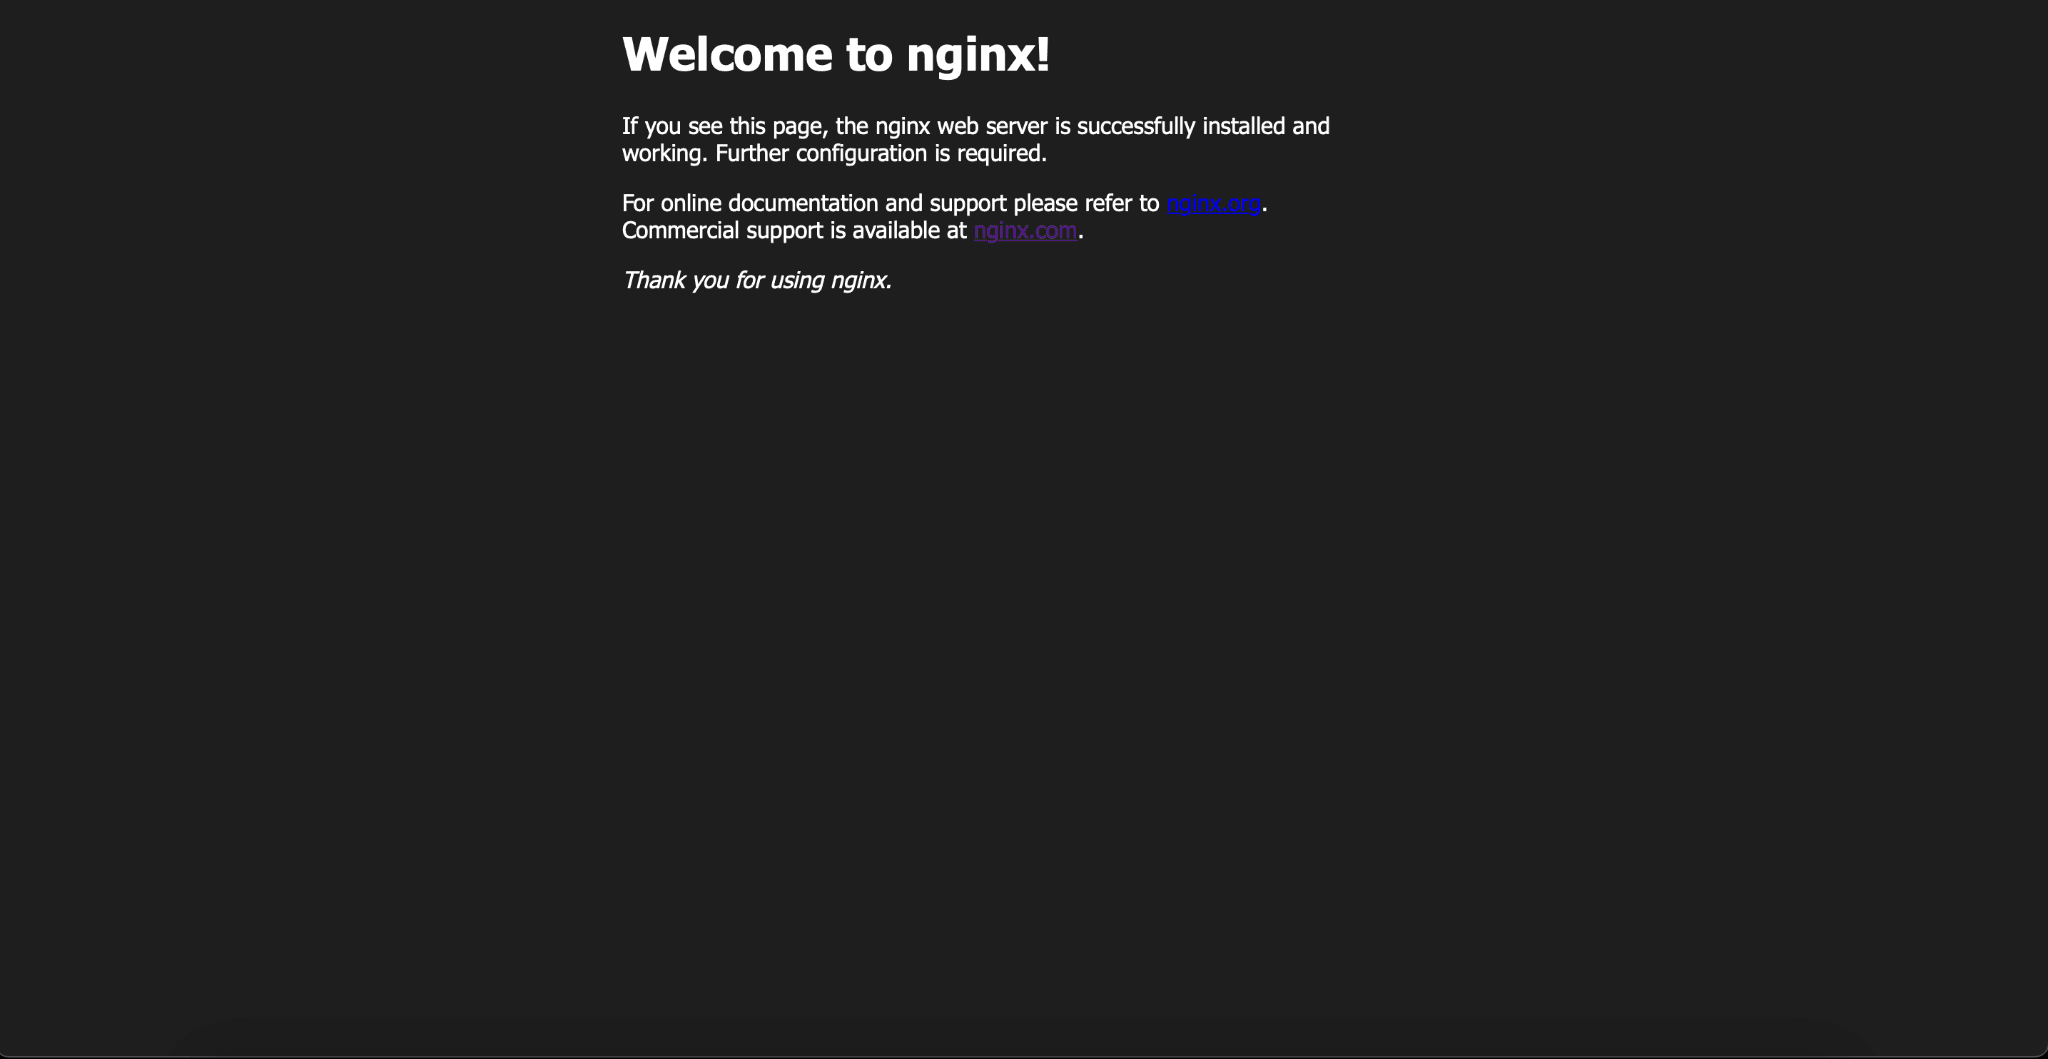
- To check if nginx is working, type the cluster’s external IP address in the address bar of your browser, as follows:
http://<external_ip_address>
For example:
http://45.67.211.154
Press Enter. Here’s what you’ll see:
Congratulations! You have successfully installed nginx via a Helm chart on Kubernetes.
Conclusion
In this tutorial, we explored how to install nginx on Kubernetes using a Helm chart and Gcore Managed Kubernetes. Check out our other articles dedicated to setting up different types of software on Gcore Cloud instances:

Related articles

As enterprises move AI from experimentation into production, they face a new infrastructure challenge. AI applications, models, and data are no longer confined to a single cloud or data center. Instead, they are distributed across multiple

Panels about AI sovereignty tend to follow a predictable arc. Someone invokes GDPR. Someone else mentions hyperscalers. A politician says something optimistic. Everyone applauds and goes home.Last week's Gcore AI panel in Luxembourg didn't
An interview with Alexey Shirobokov, CEO & Founder of Mission Space with Dima Maslennikov, Head of Startups at Gcore, recorded at House of Startups, Luxembourg. At Gcore, we work closely with startups building at the edge of deep t

Building a startup is tough. Every decision about your infrastructure can make or break your speed to market and burn rate. Your time, team, and budget are stretched thin. That’s why you need a partner that helps you scale without compromis
Europe’s cloud priorities are changing fast, and rightly so. With new regulations taking effect, concerns about jurisdictional control rising, and trust becoming a key differentiator, more companies are asking a simple question: Who really
Subscribe to our newsletter
Get the latest industry trends, exclusive insights, and Gcore updates delivered straight to your inbox.