Radar has landed - discover the latest DDoS attack trends. Get ahead, stay protected.Get the report
Under attack?

Products

Solutions

Resources

Partners

Why Gcore

  1. Home
  2. Developers
  3. What Is DNSSEC and Why Is It Important for Businesses?

What Is DNSSEC and Why Is It Important for Businesses?

  • By Gcore
  • February 9, 2024
  • 7 min read
What Is DNSSEC and Why Is It Important for Businesses?

DNSSEC (Domain Name System Security Extensions) is an extra layer of security for the DNS (Domain Name System) that ensures DNS requests aren’t spoofed. It provides cryptographic authentication to DNS data, which prevents users from being redirected to harmful web resources. This article explains why DNSSEC matters, what would happen without it, how it works, and how you can take advantage of it with Gcore to bolster your cybersecurity posture.

What Is DNSSEC?

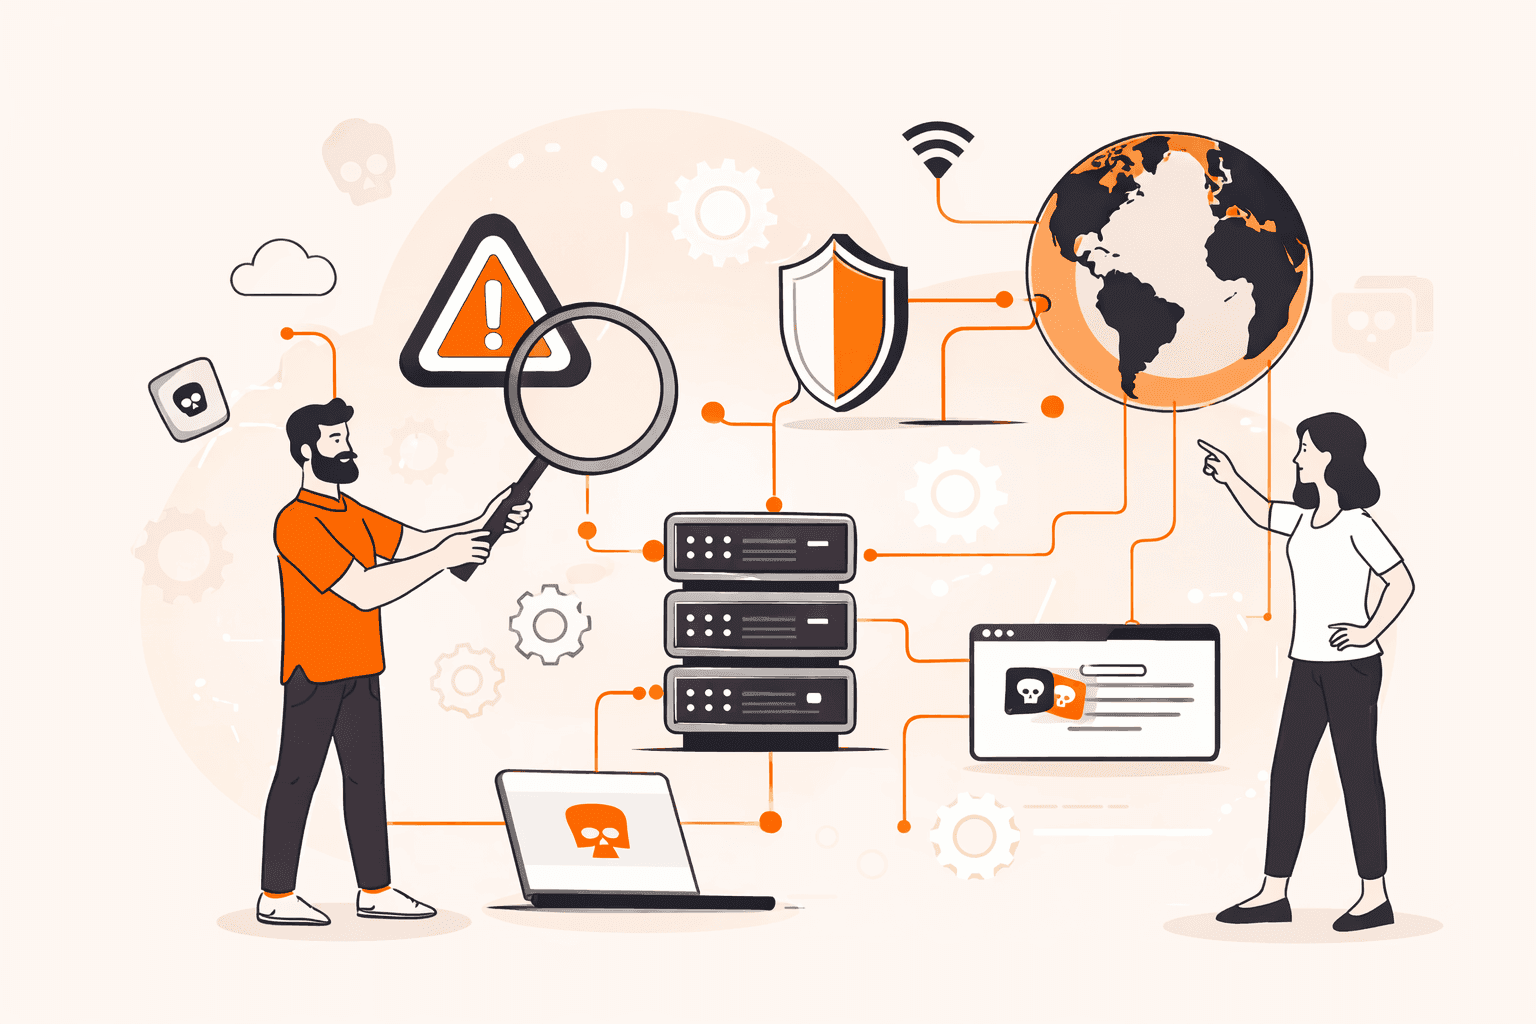
DNSSEC is an extension to DNS protocols that adds a layer of security to the DNS (Domain Name System) lookup and exchange processes to protect against attacks such as DNS spoofing, man-in-the-middle, data modification, or cache poisoning, which involve an attacker redirecting queries to a different domain. DNSSEC introduces digital signatures to the DNS data to authenticate the origin of the data and verify its integrity while in transit.

Even though DNS has been at the heart of the internet for decades, it took two decades for DNSSEC to be introduced by IETF (Internet Engineering Task Force) two decades later than DNS itself. It started to be applied on a broad scale in the mid-2000s but still lacks universal uptake.

Why Was DNSSEC Invented?

DNS was designed for the smaller networks of the early 1980s, so it lacks a built-in means of security and, when used as-is, is vulnerable to serious flaws. DNSSEC was introduced to address a specific DNS security flaw—its weak authentication system—reinforcing it with digital signatures based on public key cryptography. There exist other DNS security mechanisms to address different specific DNS issues, detailed in our dedicated DNS security article.

Regardless of the scale and nature of your web business, without addressing the vulnerabilities in the original DNS implementation, you remain vulnerable to attacks. Implementing DNSSEC on your DNS server adds a reliable layer of security, verifying that all received DNS data originates from legitimate sources. This significantly reduces the vulnerability of businesses to cyberattacks and also helps to maintain their reputation as reliable partners and service providers.

Who Needs DNSSEC?

DNSSEC is important for any organization or individual that wants to ensure the security and integrity of their DNS data. This includes:

  1. Internet service providers (ISPs) who want to ensure their customers are directed to the correct websites and not malicious ones.
  2. Businesses with an online presence that want to protect their websites from being hijacked by hackers.
  3. Government agencies and other organizations that handle sensitive information and want to prevent data leaks and cyberattacks.
  4. Internet users who want to ensure that the websites they visit are genuine and haven’t been tampered with. (Individual users browsing the internet don’t have direct control over DNSSEC, but instead rely on the ISPs, domain owners, and DNS operators to implement and manage DNSSEC.)

DNSSEC is important for anyone interested in maintaining the trustworthiness and security of internet communications. Everyone—from government agencies and famous enterprises to family businesses and individuals—can contribute to the internet’s security by making choices that support the implementation of DNSSEC.

What Security Breaches Can Happen Without DNSSEC?

Without DNSSEC, serious cybersecurity breaches can occur. The two most common ways hackers exploit DNS security problems are as follows:

1. Spoofing. Attackers can intercept communications between a recursive resolver and an authoritative server, sending fake DNS data to the resolver while spoofing the IP address of the source packet. This redirects users to a potentially harmful web resource.

For example, users might be led to a page that pretends to be a bank website, which could then capture the user’s bank access credentials, or steal passwords to social media accounts. The potential for harm in such attacks is virtually endless.

Figure 1: How spoofing can happen without DNSSEC

2. Cache poisoning. Dan Kaminsky’s bug refers to a significant security vulnerability related to DNS caching. DNS uses recursive resolvers (essentially, servers) to store responses from authoritative servers in their cache, speeding up responses when the same request is made again. However, the downside is that these servers might end up caching forged or false responses.

This vulnerability can result in web cache poisoning. When multiple users request the same DNS data, they might all get served with the fraudulent information that was cached. This incorrect information could remain in the cache for the duration of the TTL (time to live) of the forged DNS data.

Modern precautions like request port randomization and source address rotation make this type of attack harder to carry out, but it’s still possible without DNSSEC. DNSSEC verifies the authenticity of the data’s source, ensuring that the information received is indeed from the claimed source, mitigating this vulnerability.

These examples only scratch the surface of the potential dangers web service owners face due to DNS vulnerabilities when they’re not using DNSSEC, especially in environments lacking other add-on layers of security technologies like HTTPS and IPsec.

Interestingly, these breaches are exploited not only by hackers but also by officials in some countries. For example, cache poisoning is a method used in the implementation of China’s “Great Firewall.”

How Does DNSSEC Work?

DNSSEC works by solving the two fundamental problems of DNS mentioned in the previous section.

  1. It authenticates the origin of the DNS data, ensuring that data is received from a legitimate source.
  2. It ensures data integrity by verifying that the data has not been modified in transit.

At a higher level, the DNSSEC specifications can be split into three processes that together achieve these two important protections: data authentication, signature authentication, and authenticated denial of existence.

Figure 2: A schematic overview of DNSSEC

1. Authentication of DNS Data

The owner of a DNS zone generates a public and private key pair. The private key signs the DNS data, while the public key is openly published. Recursive resolvers retrieve the public key along with the DNS data, using it to verify that the data was signed by the corresponding private key. The process is similar to how HTTPS works, with the difference that the private key is used only to sign data, not to encrypt it.

Figure 3: How keys secure DNS data

This scheme solves two critical problems: data authentication and integrity checking. If the signature verification is successful, the data is considered legitimate and forwarded to the user. Otherwise, the data is discarded, and the resolver responds with an error code, stopping the potential attack.

2. Authentication of Signature

After the authenticity of the digital signature is confirmed, how can you be sure that the public key used for verification is also genuine and wasn’t falsified as a result of a man-in-the-middle attack?

DNS zones are nested within each other hierarchically. The hash of the public key (DS) of one DNS zone is signed by the private key of its parent zone, and served from the parent zone. For instance, gcore.com’s hash of public key is signed by the com zone’s private key. This creates a “chain of trust”—a  sequence of cryptographic keys each signed by another key. The public key of each DNS zone is authenticated by its respective parent zone’s key. The root zone, signed since July 2010, forms the first link in this chain and is widely trusted.

Figure 4: How the authenticity of digital signature is confirmed

3. Authenticated Denial of Existence

If someone requests a non-existent domain address, the response can also be falsified in order to lead the user into opening an infected web resource. DNSSEC this threat with a technology called “Hashed Authenticated Denial of Existence.”

DNSSEC adds a record to DNS data called NSEC, which stores all existing domain names in the zone in lexicographical (alphabetical) order. When a DNS resolver queries a DNSSEC-protected DNS server for a record that doesn’t exist, the server responds with an NSEC3 record. This record essentially says “There’s no record by the name you asked for, and here’s a cryptographic proof to show that I’m not lying.” The end user will be shown an error message, and the falsified response won’t work.

DNSSEC Downsides

While DNSSEC significantly improves the safety of DNS-related network components, it’s not a complete solution: some security problems remain beyond its scope. While DNSSEC presents certain downsides—lack of protection on the last mile and confidentiality, and performance demands, which increase maintenance costs—its implementation is a valuable investment. The enhanced network security it offers, despite the associated complexities, is crucial in protecting your business against cyber attacks.

Last Mile Problem

One important aspect of DNSSEC implementation is that it resides on resolvers and is not able to verify data integrity from the resolver to the end user; the so-called “last mile.” Consequently, DNSSEC doesn’t protect the user if, for example, hackers break into their home network router and alter its DNS cache.

Figure 5: Attackers can still manipulate DNS data since DNSSEC isn’t a comprehensive approach

Lack of Confidentiality

This is not strictly a flaw, but DNSSEC doesn’t ensure user privacy. While it digitally signs and verifies DNS data, it does not encrypt it. This means a man-in-the-middle could still access a user’s DNS records. Other security protocols, like DNS-over-TLS and DNS-over-HTTPS, were designed to address DNS privacy concerns.

Figure 6: DNSSEC digitally signs and verifies DNS data, but it doesn’t encrypt it.

Performance Considerations

DNSSEC requires careful implementation with due consideration given to performance. The security mechanism consumes additional resources, and, unless properly managed, can lead to increased latency and decreased throughput.

The three primary ways DNSSEC can impact performance are:

  • Computational load: The implementation of DNSSEC involves key generation, data signing, and signature validation, all of which demand significant computational resources due to the intensive nature of cryptographic operations.
  • Storage requirements: Compared to the DNS cache without DNSSEC, the system with DNSSEC enabled requires additional data storage because signed DNS data occupies more cache space, and public keys also require caching.
  • Network traffic: DNSSEC increases network traffic because servers need to exchange cryptographic keys.

Together, these three factors impose additional hardware costs and increased maintenance demands.

How to Use DNSSEC with Gcore

Gcore’s DNS service alleviates the administrative burden of operating your own DNS server and provides essential security measures to counter DNS security vulnerabilities. It supports DNSSEC and also ensures that all recursive resolvers involved in domain resolution use DNSSEC. This comprehensive approach addresses every aspect of DNS security.

Don’t take Gcore’s approach for granted. For DNSSEC to work effectively, it must be implemented across all levels of DNS. While authoritative name servers now support DNSSEC, its overall adoption remains slow, and not all third-party DNS servers are compatible. Increased hardware requirements and maintenance costs can make managing a DNS server challenging. Choosing a provider with a thorough approach is essential for effective DNS security.

Conclusion

DNS is at the heart of the internet, which today means it’s a target for malicious cyberattacks that have the potential to cause serious financial and reputational damage. While it doesn’t guarantee complete DNS security, DNSSEC is one crucial element in securing the internet. While it’s widely recognized that secure networks depend on secure DNS, the slow adoption of DNSSEC suggests we’re still far from a fully secure internet.

Gcore implements DNSSEC at all DNS levels for comprehensive protection. Protect yourself from malicious actors who seek to redirect users to harmful sites and compromise or falsify your data with Gcore DNS. We offer a free-forever plan as well as advanced options, all based on our network of 160+ Anycast servers, strategically located on six continents for blazing-fast performance no matter where you’re located.

Get secure DNS

Related articles

What are captions and subtitles, and how do they work?

Subtitles and captions are essential to consuming video content today. But how do they work behind the scenes?Creating subtitles and captions involves a five-step process to ensure that your video’s spoken and auditory content is accurately and effectively conveyed. The five steps are transcription, correction, synchronization/spotting, translation, and simulation/display on screen.The whole process is usually managed using specialized subtitle or caption creator software.In this blog, we explain the five steps in more detail, what the end user sees, and how to choose the right caption/subtitle service for your needs.Step 1: TranscriptionSpoken content is transformed into a text-based format. Formats are different ways to implement the textual elements, depending on technical needs.Transcription creates the raw materials that will be refined in stages 2–4.Step 2: CorrectionCorrection enhances readability by improving the textual flow. Punctuation, grammar, and sentence structure are adjusted so that the user’s reading experience is seamless and doesn’t detract from the content.Step 3: Synchronization/spottingNext, the text and audio are aligned precisely. Each caption or subtitle’s timing is adjusted so it appears and disappears at the correct moment.Step 4: TranslationTranslation is required for content intended for consumption in multiple languages. During this stage, it’s important to consider format requirements and character limitations. For example, a caption that fits on two lines in English might require three in Spanish, and so in Spanish, one caption becomes two. As a result, additional synchronization might be necessary.Step 5: Simulation/display on screenFinally, the captions or subtitles need to be integrated onto the end user’s screen. Formatting issues might arise at this stage, requiring tweaks for an optimal user experience.How does the end user see subtitles and captions?After the technical process of creating captions and subtitles, the next step is understanding how these elements appear to the end user. The type of captions you choose can greatly impact the user experience, especially when considering accessibility, engagement, and clarity. Below, we break down the different options available and how they serve different viewing scenarios.Open captions: These are always visible to viewers and are a fixed part of the video. They’re popular, for example, for video installations in museums and employee training videos—cases where maximum accessibility is the key consideration when it comes to captions and/or subtitles.Closed captions: Viewers can turn these on or off based on preference. For instance, an online course might offer this feature, allowing learners to choose how to consume the content. Students could opt temporarily to turn on closed captions to note the spelling of a new term introduced during the course.Real-time captions: These are great for live events like webinars, where the text appears almost simultaneously as the words are spoken. They keep the audience engaged in real time without missing out on crucial points. For example, ambient noise like chatter in a sports bar might obscure commentary on a live TV basketball game. Real-time captions allow viewers to benefit from near-live commentary regardless of the bar’s noise levels or if the TV’s sound is muted.Burned-in subtitles: These are etched onto the video and cannot be turned off. A promotional video targeting a multilingual audience might use this feature so that everyone understands the message, regardless of their language preference.What to look for in captioning and subtitling servicesTo deliver high-quality captions and subtitles, it's important to choose a provider that offers key features for accuracy, efficiency, and audience engagement.Original language transcription: Accurate documentation of every spoken word in your video for unrivaled accuracy.Tailored translation: Localized content that integrates translations with cultural relevance, increasing resonance with diverse audiences.Alignment synchronization: Time-annotated subtitles, matching words perfectly to the on-screen action.Automatic SRT file generation: A simplified subtitling and captioning process through effortless file creation for a better user experience.Transform your videos with cutting-edge captions and subtitles from GcoreNo matter your video content needs, it’s essential to be aware of the best type of captions and subtitles for your audience’s needs. Choosing the right format ensures a smoother viewing experience, better accessibility, and stronger engagement across every platform.Gcore Video Streaming offers subtitles and closed captions to enhance users’ experience. Each feature within the subtitling and captioning toolkit is crafted to expand your video content’s reach and impact, catering to a multitude of use cases. Embedding captions is quick and easy, and AI-automated speech recognition also saves you time and money.Try Gcore's automated subtitle and caption solution for free

Why captions and subtitles are essential for video engagement

From TikToks on silent commutes to training videos in noisy offices, silent viewing is now standard. Captions and subtitles aren’t just accessibility features anymore. They’re essential for user engagement, global reach, and video performance.This article explores why captions and subtitles matter and how they boost engagement with your videos, providing a better user experience for your audience. If you want to know how captions and subtitles work, we’ve got an article for that too.How subtitles and captions improve your video performanceSubtitles are now widely used across platforms and age groups. For many younger viewers, reading along while watching is second nature, especially on social media. For others, subtitles are a practical solution: watching videos in public spaces, scrolling during breaks, or learning on the go—all without needing sound.Captions offer tangible benefits across four key areas:Engagement and comprehension: Improve clarity in movies, boost understanding in online courses, and increase focus in business content.Accessibility and inclusion: Make content available to hard-of-hearing users and break language barriers for global audiences.SEO and discoverability: Search engines can crawl subtitle text, making your video content more findable, even when autoplayed without sound.Silent usability: Your content works in all environments, from crowded trains to quiet offices.Captions have shifted from niche to norm, helping creators reach more people, boost retention, and deliver clearer messages.Common challenges and their solutionsImplementing captions at scale poses three major challenges: cost, delay, and accuracy. Here's why these challenges exist and how Gcore Video Streaming can help you overcome them at the click of a button.CostInvesting in high-quality transcriptions can be a financial burden, especially for smaller players in online education. Specialized expertise is required for accurate educational content, and human oversight adds ongoing labor costs. Transcription is a recurring expense that grows with multiple languages or regulatory compliance.Gcore scalable AI-powered transcription services reduce reliance on costly manual processes, offering affordable, multi-language support with built-in compliance features, making transcription cost-effective for all budgets.Delay/latencyIn live events, even slight delays in captioning can disengage audiences. For example, in a Formula One race, missing real-time commentary on pit stops or track conditions can leave viewers confused or frustrated. Lagging captions fail to keep pace with the action, breaking immersion.Real-time AI ASR (automatic speech recognition) from Gcore minimizes captioning delay, so that live captions sync perfectly with events, keeping viewers fully engaged without lag.AccuracyA small text error in captions can distort the message and harm reputation. Errors in MOOCs or corporate webinars risk undermining credibility and discouraging future participation. Precision is critical to maintain trust and clarity.Gcore leverages advanced AI models fine-tuned for domain-specific vocabulary and includes automated quality checks, drastically reducing errors and preserving message integrity across all video content.Enhance your video content with Gcore AI-powered caption and subtitles toolsCaptions are now a strategic content layer, not just an accessibility checkbox. With video now the dominant format across marketing, education, and entertainment, it's critical to implement captions efficiently, affordably, and at scale.Gcore’s AI-powered Video Streaming lets you generate accurate, real-time captions across multiple languages with minimal developer effort. Built-in AI ASR (automatic speech recognition) means your captions stay synchronized even during fast-paced live events. Whether you’re running an LMS, hosting global events, or publishing OTT content, Gcore Video Streaming helps you scale captions with speed and precision.Request a demo of Gcore AI ASR

How to cut egress costs and speed up delivery using Gcore CDN and Object Storage

If you’re serving static assets (images, videos, scripts, downloads) from object storage, you’re probably paying more than you need to, and your users may be waiting longer than they should.In this guide, we explain how to front your bucket with Gcore CDN to cache static assets, cut egress bandwidth costs, and get faster TTFB globally. We’ll walk through setup (public or private buckets), signed URL support, cache control best practices, debugging tips, and automation with the Gcore API or Terraform.Why bother?Serving directly from object storage hits your origin for every request and racks up egress charges. With a CDN in front, cached files are served from edge—faster for users, and cheaper for you.Lower TTFB, better UXWhen content is cached at the edge, it doesn’t have to travel across the planet to get to your user. Gcore CDN caches your assets at PoPs close to end users, so requests don’t hit origin unless necessary. Once cached, assets are delivered in a few milliseconds.Lower billsMost object storage providers charge $80–$120 per TB in egress fees. By fronting your storage with a CDN, you only pay egress once per edge location—then it’s all cache hits after that. If you’re using Gcore Storage and Gcore CDN, there’s zero egress fee between the two.Caching isn’t the only way you save. Gcore CDN can also compress eligible file types (like HTML, CSS, JavaScript, and JSON) on the fly, further shrinking bandwidth usage and speeding up file delivery—all without any changes to your storage setup.Less origin traffic and less data to transfer means smaller bills. And your storage bucket doesn’t get slammed under load during traffic spikes.Simple scaling, globallyThe CDN takes the hit, not your bucket. That means fewer rate-limit issues, smoother traffic spikes, and more reliable performance globally. Gcore CDN spans the globe, so you’re good whether your users are in Tokyo, Toronto, or Tel Aviv.Setup guide: Gcore CDN + Gcore Object StorageLet’s walk through configuring Gcore CDN to cache content from a storage bucket. This works with Gcore Object Storage and other S3-compatible services.Step 1: Prep your bucketPublic? Check files are publicly readable (via ACL or bucket policy).Private? Use Gcore’s AWS Signature V4 support—have your access key, secret, region, and bucket name ready.Gcore Object Storage URL format: https://<bucket-name>.<region>.cloud.gcore.lu/<object> Step 2: Create CDN resource (UI or API)In the Gcore Customer Portal:Go to CDN > Create CDN ResourceChoose "Accelerate and protect static assets"Set a CNAME (e.g. cdn.yoursite.com) if you want to use your domainConfigure origin:Public bucket: Choose None for authPrivate bucket: Choose AWS Signature V4, and enter credentialsChoose HTTPS as the origin protocolGcore will assign a *.gcdn.co domain. If you’re using a custom domain, add a CNAME: cdn.yoursite.com CNAME .gcdn.co Here’s how it works via Terraform: resource "gcore_cdn_resource" "cdn" { cname = "cdn.yoursite.com" origin_group_id = gcore_cdn_origingroup.origin.id origin_protocol = "HTTPS" } resource "gcore_cdn_origingroup" "origin" { name = "my-origin-group" origin { source = "mybucket.eu-west.cloud.gcore.lu" enabled = true } } Step 3: Set caching behaviorSet Cache-Control headers in your object metadata: Cache-Control: public, max-age=2592000 Too messy to handle in storage? Override cache logic in Gcore:Force TTLs by path or extensionIgnore or forward query strings in cache keyStrip cookies (if unnecessary for cache decisions)Pro tip: Use versioned file paths (/img/logo.v3.png) to bust cache safely.Secure access with signed URLsWant your assets to be private, but still edge-cacheable? Use Gcore’s Secure Token feature:Enable Secure Token in CDN settingsSet a secret keyGenerate time-limited tokens in your appPython example: import base64, hashlib, time secret = 'your_secret' path = '/videos/demo.mp4' expires = int(time.time()) + 3600 string = f"{expires}{path} {secret}" token = base64.urlsafe_b64encode(hashlib.md5(string.encode()).digest()).decode().strip('=') url = f"https://cdn.yoursite.com{path}?md5={token}&expires={expires}" Signed URLs are verified at the CDN edge. Invalid or expired? Blocked before origin is touched.Optional: Bind the token to an IP to prevent link sharing.Debug and cache tuneUse curl or browser devtools: curl -I https://cdn.yoursite.com/img/logo.png Look for:Cache: HIT or MISSCache-ControlX-Cached-SinceCache not working? Check for the following errors:Origin doesn’t return Cache-ControlCDN override TTL not appliedCache key includes query strings unintentionallyYou can trigger purges from the Gcore Customer Portal or automate them via the API using POST /cdn/purge. Choose one of three ways:Purge all: Clear the entire domain’s cache at once.Purge by URL: Target a specific full path (e.g., /images/logo.png).Purge by pattern: Target a set of files using a wildcard at the end of the pattern (e.g., /videos/*).Monitor and optimize at scaleAfter rollout:Watch origin bandwidth dropCheck hit ratio (aim for >90%)Audit latency (TTFB on HIT vs MISS)Consider logging using Gcore’s CDN logs uploader to analyze cache behavior, top requested paths, or cache churn rates.For maximum savings, combine Gcore Object Storage with Gcore CDN: egress traffic between them is 100% free. That means you can serve cached assets globally without paying a cent in bandwidth fees.Using external storage? You’ll still slash egress costs by caching at the edge and cutting direct origin traffic—but you’ll unlock the biggest savings when you stay inside the Gcore ecosystem.Save money and boost performance with GcoreStill serving assets direct from storage? You’re probably wasting money and compromising performance on the table. Front your bucket with Gcore CDN. Set smart cache headers or use overrides. Enable signed URLs if you need control. Monitor cache HITs and purge when needed. Automate the setup with Terraform. Done.Next steps:Create your CDN resourceUse private object storage with Signature V4Secure your CDN with signed URLsCreate a free CDN resource now

How do CDNs work?

Picture this: A visitor lands on your website excited to watch a video, buy an item, or explore your content. If your page loads too slowly, they may leave before it even loads completely. Every second matters when it comes to customer retention, engagement, and purchasing patterns.This is where a content delivery network (CDN) comes in, operating in the background to help end users access digital content quickly, securely, and without interruption. In this article, we’ll explain how a CDN works to optimize the delivery of websites, applications, media, and other online content, even during high-traffic spikes and cyberattacks. If you’re new to CDNs, you might want to check out our introductory article first.Key components of a CDNA CDN is a network of interconnected servers that work together to optimize content delivery. These servers communicate to guarantee that data reaches users as quickly and efficiently as possible. The core of a CDN consists of globally distributed edge servers, also known as points of presence (PoPs):Origin server: The central server where website data is stored. Content is distributed from the origin to other servers in the CDN to improve availability and performance.Points of presence (PoPs): A globally distributed network of edge servers. PoPs store cached content—pre-saved copies of web pages, images, videos, and other assets. By serving cached content from the nearest PoP to the user, the CDN reduces the distance data needs to travel, improving load times and minimizing strain on the origin server. The more PoPs a network has, the faster content is served globally.How a CDN delivers contentCDNs rely on edge servers to store content in a cache, enabling faster delivery to end users. The delivery process differs depending on whether the content is already cached or needs to be fetched from the origin server.A cache hit occurs when the requested content is already stored on a CDN’s edge server. Here’s the process:User requests content: When a user visits a website, their device sends a request to load the necessary content.Closest edge server responds: The CDN routes the request to the nearest edge server to the user, minimizing travel time.Content delivered: The edge server delivers the cached content directly to the user. This is faster because:The distance between the user and the server is shorter.The edge server has already optimized the content for delivery.What happens during a cache miss?A cache miss occurs when the requested content is not yet stored on the edge server. In this case, the CDN fetches the content from the origin server and then updates its cache:User requests content: The process begins when a user’s device sends a request to load website content.The closest server responds: As usual, the CDN routes the request to the nearest edge server.Request to the origin server: If the content isn’t cached, the CDN fetches it from the origin server, which houses the original website data. The edge server then delivers it to the user.Content cached on edge servers: After retrieving the content, the edge server stores a copy in its cache. This ensures that future requests for the same content can be delivered quickly without returning to the origin server.Do you need a CDN?Behind every fast, reliable website is a series of split-second processes working to optimize content delivery. A CDN caches content closer to users, balances traffic across multiple servers, and intelligently routes requests to deliver smooth performance. This reduces latency, prevents downtime, and strengthens security—all critical for businesses serving global audiences.Whether you’re running an e-commerce platform, a streaming service, or a high-traffic website, a CDN ensures your content is delivered quickly, securely, and without interruption, no matter where your users are or how much demand your site experiences.Take your website’s performance to the next level with Gcore CDN. Powered by a global network of over 180+ points of presence, our CDN enables lightning-fast content delivery, robust security, and unparalleled reliability. Don’t let slow load times or security risks hold you back. Contact our team today to learn how Gcore can elevate your online presence.Discover Gcore CDN

What is a CDN?

Whether you’re running an e-commerce store, streaming videos, or managing an app, delivering content quickly and reliably is essential to keeping users satisfied. This is where a content delivery network (CDN) comes into play. A CDN is a globally distributed network of servers that work together to deliver content to users quickly, minimizing latency. Instead of relying on a single server, a CDN uses edge servers—called points of presence (PoPs)—to cache or temporarily store copies of your content closer to the user. This optimizes website performance, drastically cuts down on load times, and improves the user experience. Research suggests that a one-second lag in page loading speed can significantly decrease engagement, citing a 7% decline in conversions and an 11% decrease in page visits. CDNs considerably speed up load times by reducing latency through content caching closer to the user. By splitting up your website’s traffic over several servers, CDNs also protect it from online threats. Distributed denial-of-service (DDoS) attacks are lessened by CDNs because they spread traffic among a network of servers, improving security and availability. What Challenges Do CDNs Address?CDNs tackle two key challenges to improve website and application performance: Slow load times: Users sometimes experience frustratingly slow-loading websites and applications. This is because data must travel from a server to the end user’s device, causing latency. CDNs move servers closer to end users, reducing the distance that data has to travel and speeding up load times.  High traffic volumes: High traffic volumes during peak times or cyberattacks can overwhelm your website and lead to latency or site unavailability. Since CDNs distribute traffic across multiple servers, no single server is overwhelmed. This helps prevent crashes and delivers smooth performance for all users.Common Use Cases for CDNsCDNs are vital across a range of industries, providing measurable improvements in content delivery and user experience. E-commerce websites use CDNs to guarantee quick page loading and frictionless shopping experiences, even during periods of high traffic. Speed is crucial for online businesses. A study found that the average cost of downtime for e-commerce websites is around $500,000 per hour. This includes lost sales, operational costs, and long-term damage to brand reputation Streaming services rely on CDNs to deliver high-quality video content while minimizing buffering. Netflix states that its CDN contributes to the daily delivery of over 125 million hours of streaming content, guaranteeing a seamless experience for customers worldwide. Gaming companies use CDNs to lower latency and provide a consistent real-time user experience, especially during live multiplayer matches, where it is essential to preserve an engaging and fair gameplay experience. News outlets and blogs benefit from CDNs by ensuring their content loads quickly for readers around the world, during large-scale traffic surges, especially during major events like elections or breaking news.  The Benefits of a CDNFaster Website PerformanceEvery second counts when delivering content online. Slow websites frustrate users and harm your business. CDNs speed up content delivery by caching data closer to users, reducing page and file load times. Whether you’re delivering static content (such as CSS, HTML or JPG files) or dynamic content (like data generated by user interactions or API calls), a CDN ensures optimal performance regardless of user location. While factors like DNS settings, server configurations, and code optimization all play a role, the physical distance between your origin server and your users is a factor that only a CDN can solve. Increased Availability and ReliabilityDowntime can seriously affect online businesses. Hardware failures, traffic surges, and cyberattacks can reduce your website’s availability, harming your customers’ experience and causing financial or reputational damage. In fact, around 98% of organizations report that just one hour of downtime costs over $100,000. A CDN ensures that your website remains available, fast, and reliable by leveraging essential features such as: Load balancing: This process dynamically distributes traffic across multiple servers to optimize performance and prevent overload.Intelligent failover: Automatically redirects traffic if a server goes offline, ensuring continuity with minimal disruption.Anycast routing: Directs users to the closest or most efficient server, further reducing latency and enhancing response times.Security FeaturesAs cyber threats continue to grow in sophistication and frequency, securing your website or application is more critical than ever. According to recent statistics from Cobalt’s 2024 Cybersecurity Report, weekly attacks worldwide increased by 8% in 2023, while attackers used more sophisticated strategies to exploit vulnerabilities. Strong security measures that not only safeguard your website but also guarantee optimal performance are necessary in light of these evolving threats. CDN security features not only improve website performance but also defend against a wide range of attacks by distributing traffic across multiple servers, which mitigates DDoS attacks and filters out malicious traffic before it reaches your website. These features, from DDoS protection to safeguarding APIs, help maintain uptime, protect sensitive data, and guarantee a seamless user experience. Most modern solutions like Gcore CDN integrate robust security measures into content delivery, such as:SSL/TLS encryption facilitates secure data transmission by encrypting traffic, protecting sensitive information from being intercepted.L3/L4 DDoS protection blocks large-scale cyberattacks designed to flood your network and disrupt services.L7 DDoS protection guards your website from more complex attacks targeting how the website functions, helping it continue to operate smoothly.Web application firewall (WAF) acts as a shield, blocking harmful traffic such as hacking attempts or malicious scripts before they can affect your site.API security protects the communication between your application and other software, preventing unauthorized access or data theft.Bot protection identifies harmful automated traffic (bots), preventing activities like data scraping or login attempts with stolen credentials while allowing useful bots (like search engine crawlers) to function normally. Elevate Your Online Experience With a CDNA CDN is no longer a luxury—it’s a necessity for businesses that want to deliver fast, reliable, and secure online experiences. Whether your goal is to optimize performance, manage high traffic, or protect your site from attacks, a well-configured CDN makes all the difference.Ready to enhance your website’s performance? Our futureproof CDN runs on a global network of over 180 points of presence, so your customers get outstanding performance no matter where in the world they’re located. Get in touch with our team today to learn how our CDN can benefit your business.Discover Gcore CDN

How to Migrate Your Video Files to Gcore Video Streaming

Migrating large volumes of video files from different platforms can be daunting and time-consuming, often discouraging companies from moving to a superior provider. But it doesn’t have to be this way. We’ve created this three-step guide to help you efficiently migrate your video files to Gcore from other popular streaming platforms.Step 1: Get Links to Your VideosFirst, obtain links to your videos and download them. Look for your provider in the list below, or refer to the general SFTP/S3 storage section if applicable. After completing the steps for your provider, go straight to step 2.Google DriveShare the file: Open Google Drive and locate the MP4 file you want to download. Right-click on the file and select “Share.”Get the shareable link: In the sharing settings, click “Get link.” Ensure the link-sharing option is turned on.Set sharing permissions: Adjust the sharing permissions so “Anyone with the link” can view or download the file. Copy the generated link.Amazon S3Edit S3 block public access settings: Go to the S3 management console, select the bucket containing your MP4 file, and edit the Block Public Access settings if necessary.Add a bucket policy: Implement a bucket policy that grants public read access to your files.Get the list of objects: Navigate to the Objects tab, find your MP4 file, and click on the file to obtain the Object URL, which will be your download link.VimeoAccess the video: Log in to your Vimeo account and go to the video you wish to download.Select options: Click on the “Settings” button (gear icon) below the video player.Get video file link: In the settings menu, go to the “Video File” tab, where you can find the download link for your MP4 file.MUXEnable master access: Log in to your MUX account, navigate to the video asset, and enable master access if it’s not already enabled.Retrieve URL to master: Once master access is enabled, the URL to the master file will be available in the video asset details. Copy this URL for downloading the file.DropboxCreate a shareable link: Log in to your Dropbox account and locate the MP4 file you want to share. Click on the “Share” button next to the file.Set access permissions: In the sharing settings, create a link and set the permissions to “Anyone with the link.” Copy the generated link to download the file.General SFTP or S3 StorageAccess storage: Log in to your SFTP or S3 storage service control panel.Manage buckets/directories: Navigate to the appropriate bucket or directory containing your MP4 files.Retrieve download links: Generate HTTP/S links for the files you want to download. You can then use these links to download the files directly.Step 2: Check Availability to DownloadEnsure that your video files are available and ready for download, preventing any interruptions or issues during the migration process.Open HTTP/S link in a browser: Copy the HTTP/S link for the MP4 file and paste it into your browser’s address bar. Press Enter to navigate to the link.Check the video plays correctly in the browser: Verify that the video starts playing once the link is opened. This step ensures that the file is accessible and the link is functioning properly.Right-click to download: While the video is playing, right-click on the video player. Select “Save video as…” from the context menu. Choose a destination on your local disk to save the MP4 file.Step 3: Upload to Gcore Video StreamingNo matter which provider you’re migrating from, you need to upload your videos to Gcore Video Streaming storage. There are three primary methods to upload videos to Gcore storage:Copy from external storage: If your videos are available via public HTTPS URLs, you can directly copy the video files from external storage to Gcore. This method efficiently transfers files without downloading them to your local device first.Upload from a local device: Videos can be uploaded from your local host, backend, browser, or mobile app using the TUS resumable upload protocol. This method is resilient to interruptions, ensuring a smooth upload process by resuming from the point of failure.Batch upload: This method will soon be available to migrate extensive collections of videos, allowing you to transfer vast numbers of video files efficiently.The simplest migration option is to obtain video URLs and copy them to Gcore Video Hosting, eliminating the need to download and reupload videos.Example API Request to Copy Video from External StorageTo copy a video from another server, specify the origin_url attribute in the POST API request. The original video will be downloaded for video hosting on our server. Here is an example of the API request to set a task for copying a video from external storage:curl -L 'https://api.gcore.com/streaming/videos/' \-H 'Content-Type: application/json' \-H 'Authorization: APIKey 1234$0d16599c' \-d '{ "video": { "name": "Gcore Demo", "description": "Video copied from an external S3 Storage", "origin_url": "https://s-ed1.cloud.gcore.lu/demo-video/gcore.mp4" } }Refer to the complete documentation for detailed steps and examples of API requests. The original file must be in MP4 format or one of the following formats: 3g2, 3gp, asf, avi, dif, dv, flv, f4v, m4v, mov, mp4, mpeg, mpg, mts, m2t, m2ts, qt, wmv, vob, mkv, ogv, webm, vob, ogg, mxf, quicktime, x-ms-wmv, mpeg-tts, vnd.dlna.mpeg-tts. Streaming formats like HLS (.m3u8/.ts) and DASH (.mpd/.m4v) are intended for final video distribution and cannot be used as original file formats. Here are examples of good and bad links:Good link: https://demo-files.gvideo.io/gcore.mp4Bad link (chunked HLS format): https://demo-files.gvideo.io/hls/master.m3u8Note: Currently, only one video can be uploaded per request, so transferring your library in batches will require automation.Migrate to Gcore Video Streaming TodayGcore Video Streaming makes video migration easy with support for multiple sources and automatic transcoding. Whether you’re moving files from cloud storage, hosting platforms, or API-based services, Gcore streamlines video administration. Store, process, and distribute videos in various formats, complete with features like subtitles and timeline previews.With seamless migration and automatic transcoding, Gcore ensures your videos are optimized and ready for distribution, saving you time and effort. Simplify your video management and ensure your content is always accessible and in the best format for your audience with Gcore’s robust video streaming solutions.

Subscribe to our newsletter

Get the latest industry trends, exclusive insights, and Gcore updates delivered straight to your inbox.