Install and Play Quake III Arena in Docker Using Gcore Basic
- May 9, 2023
- 3 min read

In this tutorial, we’ll explore how to install Quake III Arena, a popular first-person shooter, in Docker, and then play it in your browser. We will first deploy a Gcore Basic instance as our sample server, a low-cost virtual machine that saves you time and effort—you can have a server ready in just five minutes! Next, we’ll install Docker on this server and run Quake III Arena.
What Is Docker?
Docker is a platform that makes it easy for developers to build, deploy, and run applications in containers. A container is a lightweight executable package that consists of everything you need to run an application, including code, libraries, and dependencies.
In our case, the application we want to run is Quake III Arena. Docker can be used to run legacy applications such as this in a modern environment.
How to Install and Run Quake III Arena
Step 1. Create a Virtual Machine
First, we want to run Quake III Arena on a Gcore Basics instance. Here’s how to do that:
1. Log in to your Gcore Cloud account. If you don’t have one yet, sign up.
2. Go to Cloud and select Projects.
3. Сlick Create project; fill in the Name field. Projects are groups of separate Cloud resources, and these groups are isolated from each other. The isolation gives you the ability to set user rights for each project.
4. In your project, click Create Instance.

5. Select the region closest to your location from the available options: Amsterdam (EU,) Frankfurt (EU,) Manassas (US,) Tokyo (Japan,) or Hong Kong (China.)
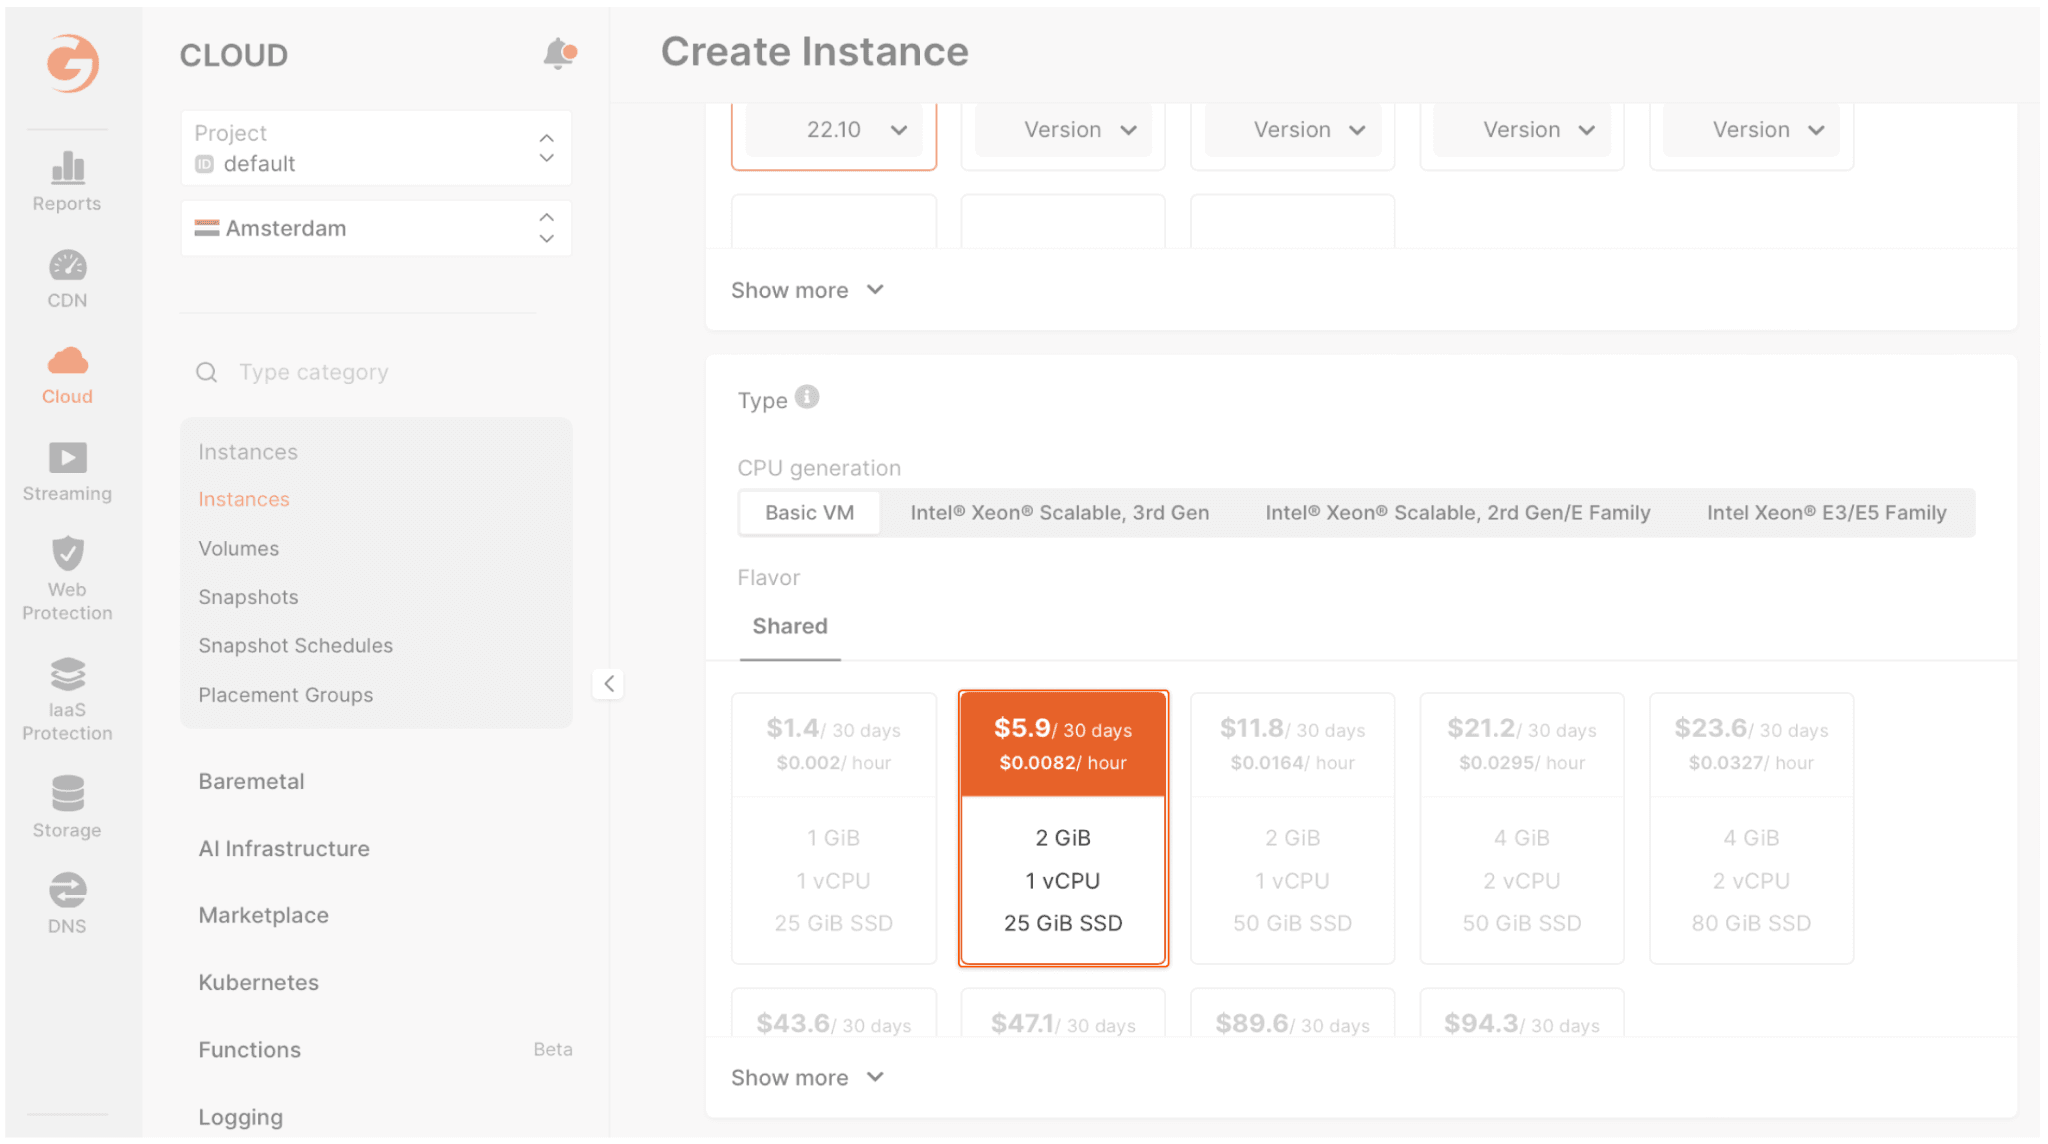
6. In Image, select Distributions and set the following parameters:
- OS: Ubuntu 22.04
- Type: Basic VM
- Flavor: 1 vCPU/2GB RAM/25GB SSD
- Network: set by default with public IP.
- Firewall: select “Default” with the “Add application ports to firewall group” flag
- SSH Key: choose your public SSH key or generate a new one.
- Name: myquakeserver (or whatever you want)
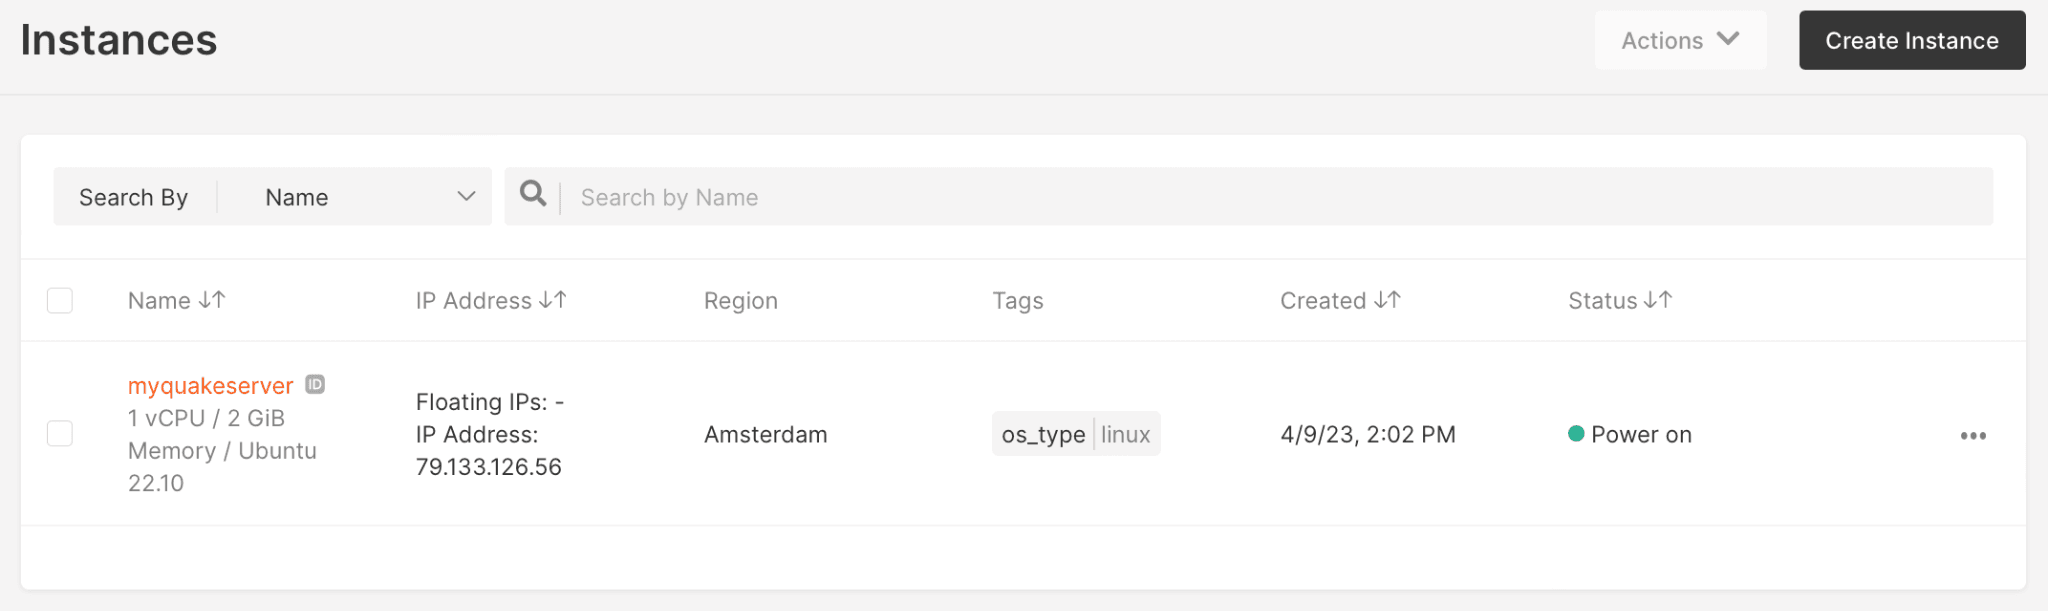
7. Now that you’ve finished the set up, click Create Instance. The virtual machine will appear in the “Instances” list. Wait until the virtual machine’s “Creating” status changes to “Power on.”
Step 2. Connect to the Server and Install Docker
Before installing Docker, make sure that the Ubuntu OS is up to date.
1. Log in to the server by SSH using the following command:
ssh ubuntu@<your_public_ip_address>For example:
ssh ubuntu@79.133.126.562. Update Ubuntu:
ubuntu@myquakeserver:~$ sudo suroot@myquakeserver:/home/ubuntu# apt update3. Install Docker:
root@myquakeserver:/home/ubuntu# apt install docker.ioStep 3. Pull the Quake III Arena Image on your Local Machine
Now that you’ve installed Docker on your server, you can pull the Quake III Arena image from the Docker Hub. Open your terminal and run the following command:
root@myquakeserver:/home/ubuntu# docker pull treyyoder/quakejs:latestThis command will pull the Quake III Arena image from the Docker Hub and store it on your local machine.
Step 4. Run Quake III Arena in Docker
To run Quake III Arena in Docker, start a new container using the Quake III Arena image. To do so, simply execute the following command:
root@myquakeserver:/home/ubuntu# docker run -d-name quakejs -e HTTP_PORT=8080 -p 8080:80 -p 27960:27960 treyyoder/quakejs:latestYou’ll now see the server logs in your terminal.
Step 5. Add the Rule 8080 in the Firewall
The Quake III Arena server uses port 8080 as a default for HTTP connections. Add the inbound and outbound rules for this port to the firewall:
1. Go to the Networking → Firewalls and select the default firewall group.
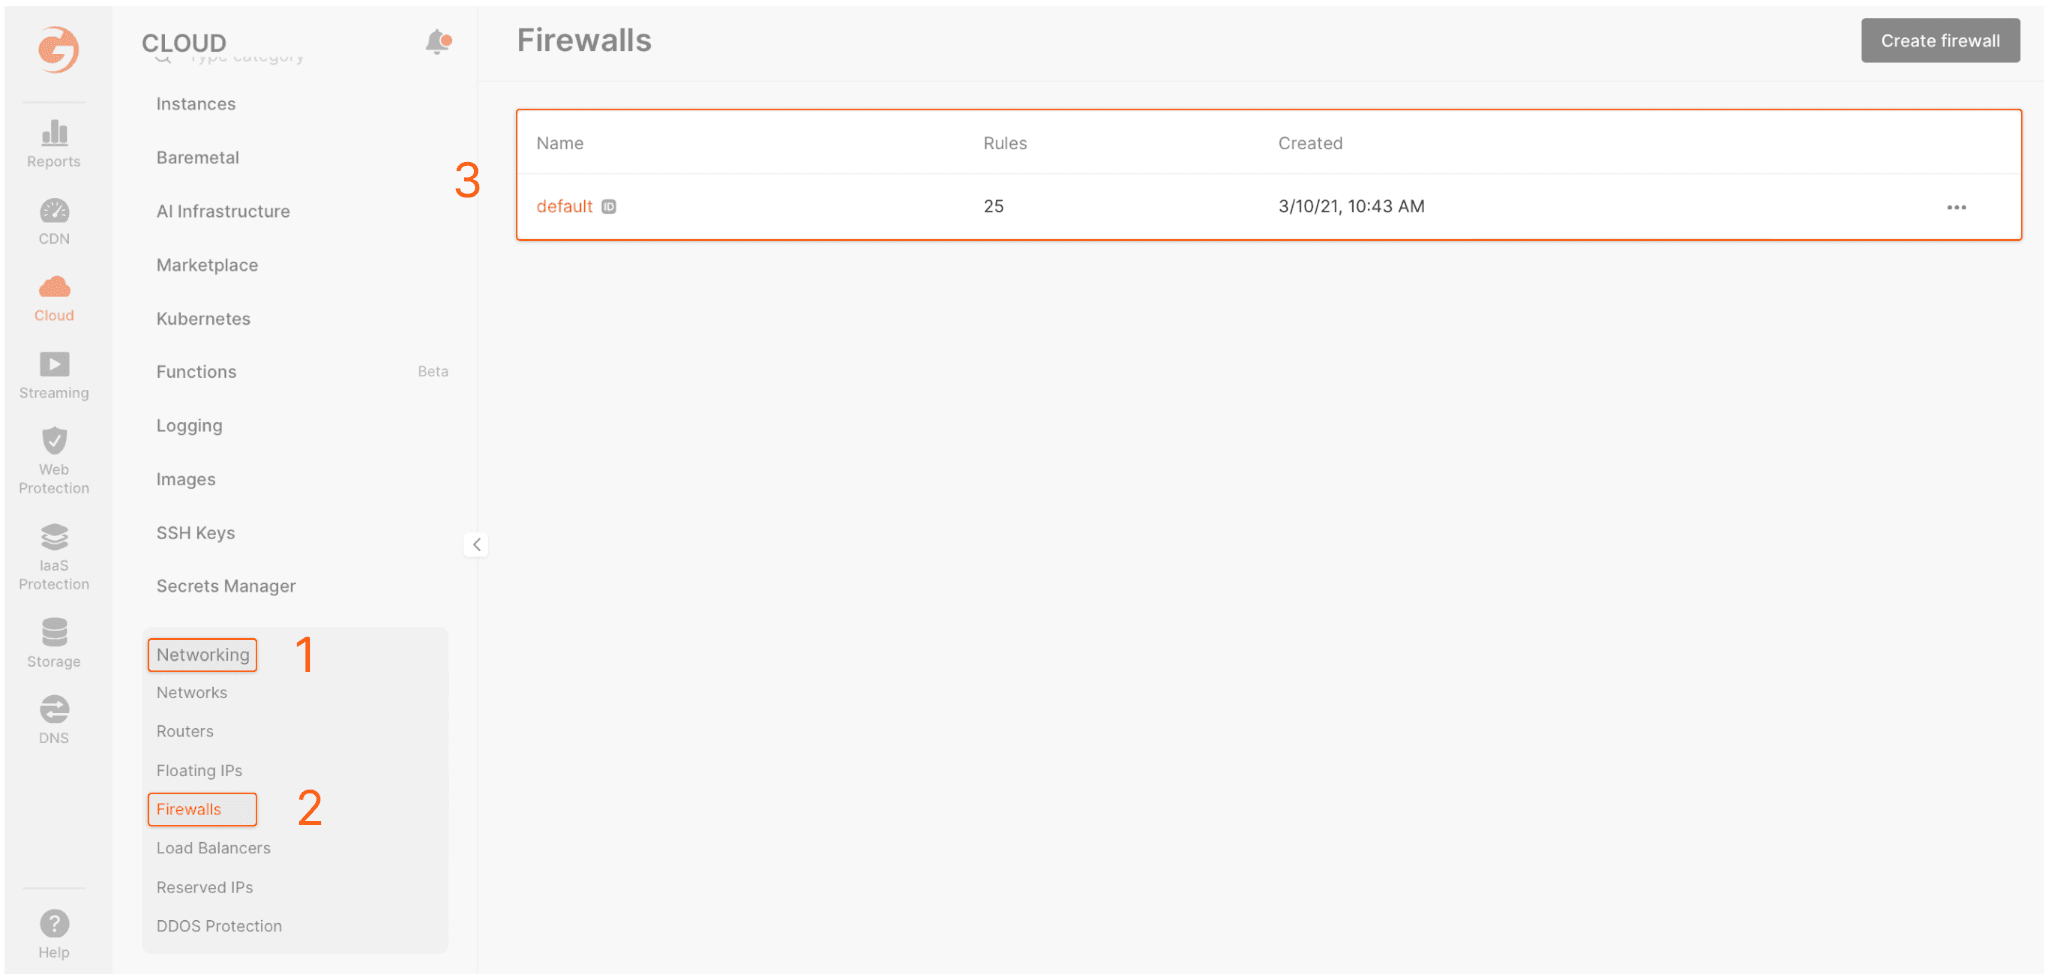
2. Click on the default firewall group and set the following parameters:
- Type: Custom
- Protocol: TCP
- Port: 8080
- Sources: All IPv4

3. In the lower-left corner of the “Firewalls” section, click Save.
Note: You also can configure this rule using one command in CLI. (This works for any virtual machine, not only for Gcore’s.) Here’s the command:
sudo ufw allow 8080/TCPStep 6. Play Quake III Arena in Your Browser
To play Quake III Arena, open a web browser on your device and enter the public IP address of your server that you obtained in Step 1, as well as the 8080 port:
http://<your_public_ip_address>:8080
For example:
http://79.133.126.56:8080
This will open the game in your browser, and you can start playing.
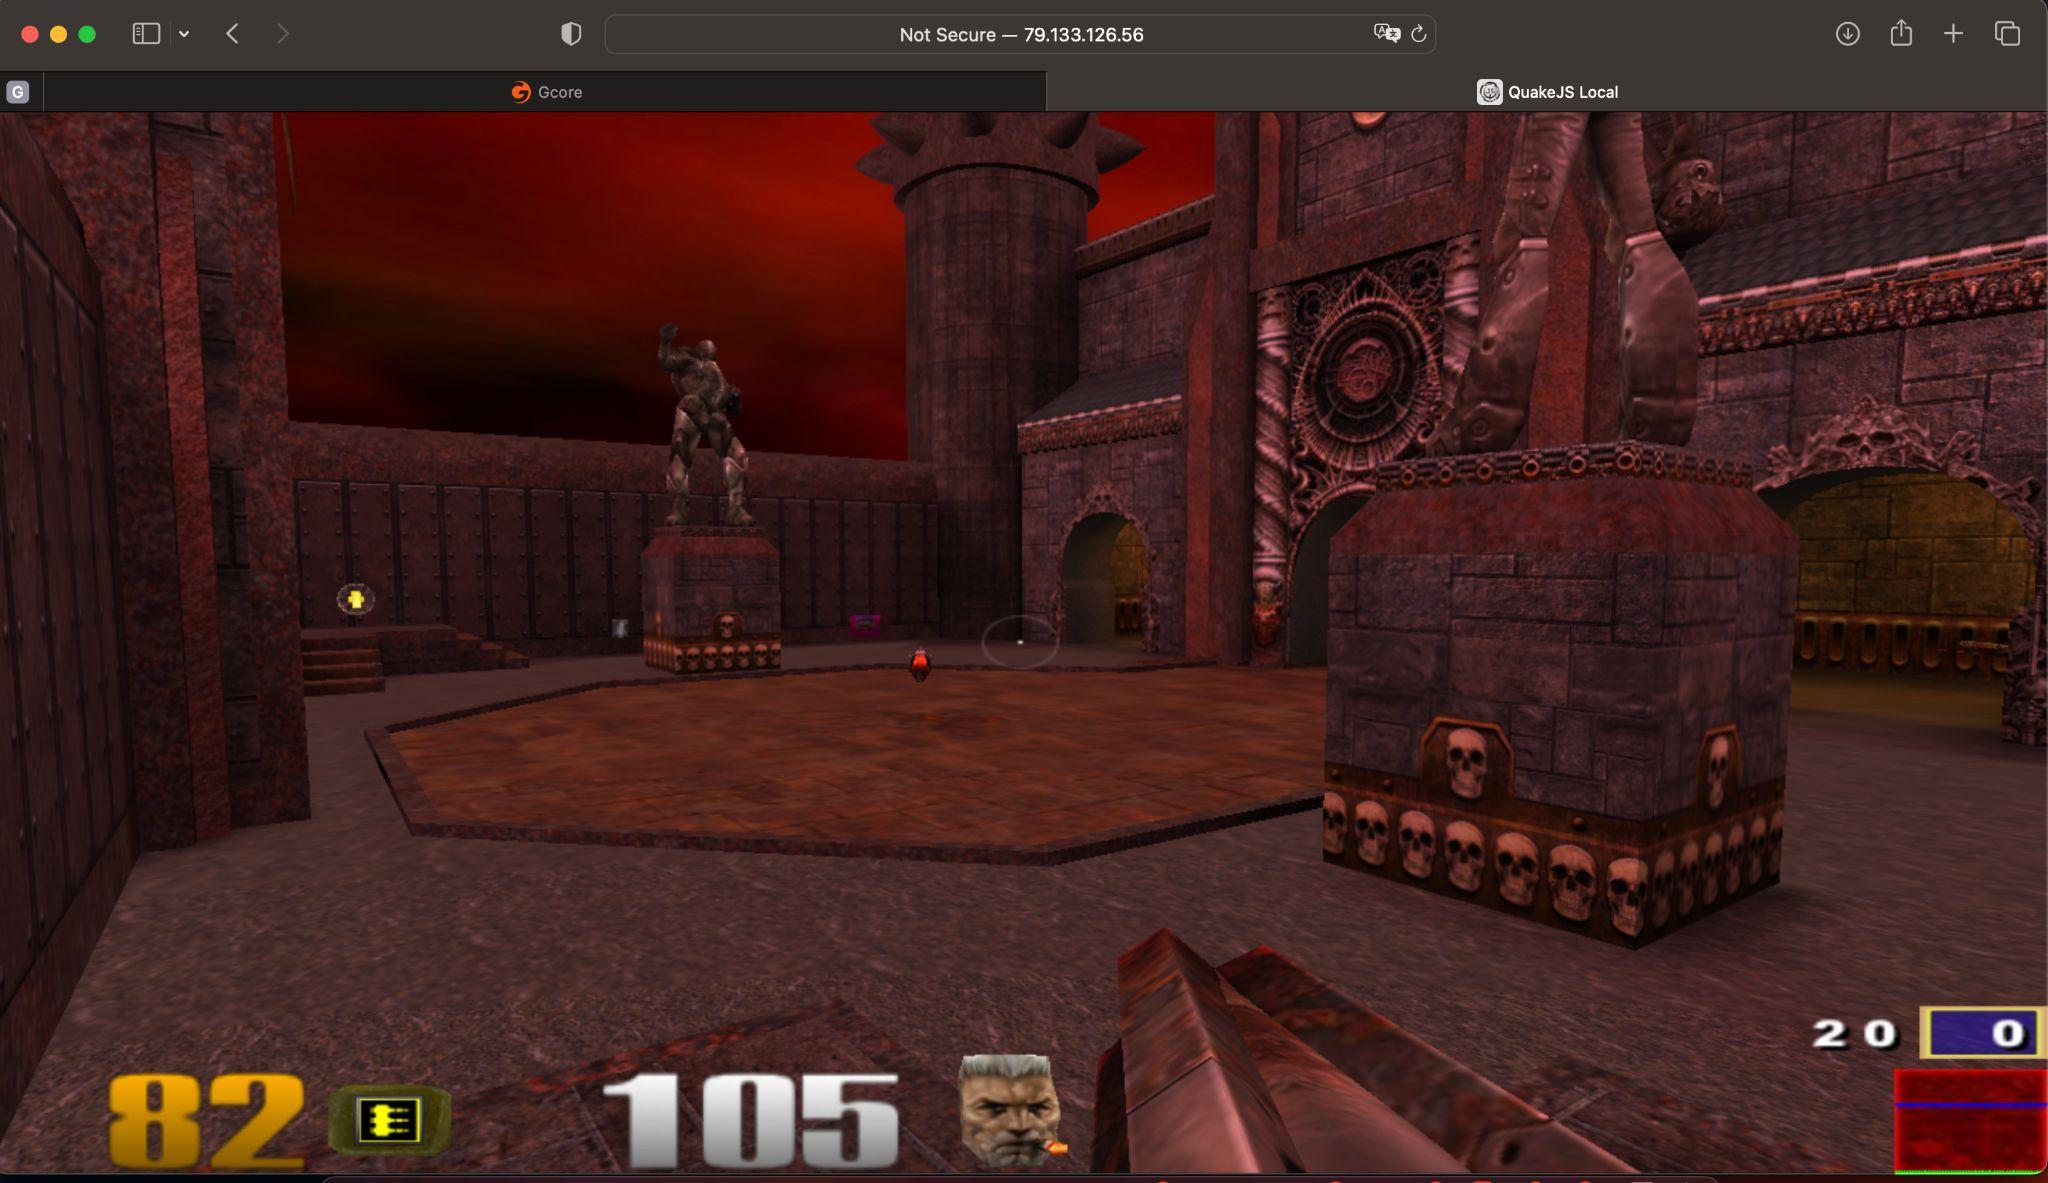
Have fun playing Quake III Arena!
Conclusion
In this tutorial, we explained how to install Quake III Arena in Docker and play it in your browser. Check out our other articles dedicated to setting up different types of software on Gcore Cloud instances:

Related articles

As enterprises move AI from experimentation into production, they face a new infrastructure challenge. AI applications, models, and data are no longer confined to a single cloud or data center. Instead, they are distributed across multiple

Panels about AI sovereignty tend to follow a predictable arc. Someone invokes GDPR. Someone else mentions hyperscalers. A politician says something optimistic. Everyone applauds and goes home.Last week's Gcore AI panel in Luxembourg didn't

An interview with Alexey Shirobokov, CEO & Founder of Mission Space with Dima Maslennikov, Head of Startups at Gcore, recorded at House of Startups, Luxembourg. At Gcore, we work closely with startups building at the edge of deep t

Building a startup is tough. Every decision about your infrastructure can make or break your speed to market and burn rate. Your time, team, and budget are stretched thin. That’s why you need a partner that helps you scale without compromis

Europe’s cloud priorities are changing fast, and rightly so. With new regulations taking effect, concerns about jurisdictional control rising, and trust becoming a key differentiator, more companies are asking a simple question: Who really
Subscribe to our newsletter
Get the latest industry trends, exclusive insights, and Gcore updates delivered straight to your inbox.