Privately Access Instagram and Telegram with a Gcore OpenVPN Instance
- May 15, 2023
- 3 min read

In our interconnected, digital world, privacy is paramount. To maintain your data privacy when using Instagram, Telegram, and other services, you can run a personal VPN server using the OpenVPN solution. This tutorial will guide you through the process so you can enjoy access to your favorite online platforms without privacy concerns.
What Is OpenVPN?
OpenVPN is an open-source virtual private network (VPN) application. It is a powerful tool that allows you to connect securely to your server from anywhere in the world, and use this server as a VPN.
To run an OpenVPN server, we will run a preconfigured Gcore Cloud OpenVPN instance. The main advantage of this approach is that it saves you time and effort: your VPN server is ready for use in under five minutes. You simply need to create an instance, download the OpenVPN configuration, and install OpenVPN Connect on your mobile device to connect to the server. No manual manipulations are required in the command line.
How to Run and Use OpenVPN
Step 1. Create a Virtual Machine with an OpenVPN Server
First, let’s create a virtual machine with an OpenVPN server:
- On your desktop, log in to your Gcore Cloud account. If you don’t have a Gcore Cloud account yet, sign up.
- Go to Cloud and select Projects.
- Сlick Create project; fill in the Name field.
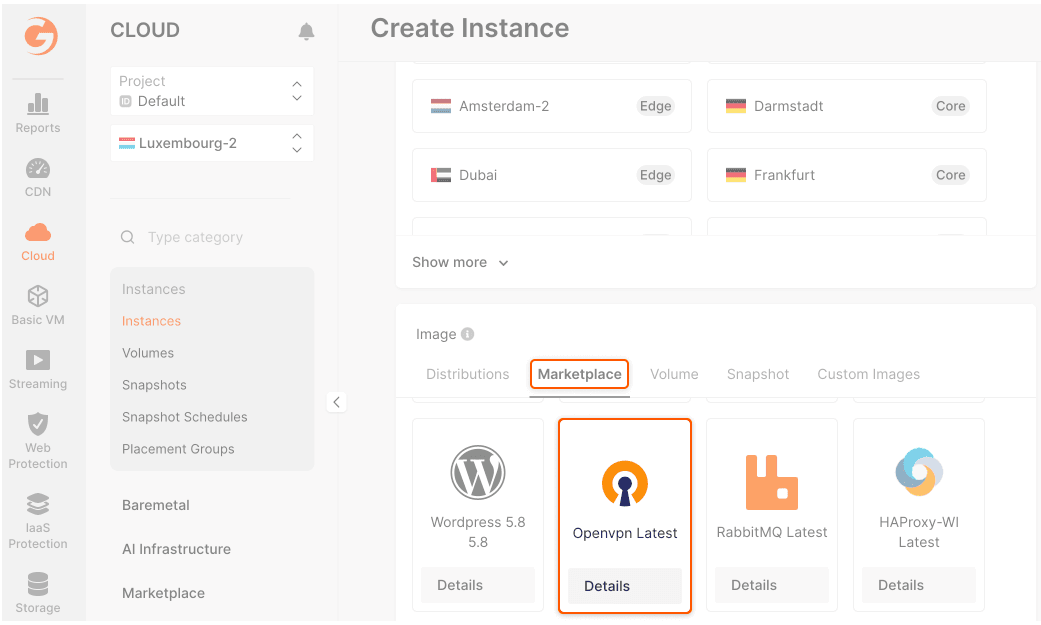
- In your project, click Create Instance.

- Select one of the available regions.
- In the Image section, select Marketplace. Click the Openvpn Latest image.
- Set the following parameters:
- App Template Configuration: external URL if you have a domain
- Type: we recommend 1vCPU / 2GB RAM
- Volume: choose any volume type with 10GB available
- Network: keep the default public IP
- Firewall: select “Default” with the “Add application ports to firewall group” flag
- SSH Key: choose your public SSH key or generate a new one
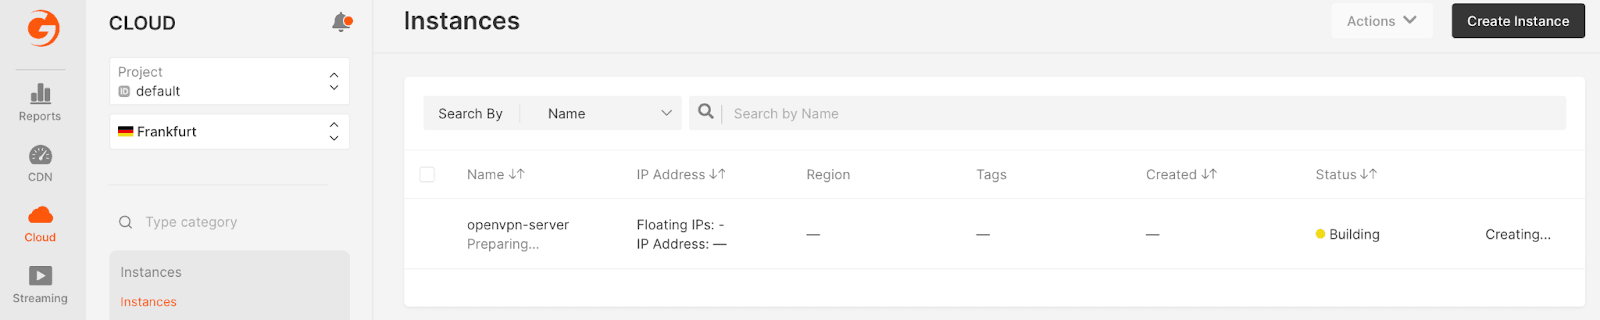
- Instance name: openvpn-server (or whatever you want)
- Now you’ve completed the set up steps, click Create Instance. The virtual machine will appear in the “Instances” list. Wait until the virtual machine’s “Creating” status changes to “Power On.”
Step 2. Download the OpenVPN Configuration to your Device
Wait for five minutes after the virtual machine is powered on. You can then download the OpenVPN configuration, which will allow you to connect to the OpenVPN server.
On your mobile device, open a web browser and type the virtual machine’s public IP address in the address bar, as follows:
http://<your_public_ip_address>
Here’s how that will look:
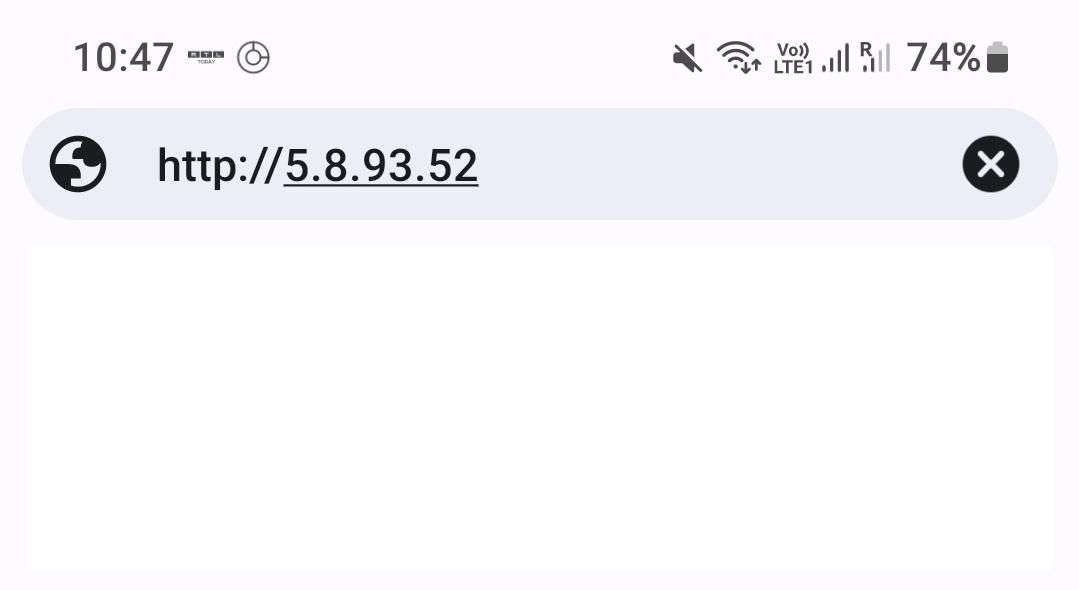
Once you type the IP address and press Enter, the configuration file is immediately downloaded to your device.
Step 3. Download the OpenVPN Connect Application
How you download the OpenVPN Connect application depends on your device. If you have an Android device, go to the OpenVPN Connect page in the Google Play Store and click Install. If you have an iOS device, go to the OpenVPN Connect page in the App Store and click Install.
Once the application is installed, use the OpenVPN configuration that you downloaded in Step 2 to connect to your OpenVPN server.
Step 4. Apply the OpenVPN Configuration to OpenVPN Connect
Finally, you need to to apply the OpenVPN configuration to the OpenVPN Connect application.
- Open the OpenVPN Connect application on your device.
- Select Upload File and then tap BROWSE.
- Look for the file with the .ovpn extension (it’s at the end of the file name.) You can also type “.ovpn” in the search option to find the OpenVPN configuration file.
- Once you have found the file, select it. Here’s what you’ll see:
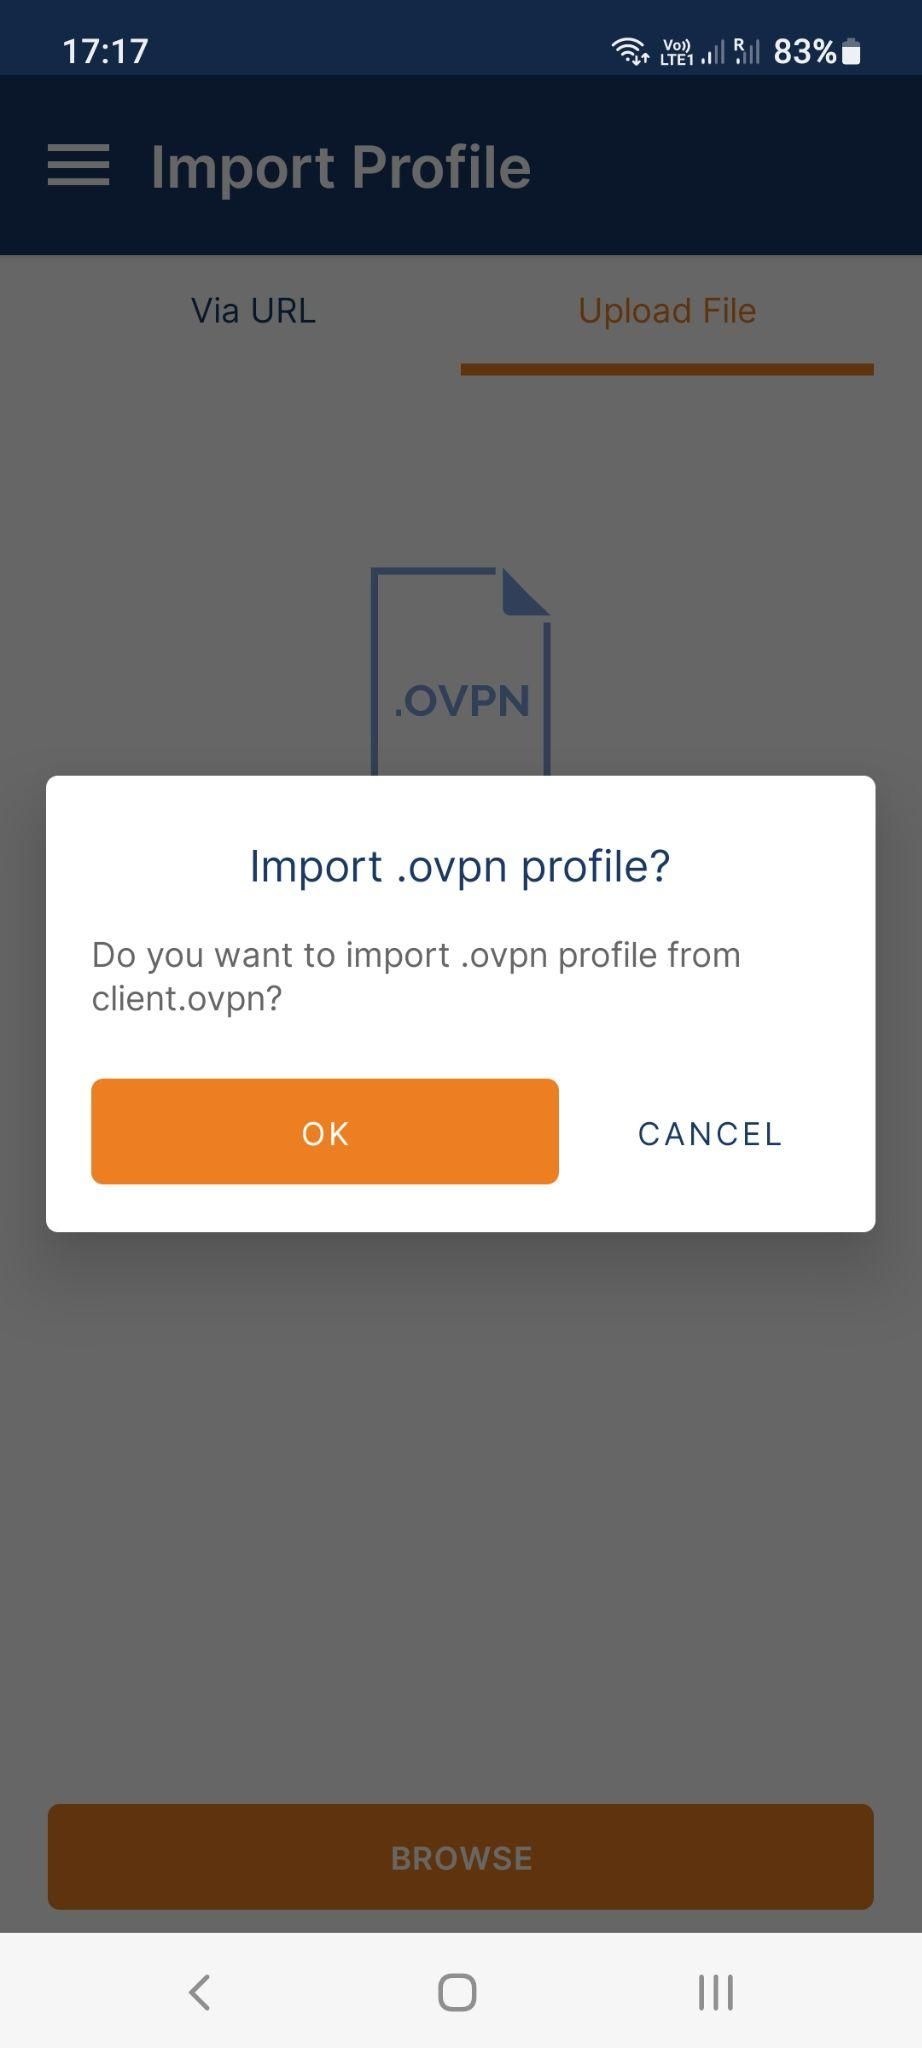
- Tap OK.
- On the Imported Profile screen, tap CONNECT.

- On the Connection request pop-up, tap OK to accept the request.
- On the Profiles screen, you’ll see the status CONNECTED, which means you are now connected to the OpenVPN server.

Congratulations! You can now access any online service anywhere in the world while maintaining your personal privacy.
Conclusion
OpenVPN provides a quick and easy workaround for accessing banned services, including Instagram, Facebook, and Telegram. Using a preconfigured Gcore Cloud OpenVPN instance is a reliable option, allowing you to enjoy unrestricted internet access wherever you are in the world.
Check out our other articles dedicated to setting up different types of software on our Cloud instances:

Related articles

As enterprises move AI from experimentation into production, they face a new infrastructure challenge. AI applications, models, and data are no longer confined to a single cloud or data center. Instead, they are distributed across multiple

Panels about AI sovereignty tend to follow a predictable arc. Someone invokes GDPR. Someone else mentions hyperscalers. A politician says something optimistic. Everyone applauds and goes home.Last week's Gcore AI panel in Luxembourg didn't

An interview with Alexey Shirobokov, CEO & Founder of Mission Space with Dima Maslennikov, Head of Startups at Gcore, recorded at House of Startups, Luxembourg. At Gcore, we work closely with startups building at the edge of deep t

Building a startup is tough. Every decision about your infrastructure can make or break your speed to market and burn rate. Your time, team, and budget are stretched thin. That’s why you need a partner that helps you scale without compromis

Europe’s cloud priorities are changing fast, and rightly so. With new regulations taking effect, concerns about jurisdictional control rising, and trust becoming a key differentiator, more companies are asking a simple question: Who really
Subscribe to our newsletter
Get the latest industry trends, exclusive insights, and Gcore updates delivered straight to your inbox.