
Unlocking the world of graphic design on your Linux system has never been easier. If you’re using Ubuntu and are on the hunt for a robust, open-source image editor, GIMP stands out as a premier choice. Follow our step-by-step guide to seamlessly install GIMP on Ubuntu and embark on your creative journey with confidence and ease.
What is GIMP?
GIMP is a highly efficient and versatile software that enables photo retouching, image composition, and authoring with utmost ease and precision. It is an open-source raster graphics editor that is absolutely free to use, making it an excellent choice for graphic designers, photographers, and artists alike. Here’s some notable features:
- Layered Editing. Just like premium software, GIMP offers the ability to work with multiple layers in an image, allowing for complex compositions and edits.
- Customizable Interface. Users can modify the layout and tools according to their preferences, optimizing the workspace for specific tasks.
- Extensive File Format Support. GIMP supports a variety of file formats including JPEG, GIF, PNG, TIFF, and more. It also provides a unique XCF format that preserves layers and other image attributes.
- Scripting and Automation. Through languages like Scheme, Python, and Perl, tasks in GIMP can be automated, making repetitive tasks faster and more consistent.
- Advanced tools. It provides sophisticated tools that are often comparable to premium software like Adobe Photoshop. This includes layers, masks, advanced filters, color adjustment tools, and a comprehensive suite of brushes.
With these features and many others, GIMP establishes itself as a powerful asset in the realm of graphic design, competing closely with certain premium software regarding its capabilities. In the following section, we’ll explore how to set it up on Ubuntu.
Installing GIMP Using the Terminal
Here’s a step-by-step guide on how to install GIMP through the terminal:
#1 Update Package Lists
Before installing any new software, it’s a good habit to ensure your system’s package lists are up to date.
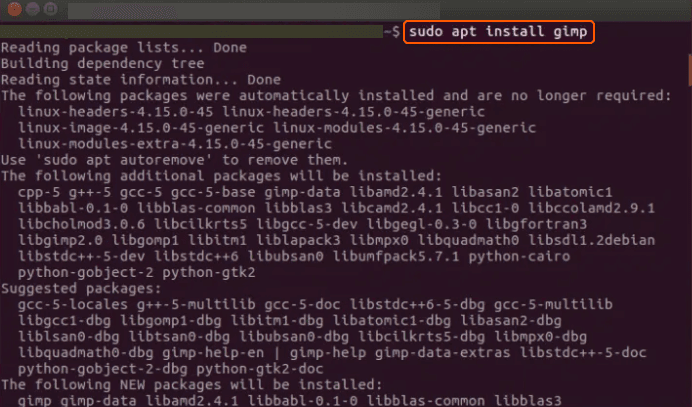
sudo apt update#2 Install GIMP
Now, use the apt package manager to install GIMP.
sudo apt install gimpThe terminal will show you which packages are going to be installed and will ask for your confirmation. Simply press ‘Y’ to proceed.
#3 Launch GIMP
Once the installation is complete, you can either launch GIMP from your application menu, or type gimp into the terminal and press enter.
#4 Verify Installation
To ensure GIMP was successfully installed, you can type the following:
gimp --versionInstalling GIMP via Ubuntu Software Center
The Ubuntu Software Center provides a graphical user interface that allows users to search for, install, and manage software packages. Here’s a step-by-step guide on how to install GIMP using the Ubuntu Software Center:
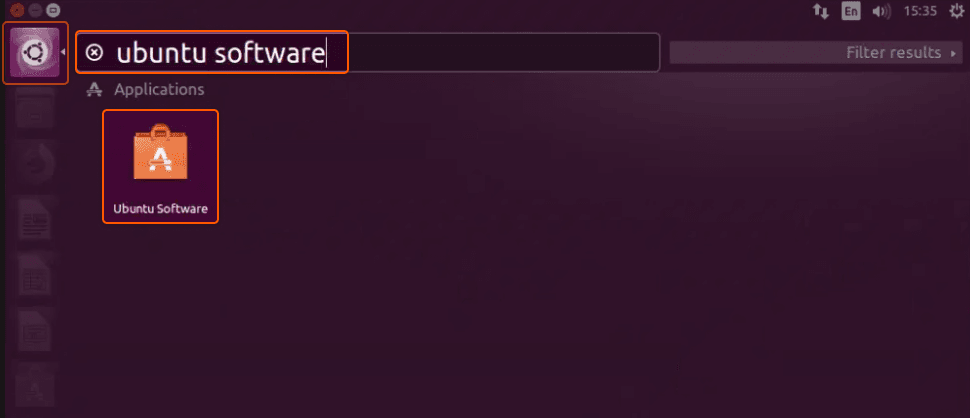
#1 Open Ubuntu Software Center
Click on the Ubuntu Software Center icon on your dock or application menu. If you can’t locate it directly, you can search for “Software” or “Ubuntu Software” in the application menu.
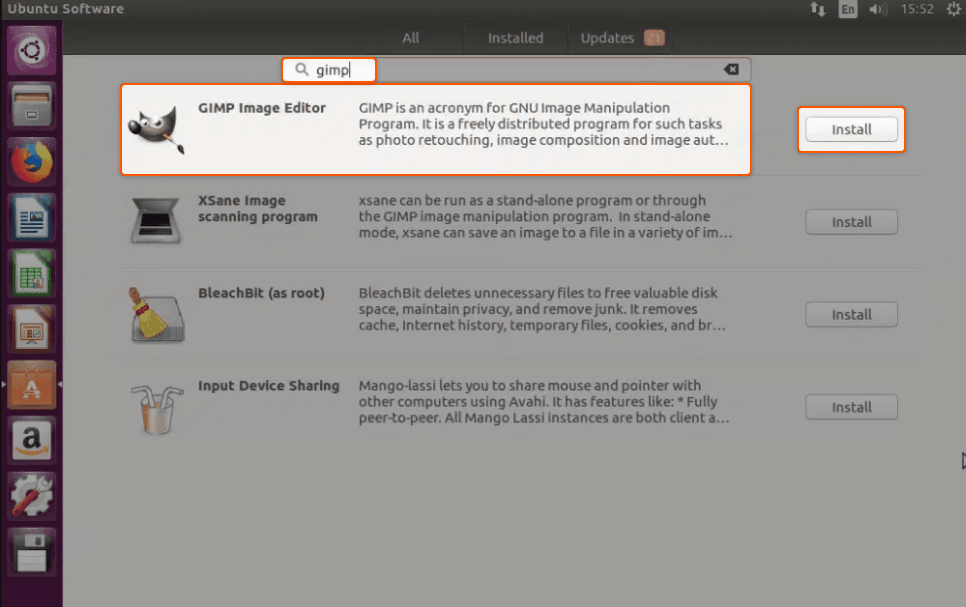
#2 Search for GIMP
Once inside the Ubuntu Software Center, there will be a search bar at the top. Type “GIMP” into the search bar and press enter.
#3 Select and Install GIMP
You will see a list of applications related to your search term. Locate the official GIMP application. It should have a recognizable logo and description. On the GIMP software detail page, there will be an “Install” button. Click this button. If prompted, enter your password and grant the necessary permissions.
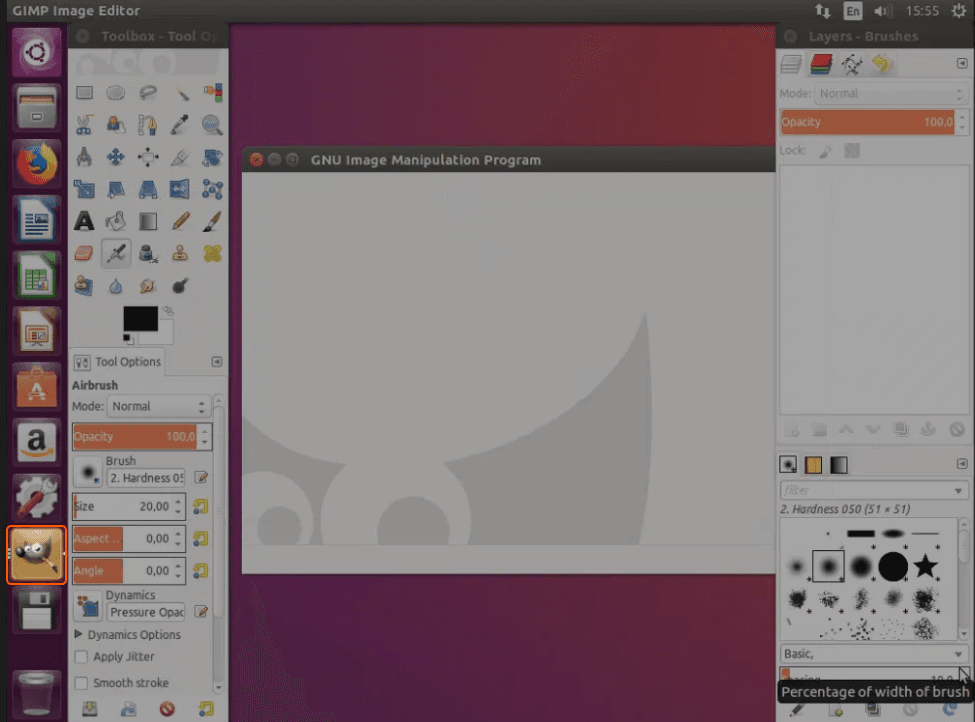
#4 Launch GIMP
After the installation, GIMP will be added to your application list. You can launch it directly from the Ubuntu Software Center by clicking the “Launch” button, or you can find it in your application menu.
That’s it! Installing GIMP on Ubuntu is straightforward, whether you’re using the command-line Terminal or the user-friendly Ubuntu Software Center. By following the provided steps, you’ll equip yourself with a powerful graphics editing tool, primed to assist you in all your creative endeavors. Ubuntu’s versatility in offering multiple installation methods ensures that users of all skill levels can seamlessly access the required software. Dive into your projects and happy designing with GIMP!
Conclusion
Want to run Ubuntu in a virtual environment? With Gcore Cloud, you can choose from Basic VM, Virtual Instances, or VPS/VDS suitable for Ubuntu:
- Gcore Basic VM offers shared virtual machines from €3.2 per month
- Virtual Instances are virtual machines with a variety of configurations and an application marketplace
- Virtual Dedicated Servers provide outstanding speed of 200+ Mbps in 20+ global locations
Related articles


Subscribe to our newsletter
Get the latest industry trends, exclusive insights, and Gcore updates delivered straight to your inbox.