Connect to the cluster
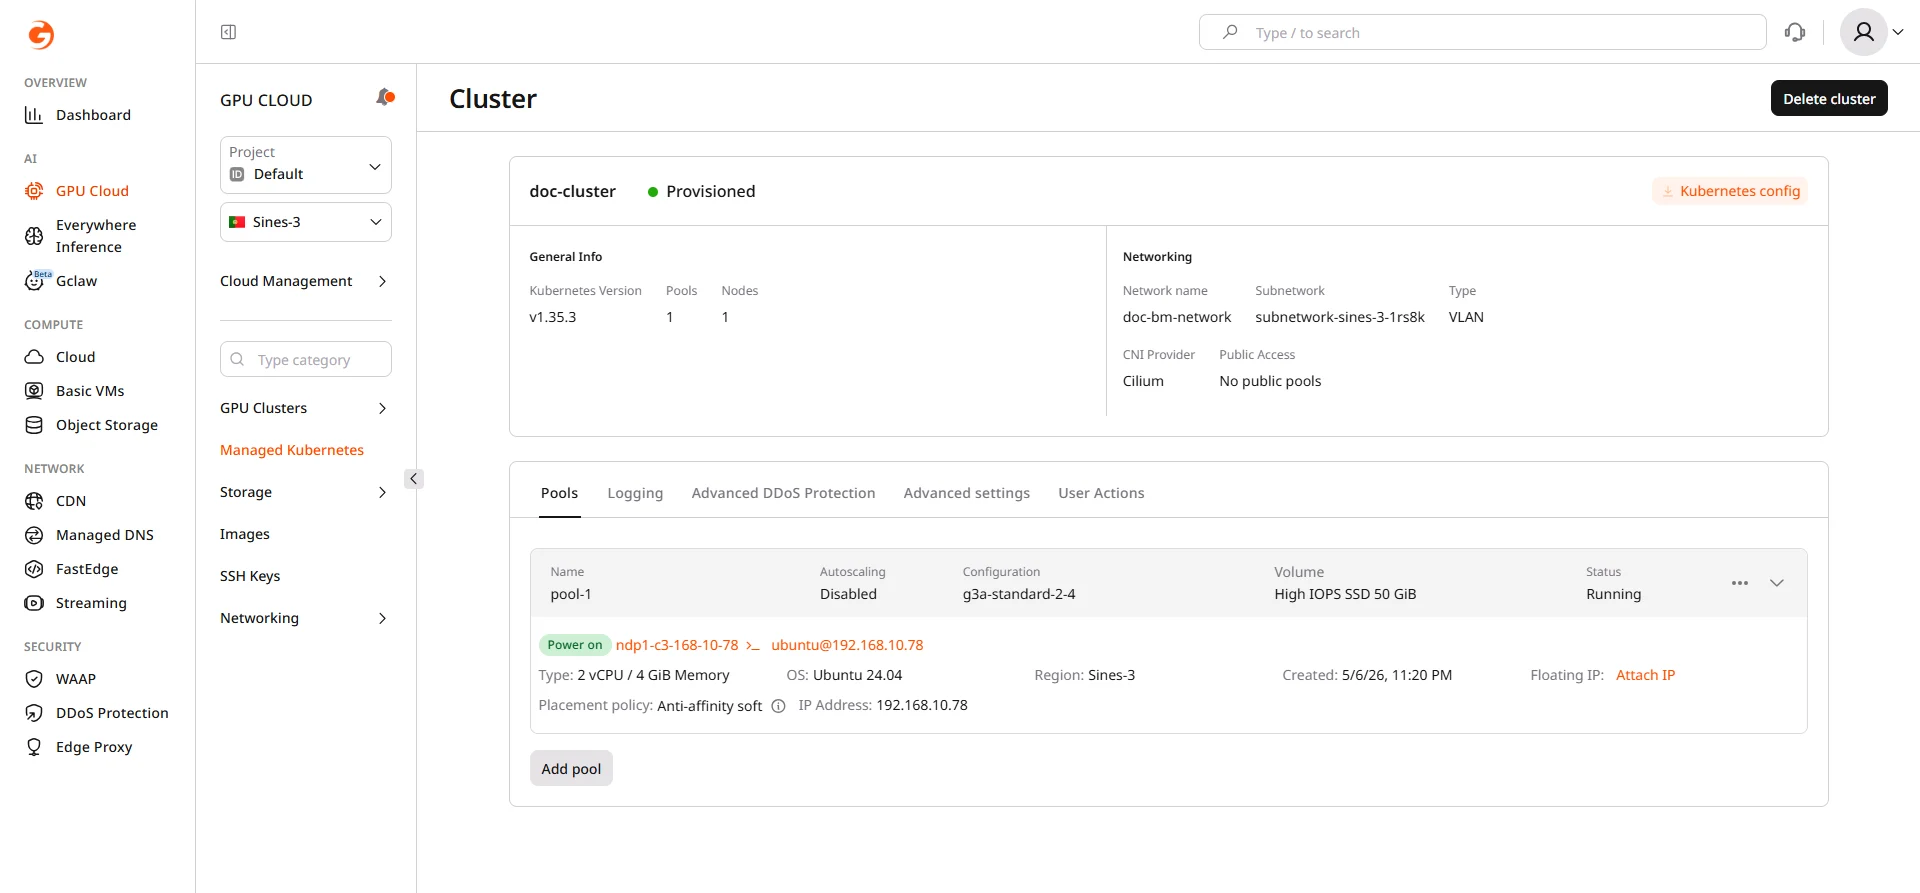
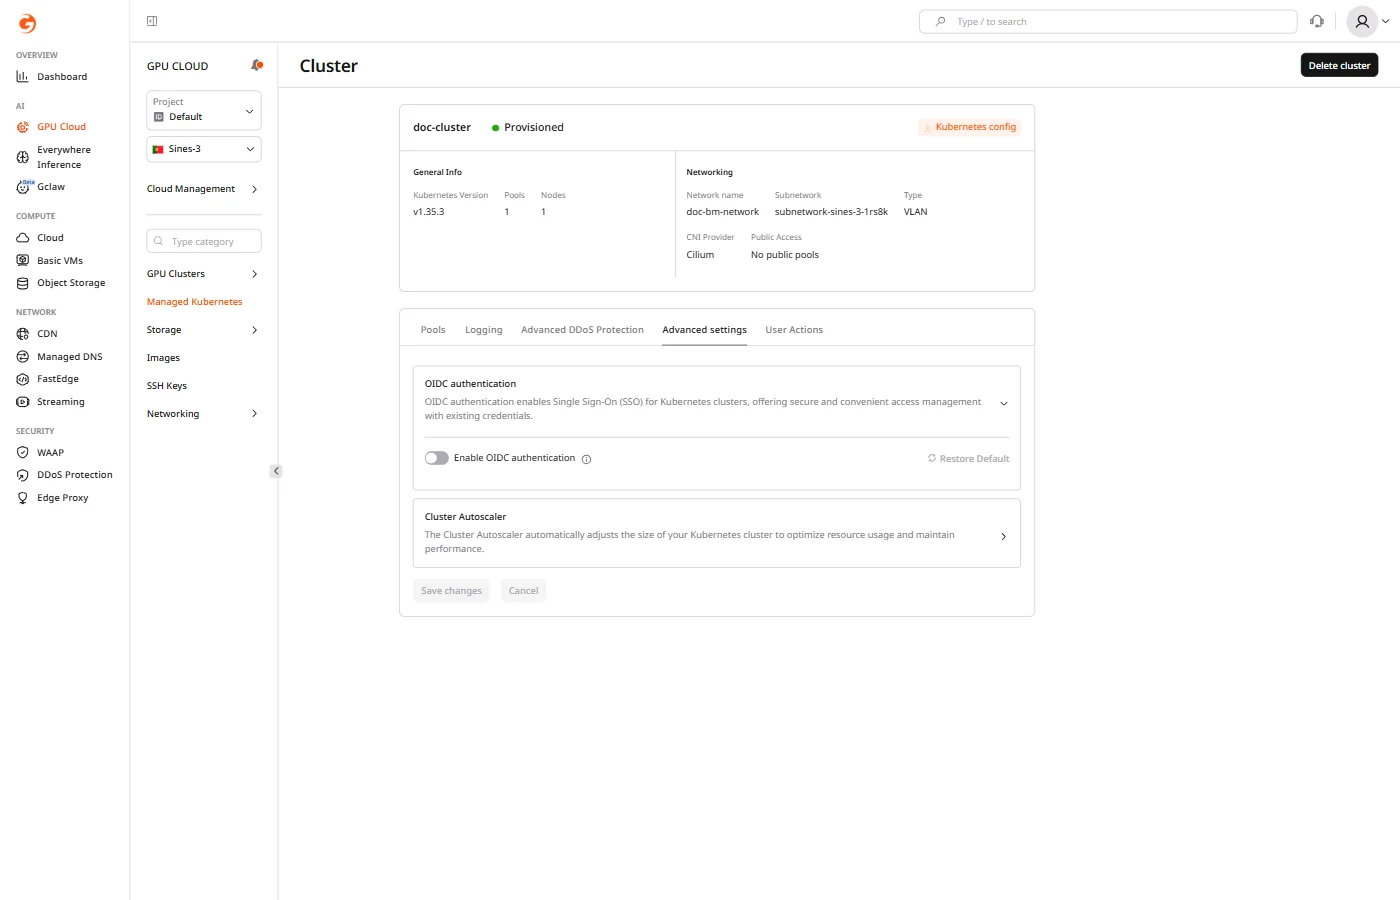
The kubeconfig file enables kubectl connections to the cluster. Download it from the cluster overview page:- Navigate to the cluster overview page.
- Click Kubernetes config.
- Save the downloaded
k8sConfig.ymlfile.
Kubeconfig certificates are renewed automatically every two years. A notification appears in the portal and is sent by email two weeks before expiry. Download a fresh kubeconfig after renewal.
Cluster overview
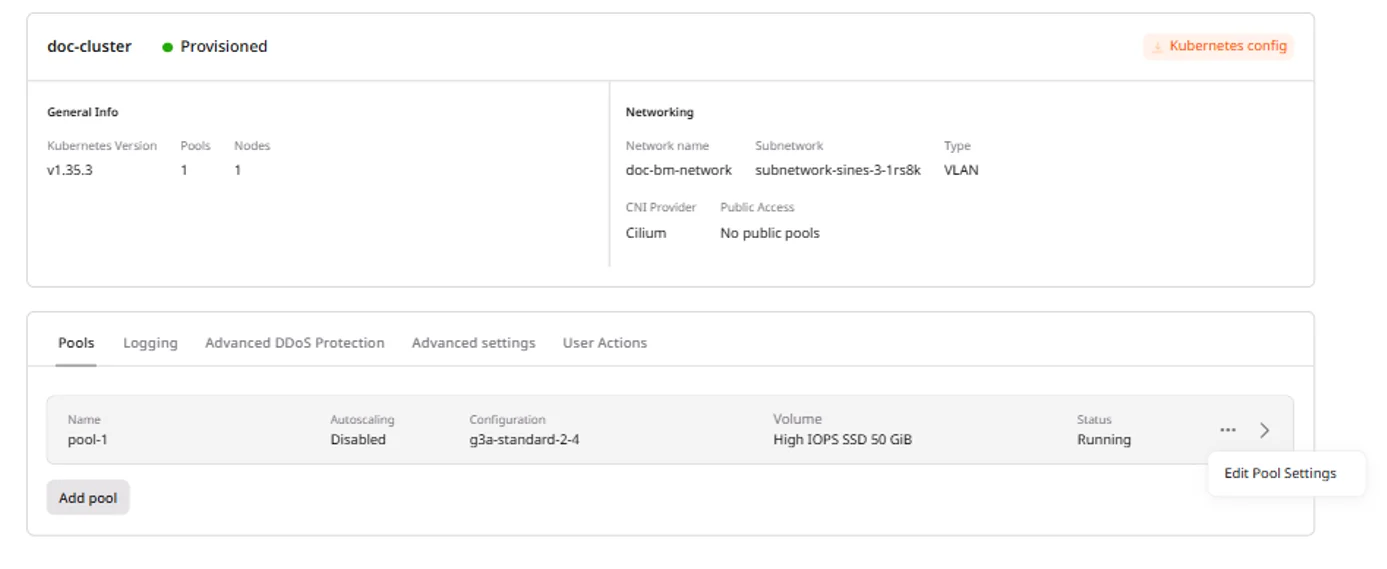
The cluster overview page shows the cluster name, status, Kubernetes version, networking configuration (network, subnetwork, CNI provider), and provides access to management tabs.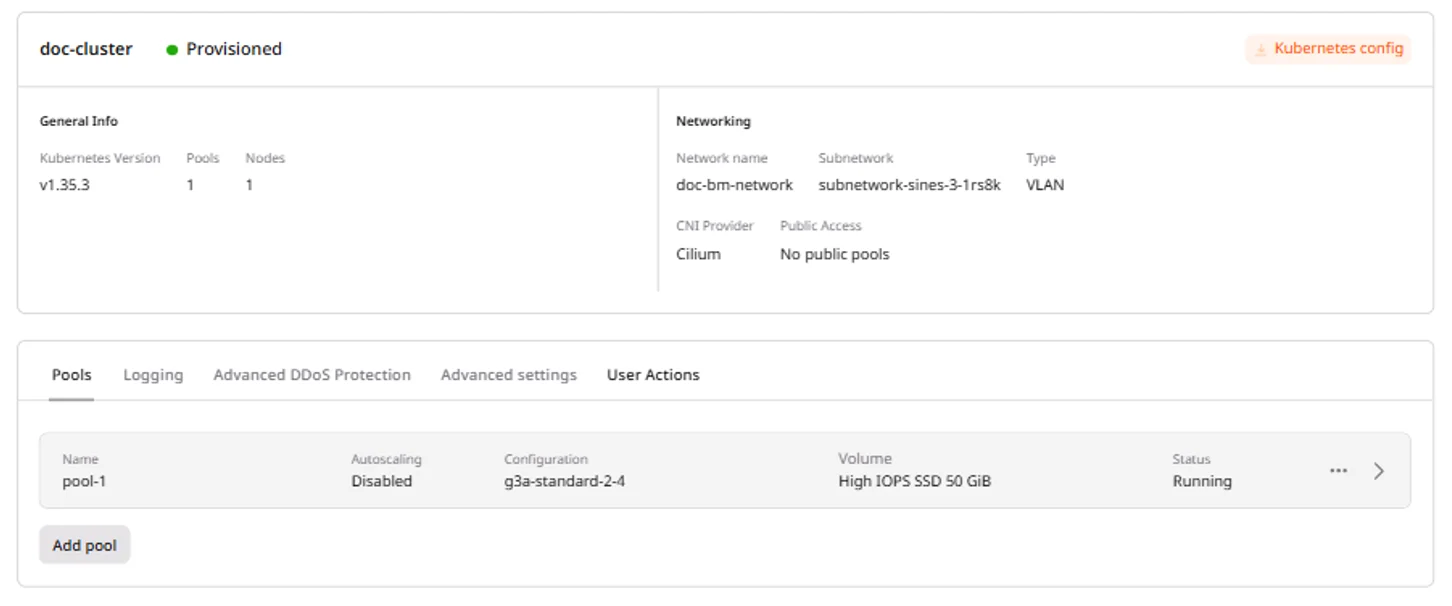
| Tab | Description |
|---|---|
| Pools | View and manage node pools, add new pools |
| Logging | Configure log collection to OpenSearch Dashboards (paid feature) |
| Advanced DDoS Protection | Enable Advanced DDoS Protection for cluster nodes (requires Public IPv4 address; not available in all regions) |
| Advanced settings | OIDC authentication and Cluster Autoscaler configuration |
| User Actions | Audit log of cluster operations |
Manage node pools
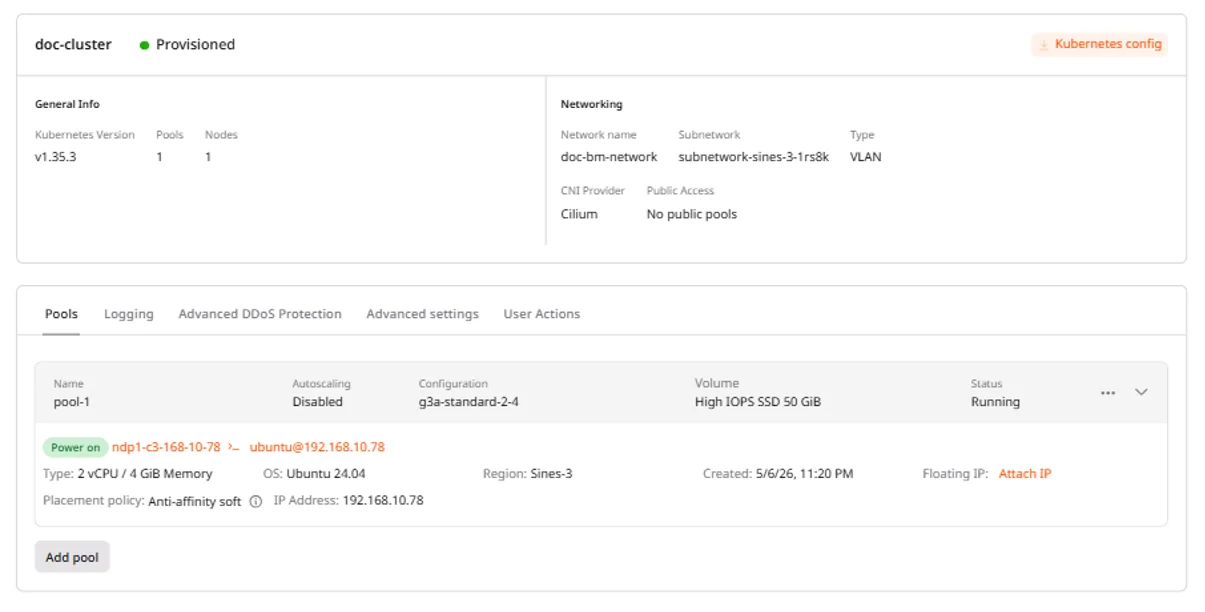
Node pools group worker nodes with identical configuration. Each pool can have a different instance type, enabling mixed workloads within a single cluster.View pool details
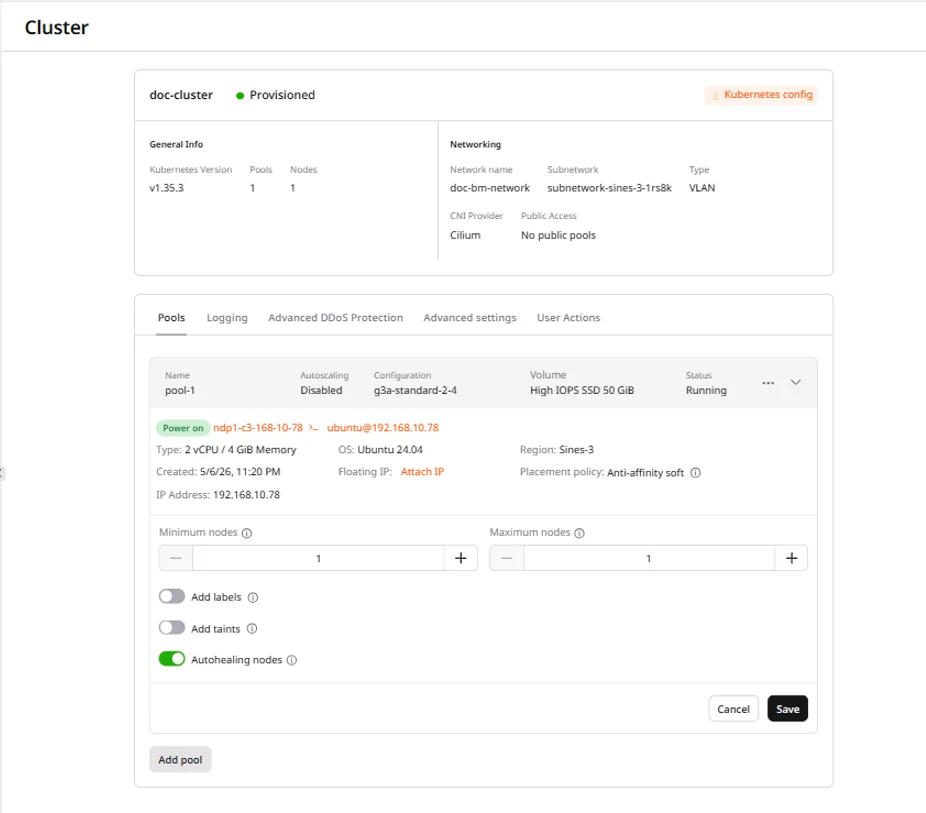
The expanded pool card shows the pool name, autoscaling status, instance flavor, volume configuration, node list, and current status.- Navigate to the Pools tab.
- Click a pool to expand its details.
Scale node pools
Node pools scale automatically within the configured min/max limits. Autoscaling is active when Maximum nodes is greater than Minimum nodes. When they are equal, the pool maintains a fixed size.A single node pool supports up to 100 nodes. To increase this limit, contact support. The number of pools per cluster is not limited. A single region supports up to 100 clusters.
- Navigate to the Pools tab.
- Expand the target pool.
- Click the … menu next to the pool header and select Edit Pool Settings.
- Adjust Minimum nodes or Maximum nodes.
- Click Save.
Replace a node
The replace action deletes a node and provisions a new one with the same configuration. Use it to recover a node that is stuck, degraded, or behaving unexpectedly without modifying the pool settings.- Navigate to the Pools tab.
- Expand the target pool.
- Click the … menu next to the node and select Replace.
- Confirm the replacement.
Add a GPU node pool
To add GPU nodes to an existing cluster:- Navigate to the Pools tab.
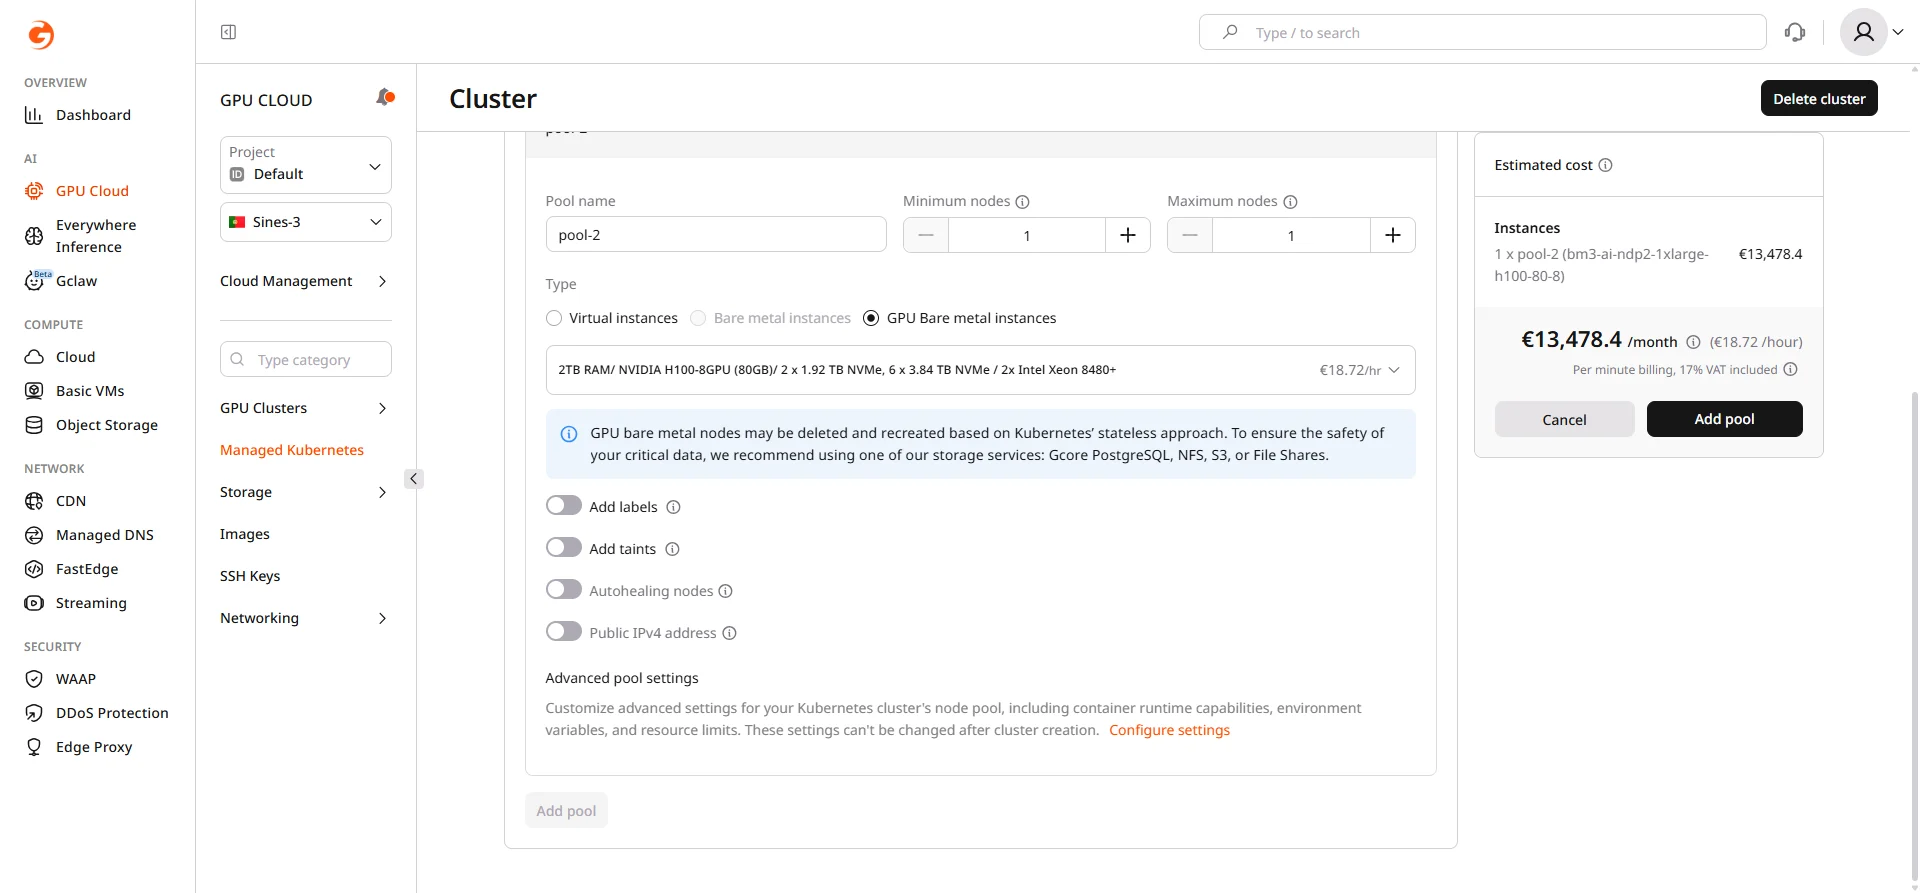
- Click Add pool.
- Enter a Pool name.
- Set Minimum nodes and Maximum nodes.
- Select GPU Bare metal instances as the node type.
- Choose a GPU flavor from the dropdown. Available flavors depend on the region.
- (Optional) Add labels for node selection in pod specs.
- (Optional) Add taints to dedicate nodes to GPU workloads.
- Click Add pool.
GPU node pools may take several minutes to provision. Monitor the pool status in the Pools tab.
Schedule workloads on GPU nodes
Use node selectors or affinity rules to schedule pods on GPU nodes. ThenodeSelector field targets nodes by their pool label:
Use persistent storage
Gcore clusters include CSI-based storage classes backed by Cinder volumes. List available storage classes:Delete a node pool
Removing a pool terminates all nodes in that pool. Running pods are evicted and rescheduled to other available nodes if resources permit.- Navigate to the Pools tab.
- Click the … menu next to the pool and select Delete.
- Confirm the deletion.
Configure cluster autoscaling
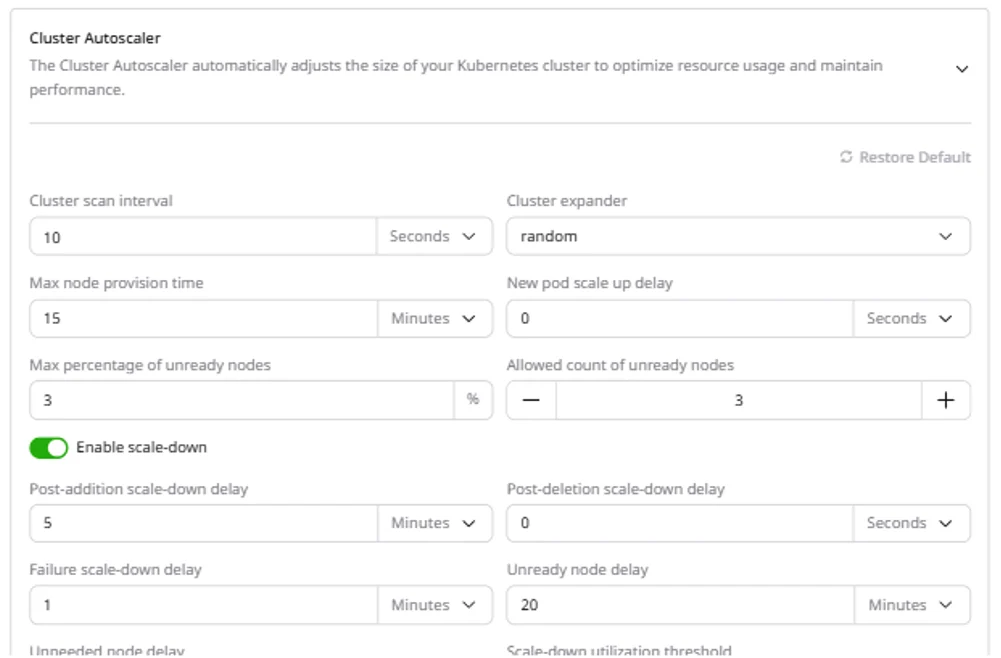
The Cluster Autoscaler adjusts cluster size based on workload demand. When pods are pending due to insufficient resources, the autoscaler adds nodes. When nodes are underutilized, it removes them. Autoscaling operates within the min/max limits set per pool.The Cluster Autoscaler scales based on CPU and memory utilization only. GPU utilization is not used as a scaling signal.
- Navigate to the Advanced settings tab.
- Expand Cluster Autoscaler.
- Configure the parameters and click Save changes.
| Parameter | Description | Default |
|---|---|---|
| Cluster scan interval | How often the autoscaler checks for pending pods | 10 seconds |
| Cluster expander | Strategy for selecting which node group to scale | random |
| Max node provision time | Maximum time to wait for a node to become ready | 15 minutes |
| New pod scale up delay | Wait time before triggering scale-up for new pods | 0 seconds |
| Post-addition scale-down delay | Wait time after adding a node before considering scale-down | 5 minutes |
| Post-deletion scale-down delay | Wait time after deleting a node before the next deletion | 0 seconds |
| Unneeded node delay | How long a node must be unneeded before removal | 5 minutes |
| Scale-down utilization threshold | Node utilization below which it is considered for removal | 99% |
| Max bulk deletion of empty nodes | Maximum empty nodes deleted at once | 10 |
| Max graceful termination time | Time allowed for pods to terminate gracefully | 600 seconds |
Configure logging
Cluster logging collects container and system logs, storing them in OpenSearch Dashboards for analysis and debugging. Logging is a paid feature.- Navigate to the Logging tab.
- Toggle Enable Logging.
- Select an existing log topic or create a new one.
- Click Save.
Configure OIDC authentication
OIDC authentication enables Single Sign-On (SSO) for Kubernetes API access through an external identity provider such as Okta, Azure AD, or Keycloak.- Navigate to the Advanced settings tab.
- Expand OIDC authentication.
- Configure the identity provider settings and click Save changes.
| Field | Description |
|---|---|
| Issuer URL | The OIDC issuer endpoint (e.g., https://example.com) |
| Client ID | Application client ID from the identity provider |
| Groups claim | JWT claim containing group membership (optional) |
| Groups prefix | Prefix added to group names (default: oidc) |
| Set required claims | Require specific claims in tokens |
| Signing algorithms | JWT signing algorithms to accept (default: RS256, optional) |
| Username claim | JWT claim used as the username (default: sub) |
| Username prefix | Prefix added to usernames (default: oidc) |
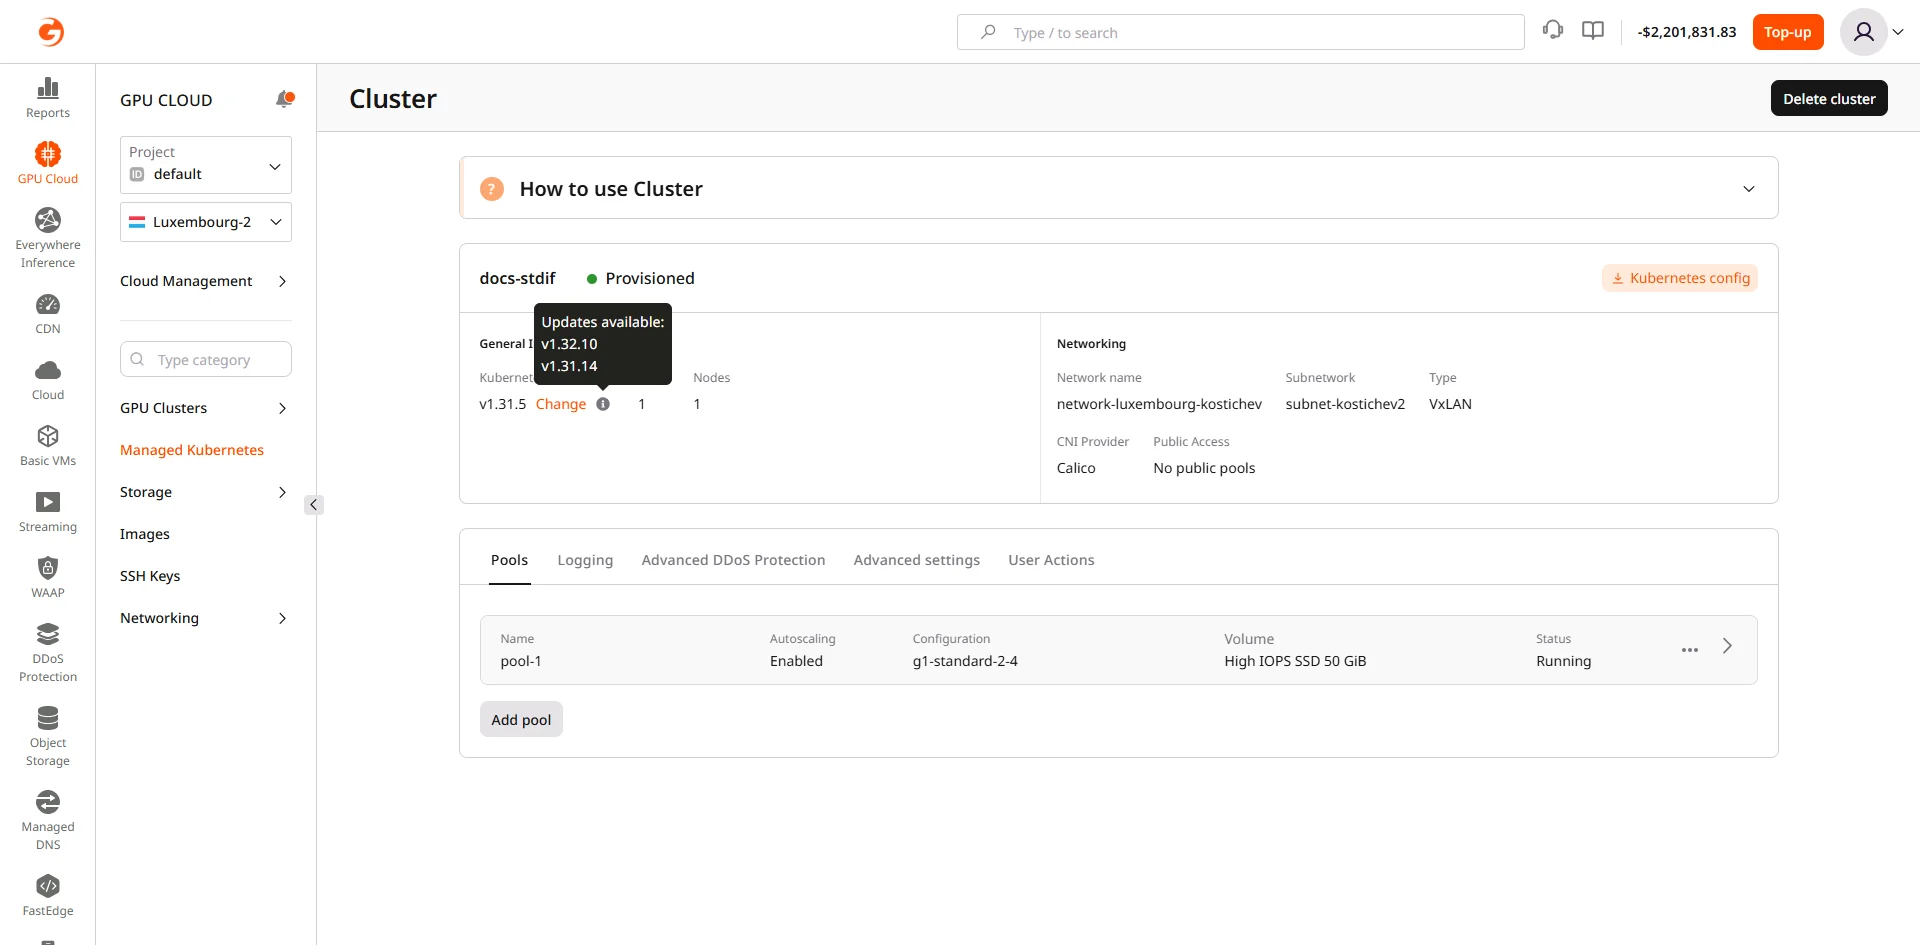
Upgrade Kubernetes version
Kubernetes upgrades use a rolling update strategy: a new node on the target version is provisioned, workloads migrate to it, and the old node is removed. This repeats until all nodes run the new version, minimizing downtime.Before upgrading
Check that the cluster control plane version and node versions match:Start the upgrade
When a newer Kubernetes version is available, an upgrade prompt appears in the cluster overview next to the Kubernetes Version field:- In the cluster overview, click the upgrade prompt next to Kubernetes Version.
- Select the target version (next minor version only).
- Confirm the upgrade.
After upgrading
After the control plane upgrades, update the local kubectl client if the version skew exceeds one minor version:Update the Cluster Autoscaler
The Cluster Autoscaler image must match the cluster’s Kubernetes minor version. Find the latest release for the new version on the releases page, then update the image:<X.XX.X> with the release that matches the upgraded cluster version. For example, if the cluster is now v1.35, use the latest 1.35.x Cluster Autoscaler release. A version mismatch causes the autoscaler to stop scaling correctly.
Verify the rollout completed:
Update the NVIDIA device plugin (GPU bare metal pools only)
The NVIDIA device plugin DaemonSet must be updated after a cluster upgrade to maintain GPU resource scheduling. Find the latest compatible release on the releases page, then apply it:<X.X.X> with the target plugin version. Verify the DaemonSet is running on all GPU nodes:
READY equal to DESIRED before scheduling GPU workloads.
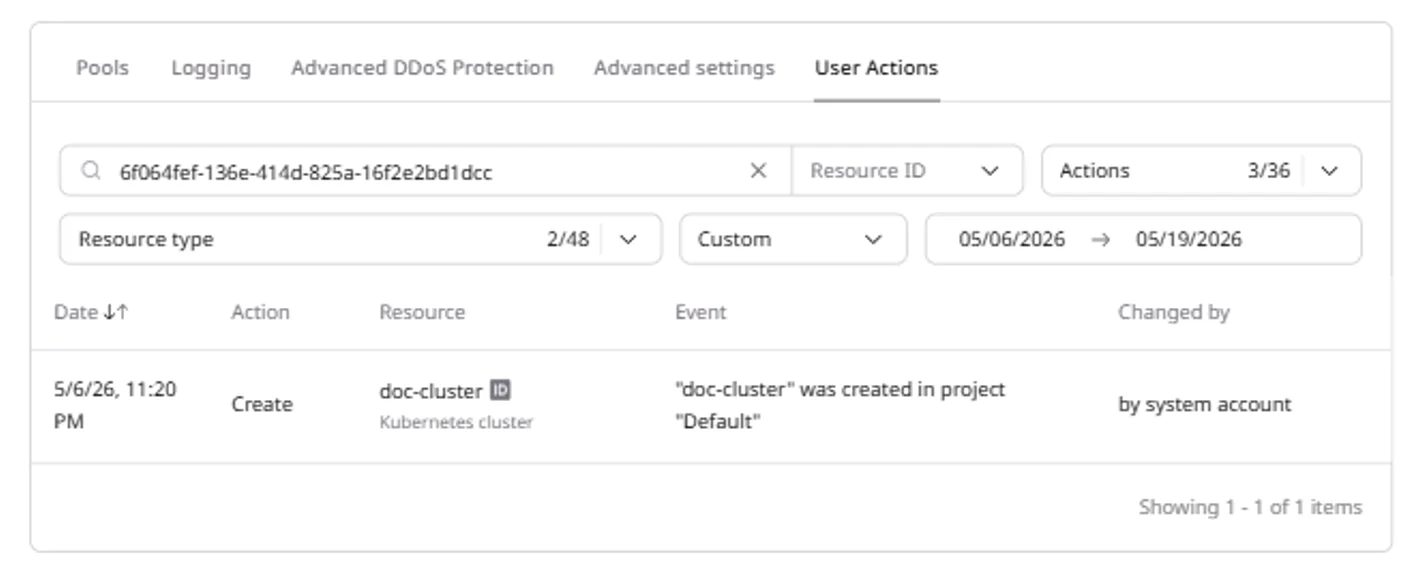
View audit log
The User Actions tab provides an audit log of all cluster operations: creation, pool changes, configuration updates, and upgrades. Each entry shows the timestamp, action type, affected resource, event description, and the account that performed the action.- Navigate to the User Actions tab.
- Use filters to narrow results by resource name, action type, resource type, or date range.
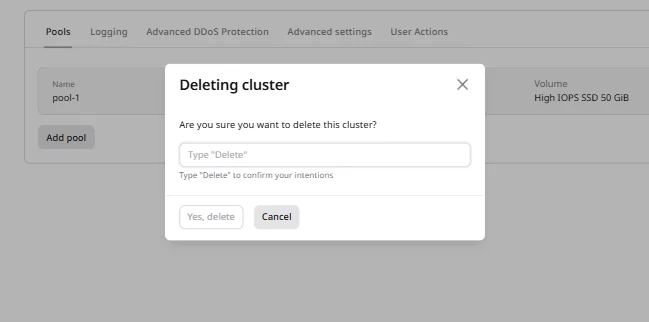
Delete the cluster
Cluster deletion removes all nodes, pools, and associated resources. External resources such as Object Storage buckets and Persistent Volumes created outside the cluster are not affected.- Navigate to the cluster overview.
- Click Delete cluster.
- Type
Deletein the confirmation field. - Click Yes, delete.