A CDN resource is a proxy between Gcore caching edge servers and a website’s origin. Creating one accelerates content delivery by routing requests through Gcore’s global infrastructure.
During setup, choose how DNS is managed:
- Do not delegate — keep DNS at the current provider and add a single CNAME record pointing to Gcore. Best when only specific asset URLs need to be served through CDN.
- Delegate to Gcore DNS — transfer DNS management to Gcore Managed DNS and update nameservers at the domain registrar. Best for routing all site traffic through CDN without changing individual URLs.
Step 1. Start creation
Go to the CDN page and click Create CDN resource.
Step 2. Configure domain and DNS
The following sections cover entering the domain, selecting the DNS option, and optionally enabling WAAP — all done on the same creation form.
1. Enter a domain
In the Add domain field, enter the domain to accelerate.
- For CNAME-based setup, use a subdomain such as
cdn.yourwebsite.com.
- For DNS delegation, use the root or any level domain such as
yourwebsite.com or store.yourwebsite.com.
After a CDN resource is created, the custom domain cannot be changed.
2. Select the DNS option
Choose how DNS will be managed for this resource:
- Do not delegate — keeps DNS at the current provider. After resource creation, add a CNAME record at the DNS provider pointing the entered subdomain to the
*.gcdn.co value shown in the portal.
- Delegate to Gcore DNS — automatically creates a DNS zone in Gcore Managed DNS. After resource creation, update the nameservers at the domain registrar to the Gcore nameservers shown in the portal. If Managed DNS hasn’t been used before, the Free plan activates automatically.
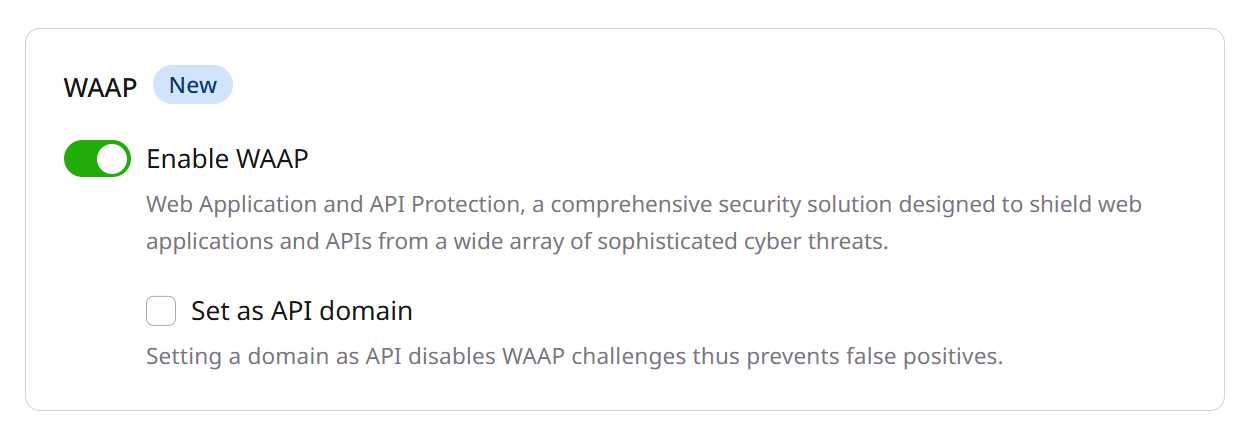
3. Enable WAAP (optional)
Enable the Enable WAAP toggle to activate Web Application and API Protection alongside CDN acceleration. WAAP provides Layer 7 DDoS protection and web application security; configure it after resource creation using the WAAP setup guide.
An origin is the source server (website, application, or storage bucket) from which the CDN fetches content. Each origin is associated with an origin group.
Choose one of the following options:
- Specify content origin — select this when no origin group exists yet. Follow the instructions in step 2 of the origin group guide.
- Select origin group — select this when an origin group already exists. Choose the required group from the dropdown. This option only appears when existing groups are available.
Add a description (optional)
Provide any additional notes about this CDN resource. The description is displayed next to the resource CNAME in the CDN resources list and does not affect settings.
Step 4. Create the resource
Click Create CDN resource to create the resource. When WAAP was enabled in Step 2, the button reads Create and enable protection.
After creation, the portal displays the next steps based on the DNS option selected in Step 2.
Step 5. Complete DNS setup
Do not delegate (CNAME)
The portal shows the generated *.gcdn.co CNAME value after resource creation. In the DNS provider’s control panel, add a CNAME record for the subdomain entered in Step 2:
| Field | Value |
|---|
| Name / Host | The subdomain entered in Step 2, e.g. cdn.yourwebsite.com |
| Value / Points to | The *.gcdn.co value shown in the portal, e.g. cl-1ab23456.gcdn.co |
*.gcdn.co value.
Delegate to Gcore DNS (nameservers)
The portal shows the Gcore nameservers to configure at the domain registrar. Log in to the registrar and replace the current nameservers with the values shown in the portal. The current values are typically:
ns1.gcorelabs.net
ns2.gcdn.services
Step 6. Integrate the CDN resource with the website
For CNAME-based setups, update the static file URLs in the website admin panel to use the CDN subdomain instead of the origin domain.
For example, change yourwebsite.com/images/image.jpg to cdn.yourwebsite.com/images/image.jpg. Uncached requests continue to reach the origin server, while cached files are served from CDN edge nodes.
For sites built on a CMS such as WordPress, Joomla, or Drupal, use a plugin to replace domain names in file paths. The CMS integration guide covers the supported platforms and plugins.
CDN resource creation is complete. Click Open resource settings to view and configure advanced settings.
Troubleshoot resource creation
If content is not being served through the CDN after completing all steps, verify the following in the resource settings:
- The CNAME record or nameservers at the DNS provider are correctly configured with the values shown in the portal.
- DNS propagation is complete — changes can take up to 24 hours to propagate.
- For CNAME-based setups: static file URLs in the website source have been updated to use the CDN subdomain.
If issues persist, contact Gcore support or follow the CMS integration guide.