API
The Gcore Customer Portal is being updated. Screenshots may not show the current version.
DNS Hosting
DNS Hosting
Chosen image
Home/DNS Hosting/Plugins/OctoDNS

Use Gcore DNS as a secondary DNS with OctoDNS

What is a secondary DNS?

A secondary DNS is a backup DNS that stores a copy of information about your zones and records. It receives data from the primary server. To use our DNS as a secondary one, send the information about all DNS records right from the databases of your provider using this instruction. 

Before you start, check your provider against the table of providers who support OctoDNS. If not, unfortunately, it is not possible to transfer the records automatically.

Synchronize records of Gcore DNS with your DNS

Synchronize records of Gcore DNS with your DNS

This guide will help you to install OctoDNS  — a tool for managing DNS zones of different providers. Using it, you will make records on our DNS server identical to records on yours. That's how it works:

Synchronize records of Gcore DNS with your DNS

1. In your account, create a necessary DNS zone manually. If the zone has been already created, skip this step.

create a necessary DNS zone manually

2. On your PC, update a local package index to download all new versions.

sudo apt update

Perform all next steps of this tutorial on your PC.

3. Install python and virtualenv packages.

sudo apt install python virtualenv

4. Create necessary directories for OctoDNS — a tool for managing DNS zones.

mkdir ~/octodns ~/octodns/config

5. Go to "octodns".

cd ~/octodns

6. Create a python virtual environment, activate it and stay in it while you work with this tutorial.

7. (Optional) if you don’t have Git, install it via the following command:

sudo apt-get install git-all

8. In virtualenv, install OctoDNS pip packages for two providers: Gcore and yours. To do this, use the command below (replace "octodns_yourprovider" to "module" of your provider from the table of providers).

pip install --user octodns octodns_gcore octodns_yourprovider

After installation, request OctoDNS version to make sure everything works.

octodns-sync --version

You will receive a response with your OctoDNS version, for example:

octoDNS 0.9.17

If you see the error:

octodns-sync: command not found

Most likely you are not in virtualenv. Do steps no. 4-6 again.

9. Go to the "config" directory you have already created.

cd ~/octodns/config

10. Create a configuration file inside.

nano config.yaml

In this configuration file, you need to specify providers and zones that OctoDNS will manage as well as the dependencies between them. The final file will look like this:

configuration file

We will tell you how to fill in each data section. First, copy the template below and paste it into the configuration file (for the .yaml format, indentations are very important — our template will help you to enter the data exactly so that the program can read it):

providers:  
    [your provider name]:  
        [your provider class]  
        [authentication data, line no. 1]  
        [authentication data, line no. 2] 
        [authentication data, line no. ...] 
    gcore:  
        class: octodns_gcore.GCoreProvider  
        [authentication data, line no. 1]  
        [authentication data, line no. ]  
        [authentication data, line no. ...]  
zones:  
  [your DNS zone no. 1].:  
    sources:  
      - [your provider name]  
    targets:  
      - gcore  
  [your DNS zone no. 2].:  
    sources:  
      - [your provider name]  
    targets:  
      - gcore

Secondly, you have to fill in providers sections. Templates for them are located in OctoDNS repositories of providers. Let's start filling in the form of the Gcore DNS provider. To open its repository, open the the table of providers and click module name "octodns_gcore".

providers

Find the "Configuration" section. Three things are described there: provider name, provider class name and authentification data. 

Configuration

Provider name (gcore) and class name (class: octodns_gcore.GCoreProvider) are already in our configuration file template, you don't need to copy-paste them. Now you have to fill in authentification data according to what is writtten in the "Conguration" section. You can choose what authentication data to use: an API key or a login-password pair. We recommend using an API key.

Example of configuration with an API key:

    gcore:  
       class: octodns_gcore.GCoreProvider  
       token: Fdjkfjsflsfjdjjfjsnflfdlsdf&fsfhd  
       token_type: APIKey

Example of configuration with a login-password pair:

   gcore:  
       class: octodns_gcore.GCoreProvider  
       login: Yourlogin  
       password: Yourpassword  
       auth_url: https://api.gcore.com  
       url: https://api.gcore.com/dns  
       records_per_response: 1

In "config.yaml" file, fill in your provider section as you've just done for Gcore DNS: open its repository, find the "Configuration" section, copy and paste the provider name and its class name, fill in authentication data. If your provider is Amazon Route 53, the result will be as follows:

   route53:  
       class: octodns_route53.Route53Provider  
       access_key_id: YourKeyID  
       secret_access_key: YourSecretKeyID  
   gcore:  
       class: octodns_gcore.GCoreProvider  
       token: Fdjkfjsflsfjdjjfjsnflfdlsdf&fsfhd  
       token_type: APIKey

Then fill in the DNS zones data. For each zone, enter its name and a pair of source-target providers. Your provider will act as a source (OctoDNS will take DNS records from its databases), and Gcore DNS provider will act as a target (its records will be edited to be identical to data of your provider). For example, to synchronize DNS records of "myzone.com" and "mymyzone.com" zones, you need to enter the following data:

DNS zones data

After adding all zones to the file, save changes and close it.

11. The last step is synchronizing DNS records. Run the test command first — it will show you what changes OctoDNS will make during synchronization.

octodns-sync --config-file=[your configuration file directory]

For example, if the directory of the configuration file is /home/ubuntu/octodns/config/config.yaml, then the command will be:

octodns-sync --config-file=/home/ubuntu/octodns/config/config.yaml

If the configuration file was filled out correctly, you will get output with a similar summary at the end:

configuration file

These are the changes OctoDNS is going to make to our DNS records. If everything is correct, run the command to make these changes:

octodns-sync --config-file=[your configuration file directory] --doit

You will see similar output:

output

It means the changes have been made. You can see the updated list of records in your Control panel in the DNS tab.

Control panel in the DNS tab.

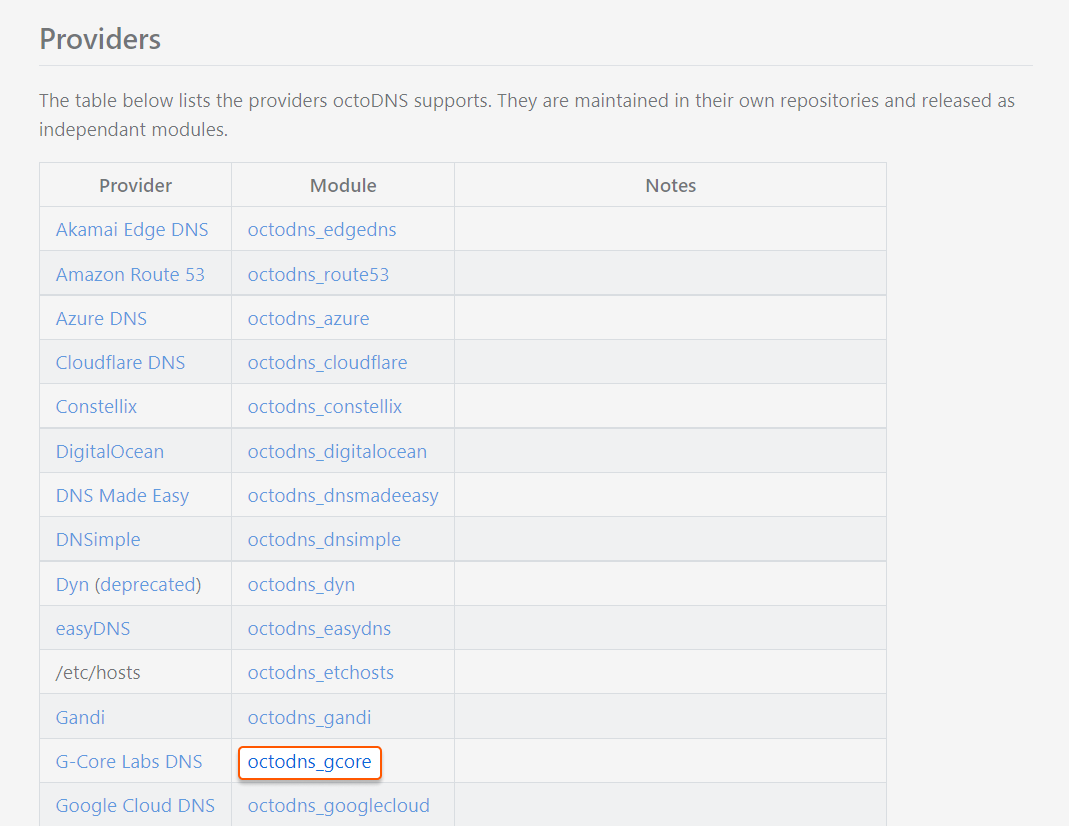
Update records of our secondary DNS

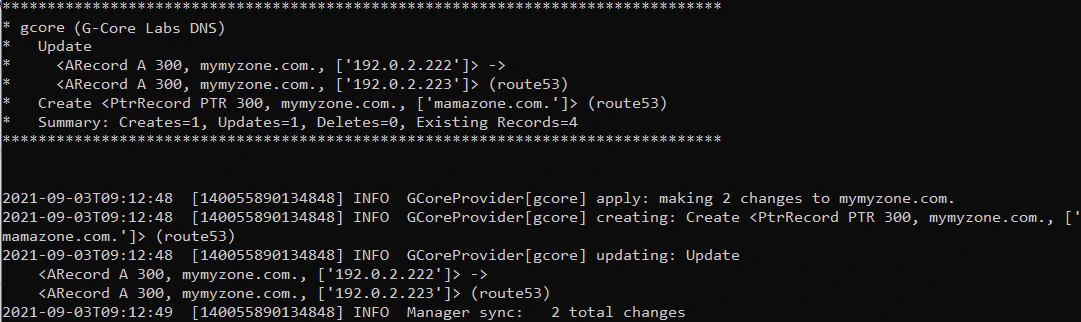
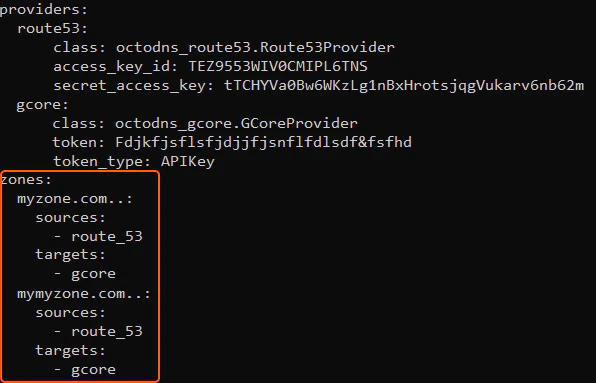
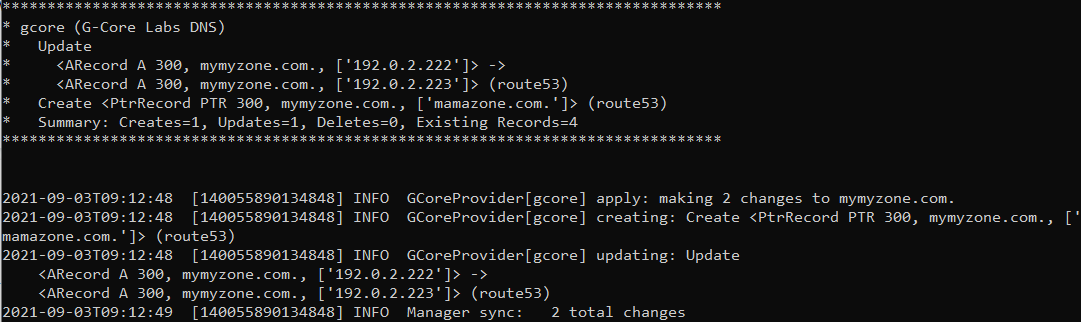
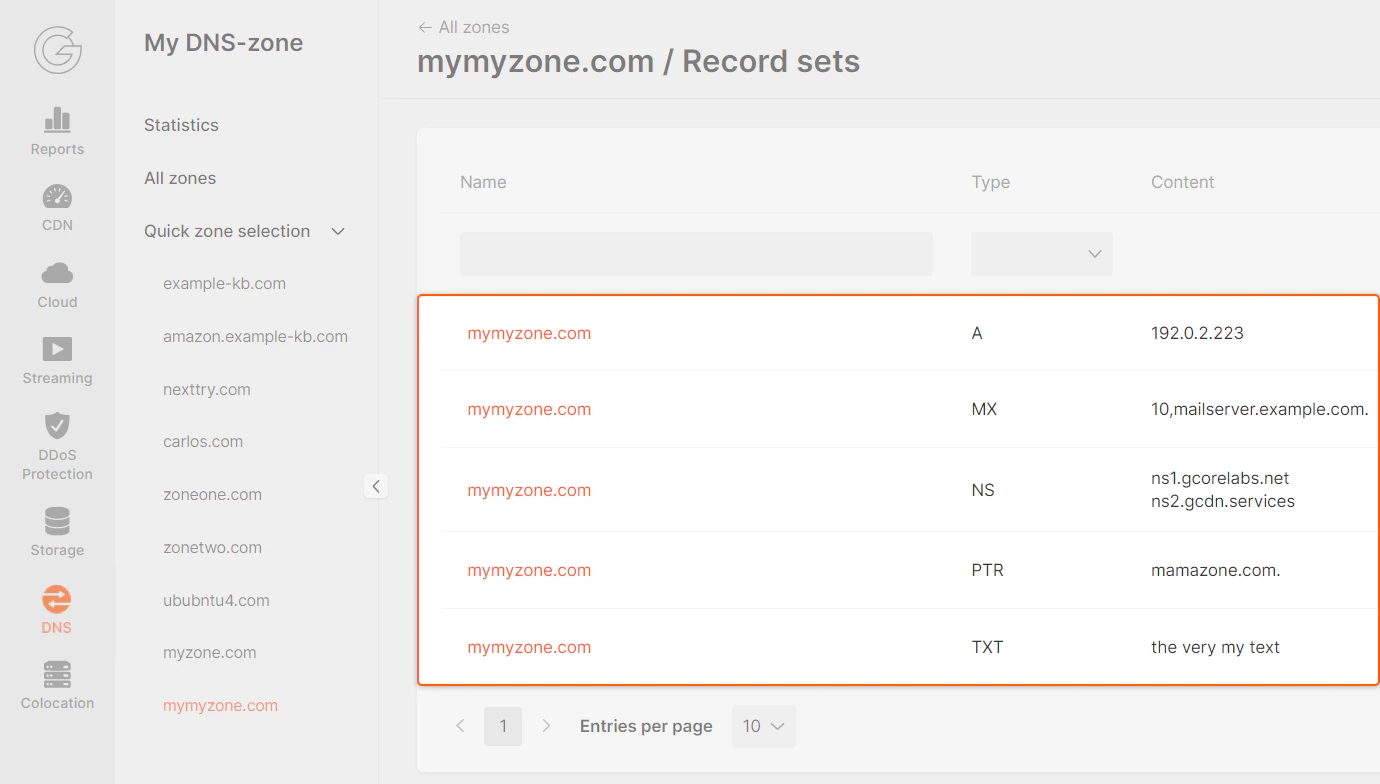
The instructions below are for updating records manually. If you need an auto-update of records, set up automatic execution of the commands from this instruction via the cron daemon.

1. Go to "octodns".

cd ~/octodns

2. Activate the python virtual environment.

  1. You have already configured necessary zones as part of the instruction "Synchronize records in DNS Gcore with your DNS" above. To synchronize DNS records, run the command:
octodns-sync --config-file=[your config file directory] --doit

You will see similar output:

output

It means the changes have been made. You can see the updated list of records in your Control panel in the DNS tab.

Was this article helpful?

Not a Gcore user yet?

Learn more about our DNS hosting

Go to the product page