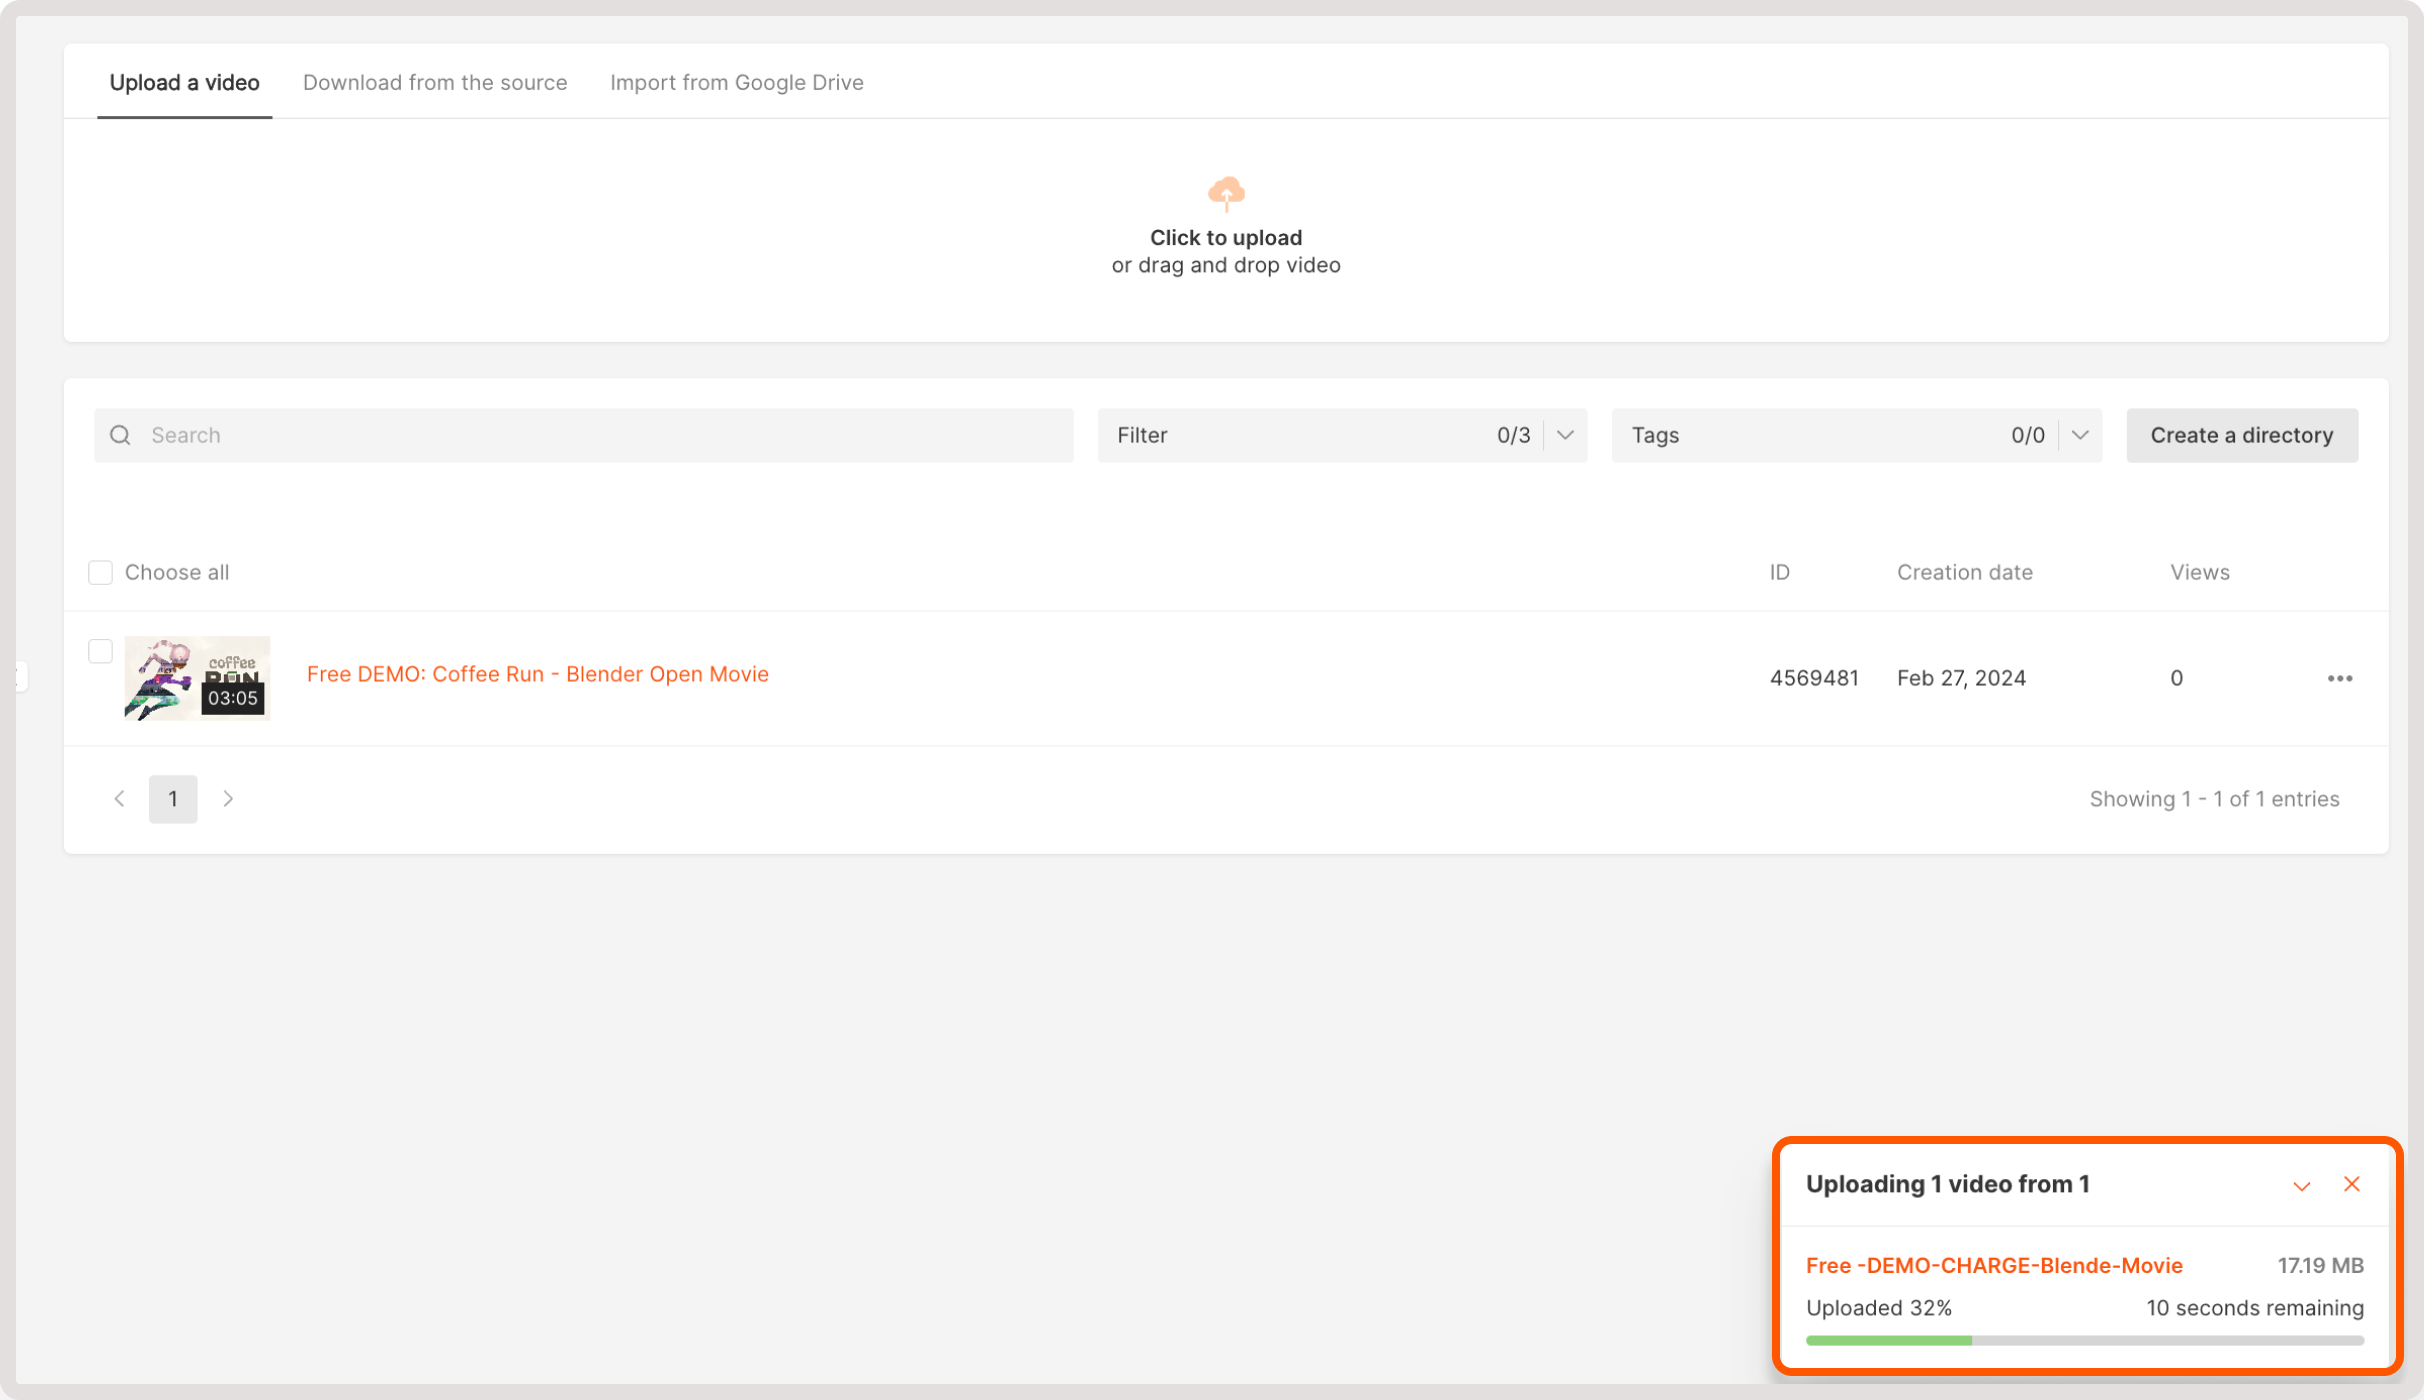
Step 1. Upload a video to the customer portal
Navigate to the Video Hosting tab and upload a video using one of the following actions:- Upload the video. On this tab, you can add locally stored videos. Either click the Click to upload button or drag and drop your files to the designated upload area.

- Download from the source. Here you can upload a video from the origin by specifying the video title and video origin URL.

- Import from Google Drive. To add a video, click the Click here area, sign in to your Google account, and then choose the required video from your Google Drive.

| Status | What it means |
|---|---|
empty | The video entity was created, but the source file is still being received by upload, import, or download from your source. |
pending | The source file was received and is being prepared for processing. |
viewable | The video can already be watched in one of the available qualities. |
ready | The video is fully prepared and available in all processed qualities. |
error | The video could not be uploaded or prepared. Check the file and try again. |
If a video enters
Error status after upload, first inspect the original file itself. Some failures are caused by technical parameter changes inside the source file, such as pixel format or color range changing near the end. In such cases, retrying the same file usually does not help. Re-export or trim the source and upload the corrected file again.Step 2. Update video settings
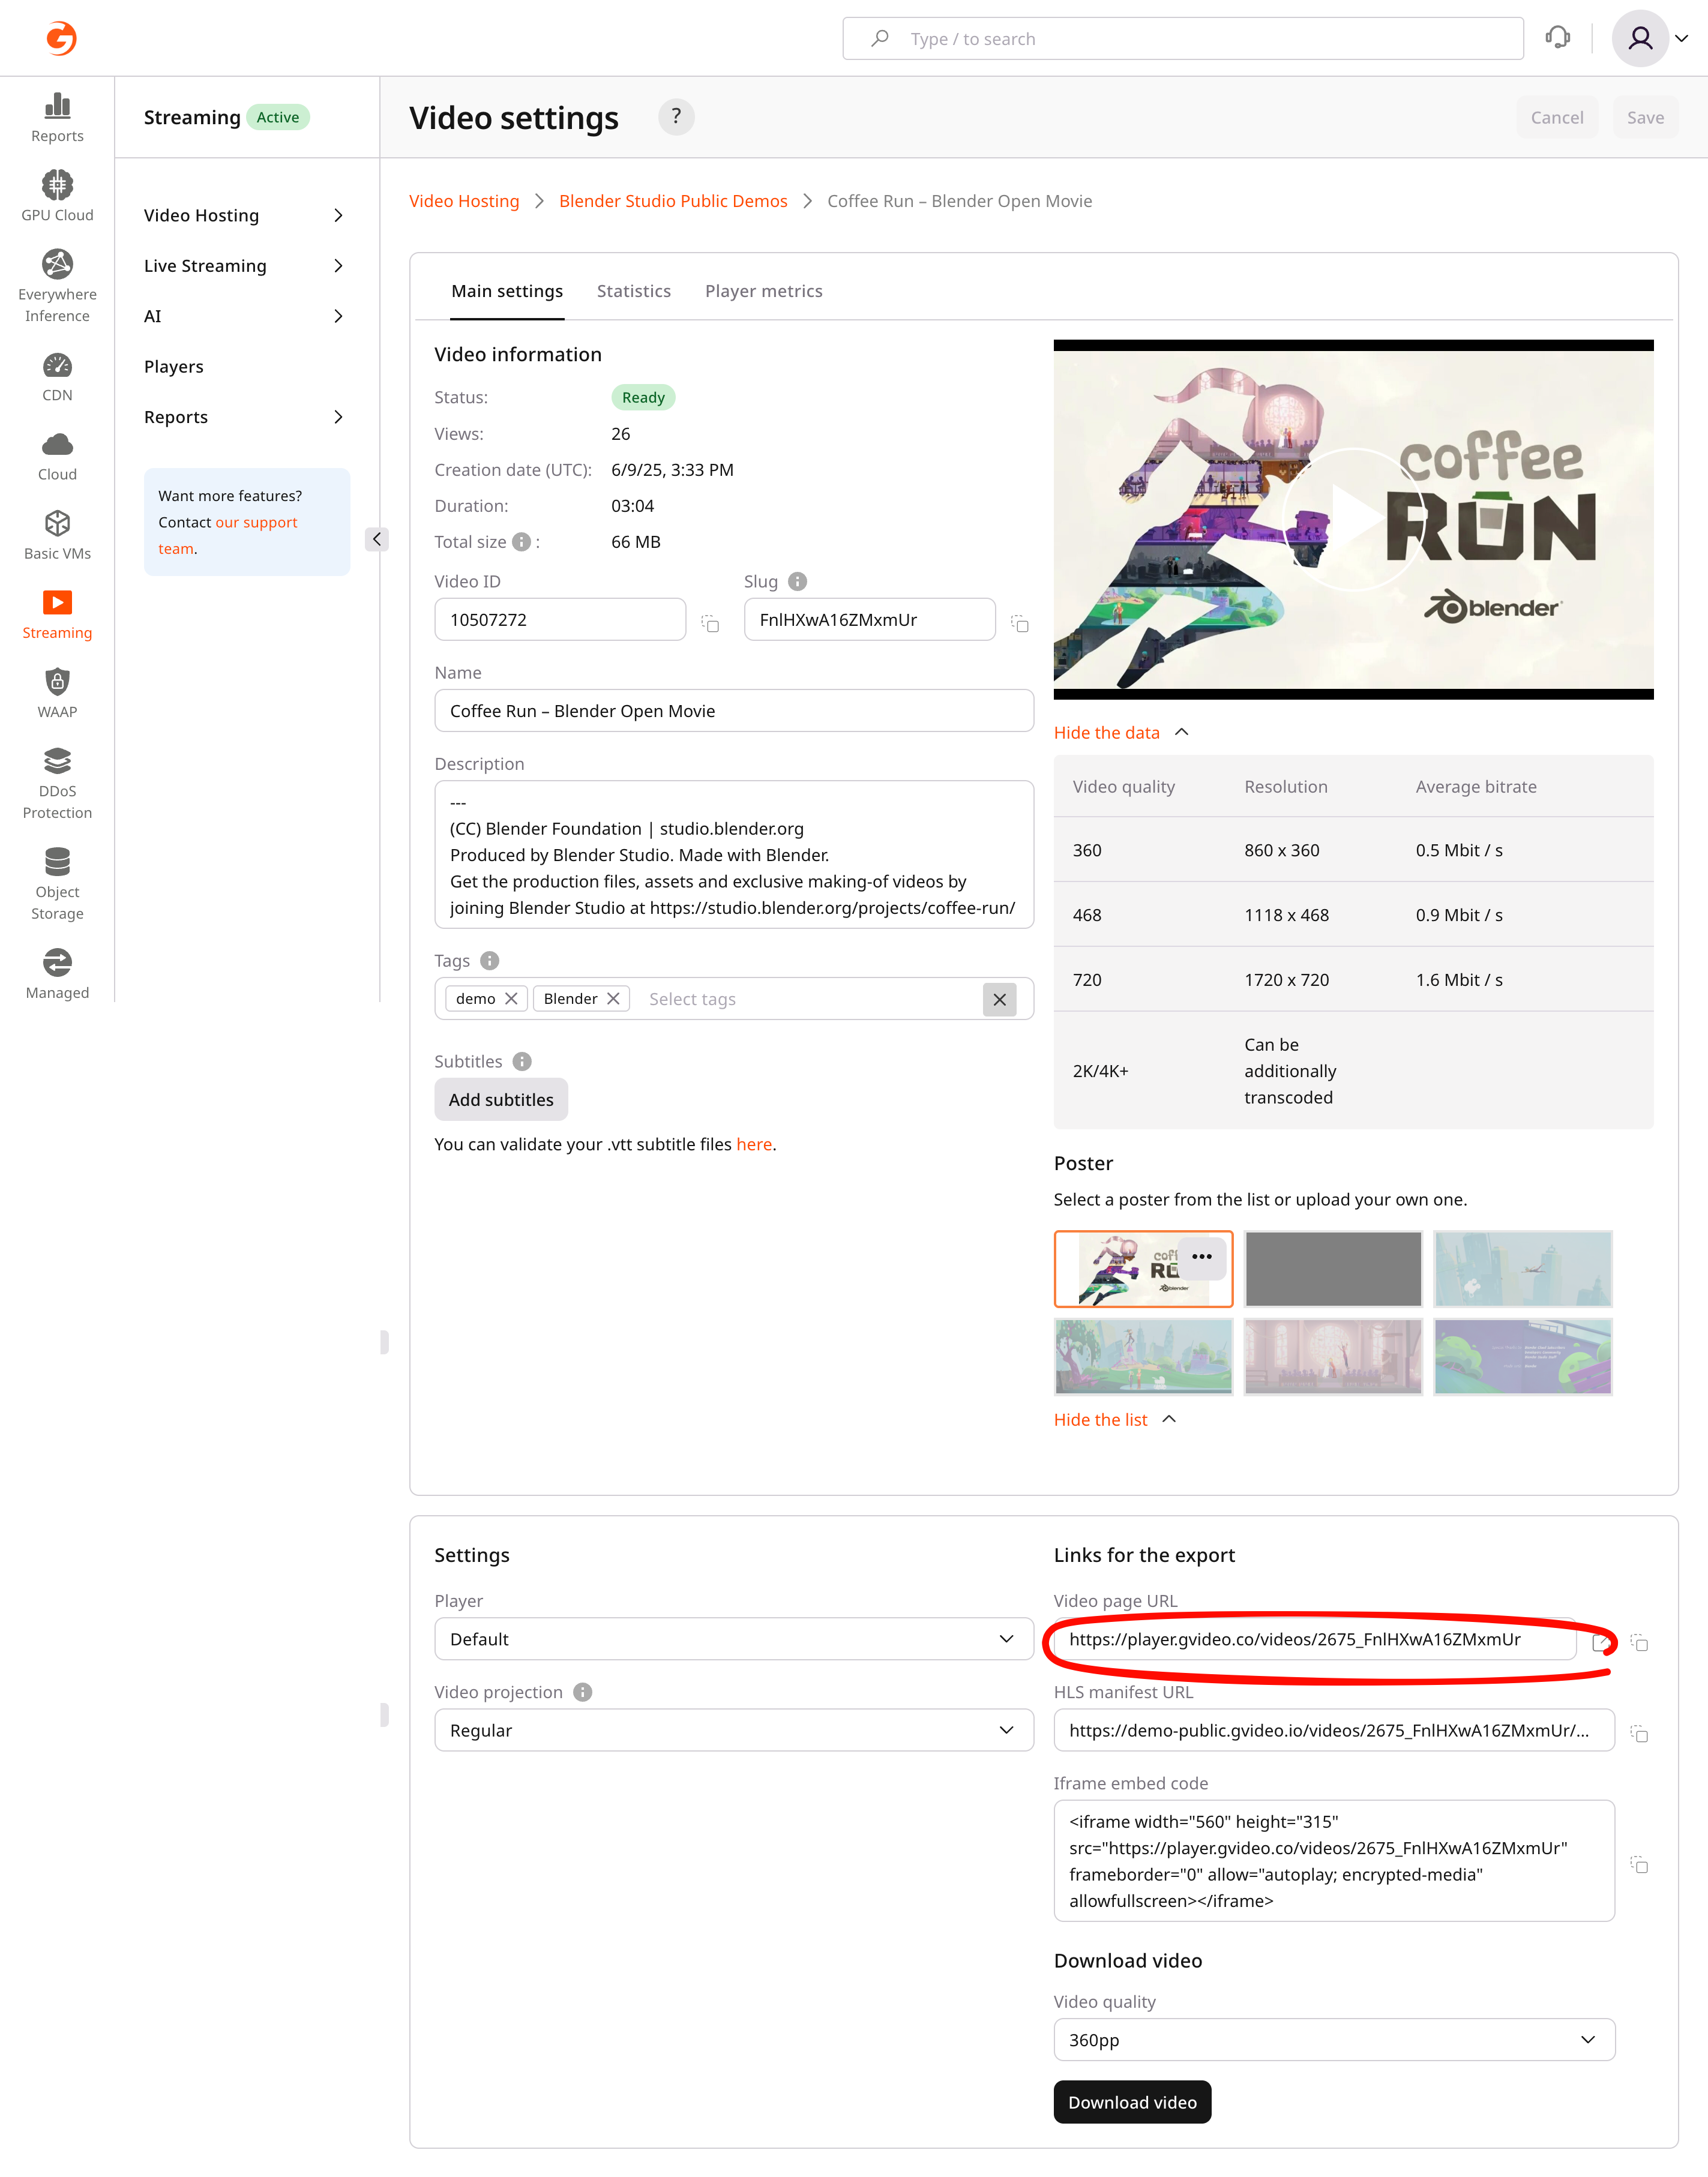
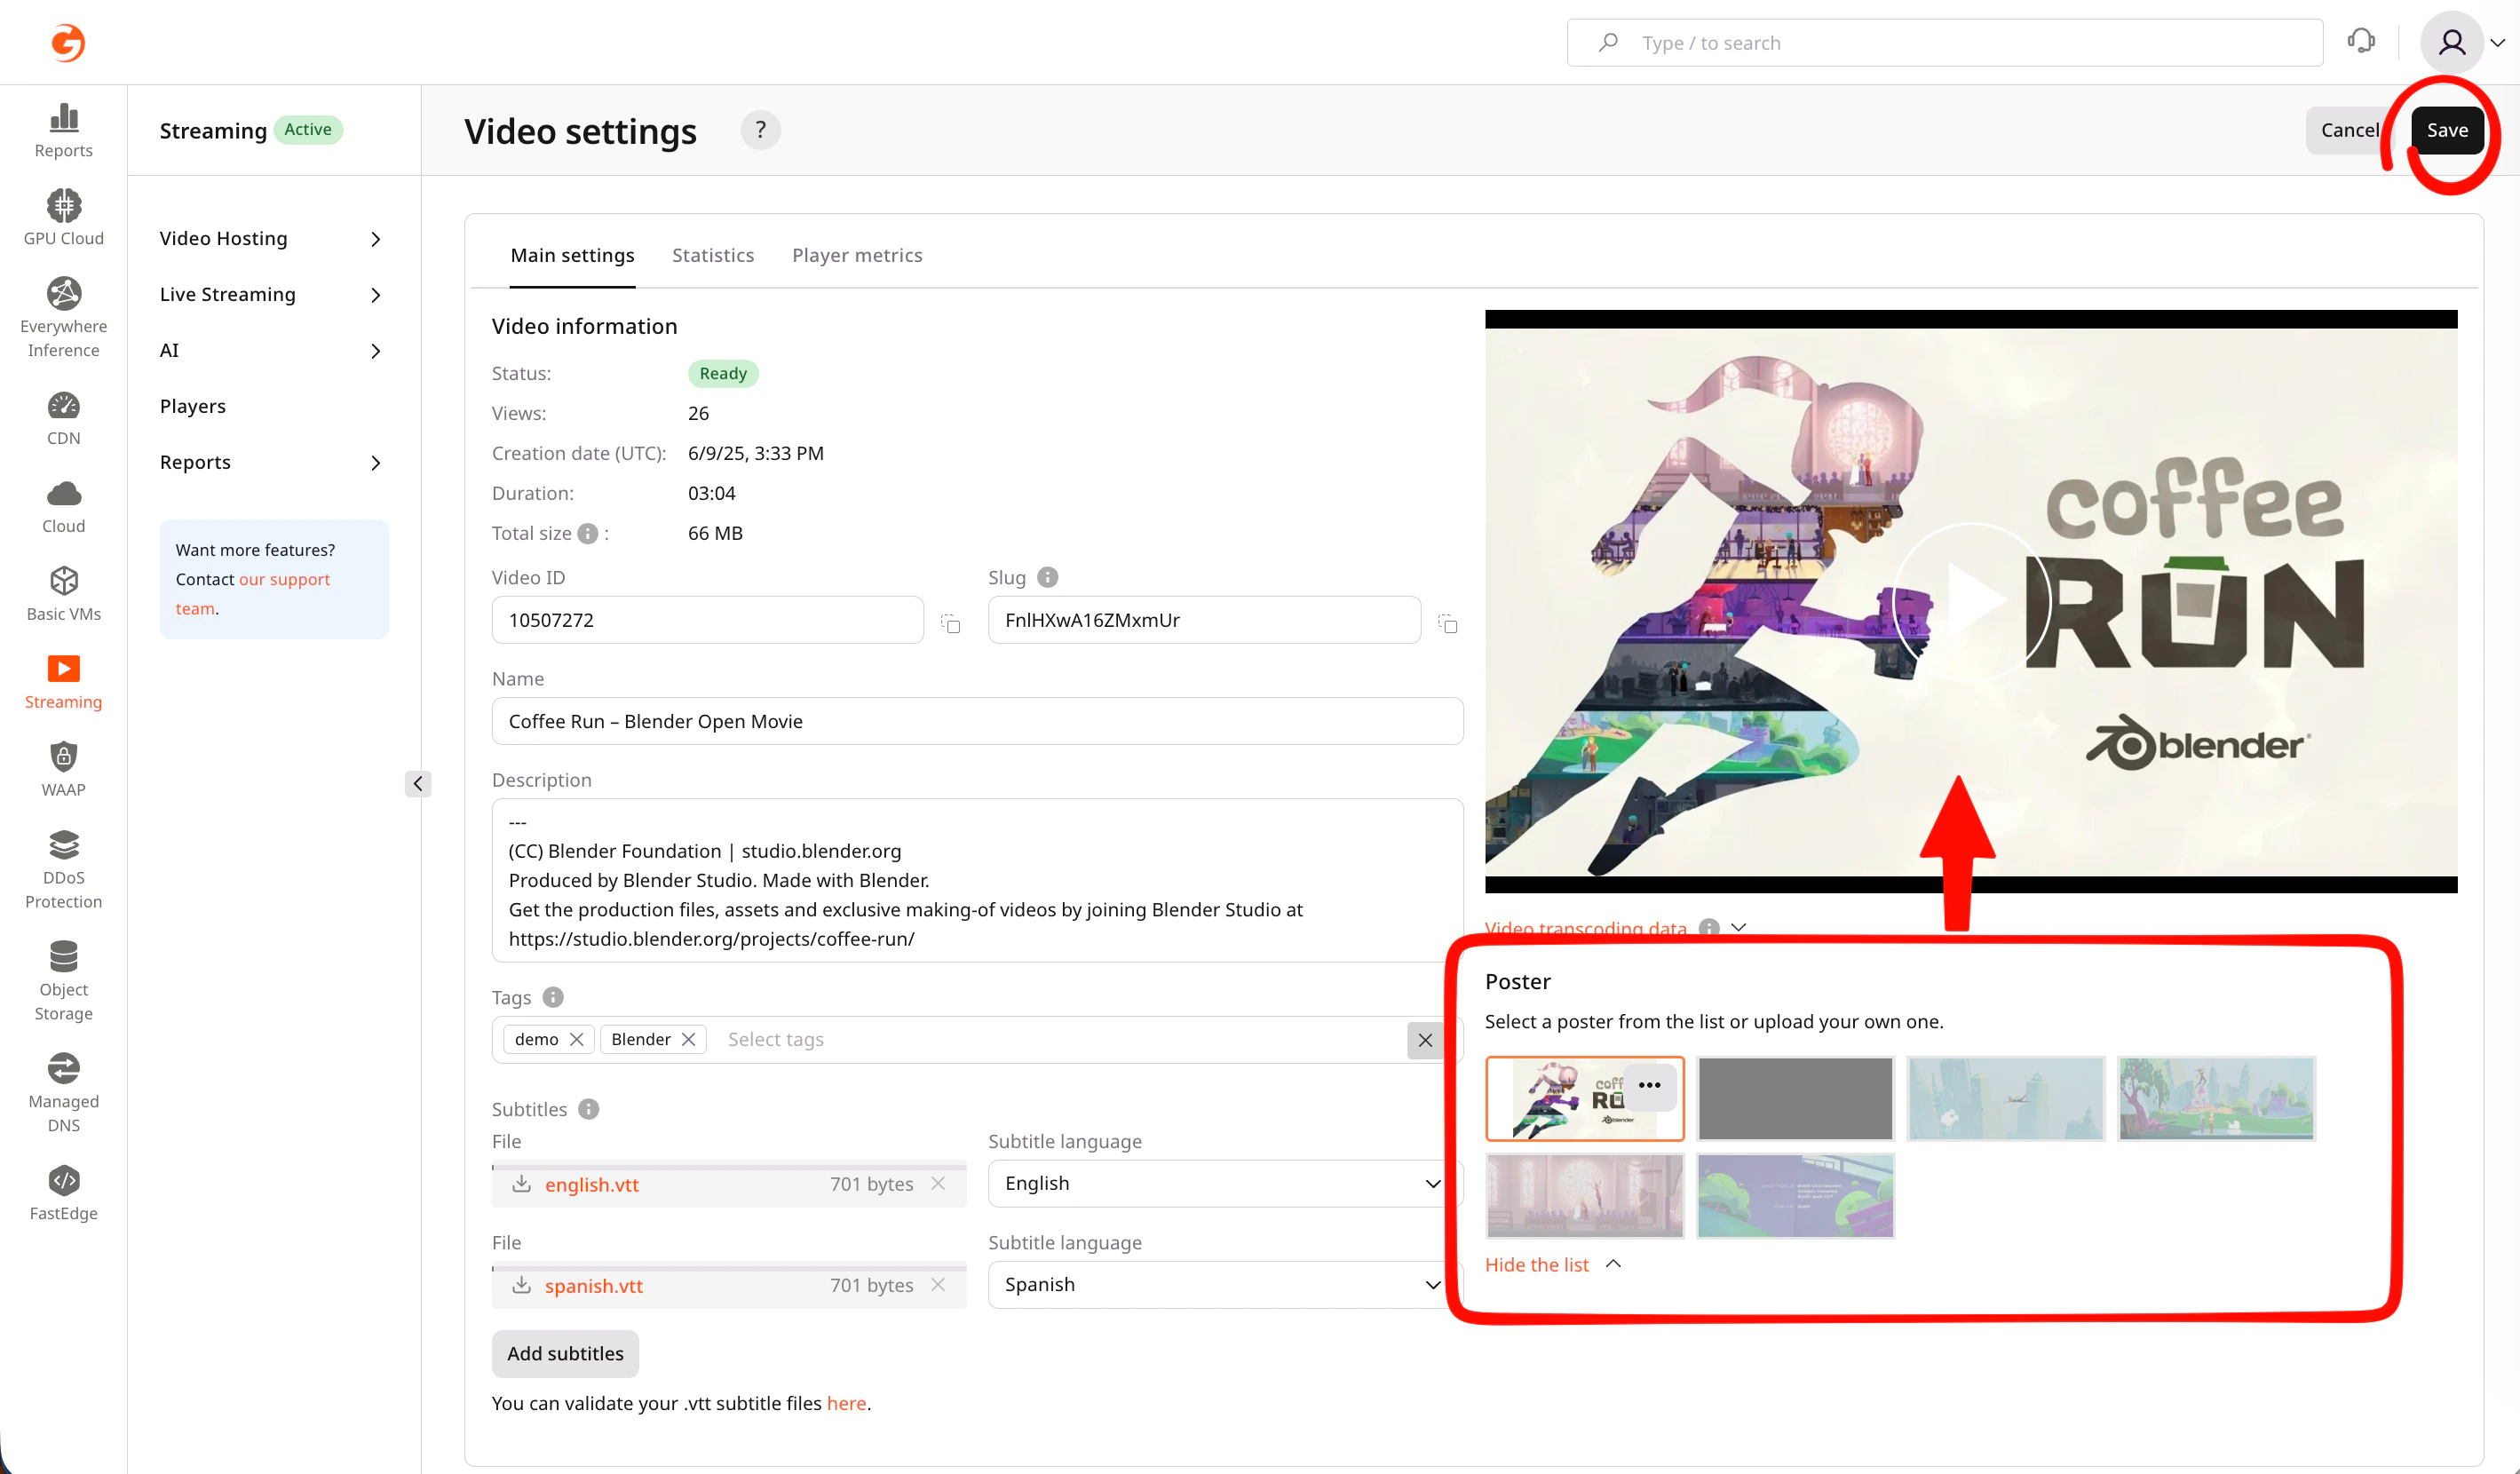
If you need to adjust some video configuration, get links to export the video or set up subtitles and tags. You can do so on the Main settings tab: 1. Open video settings by clicking the video name or the three-dot icon next to it.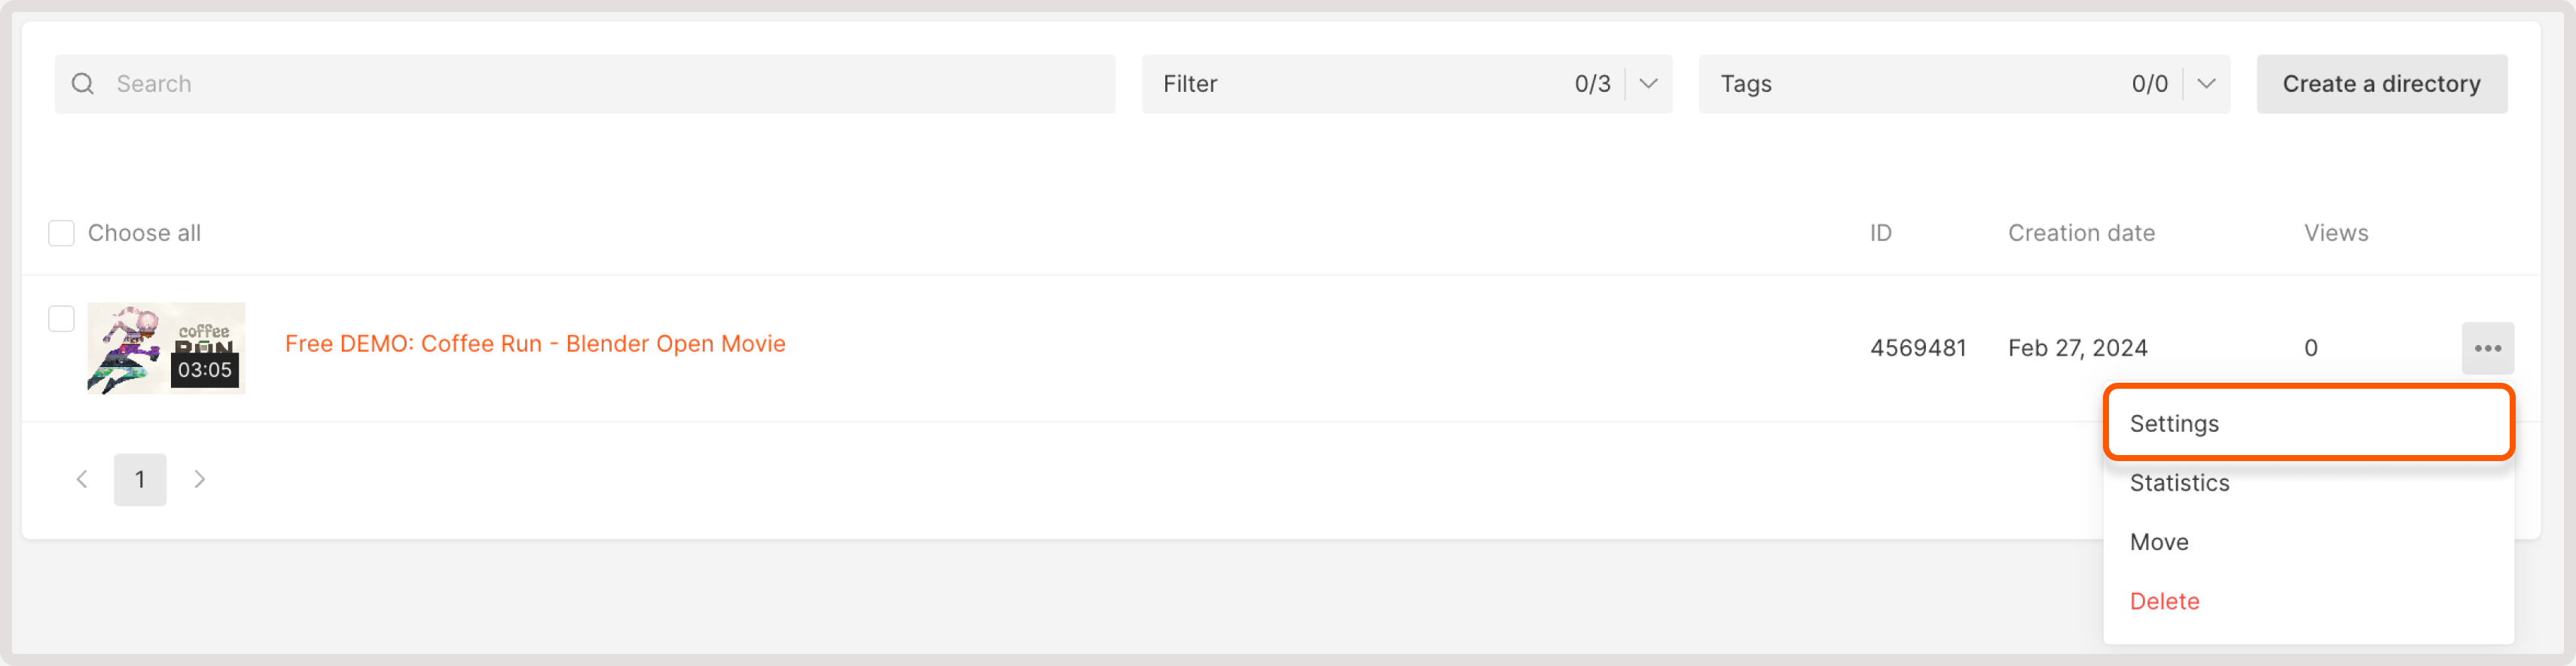
- Name : Change its name (it will be displayed in the Gcore Customer Portal)
- Description : Enter a description (it will be displayed in the Gcore Customer Portal)
- Player : Select custom player, if you enabled the Players feature
- Tags : Select tags for a video
- Subtitles : Add subtitles and choose a subtitle language
- Screensaver : Select a screensaver from screenshots or upload a screensaver from your computer

Step 3. Choose a player UI customization and video projection
Customize the functionality and appearance of a built-in HTML web player for the uploaded video. Note that these settings apply only to the built-in player and won’t affect viewers using external or OS-native players. In the Player dropdown, you can choose the existing configuration. To add a new built-in player and customize its settings, refer to our dedicated guide.Step 4. Export video
In the Links for export section, choose the relevant export method:- Video page URL : A Web player URL to access and play the video directly from a website.
- HLS manifest URL : A URL to a master playlist HLS (master.m3u8) with MPEGTS container.
- iFrame embed code : A URL to our HTML video player with the video inside. It can be inserted into an iframe on your website and the video will automatically play on all browsers.