General information
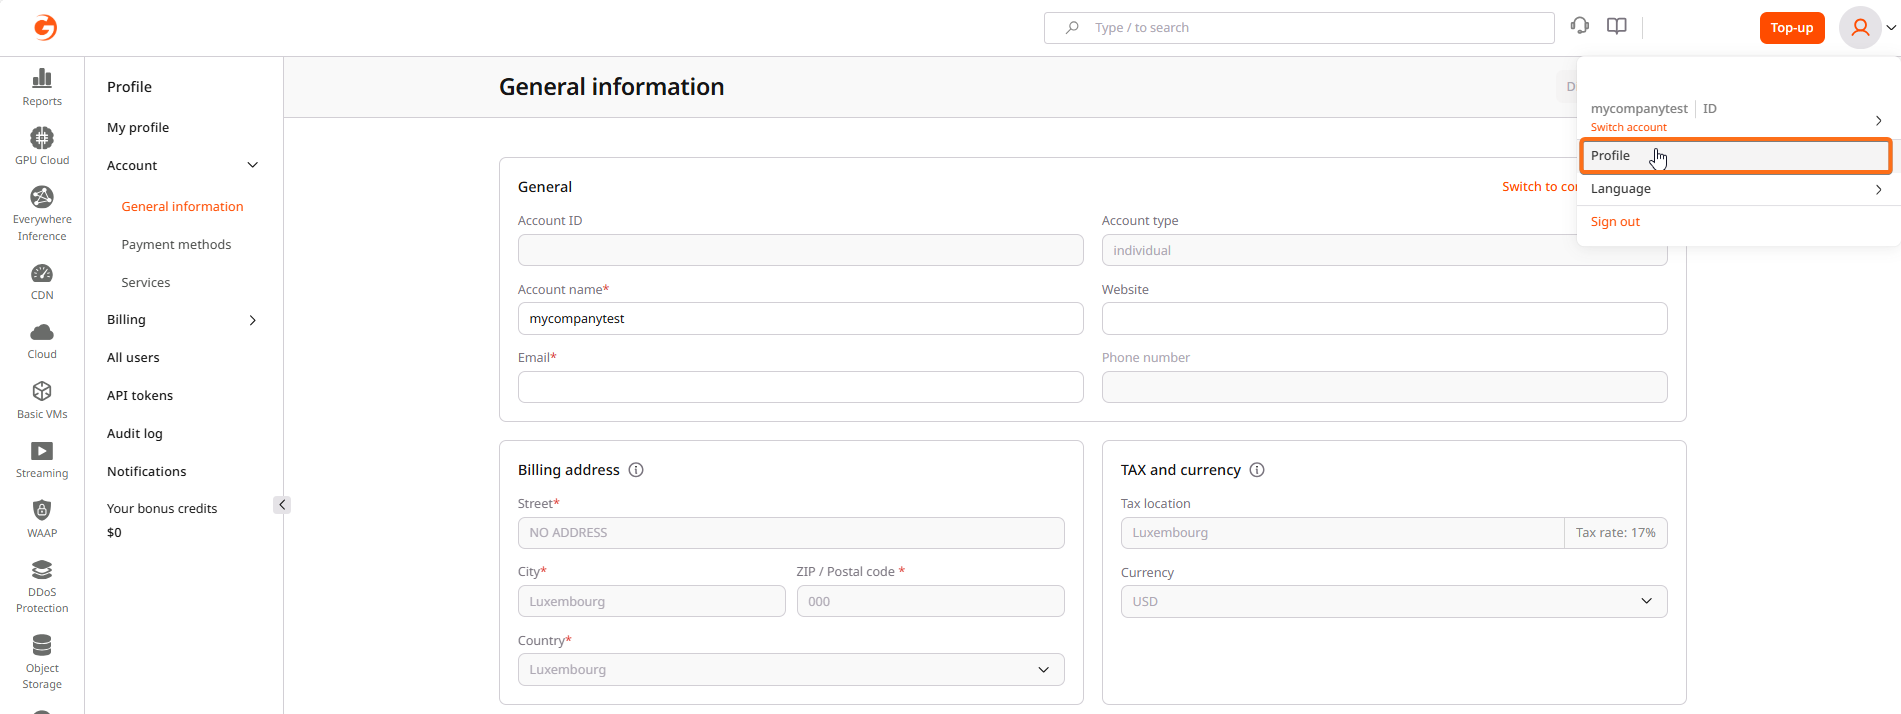
The General information page displays core account details and billing configuration.Account identification
The following fields identify the account in the Gcore system:| Field | Description |
|---|---|
| Account ID | Unique identifier for the account. This value is read-only and cannot be changed. |
| Account type | Either “individual” or “company”. Individual accounts can request to switch to company status. |
| Account name | Display name for the account. This field is editable. |
| Website | Optional company website URL |
| Primary contact email for the account | |
| Phone number | Contact phone number (read-only for some account types) |
Switch to company account
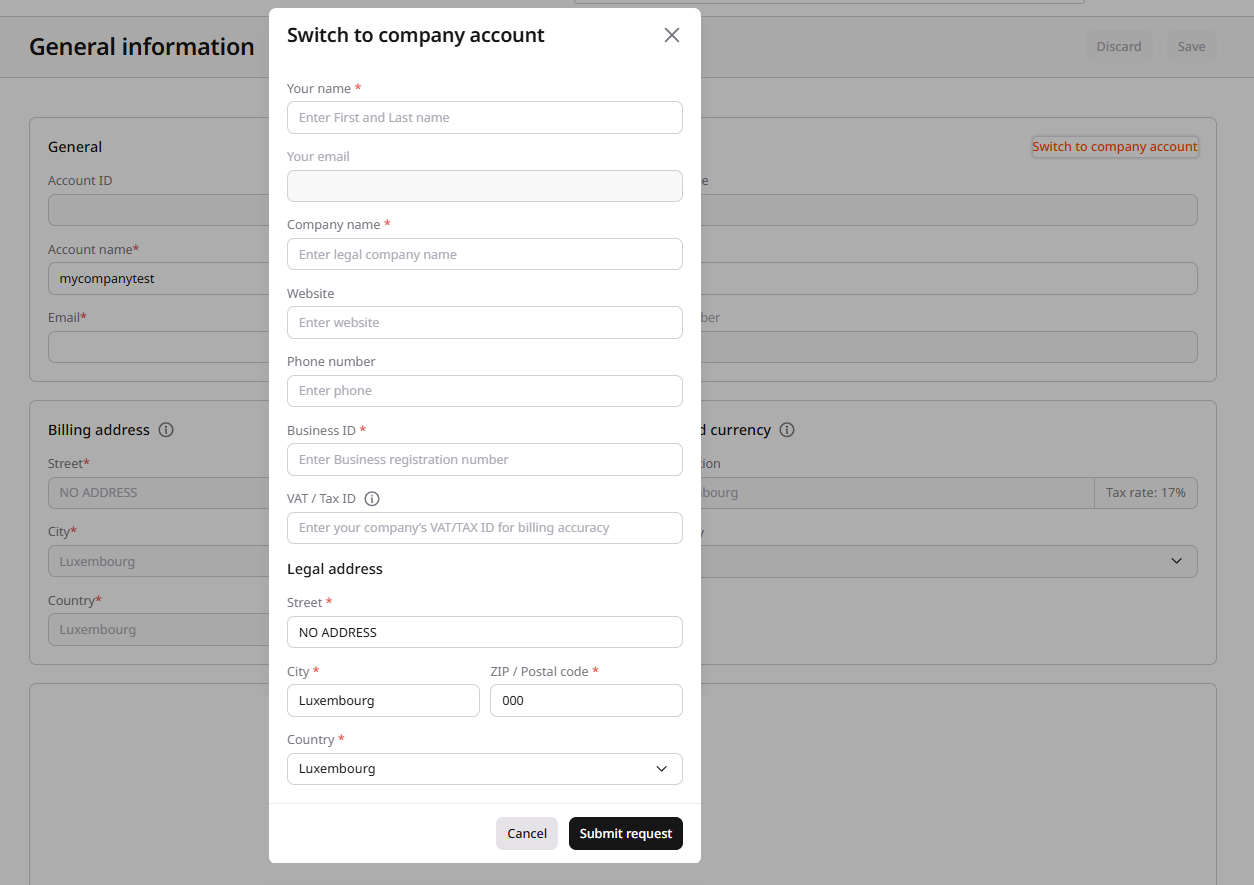
Individual accounts can request to convert to a company account. This process involves identity verification (Know Your Customer, or KYC) and requires business documentation. To initiate the switch:- On the General information page, click Switch to company account.

- Complete the form with the required information:
- Full name of the account holder
- Legal company name
- Website (optional)
- Phone number (optional)
- Business ID (registration number)
- VAT/Tax ID (optional, for billing accuracy)
- Legal address (street, city, postal code, country)

- Click Submit request.
Company accounts have access to additional billing features including VAT invoicing and the ability to add business details to invoices.
Billing address
The billing address appears on invoices and is used for tax calculations. Required fields include:- Street address
- City
- ZIP/Postal code
- Country
Your billing address is separate from the address specified in your payment method. Changes made on one page won’t affect the other.
Tax and currency
Tax settings determine how charges are calculated:- Tax location: The country used for tax rate calculation. Displays the applicable tax rate percentage.
- Currency: The currency for billing. Options include USD and EUR.

Payment methods
The Payment methods page manages how charges are paid. Gcore supports multiple payment options:- Credit or debit card: Visa, Mastercard, American Express, JCB, and Maestro
- PayPal: Link a PayPal account for payments
- Google Pay: Pay using Google Pay
- Apple Pay: Pay using Apple Pay (available on supported devices)
- In the sidebar, select Account > Payment methods.
- Select the payment type.
- Enter the required information.
- Confirm the payment method address.
- Click Confirm information.
Services
The Services page provides an overview of all Gcore services associated with the account. Each service entry displays:- Service name: The Gcore product (CDN, Cloud, Object Storage, etc.)
- Status: Current state (Active, Stopped, or available for activation)
- Plan: The current pricing plan
- Credit limit: Usage threshold for pay-as-you-go services
| Status | Available actions |
|---|---|
| Active | Change plan, Disable service |
| Stopped | Resume service |
| Not activated | Activate service |
Account deletion
If account deletion has been requested, the General information page displays an Account deletion status section showing:- Current deletion status (In progress)
- Remaining time before permanent deletion
- Option to cancel the deletion request
