API
The Gcore Customer Portal is being updated. Screenshots may not show the current version.
CDN
CDN
BillingCDN resources overviewOrigin groupPurgePrefetchReports
API
Chosen image
Home/CDN/CDN resource options/Status code

Configuring HTTP Status Codes for CDN-Hosted Content

The “Set status code” option enables you to establish custom HTTP status codes for content hosted on the Gcore CDN, which can be applied based on a schedule.

For instance, in accordance with certain jurisdictions' laws, children under the age of 16 are not allowed to access specific content past 22:00. To comply with this regulation, the “Set status code” option can be configured to either send a 403 error code to users or redirect them to a different page when they attempt to access this restricted content. The schedule should be set such that this code is only activated after 22:00.

You can configure the option in two ways:

  • Via Resource settings: the custom code will be applied to all the CDN resource's content -Via Rules: the custom code will be applied only to certain files

Select the appropriate method and click the desired tab below to learn how to configure this option.

Resource settings

1. In the Gcore Customer Portal, navigate to CDN.

2. Click the CNAME of the required CDN resource to open Resource settings.

Open settings of the special CDN resource

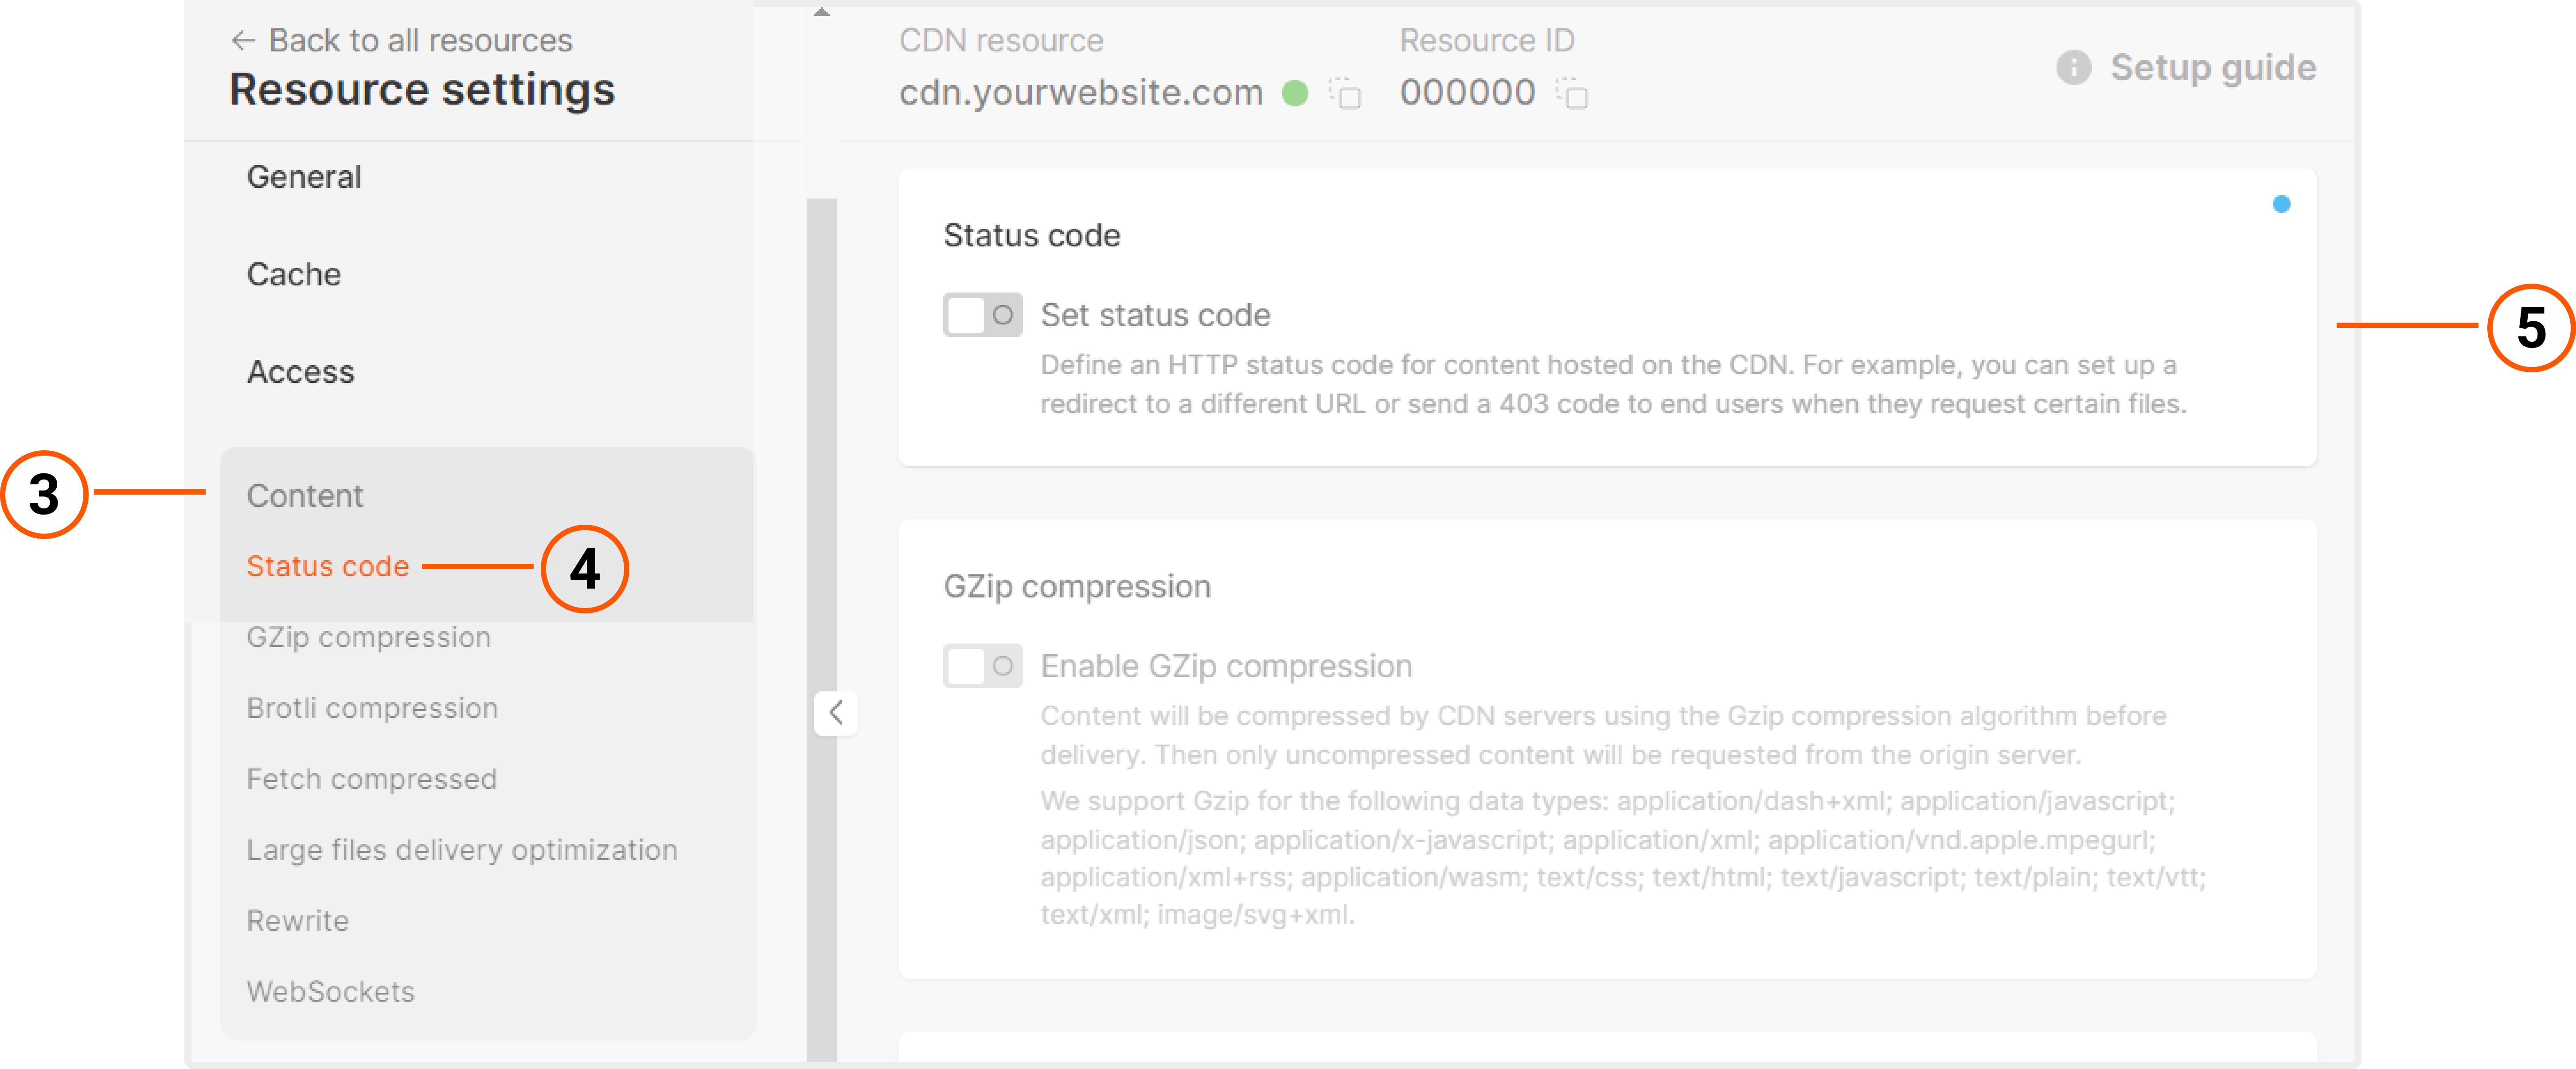
3. Click the Content section to open nested options.

4. Click Status code.

5. Enable the Set status code toggle.

Enable the Set status code option

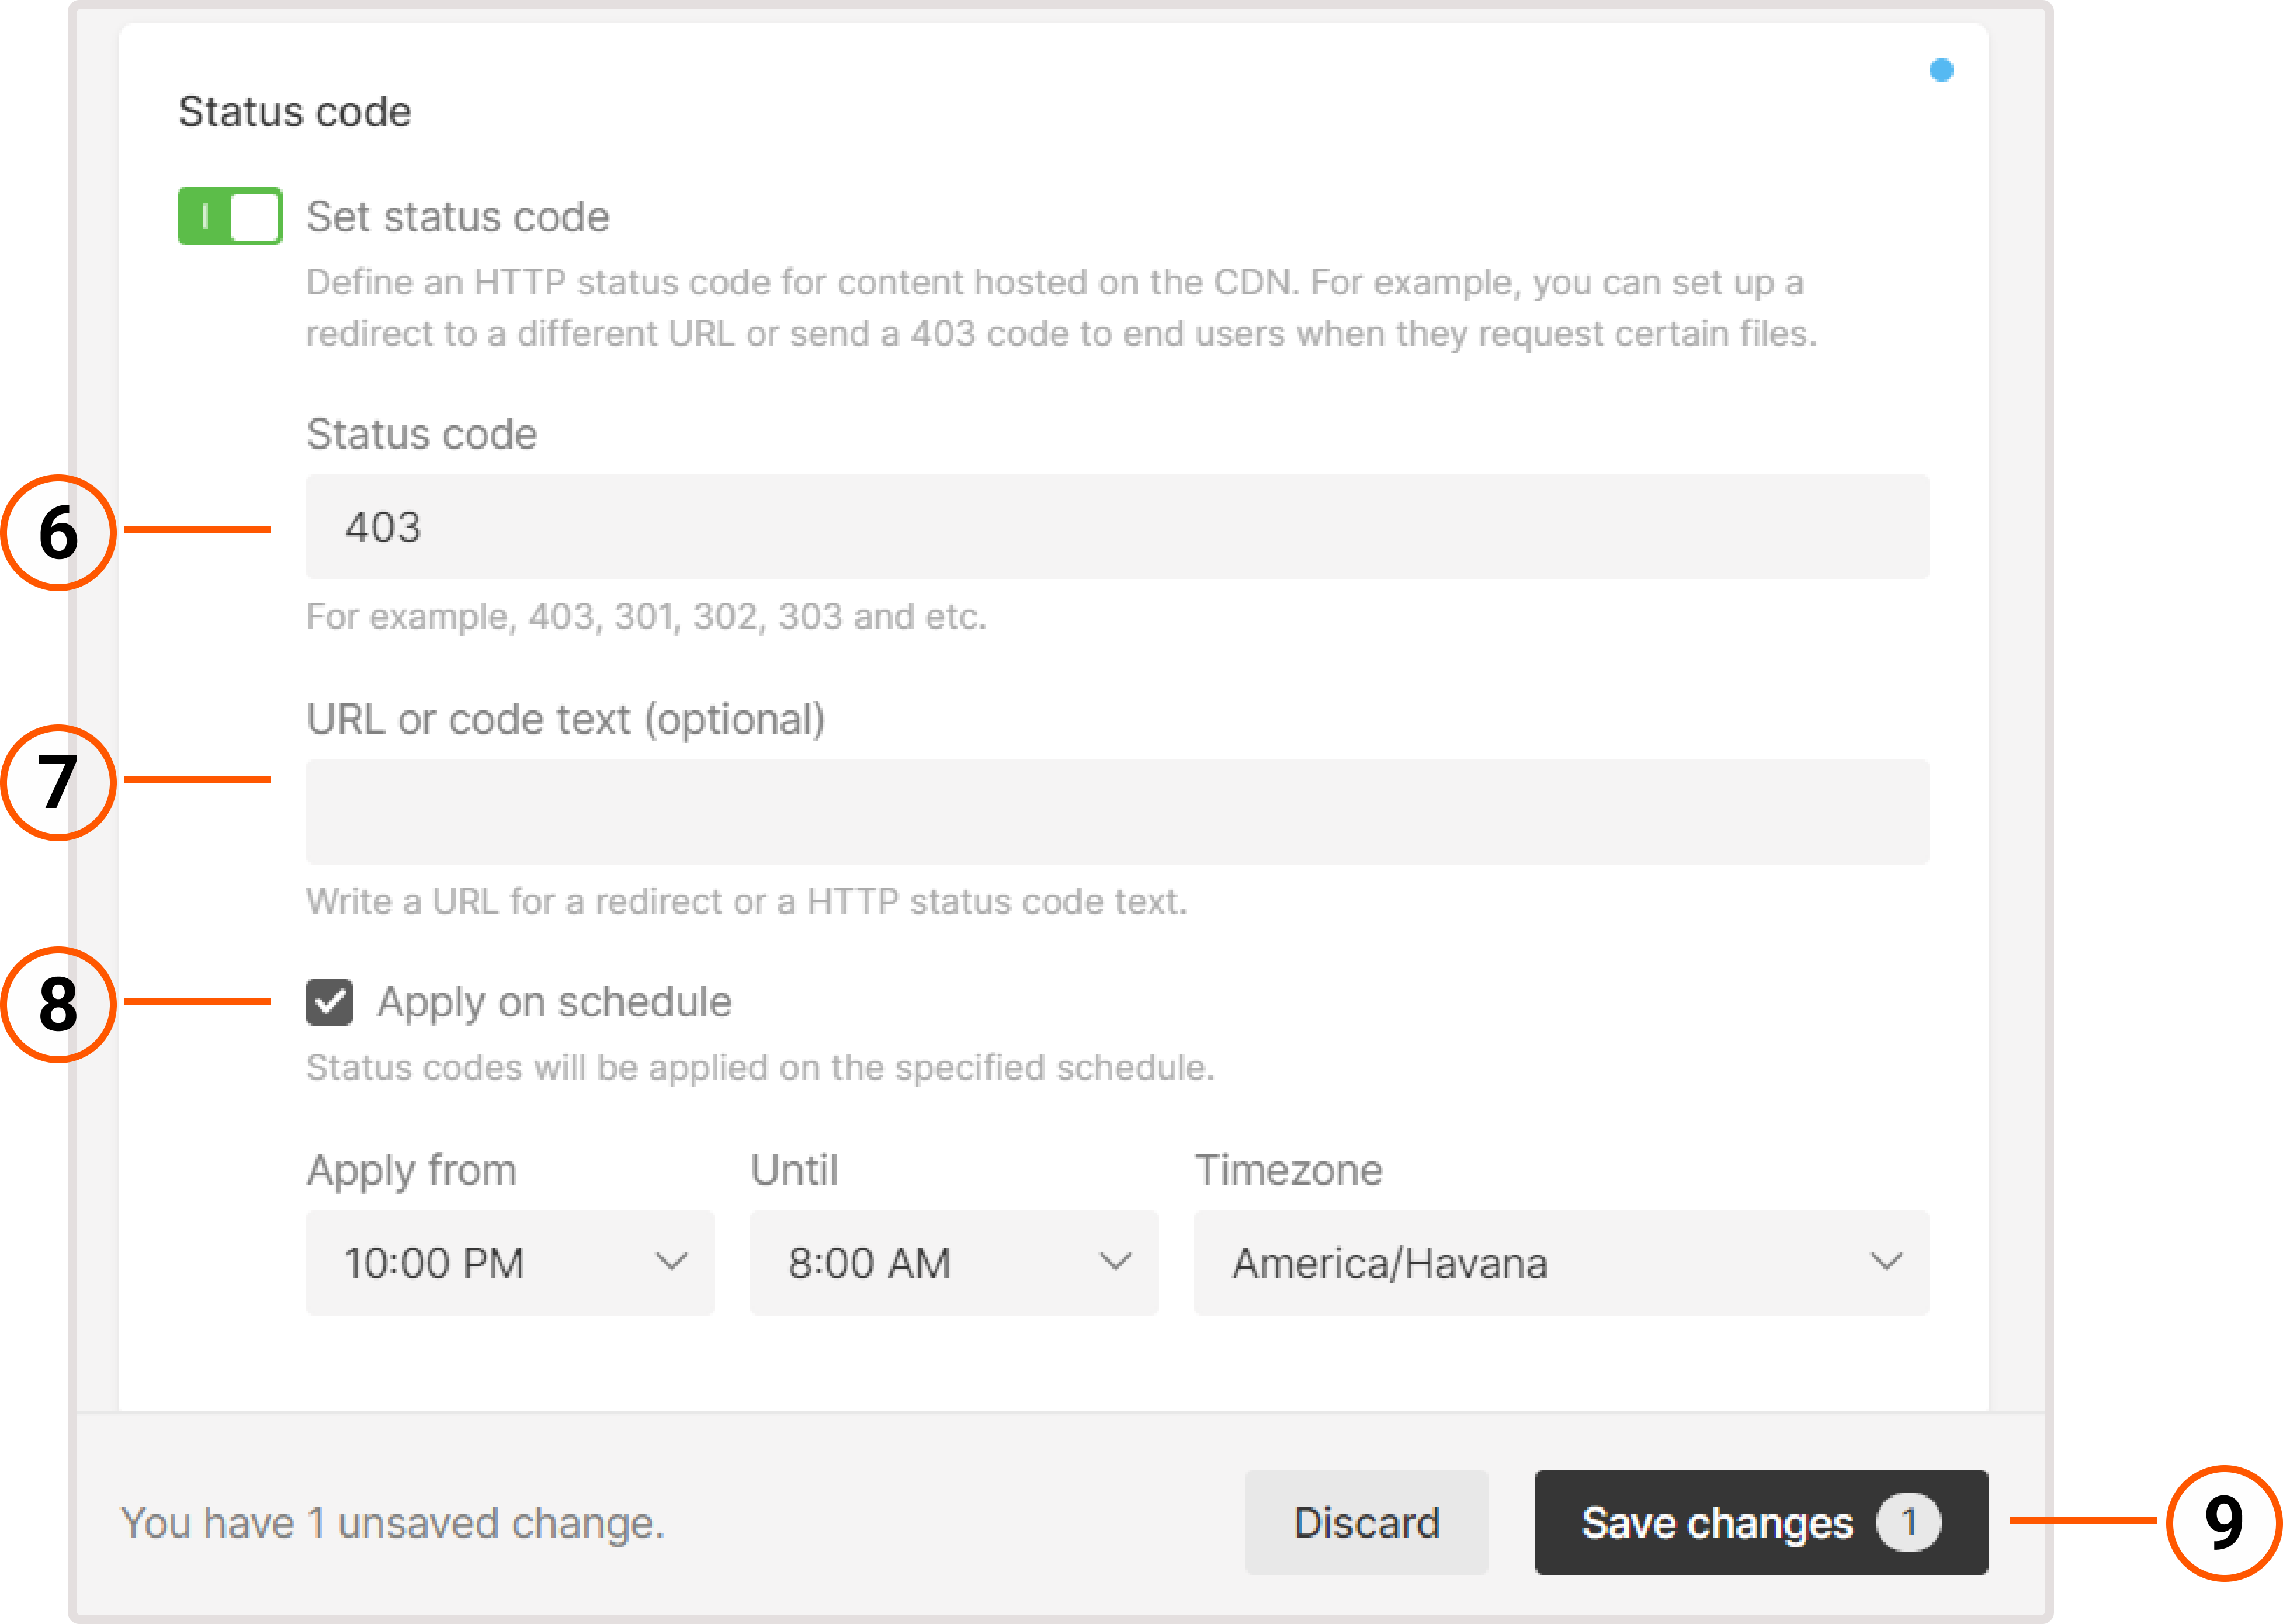
6. Specify the desired HTTP status code in the field.

You can’t specify 408, 444, 494, 495, 496, 497, or 499 codes.

7. (Optional) Specify a URL for a redirect or an HTTP status code text.

8. (Optional) Enable a schedule. In the expanded block, set the time when the custom status code will be applied, as well as the time zone.

9. Save changes.

Configure the Set status code option

That’s it! The custom code will be applied to all files delivered via the CDN.

Rules

1. In the Gcore Customer Portal, navigate to CDN.

2. Click the CNAME of the needed CDN resource to open Resource settings.

Open settings of the special CDN resource

3. Go to the Rules tab.

4. Click Create rule.

5. In the menu that opens, click Create blank rule.

Open rules to set a custom code for specific files

On the page that opens, specify to which files the rule for custom code will be applied. Configure the other settings on the page. Our guide on creating a rule manually explains the configuration options in depth.

6. At the end of the page, click Add option.

Add an option in the rule to set a custom code for specific files

7. Click Status code in the list to add the option to the rule.

8. Click Close.

Apply the “Set custom code” option to the rule

9. Enable the Set status code toggle.

10. Specify the desired HTTP status code in the field.

You can’t specify 408, 444, 494, 495, 496, 497, or 499 codes.
11. (Optional) Specify a URL for a redirect or an HTTP status code text.

12. (Optional) Enable a schedule. In the expanded block, set the time when the custom status code will be applied, as well as the time zone.

13. Save changes.

Configure the Set status code option in the rule

That’s it! The rule with the set custom code will be applied to specified files delivered via the CDN.

Was this article helpful?

Not a Gcore user yet?

Learn more about our next-gen CDN

Go to the product page