API
The Gcore Customer Portal is being updated. Screenshots may not show the current version.
Edge Cloud
Edge Cloud
OverviewBillingTerraform
API
Chosen image
Home/Edge Cloud/Use cases/Set up a mailing server

Set up a mailing server in Gcore Cloud VM

This article outlines basic steps for setting up a mail server using popular components such as Postfix and Dovecot. Please note that mail server setup may vary depending on the selected software and operating system, as well as the environment’s specific settings. This article is focused on the Ubuntu and Debian operating systems.

Please note: The use of email sending services must not violate our terms of use. Suspicious requests will be rejected and, if necessary, accounts will be blocked.

  1. Create an Virtual Machine.

Install Cloud VM using our guide. The minimum available configuration—1vCPU and 2 GB RAM—will be enough to install and run a mail server on your VM.

  1. Check internet access.

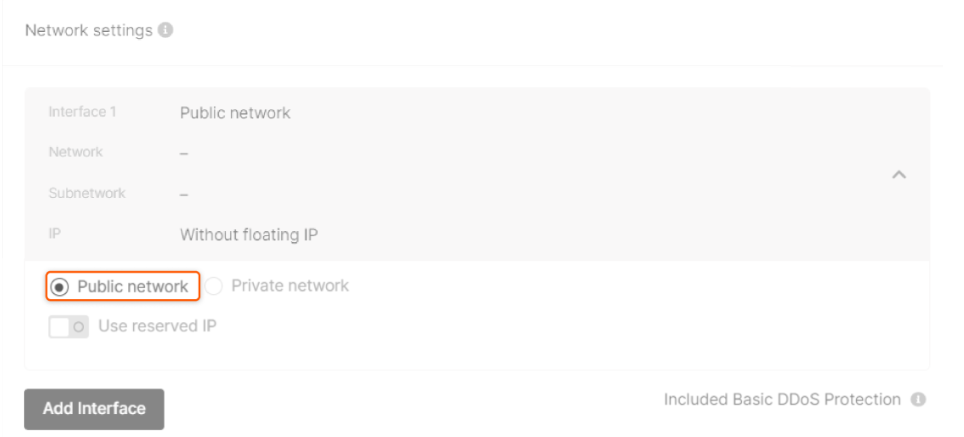
Check the Network settings tab in the machine settings. The interface must be set to the public to access the internet.

Network settings tab in the machine settings

However, if you first chose the option private method, then you need to get a floating IP address to access the internet.

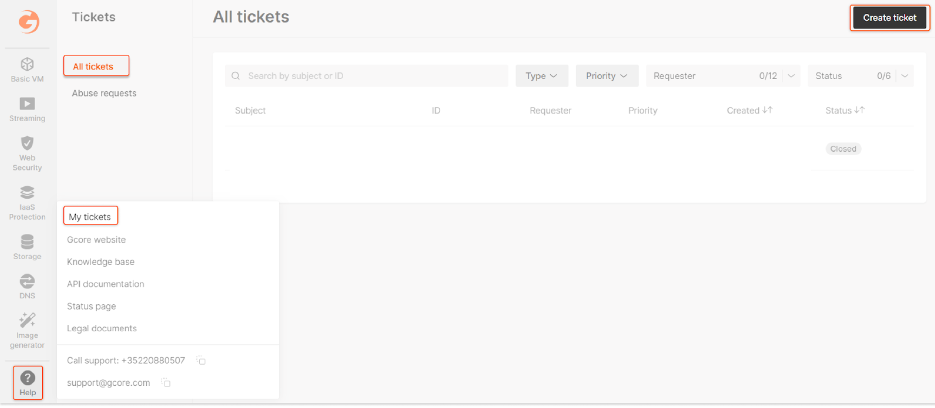
Please note: By default, Gcore Cloud VM has limits on SMTP port 25. In order to open a port and successfully install a mail server, contact support and click Create Ticket.

Create Ticket
  1. Connect to your Gcore Cloud VM via either SSH or the VNC concole in the Customer Portal.

  2. Install Postfix.

Postfix is one of the popular Mail Transfer Agents (MTAs) responsible for sending and delivering mail messages. To install Postfix, run the following commands:

sudo apt-get update
sudo apt-get install postfix

During Postfix installation, you will be prompted to select a configuration type. Select the Internet Site option and enter the fully qualified hostname of your server, then click <Ok>.
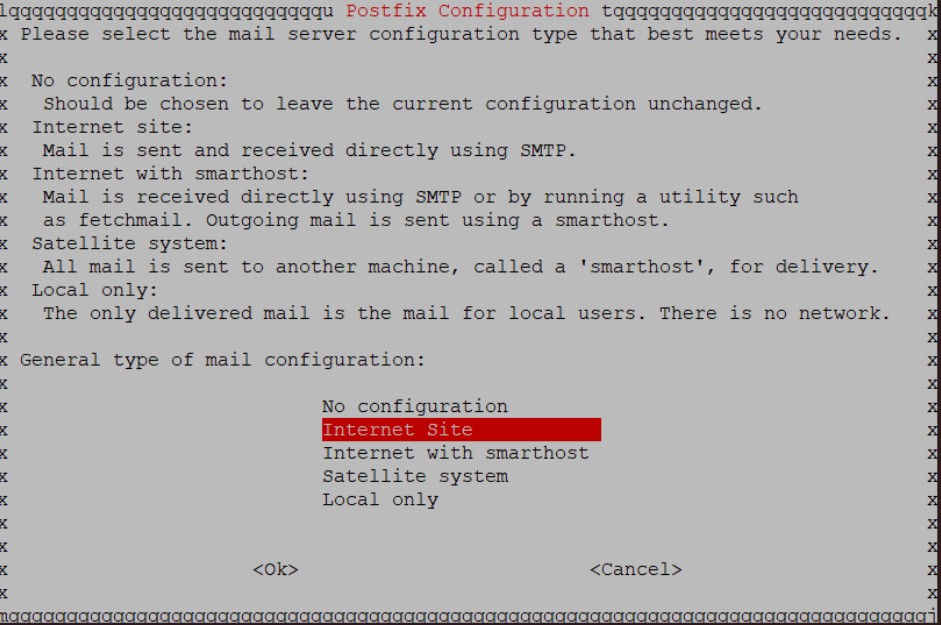
Internet Site option
  1. Configure Postfix.

Navigate to the Postfix configuration file:

sudo nano /etc/postfix/main.cf

In this configuration file, edit the following parameters:

myhostname = your_server_domain.com
mydestination = your_server_domain.com, localhost.localdomain, localhost
mynetworks = 127.0.0.0/8 [::ffff:127.0.0.0]/104 [::1]/128
  • myhostname: Specify the fully qualified domain name of the Virtual Server on which Postfix is running.

  • mydestination: Specify the domains for which mail will be delivered locally instead of being forwarded to another host.

  • mynetworks: Specify a list of networks or IP addresses from which mail messages are allowed to be sent through this server.
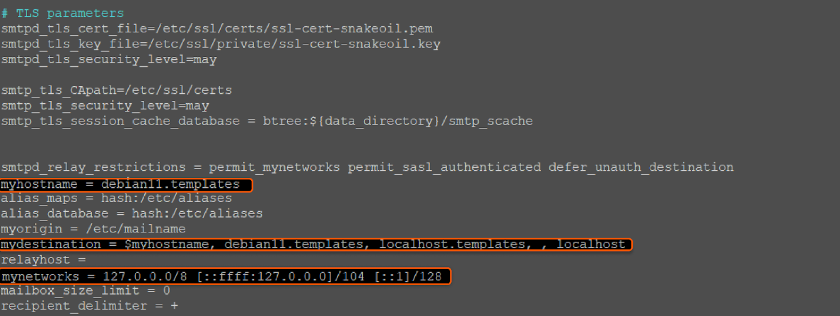
Configure Postfix

Save the changes and restart Postfix:

sudo service postfix restart

More information about Postfix is available in their documentation.

  1. Install Dovecot.

Dovecot is an IMAP (Internet Message Access Protocol) and POP3 (Post Office Protocol 3) server that provides access to mailboxes. It is required during the mail server setup, so installing it will be the next step. Use the following command to install Dovecot:

sudo apt-get install dovecot-imapd dovecot-pop3d
  1. Configure Dovecot.

Add the following SSL parameters:

listen = *, ::
ssl = required
ssl_cert = </etc/ssl/certs/ssl-cert-snakeoil.pem
ssl_key = </etc/ssl/private/ssl-cert-snakeoil.key

Insert the required SSL parameters below, as noted in the screenshot, after listen = *, ::.

required SSL parameters

Save your changes and restart Dovecot:

sudo service dovecot restart
  1. Create mailboxes.

Now you have successfully configured and installed Postfix and Dovecot, you can create mailboxes for users. For each user, run this command:

sudo useradd -m -s /usr/sbin/nologin username
sudo passwd username

Create a password for each user and retype it. The password will be saved automatically.

Create a password
  1. Add DNS records.

Next, you should manage the DNS settings. Use our PD guide to get step-by-step configuration instructions.

  1. Test and verify.

Restart Postfix and Dovecot to apply the changes.

sudo service postfix restart
sudo service dovecot restart

You can use an email client (for example, Thunderbird) to send a test email from one of the email addresses you created. After sending a test email, check your email client or webmail to receive this email. Analyze the Postfix and Dovecot logs, located in the following directory:

/var/log/mail.log

Was this article helpful?

Not a Gcore user yet?

Discover our offerings, including virtual instances starting from 3.7 euro/mo, bare metal servers, AI Infrastructure, load balancers, Managed Kubernetes, Function as a Service, and Centralized Logging solutions.

Go to the product page