What is a floating IP address?
A Floating IP is a public, static IP address that can be assigned to Virtual Machines (VMs), Bare Metal servers, and Load Balancers, allowing them to receive external connections without having a public network interface. This means that these products don’t have a public network interface, but they can still receive incoming connections from the Internet.InfoThe private subnet of the VM must be routable. Routing can be enabled in the subnet settings.
What is it used for?
A floating IP allows you to quickly provide access from an external network to a Virtual Machine that doesn’t have a public network interface. By assigning an address to the VM you will be able to connect to it. Another method for providing access is by creating a public interface for the device. However, this can cause conflicts with the private routed interface as both are used for accessing the internet. You would have to configure the routing manually. A Floating IP is a convenient solution if you only need temporary access to an external network or prefer not to deal with routing configuration.How does it work?
When you reserve a floating IP and assign it to your Virtual Machine, the router directs incoming traffic to your device by forwarding packets intended for that IP. Outgoing traffic from your instance will still use its private IP, while incoming traffic will be forwarded through the Floating IP. If your instance has multiple private IPv4 addresses within a routable private subnet, you can assign a unique floating IP to each of these private addresses. Multiple private subnets from one network can be grouped to a single port, allowing the client to attach a Floating IP to any of the routable addresses.Check if your subnet is routable
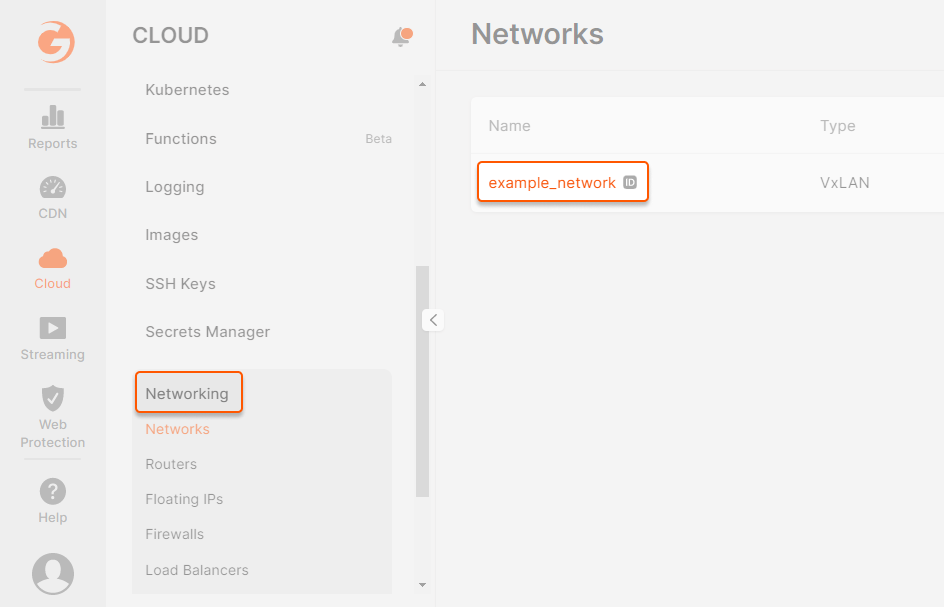
- Open the Networking section, select the required network, and navigate to your equipment’s subnet settings.
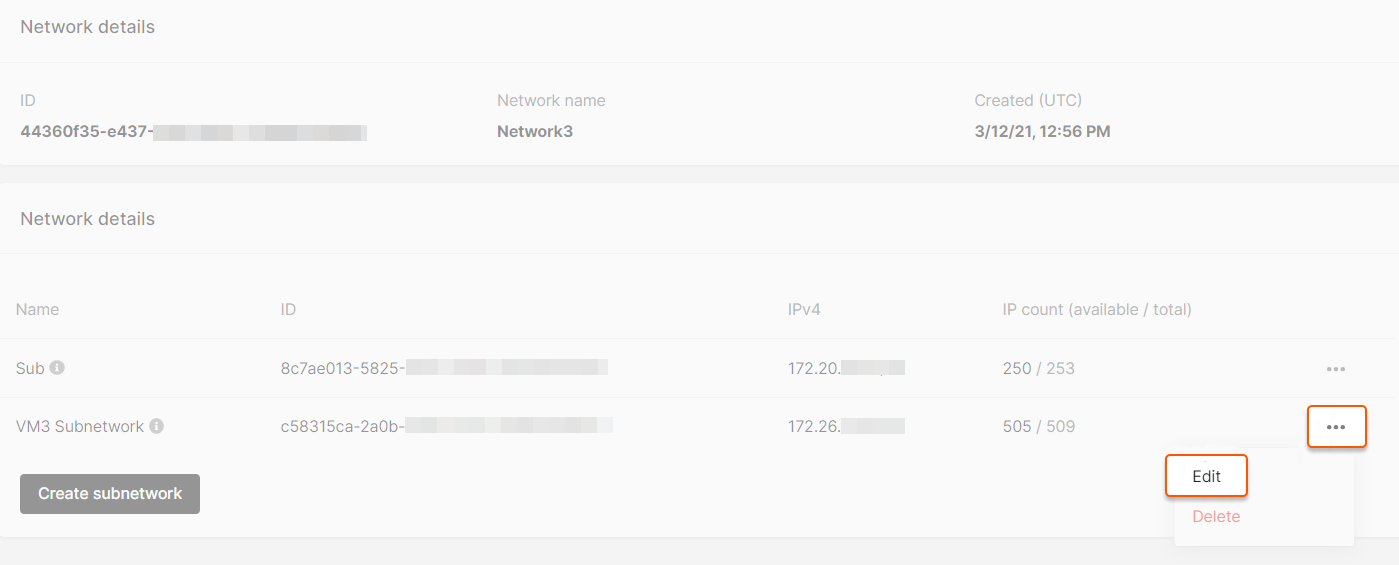
- Click the three-dot menu, then select Edit.
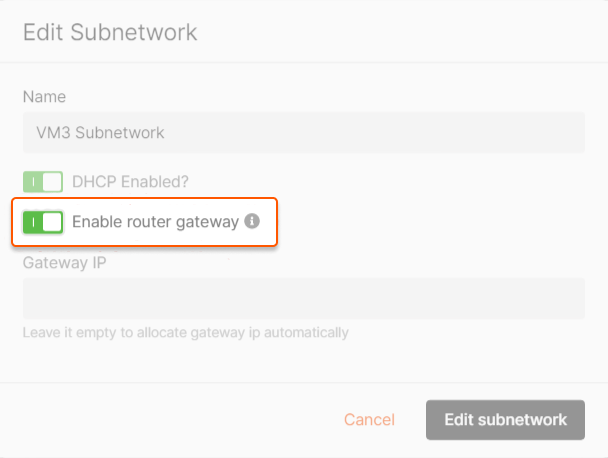
- Ensure the Enable router gateway slider is enabled, making the subnet routable, and allowing servers within the subnet to access the Internet and receive incoming connections.
Reserve a floating IP from the menu
A floating IP is assigned by a specific data center, and its address is linked to that location. It can only be transferred to a Virtual Machine within the exact location.- Select the Region where your machine is located to assign a floating IP and navigate to the Networking section.
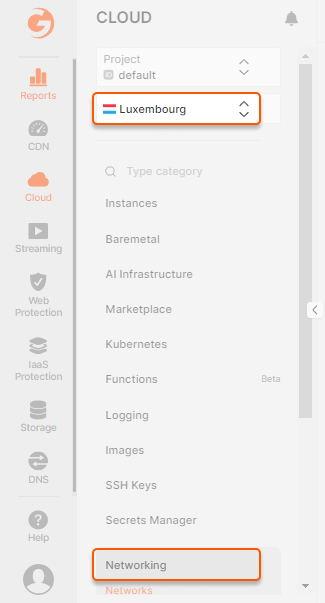
- Open the Floating IPs section. You can create a floating IP without assigning it to a machine by clicking Create a new floating IP.
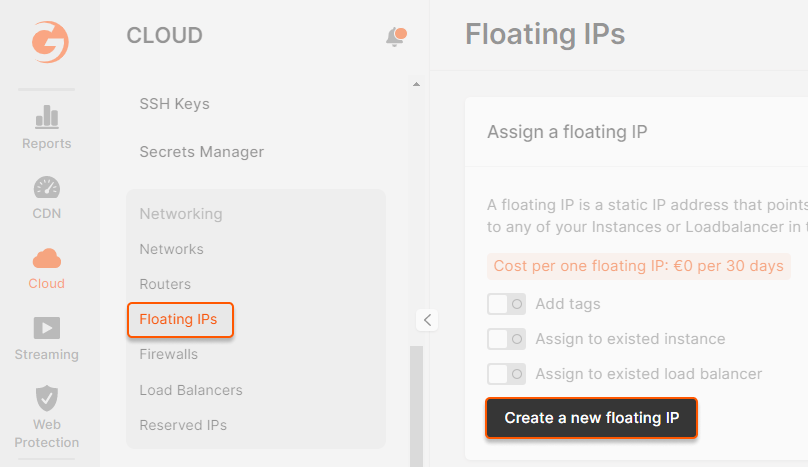
- Additionally, you can create a floating IP and immediately assign it to a specific Virtual Machine. To do this, enable the “Assign to existing instance” slider, select the machine and interface, and click Create a new floating IP.

Reserve a floating IP when creating a Virtual Machine
When creating a VM, in the “Network settings” section, select the “Private ” network type. Specify the network and subnet of the interface you want to assign the floating IP. Enable the “Use floating IP ” slider, click “Create a new floating IP ”, and save the settings using the “Add Interface ” button.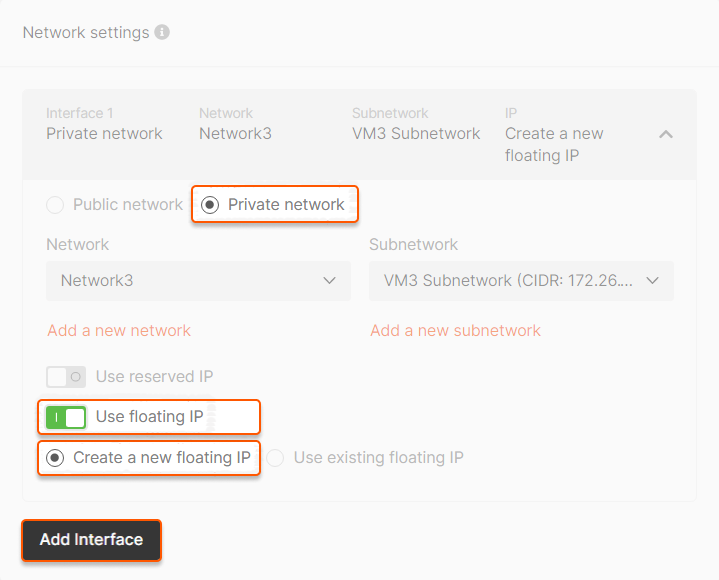
InfoA Floating IP can only be added after creating the network interface. A subnet must be created before assigning the floating IP if you add a new interface.
Assign a floating IP to a Virtual Machine
Next to the free IP, click “Assign to instance” or select this option from the selector on the right.
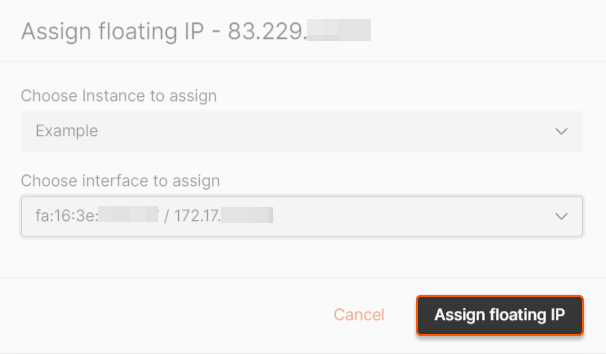
Detach a floating IP from a Virtual Machine
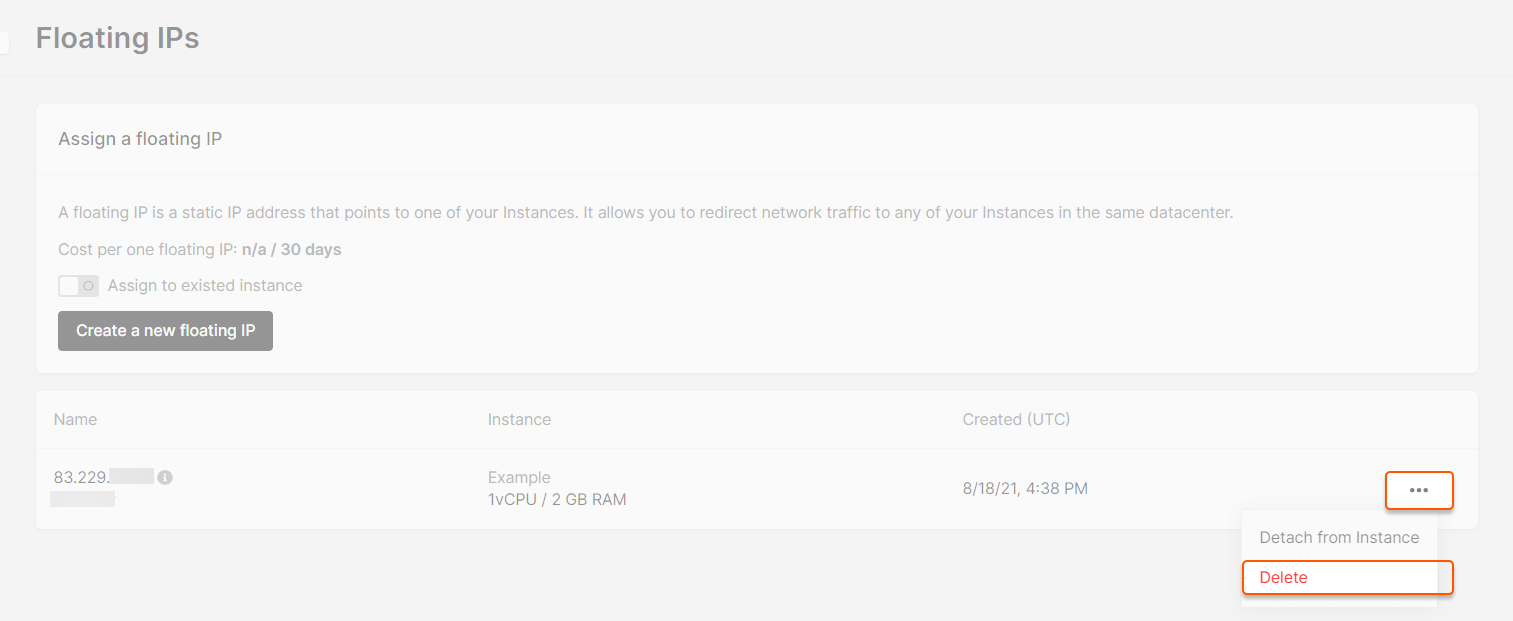
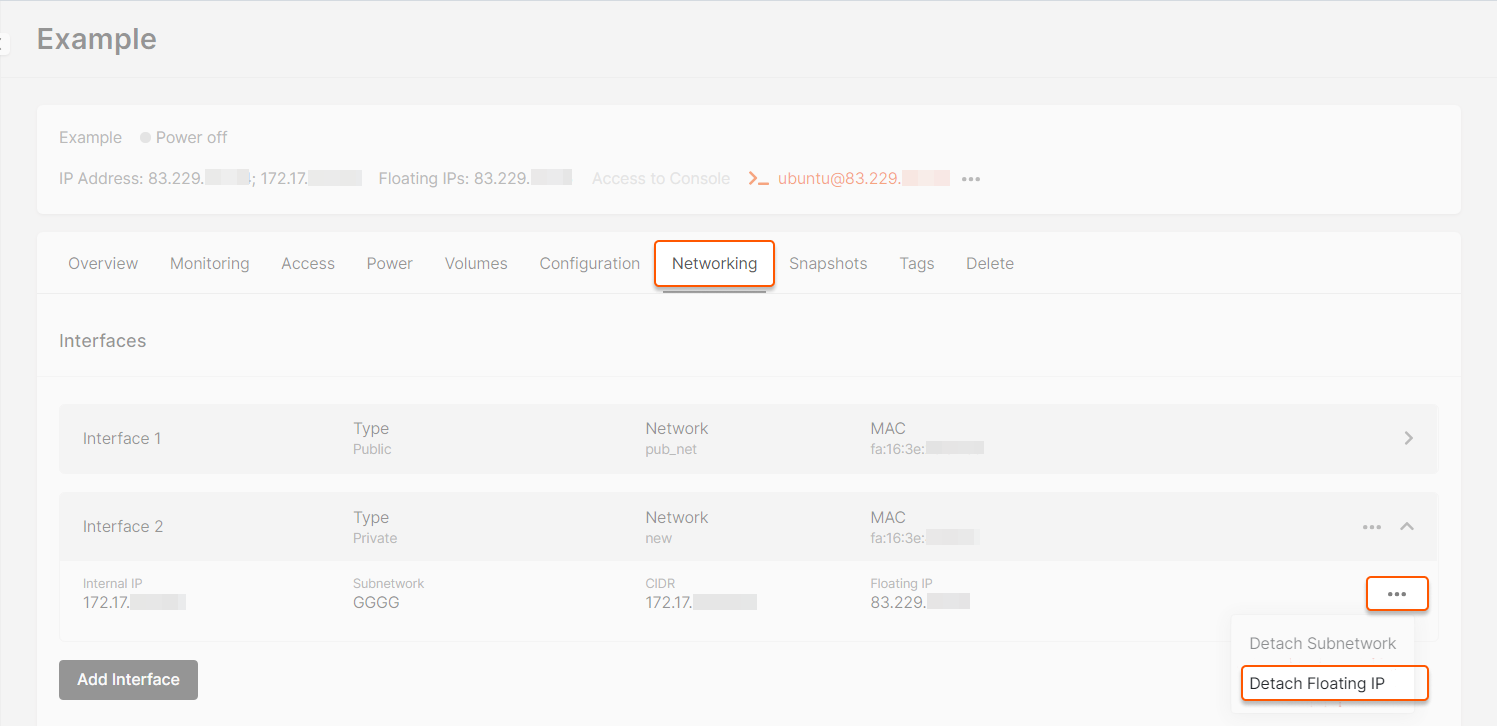
You can detach a floating IP address in the “Floating IPs” section or in the Virtual Machine menu. In the “Floating IP” section, click the selector next to the address and select Detach from Instance, and the IP will no longer be assigned to the machine.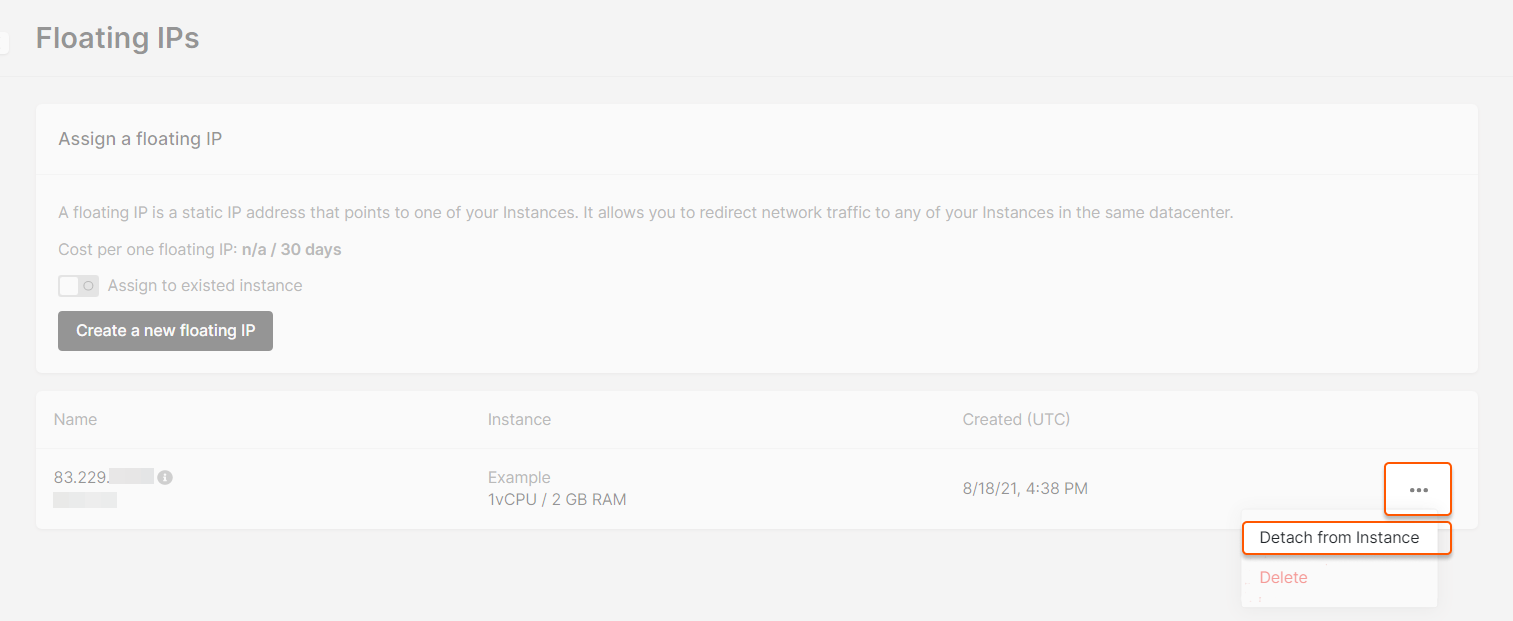
Delete a floating IP
In the “Floating IPs” section, click the selector next to the desired address and select Delete. The IP will be removed, and you will no longer be charged.