Types of networks
For Cloud resources, you can configure the following types of networks:-
Private network : This interface is for local internal connections to the server and doesn’t have access to the external network. Resources with private interfaces can only be accessed from the same network. However, you can customize their setup and establish internet connectivity.
For example, if you add a VM with a private interface to a public Load Balancer, this Virtual Machine will receive requests from the internet. You can also assign a Floating IP address to provide external connectivity. - Public network : This interface grants access to the external network. Instances with a public network interface will be available from the internet.
- Dedicated network : This network type is designed for individual usage, providing an exclusive pool of addresses for each client. It works with Bare Metal servers and supports assigning multiple public IP addresses to a single server, making it ideal for advanced use cases such as virtualization and traffic balancing. These networks rely on dedicated public subnets, and the number of supported public IPs depends on the size of the assigned subnet. Other customizations are available upon request to meet specific needs.
- Virtual Machines use VxLAN, enabling isolated communication between instances across different physical hosts. At the same time, they can operate in both VxLAN and VLAN networks.
- Bare Metal servers use VLAN, providing direct Layer 2 segmentation for higher performance and security.
Create and attach networks to cloud resources
You can attach both public and private networks to Virtual Machines, Bare Metal, Load Balancers, and Managed Kubernetes clusters. There are two ways to create and attach a network: during resource creation or by adding a network separately and then attaching it to an existing Cloud resource. The support team must configure a dedicated network before it can be selected or used. This network type allows the assignment of multiple public IP addresses to a single server, with the total number of IPs determined by the size of the assigned subnet. Public IPs in a dedicated network must be explicitly assigned to the server in order to function. Unassigned IPs within the subnet will not be operational.Attach a network when creating a new cloud resource
For detailed steps on how to attach a network interface for each resource, refer to the relevant guide:- Attach network interface to a Virtual Machine
- Attach network interface to a Bare Metal
- Attach network interface to a Managed Kubernetes cluster
- Attach network interface to a Load Balancer
Create a network from the Networks page
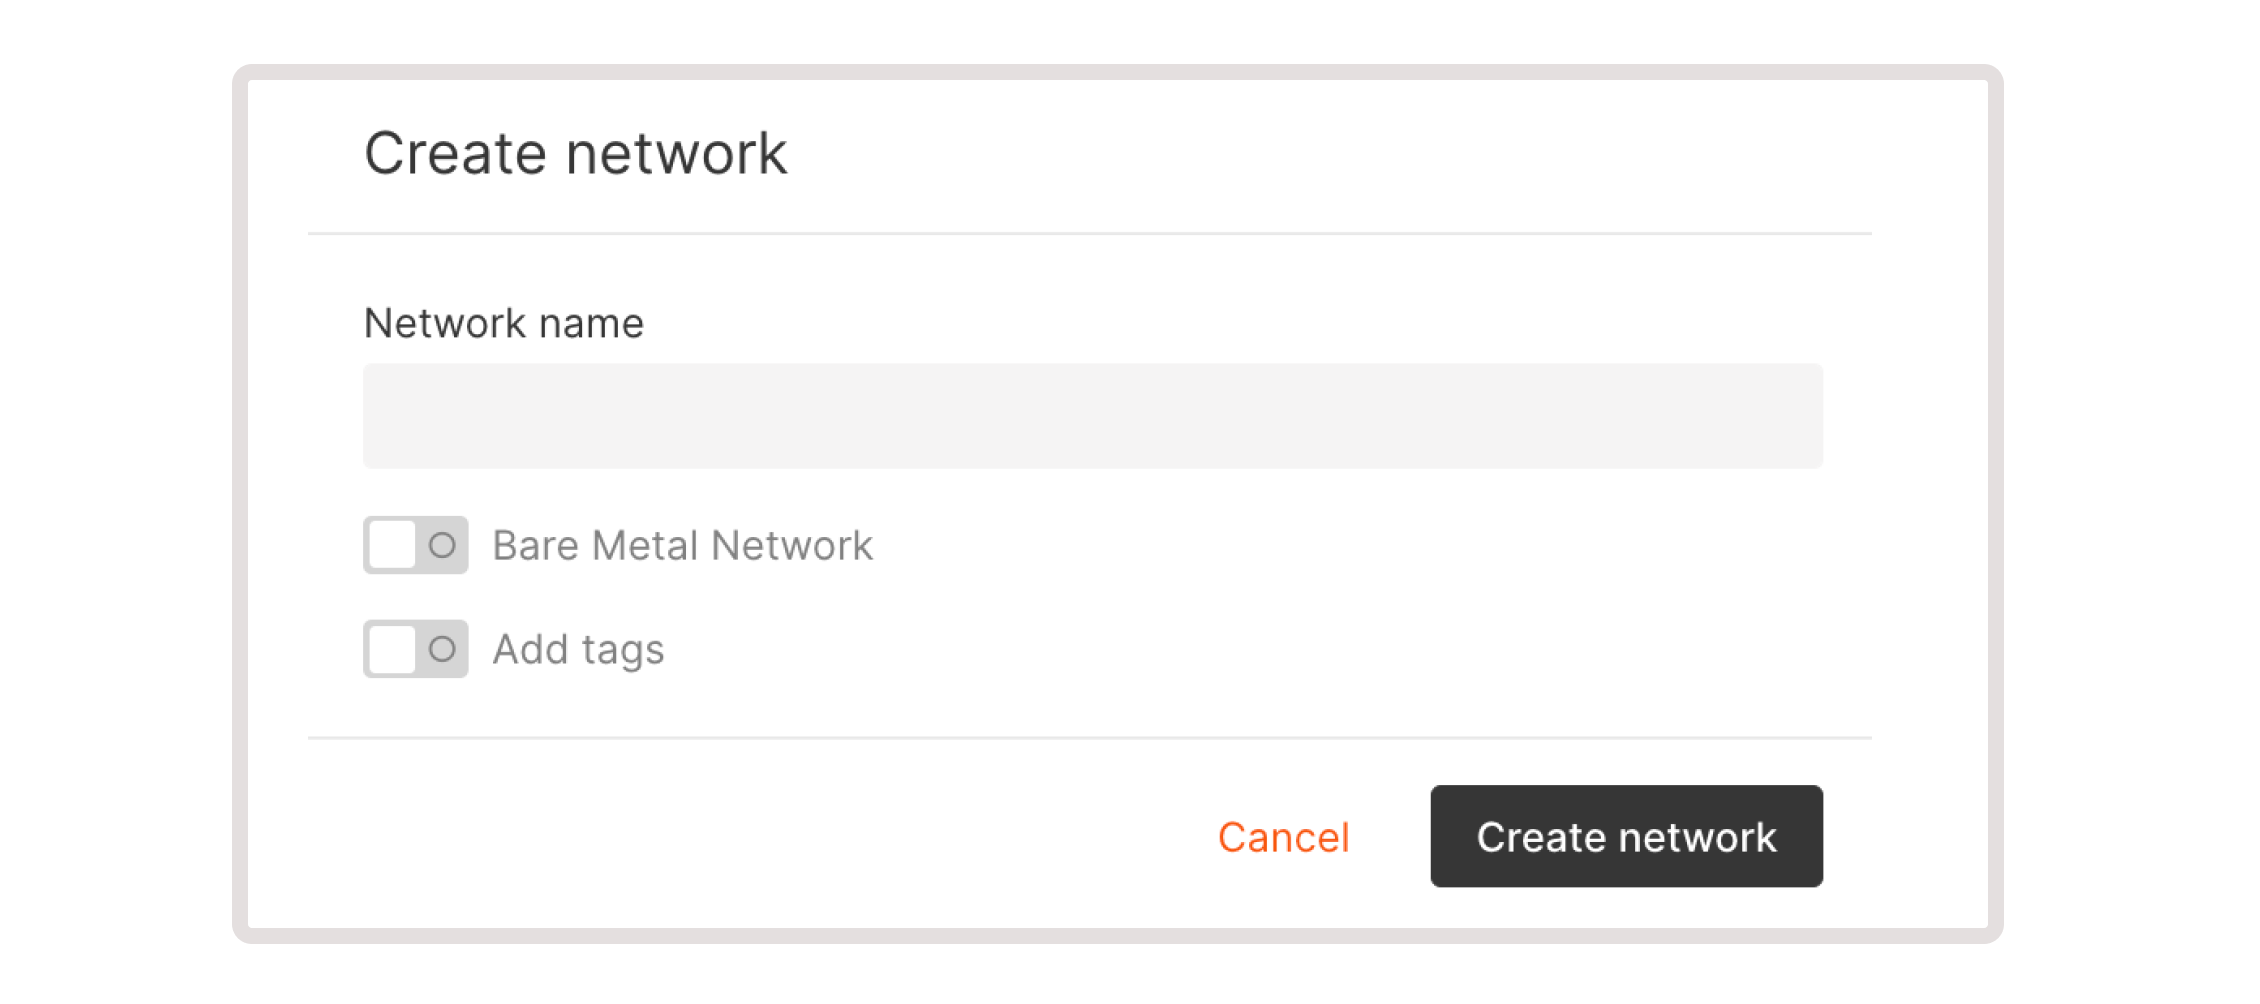
You can create new network interfaces in the Customer Portal, on the Networks page. To add a new network: 1. In the Gcore Customer Portal, navigate to Cloud > Networking. 2. Click Create network.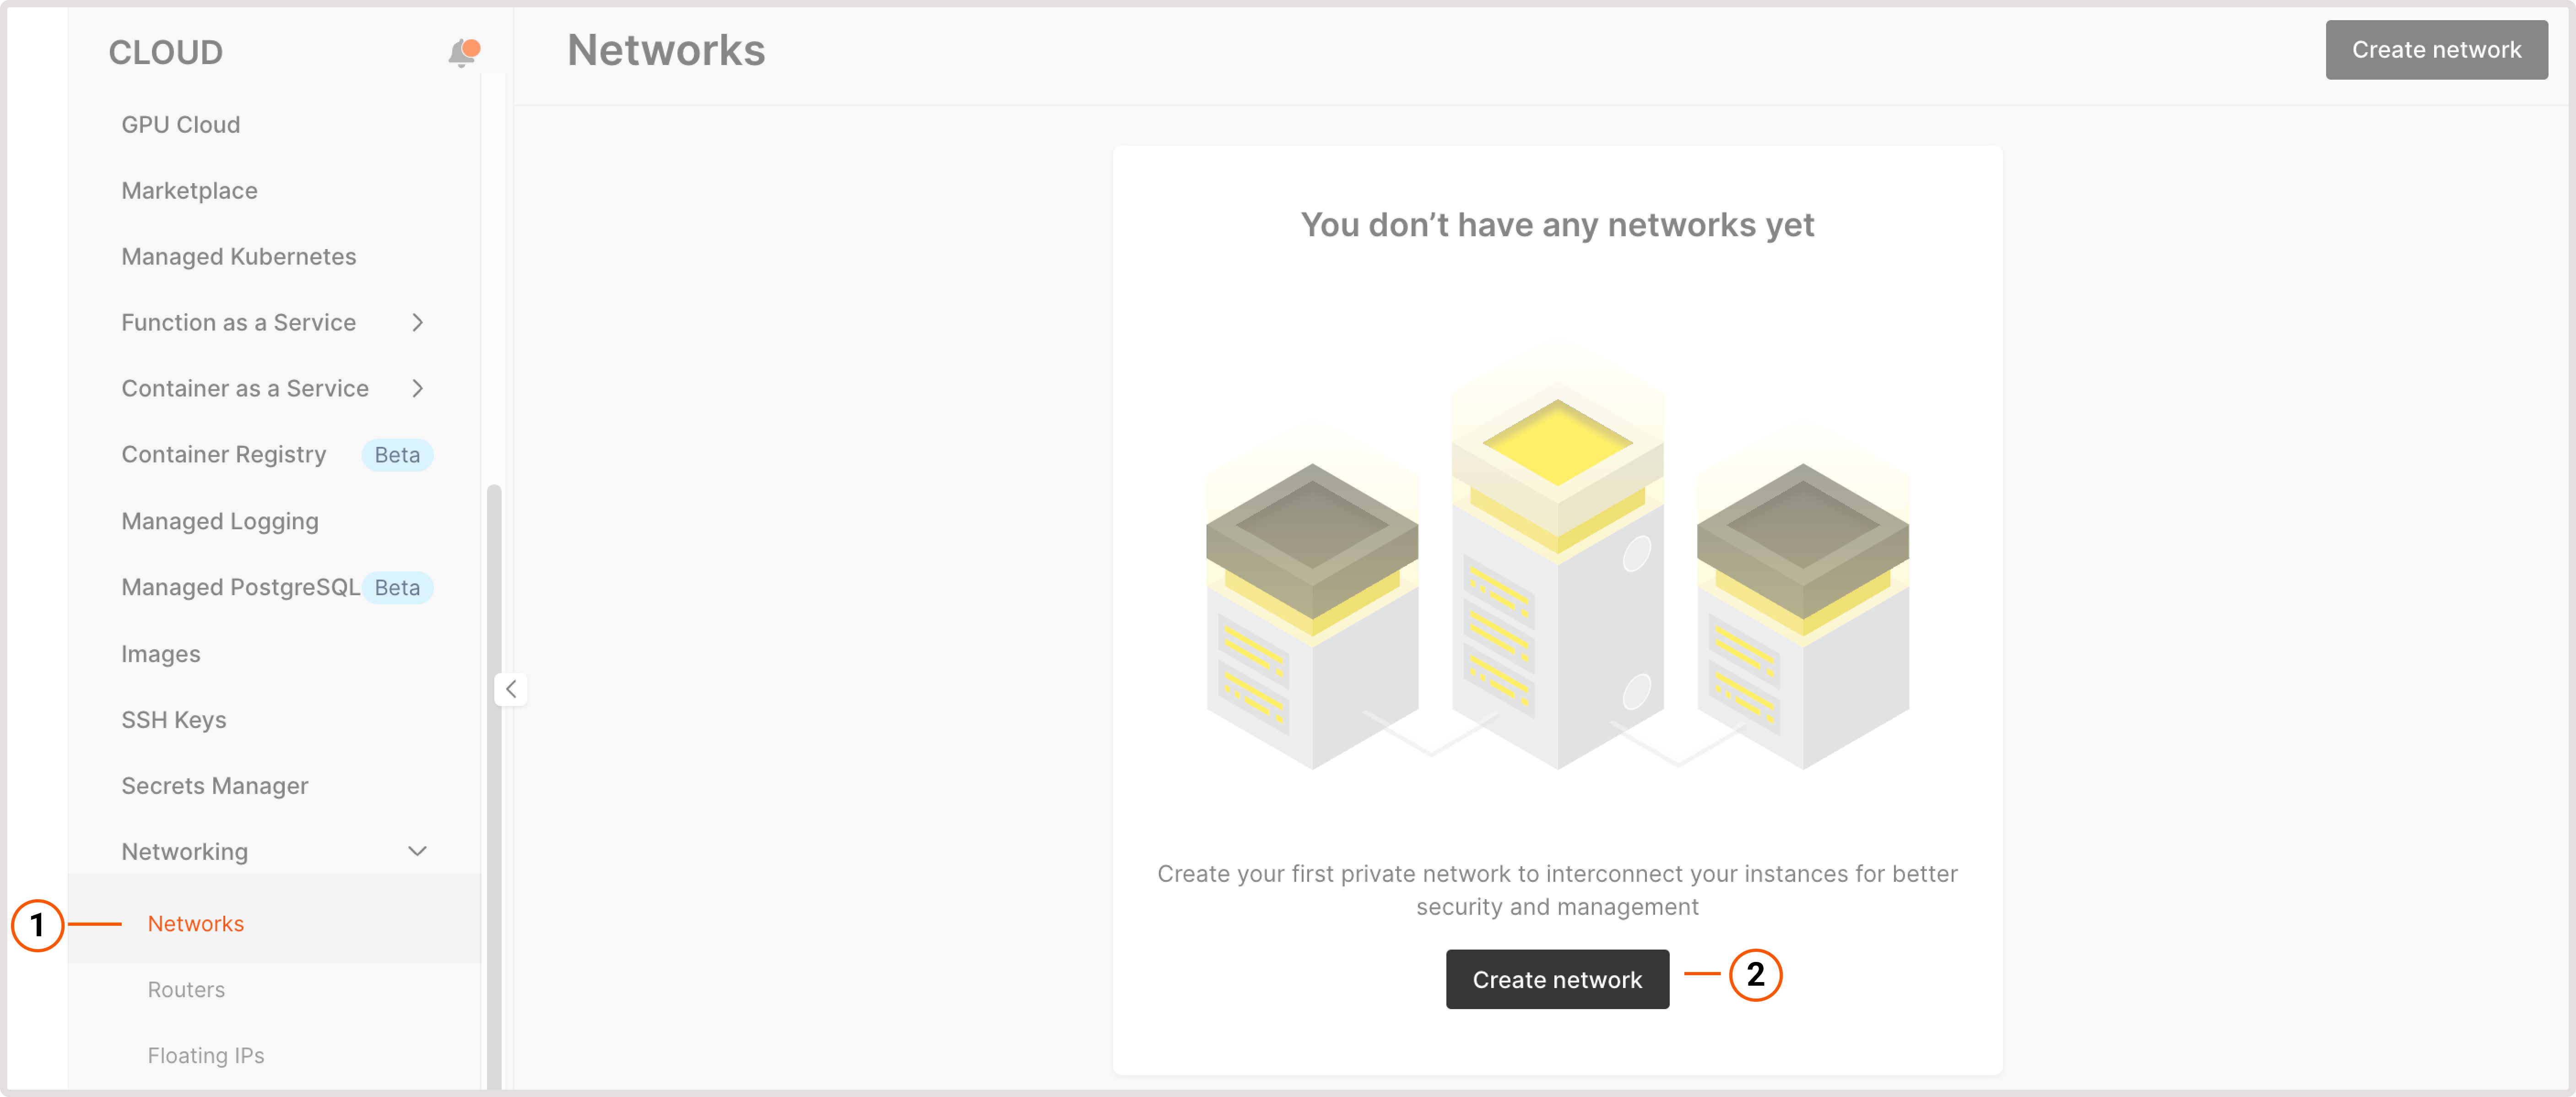
Attach a network interface to an existing VM or Bare Metal
InfoYou can’t change network interfaces for created Load Balancers.
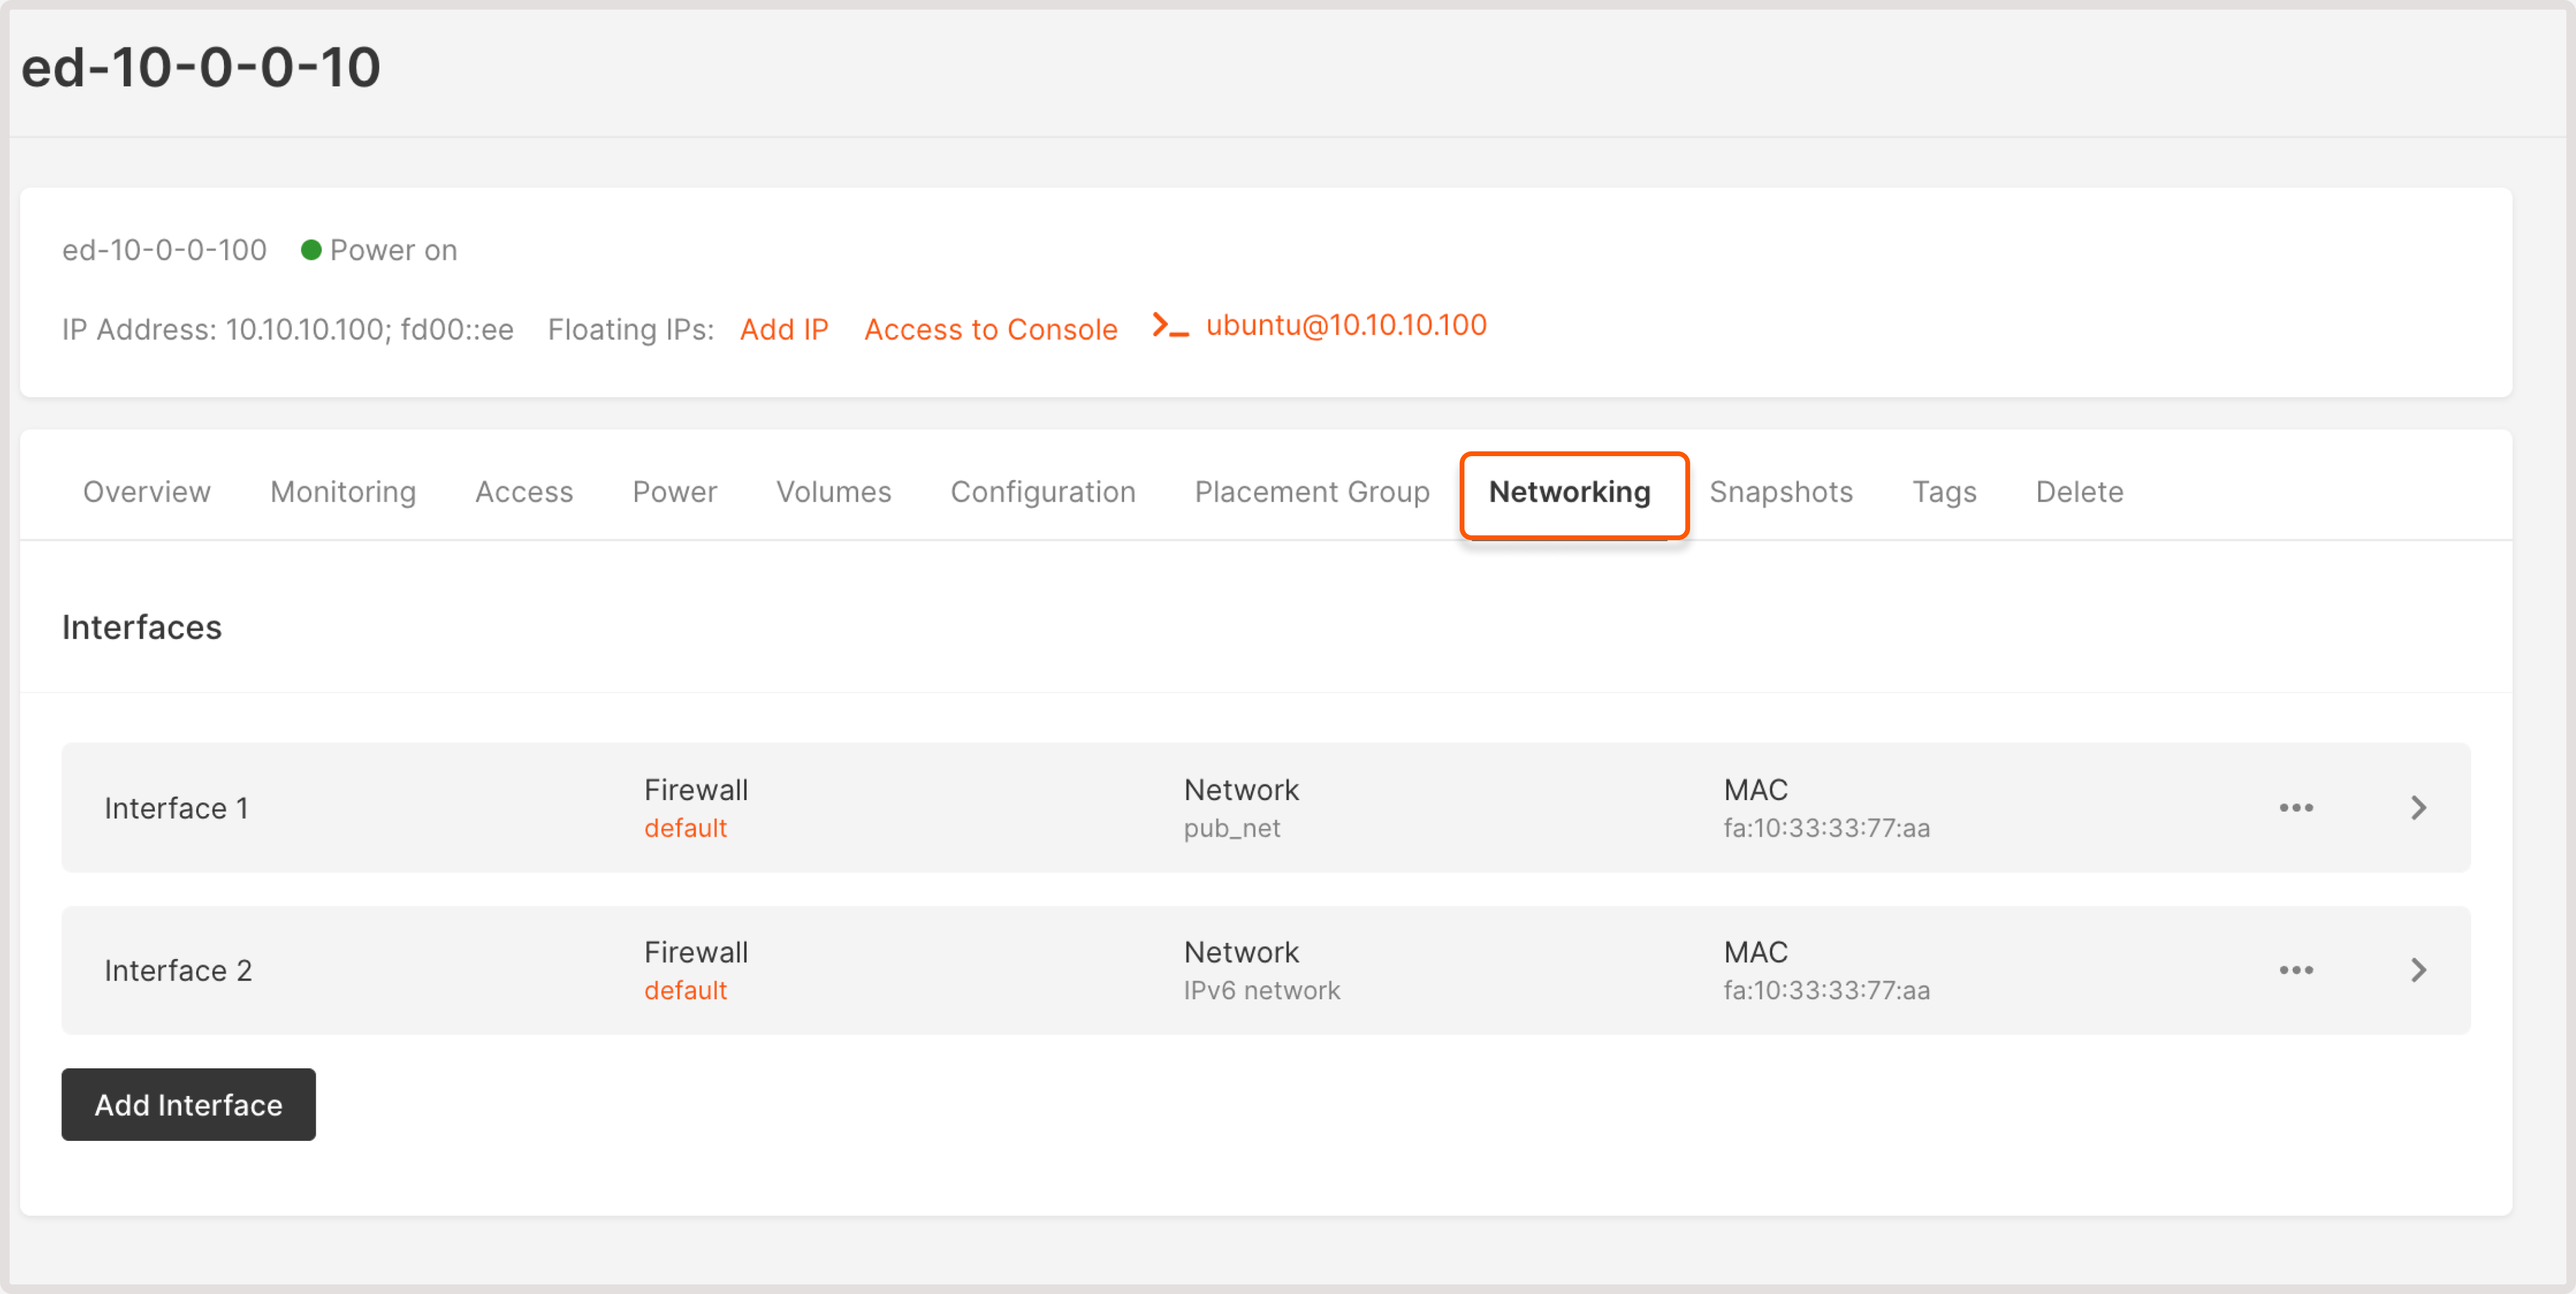
- Public : Each virtual machine can only have one native public interface. If you require additional public IP addresses, consider using a reserved IP address or floating IP address (applied to a private interface) instead.
- Private : Choose a network from the list or create a new one, then configure a subnetwork according to your requirements.
InfoInfiniBand networks can only be attached to resources with flavors that support them.
Detach a network from a VM or Bare Metal
To remove an interface from your cloud resource, you need to detach all subnetworks within this network interface: 1. In the Gcore Customer Portal, navigate to Cloud. 2. Open the relevant page with the resource: Virtual Instances or Bare Metal. 3. Find the needed resource and click its name to open it. 4. Go to the Networks tab and find the network to detach. 5. Click the three-dot icon next to each subnetwork within the network and select Detach subnetwork.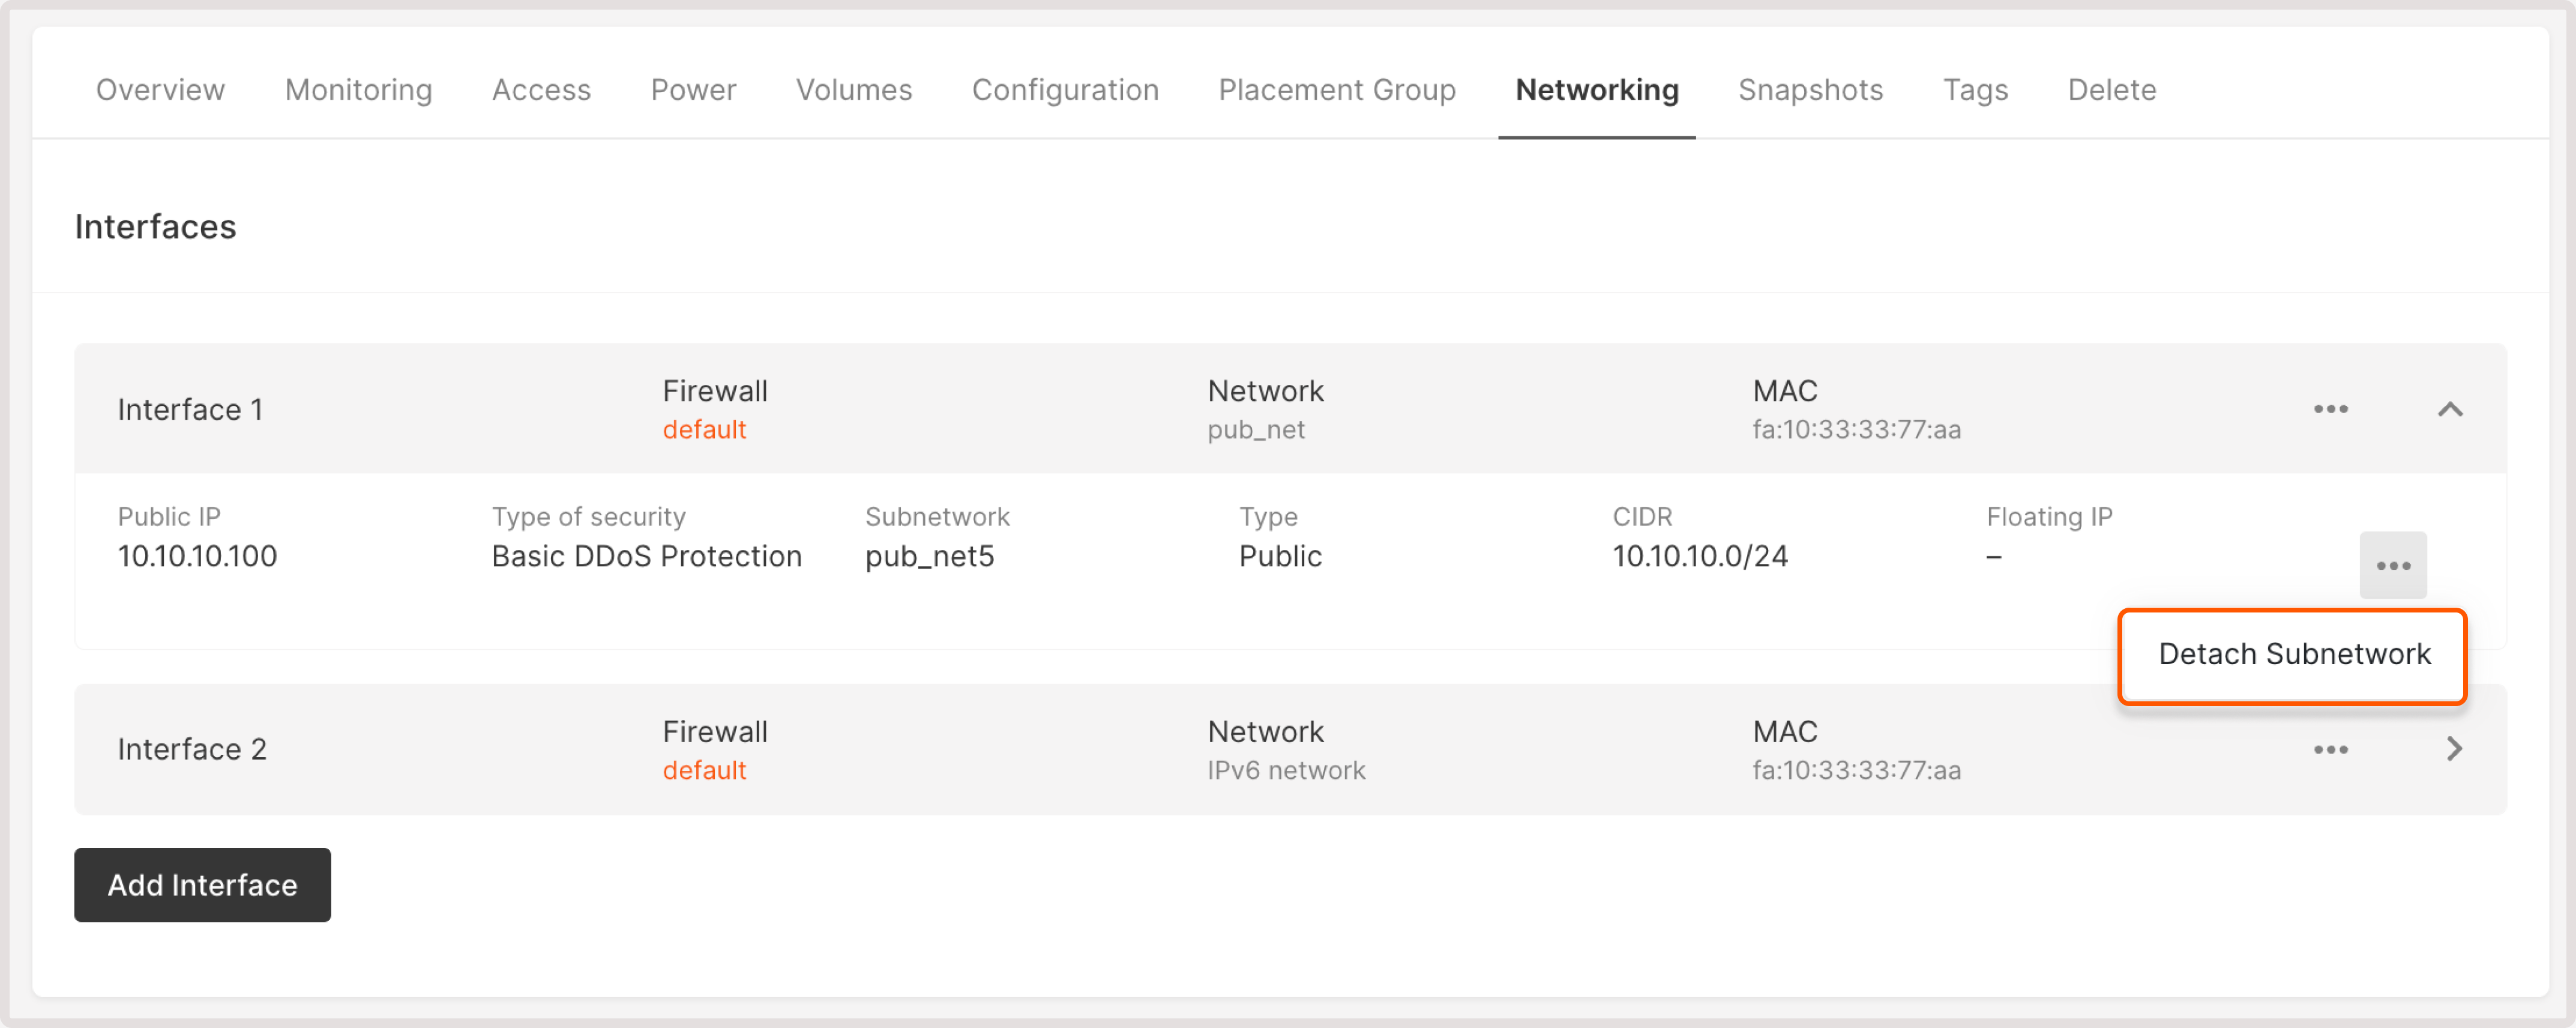
Manage networks
All your configured network interfaces and their subnetworks appear in the Customer Portal, on the Networks page. You can view network details, rename or delete a network, and configure its subnetworks.View network details
1. In the Gcore Customer Portal, navigate to Cloud > Networking. 2. Find the needed network and click its name to open the details page. The details page includes comprehensive information about the network, such as network ID, creation date, tags, and other relevant specifications.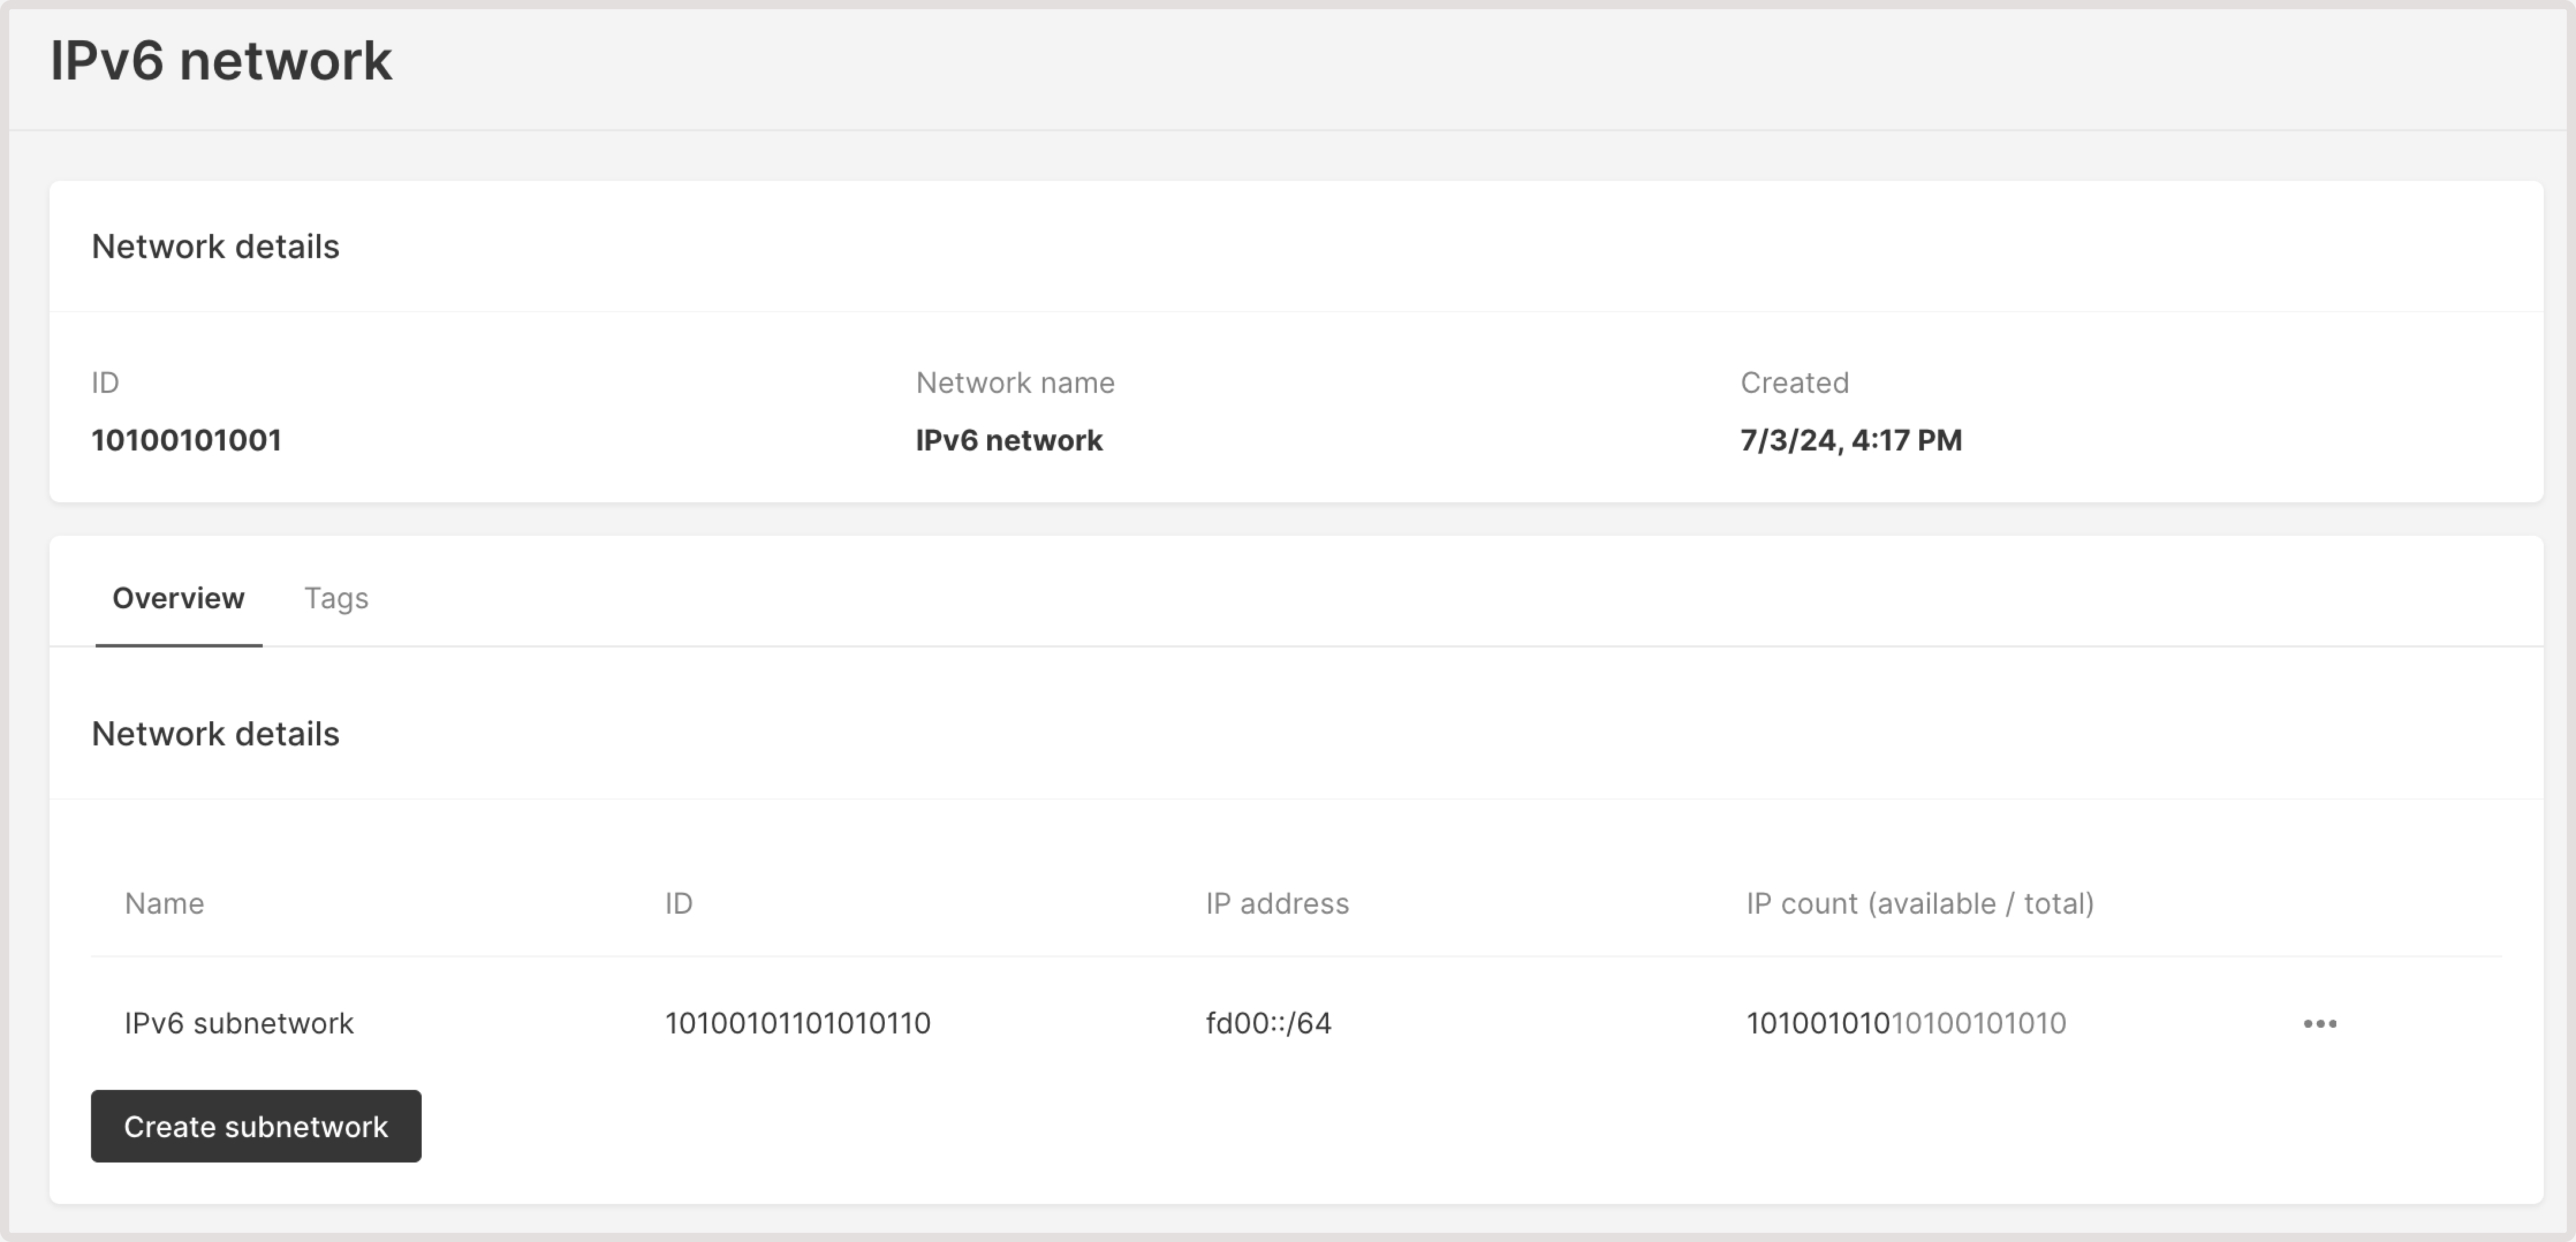
Port security
Port Security is enabled by default for all Virtual Machines, allowing only authorized traffic through network interfaces. To establish connectivity, you must configure a firewall. In some cases, such as specific network configurations or applications that require unrestricted access, turning off Port Security may be necessary. To disable Port Security: 1. Open the Gcore Customer Portal and navigate to your Virtual Machine. 2. Go to the Networking tab. 3. Click on the three-dot menu next to the interface. 4. Select Disable Port Security.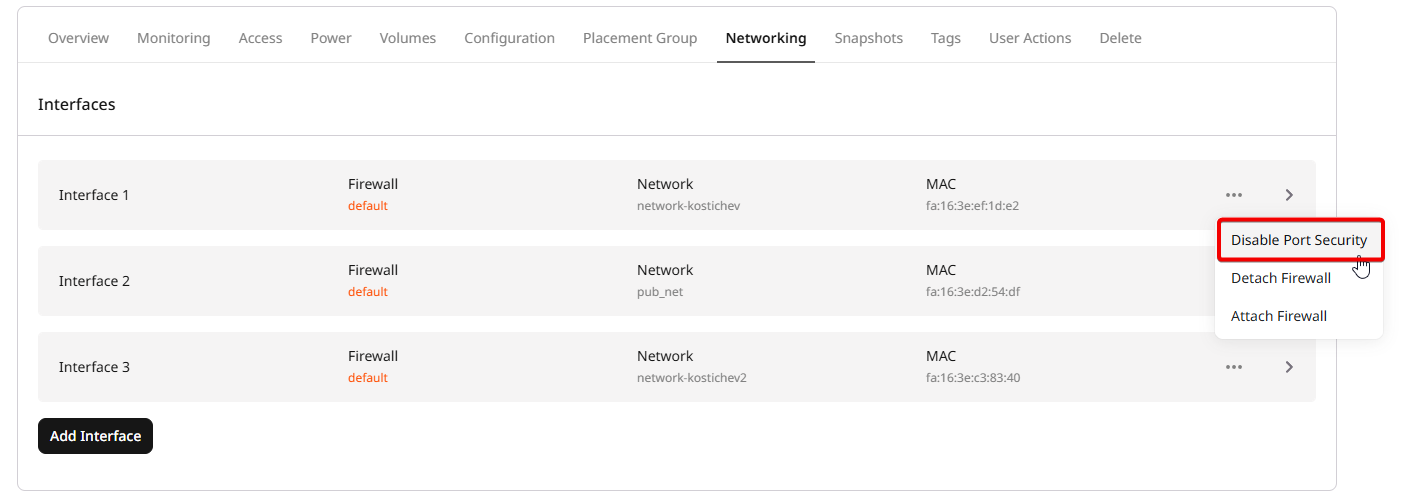
Rename a network
1. In the Gcore Customer Portal, navigate to Cloud > Networking. 2. Find the network that you want to rename and click the three-dot icon next to it. 3. Select Rename.
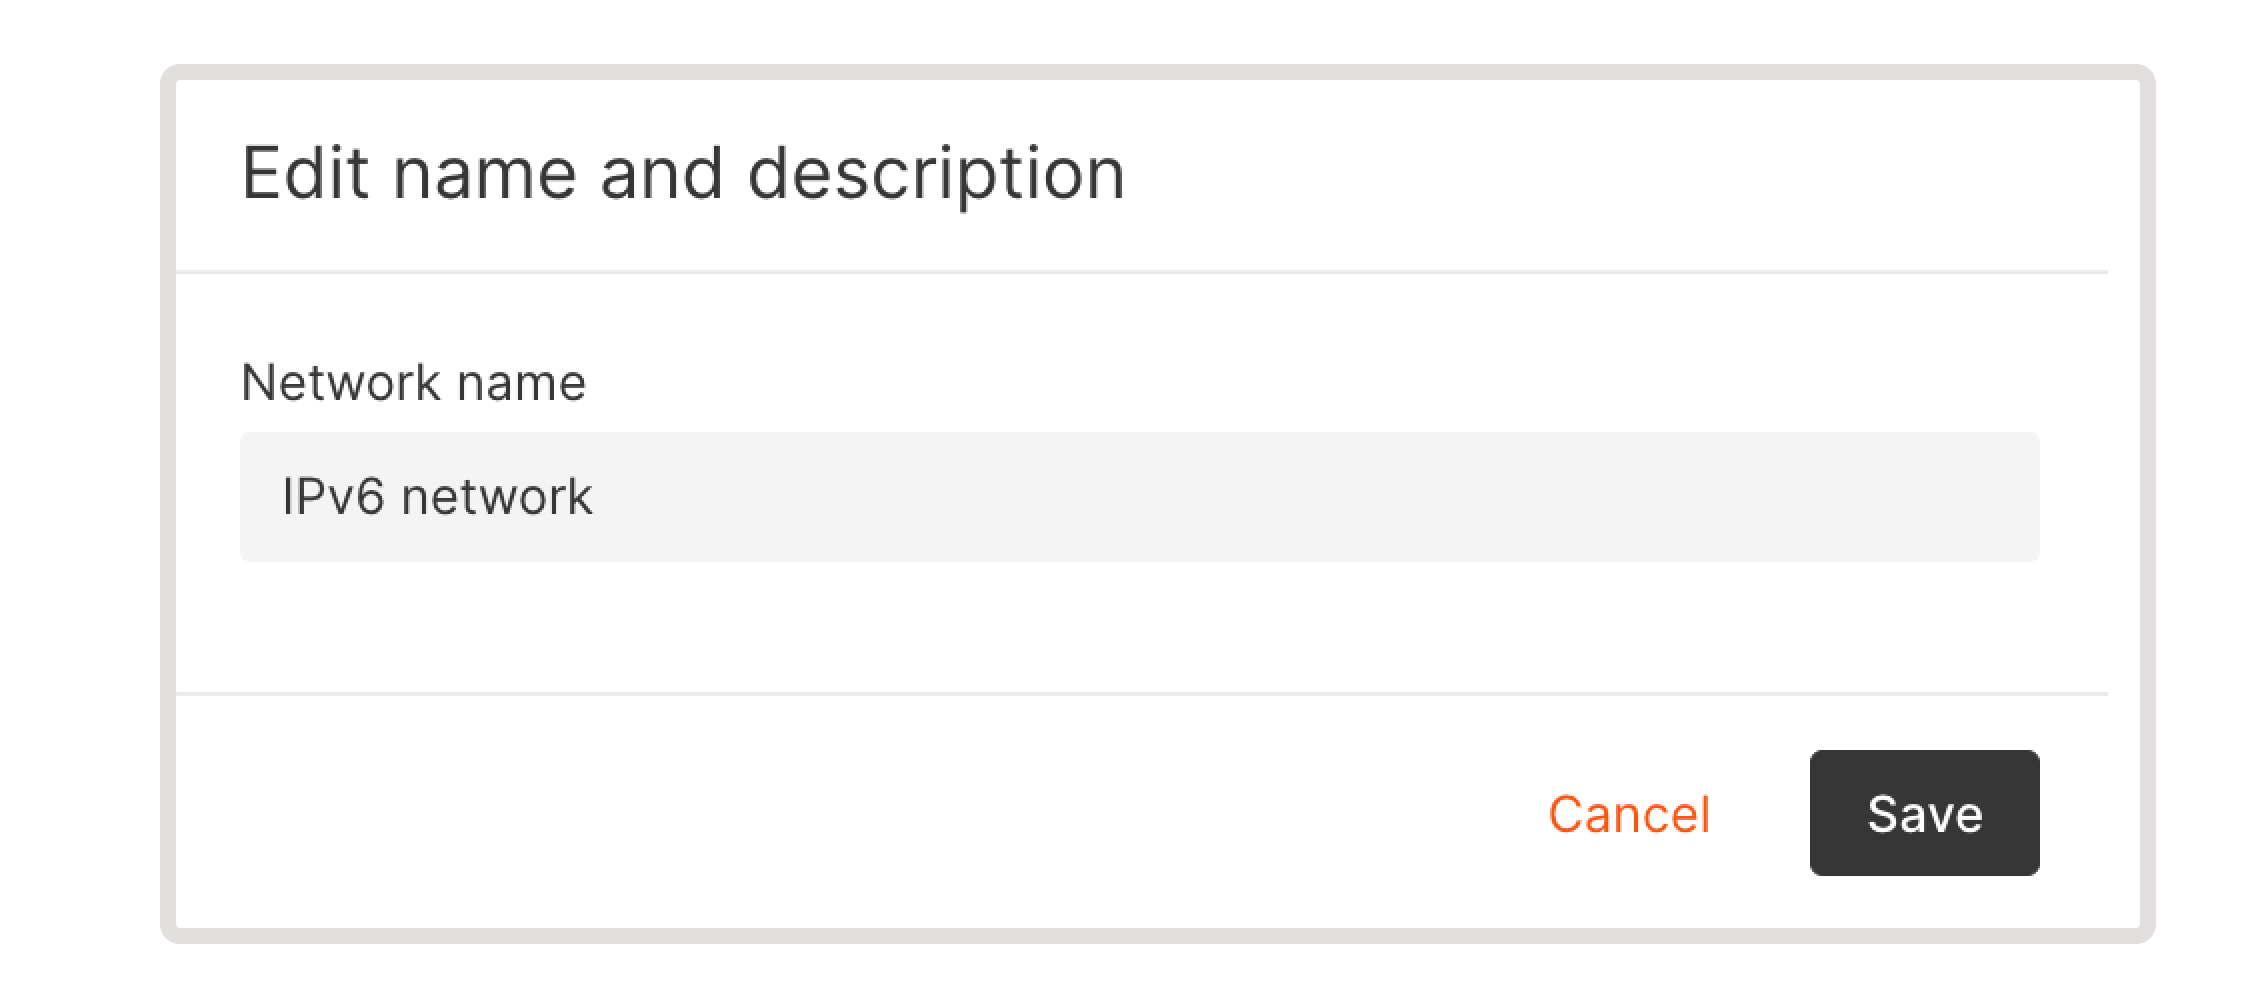
Delete a network
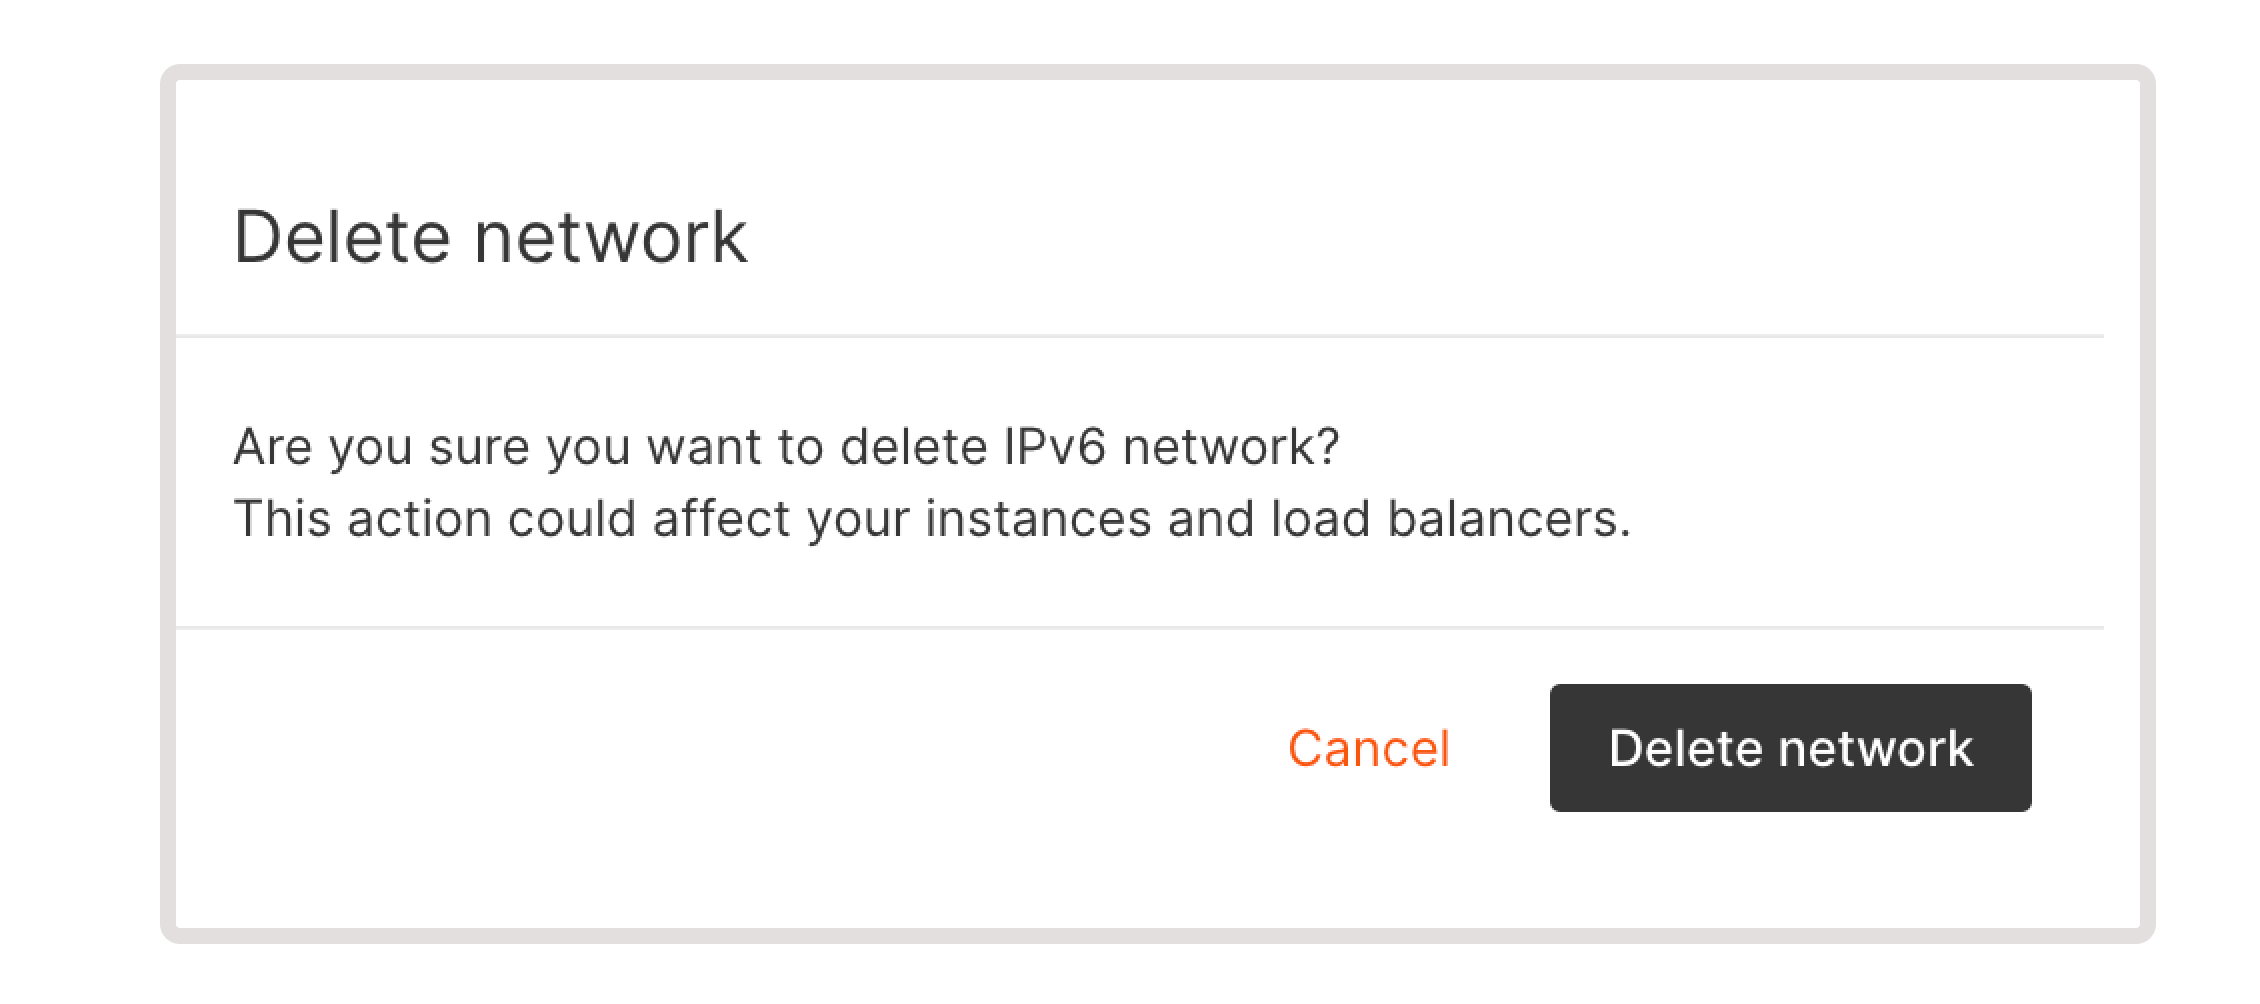
1. In the Gcore Customer Portal, navigate to Cloud > Networking. 2. Find the network that you want to remove and click the three-dot icon next to it. 3. Select Delete.
