Step 1. Initiate the process
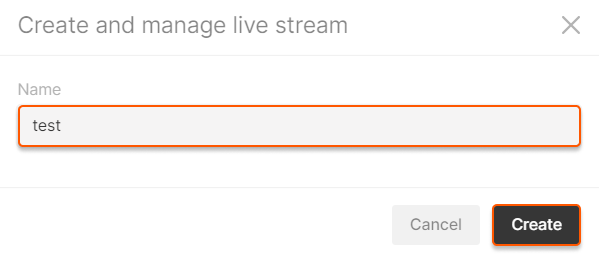
1. In the Gcore Customer Portal, navigate to Streaming > Live Streaming. 2. Click the Create Live stream button on the top right.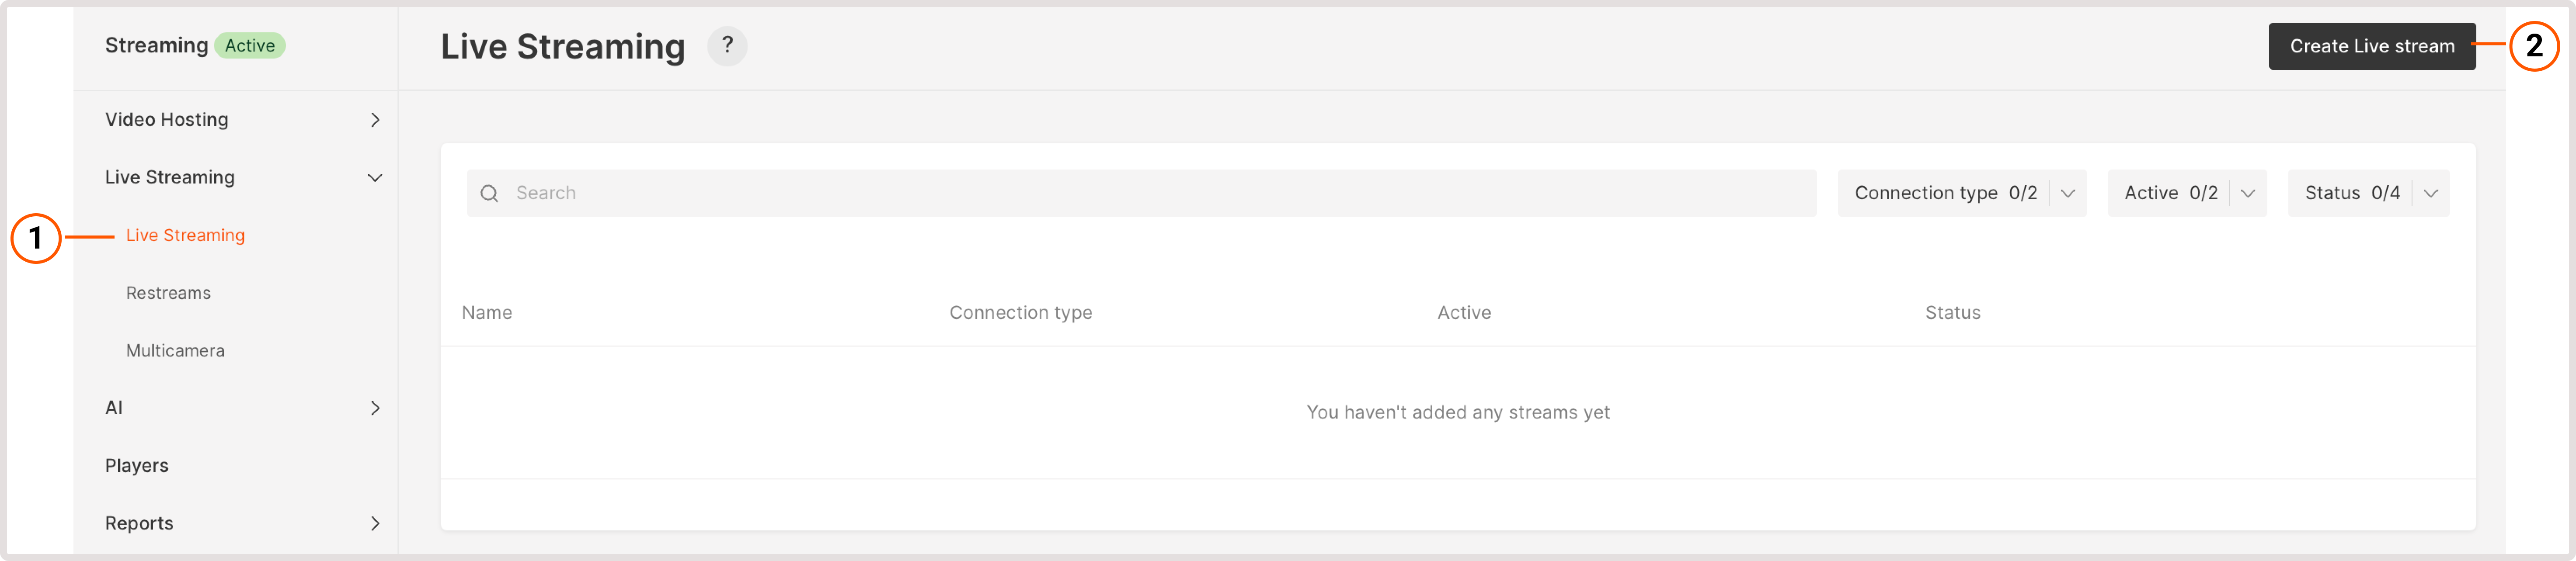
The 'Create Live stream' button is unavailable?
The 'Create Live stream' button is unavailable?
Step 2. Set the ingest type and additional features
Low latency explanation
Low latency explanation
By default, we offer live streams with low latency (a 4–5 second delay.) Low latency is available in two protocols: LL-DASH (compatible with all devices except iOS) and LL-HLS (compatible with iOS). This feature is active from the start for all users, including those on the trial period or free tier, with no plan upgrades required. You can also obtain legacy HLS with MPEGTS format segments, in which case, please read our article.
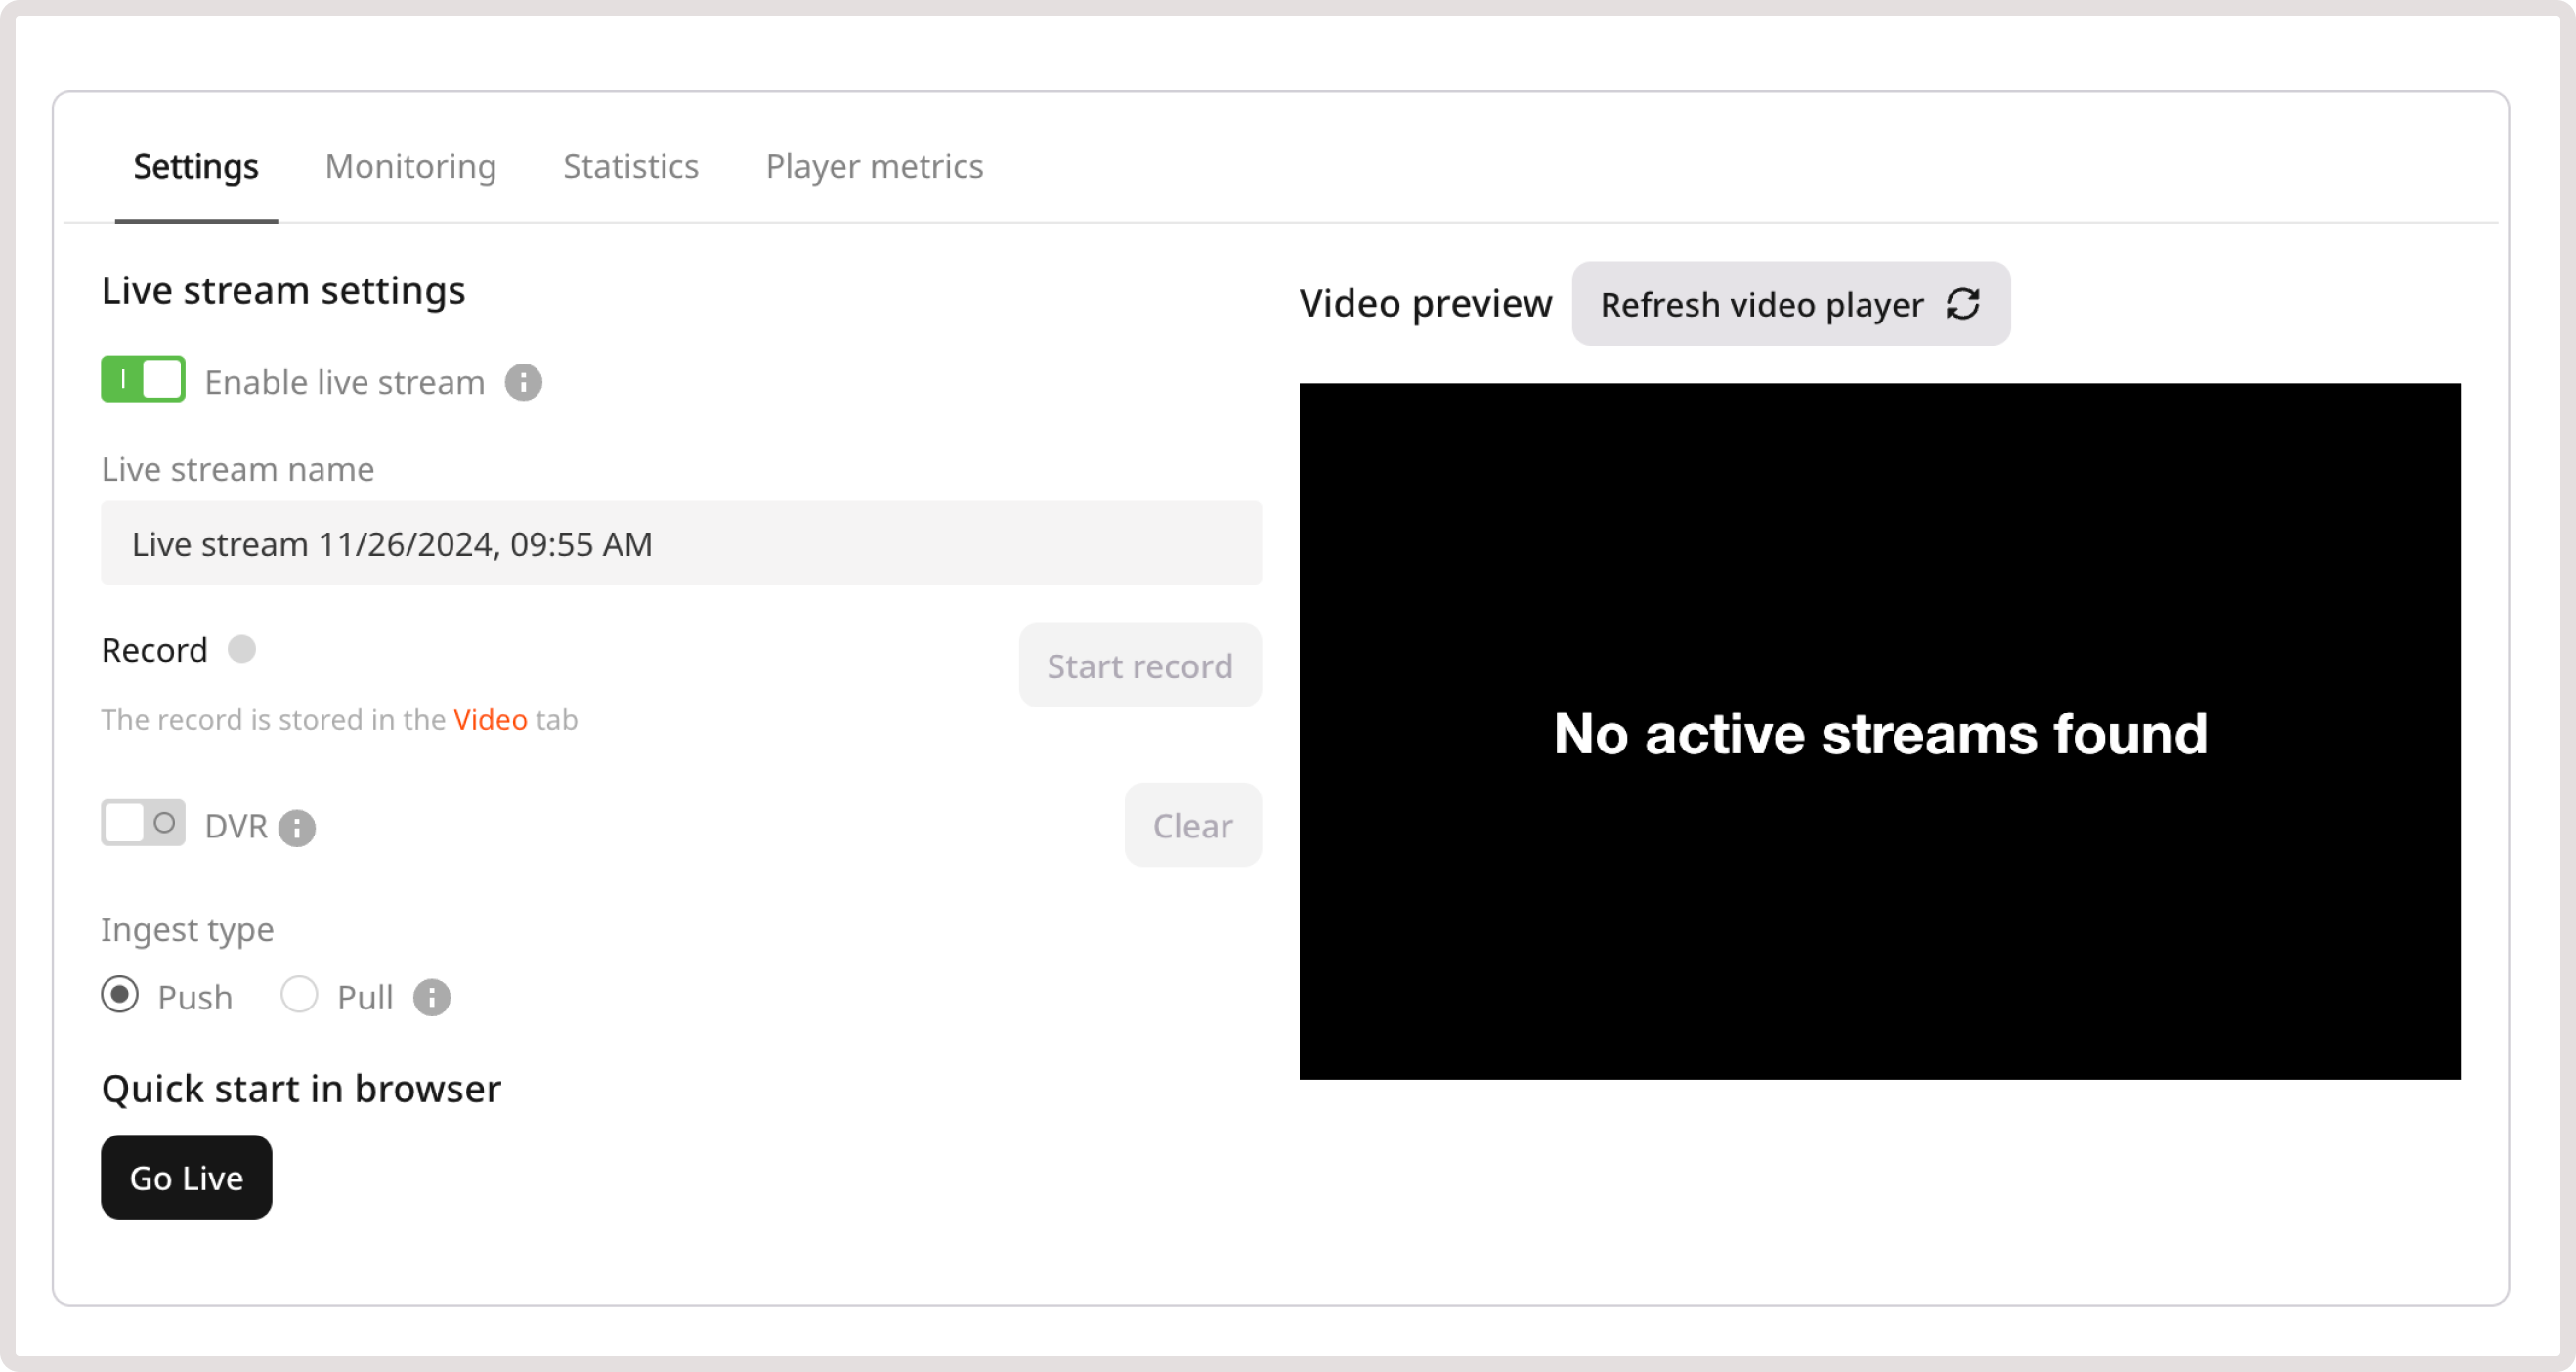
- Record for live stream recording. It will be active when you start streaming. Remember to enable the toggle if you require a record of your stream.
- DVR for an improved user experience. When the DVR feature is enabled, your viewers can pause and rewind the broadcast.
When to choose Push vs Pull
- Push (most common)
- Pull (if you have your own streaming server)
Choose Push if:
- You generate a live stream from your web-cam, mobile device or computer
- You’re using a streaming encoder OBS, Streamlabs, vMix, or any other software and hardware encoder
- You don’t have your own streaming server
- Configure your encoder with Gcore’s server URL and stream key
- Your encoder sends (pushes) the stream to our server via RTMP, SRT, WebRTC WHIP
- Gcore transcodes the stream into multiple quality levels
- Gcore delivers via CDN in HLS and MPEG-DASH formats
Step 3. Configure your stream
Depending on the selected ingest type and protocol, your settings will differ.For PUSH streams
Refer to specific protocol pages for detailed configuration:For PULL streams (step-by-step)
If you selected Pull as your ingest type:-
Prepare your source stream URL
- Ensure your stream is already running on your server
- Copy the complete URL (e.g.,
https://1.1.1.1/live/stream.m3u8)
-
Enter the URL in the PULL URL field
- Paste your stream URL into the “PULL URL” field
- You can enter multiple URLs separated by spaces for failover (optional)
- Example with backup:
rtmp://1.1.1.1/live/stream rtmp://1.1.1.2/live/stream
-
Select geo-distributed pull point (optional)
- Contact support to configure the optimal pull location
- This minimizes latency by pulling from a server closer to your origin
-
Enable the stream
- Make sure the Enable live stream toggle is ON (should be green)
- Click the Save button in the top right corner
-
Wait for activation
- The stream will become active within approximately 15 seconds
- You’ll see a preview on the Live Stream Settings page when ready
- The first webhook notification indicates the stream is available for playback
Troubleshooting: If the stream doesn’t appear after 2 minutes, verify:
- Your source stream is actively running and accessible
- The URL is correct and publicly reachable
- Your firewall allows Gcore’s servers to access your stream
Step 4. Start the stream
Start a live stream on your media server or encoder. You will see a streaming preview on the Live Stream Settings page if everything is configured correctly.Step 5. Embed the stream to your app
After configuring your stream, you can embed it into your app or website. The Live stream settings page in the Gcore Customer Portal provides the export links and player embed options you need.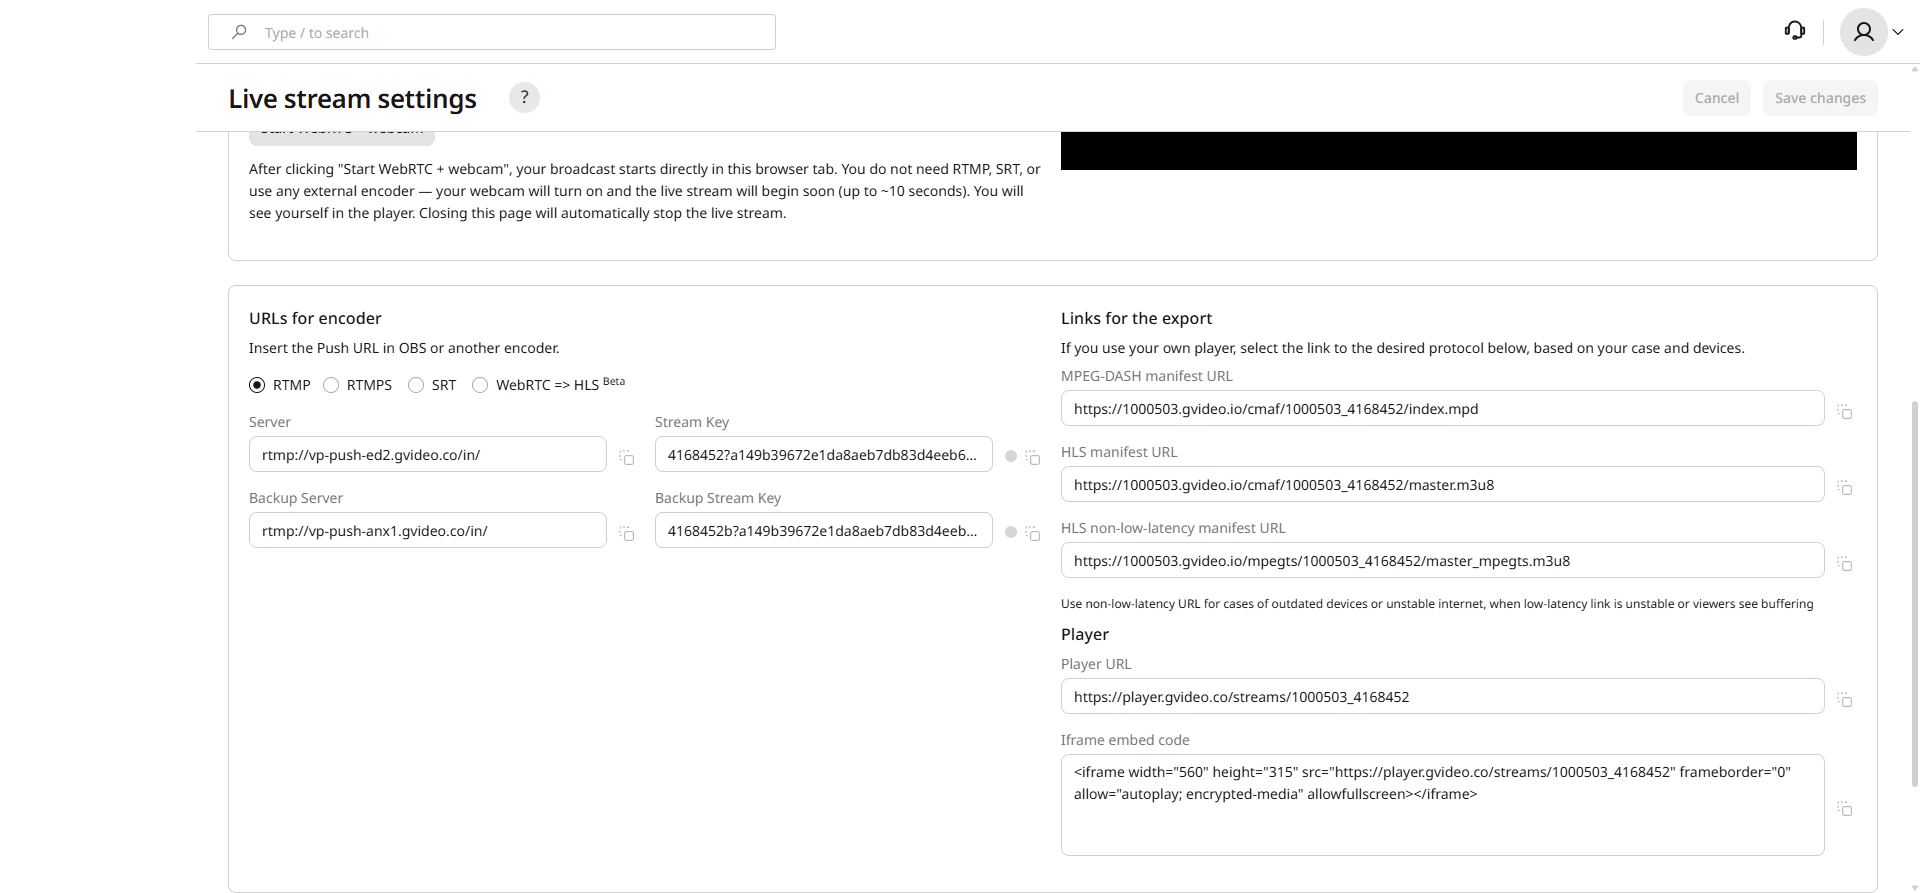
Links for the export
If you use your own player, select the appropriate link based on your use case and target devices:| Link | Description |
|---|---|
| MPEG-DASH manifest URL | Low-latency adaptive bitrate streaming. Compatible with most modern devices except iOS Safari. |
| HLS manifest URL | Low-latency HLS (LL-HLS) with CMAF segments. Compatible with all devices including iOS. |
| HLS non-low-latency manifest URL | Traditional HLS with MPEG-TS segments. Use this for outdated devices or unstable internet connections when the low-latency link causes buffering. |
Player
To quickly embed the stream using the Gcore player:| Option | Description |
|---|---|
| Player URL | Direct link to the hosted player page. Share this link with viewers or use it for testing. |
| Iframe embed code | Copy and paste this code into your website or CMS to embed the player directly. To change the player behavior (disable low latency, change colors, etc.), see Customize appearance of the built-in player. If something doesn’t work in your player, contact our support team. |