How to upload an SSL certificate to your account
1. Go to SSL certificates and click Add SSL certificate.
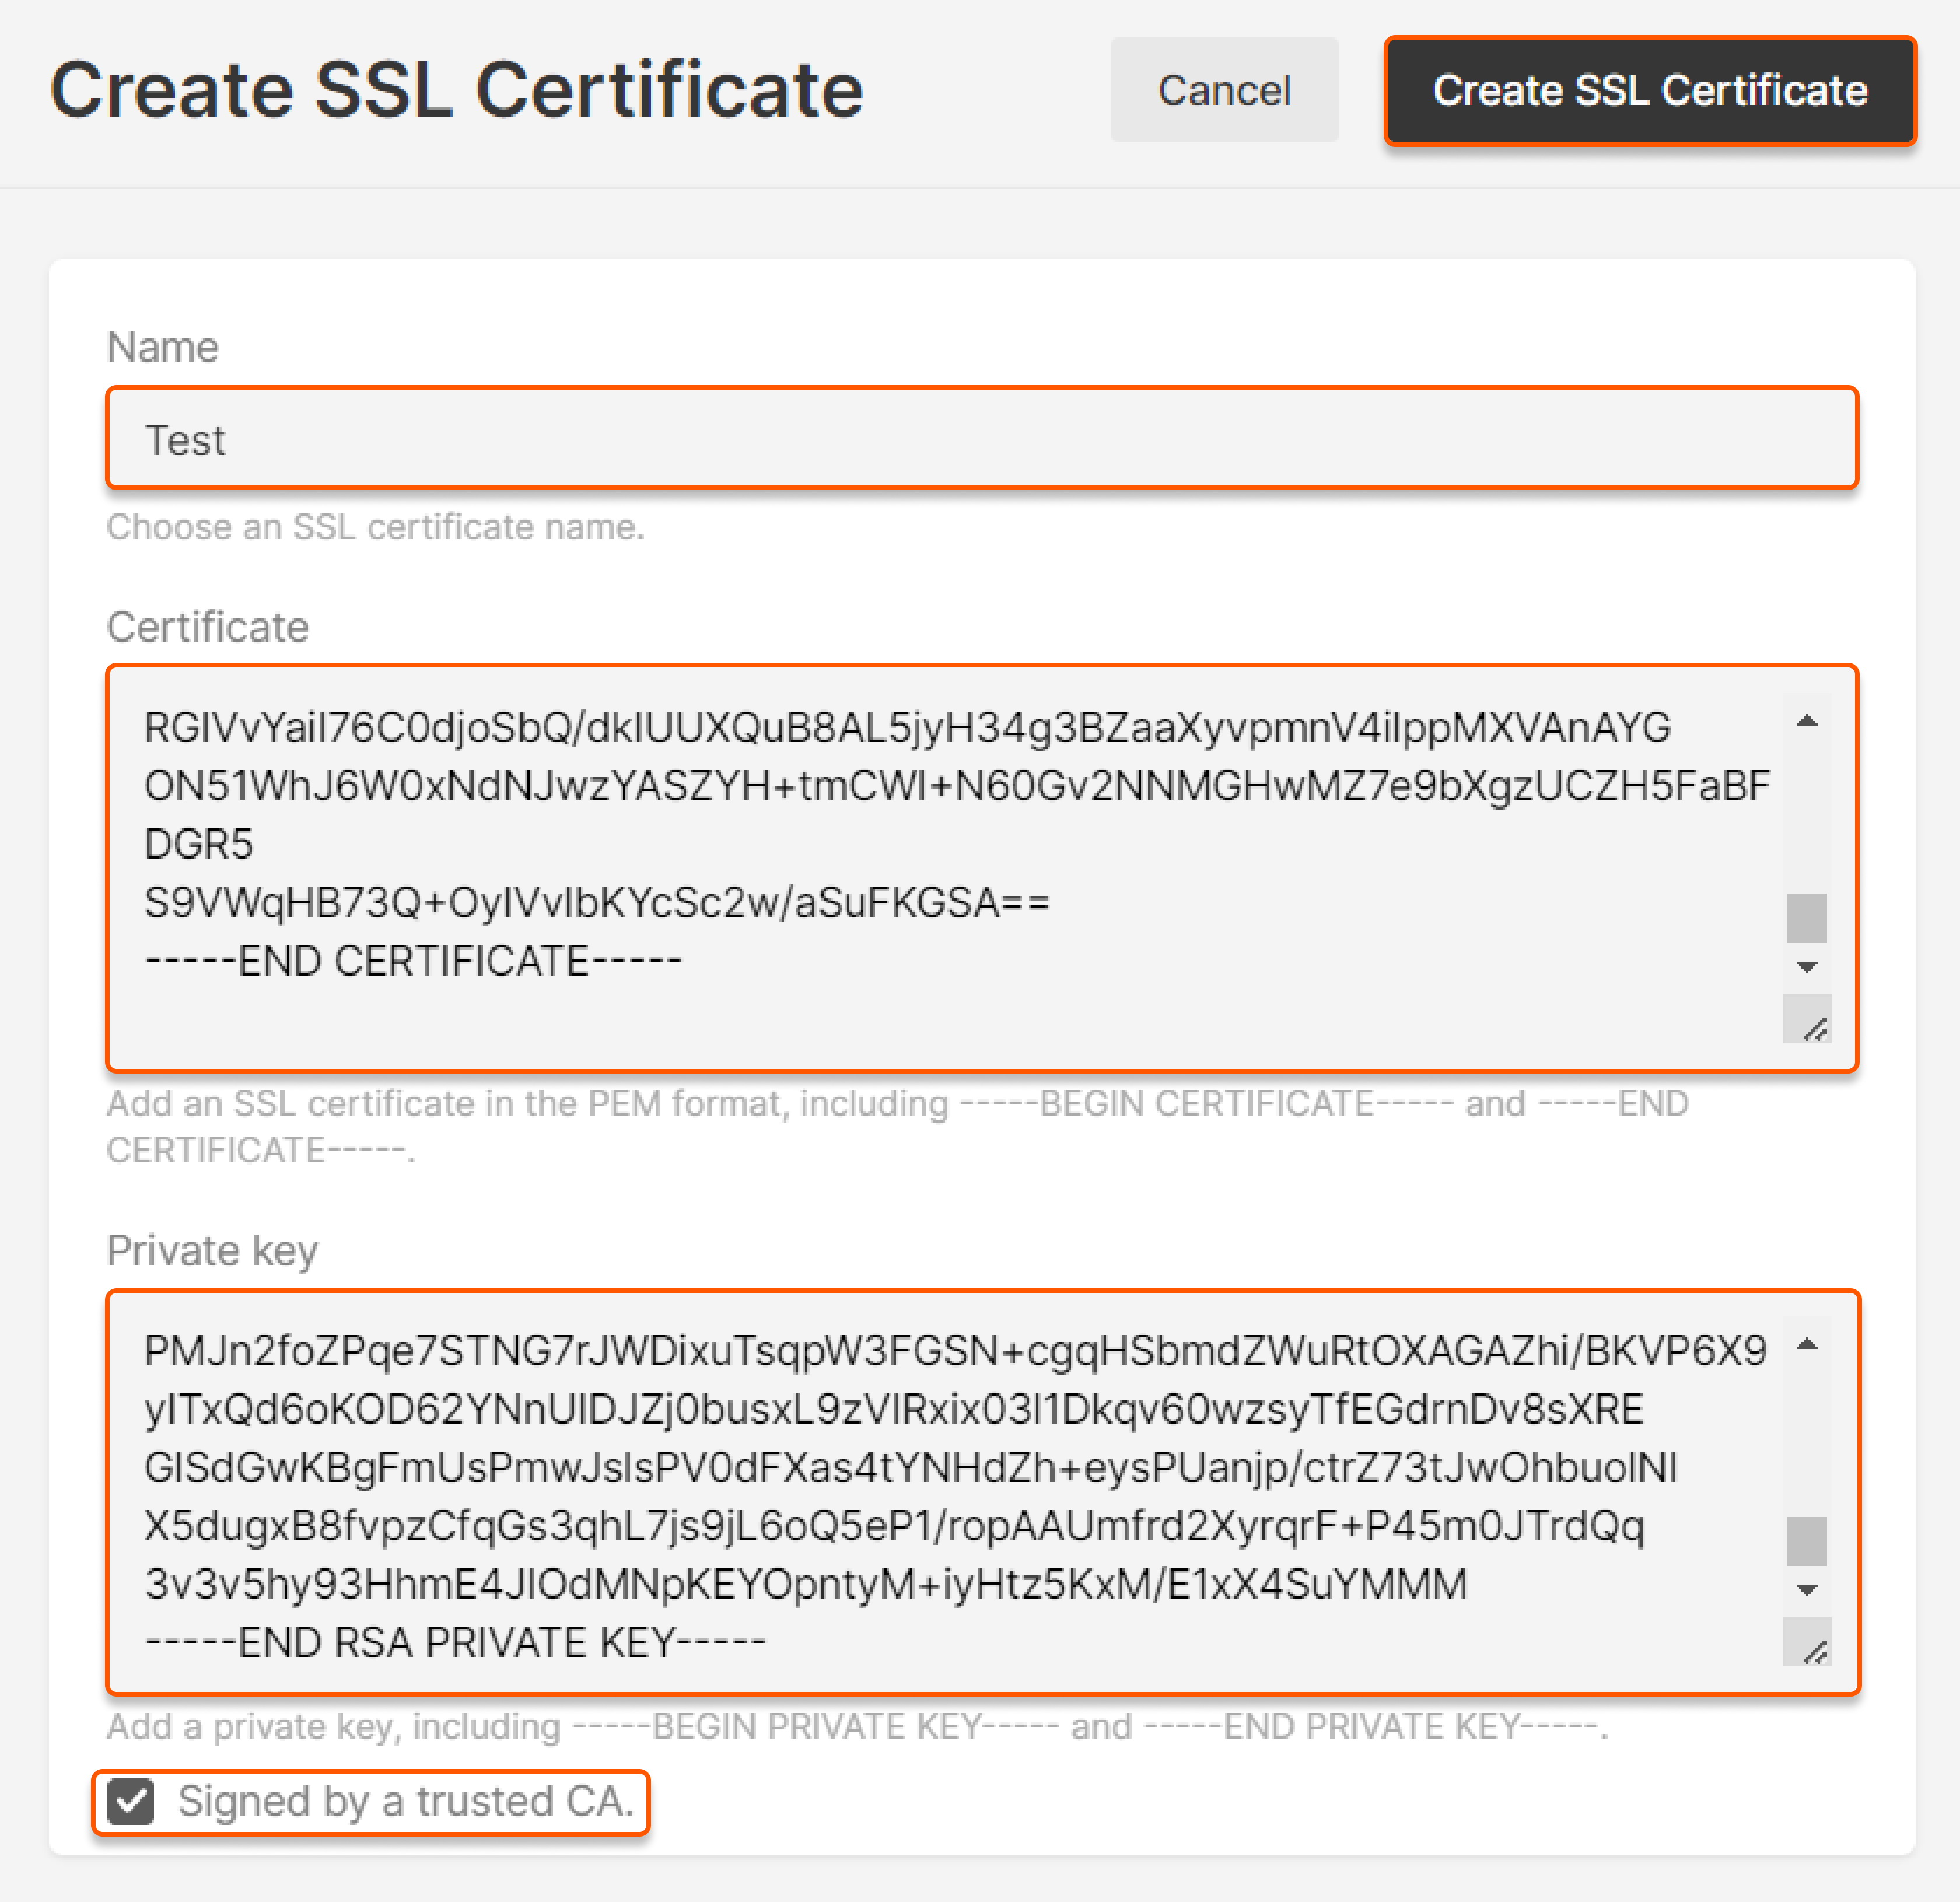
- The SSL certificate name, which can be found in the Gcore Customer Portal
- Certificate chain (personal certificate, intermediate CA, root CA) in the PEM format
- Private key

How to insert an SSL chain and a key correctly
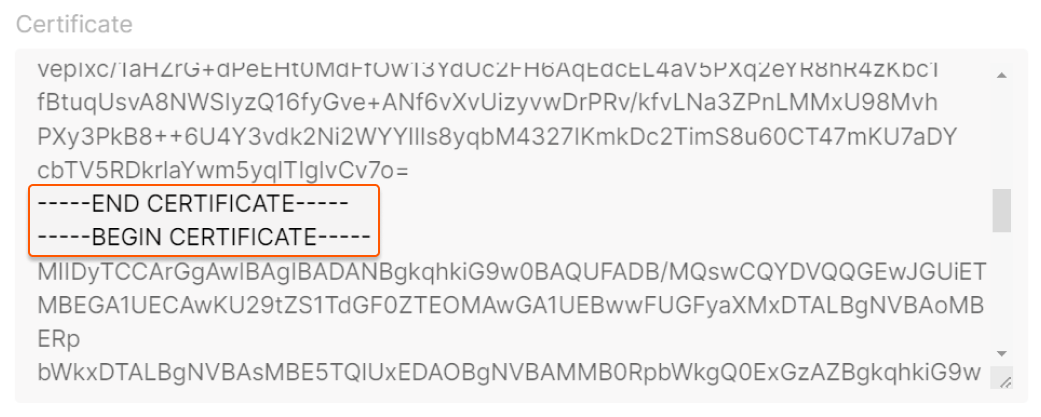
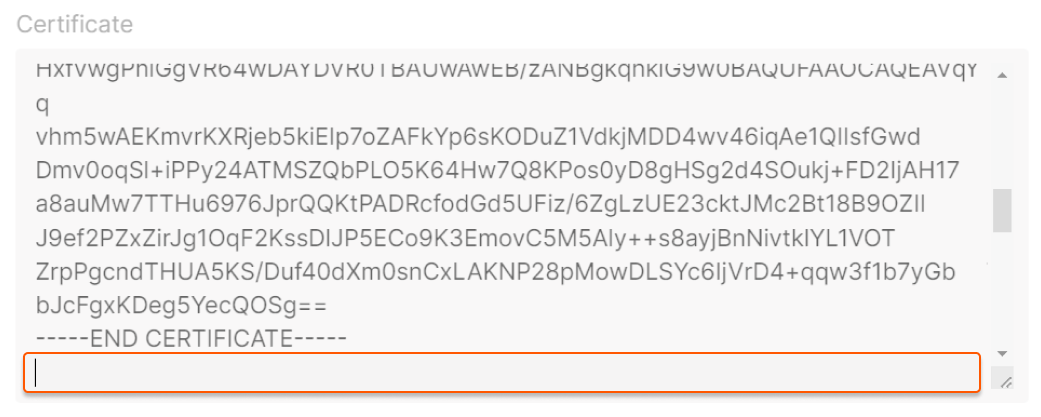
1. Open the certificate file in PEM format (.pem, .crt, or .cer) using a text editor like Notepad. 2. Copy and paste the certificate chain in this order: personal certificate, intermediate CA, root CA. 3. All the contents of the certificate must be inserted into the Certificate field, including the tags-----BEGIN CERTIFICATE----- and -----END CERTIFICATE-----.
4. The certificate chain must be inserted without blank lines. Here’s an example of how it should look:
-----BEGIN RSA PRIVATE KEY----- and -----END RSA PRIVATE KEY-----.
How to attach the SSL certificate to the CDN resource
You can attach the SSL certificate to your CDN resource either:- During CDN resource creation
- To an existing CDN resource
Method 1: Add SSL certificate during CDN resource creation
1. Follow steps 1–3 of the guide Create a CDN resource for static assets only until the “Custom domain” field is filled in.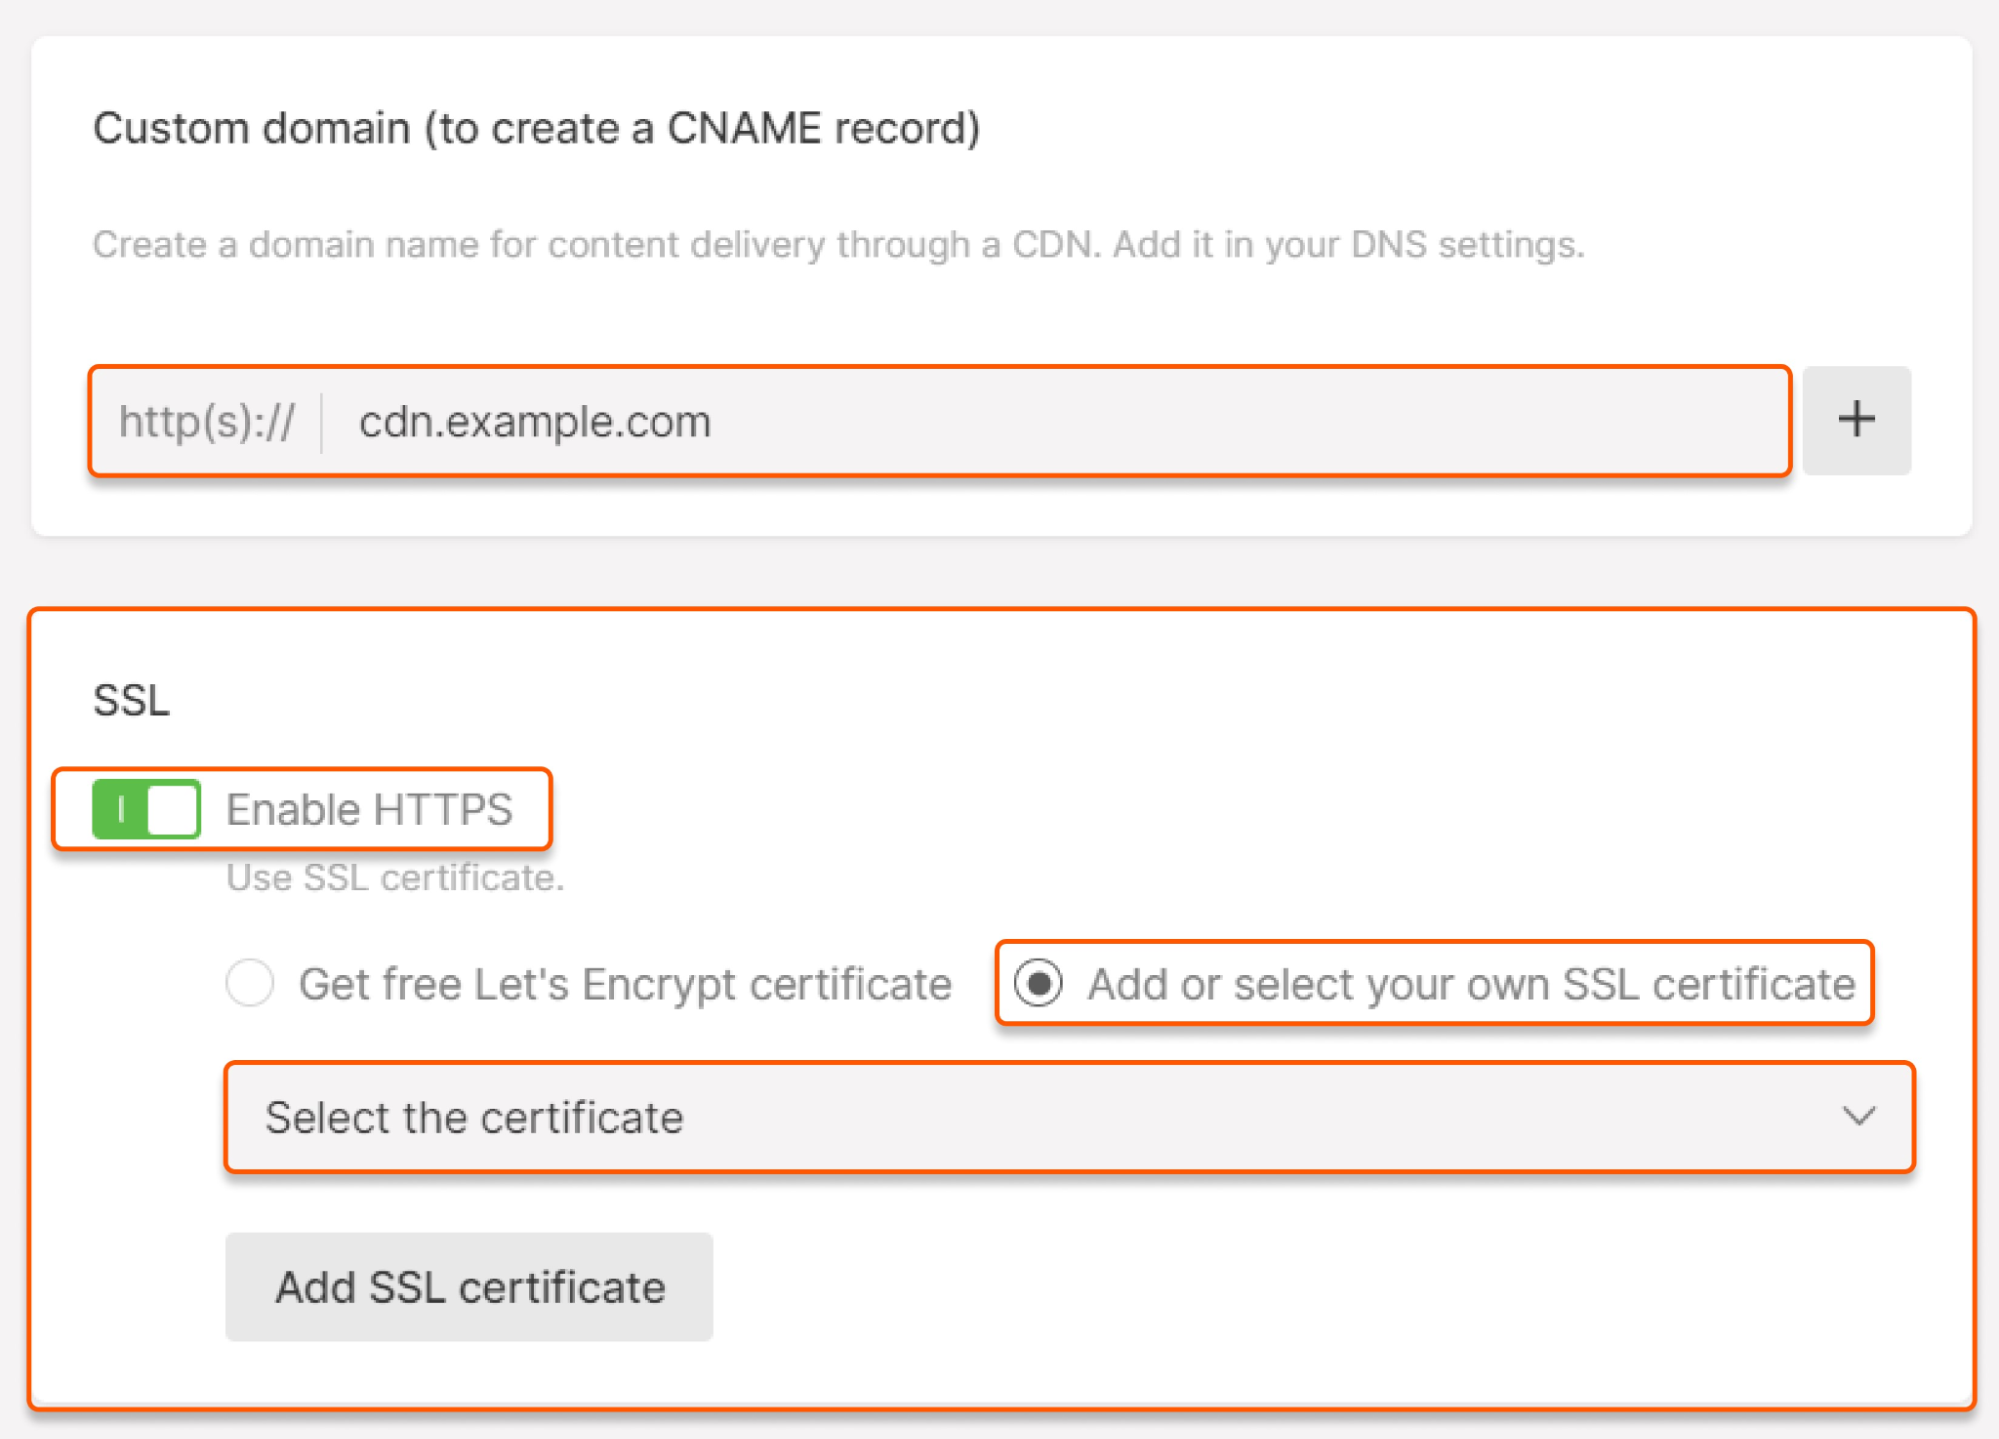
If you haven't uploaded the SSL certificate
If you haven't uploaded the SSL certificate
If you haven’t yet added a certificate or want to upload a new one for this resource, click Add SSL certificate. Specify your SSL certificate’s data in the pop-up window. Review our guide for help inserting the certificate and key contents. After pasting the data, сlick Add SSL certificate.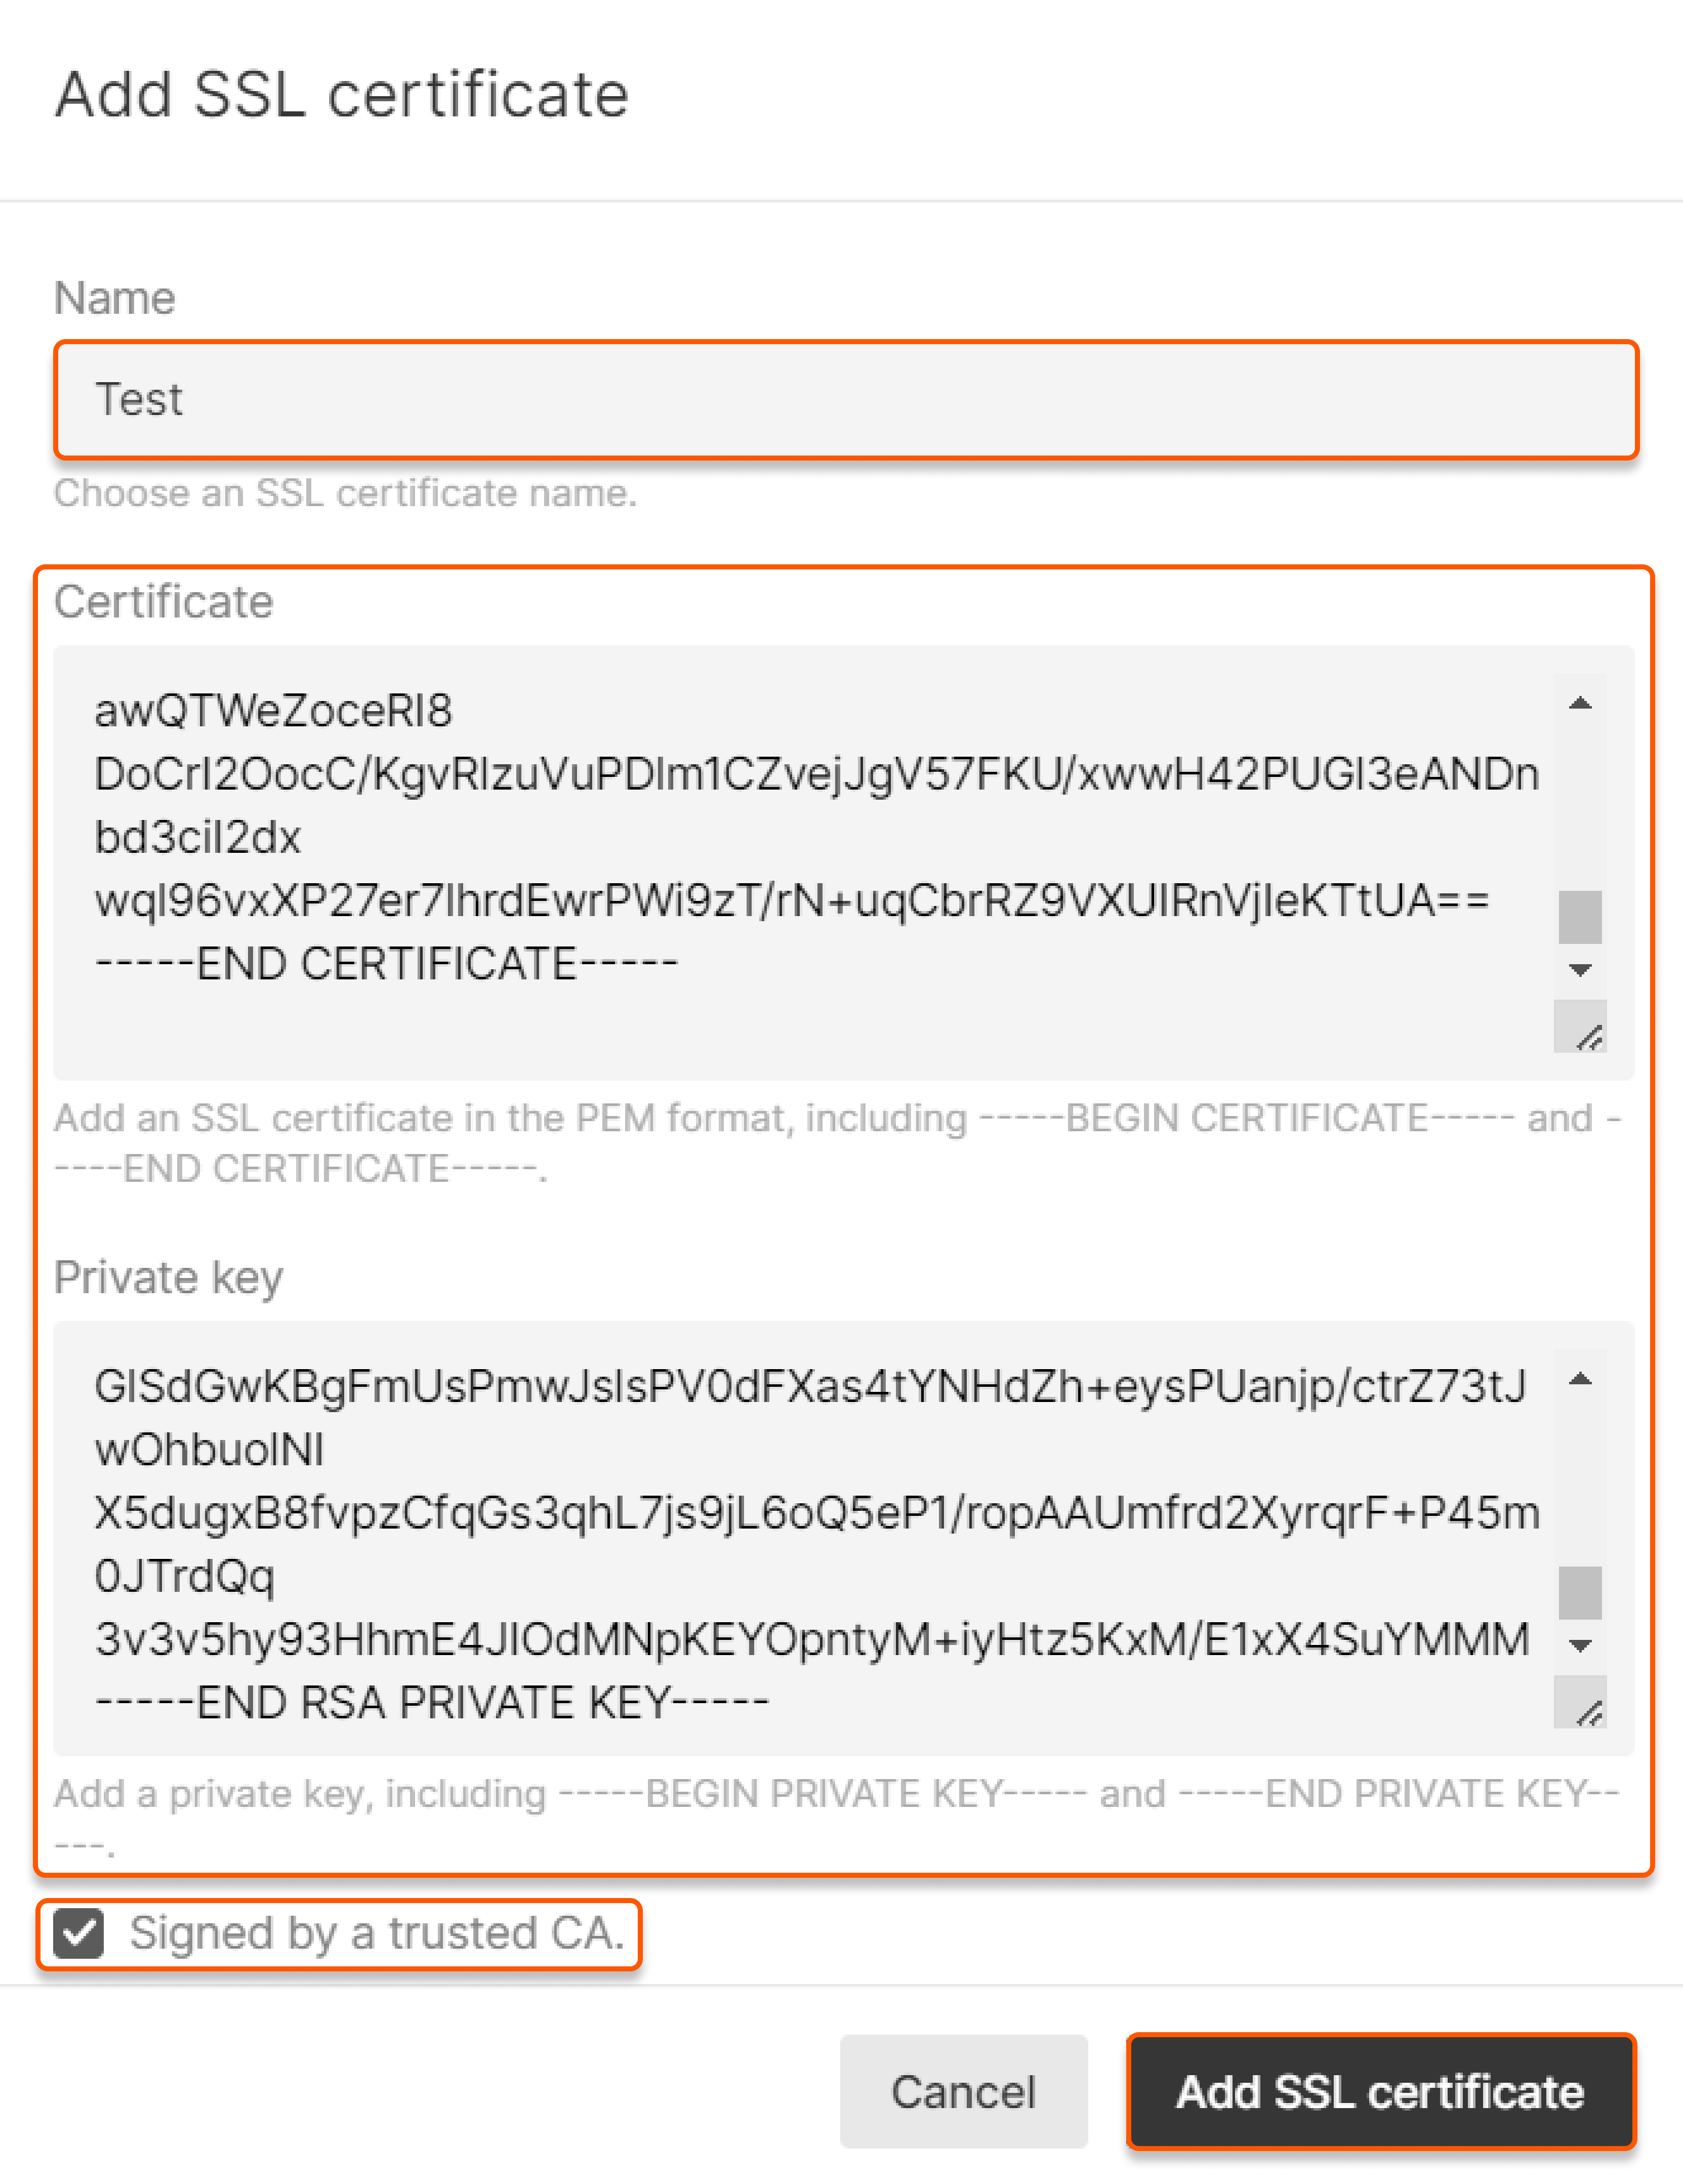

Method 2: Add SSL certificate for an existing CDN resource
1. Select the resource you want to configure in the CDN resources section.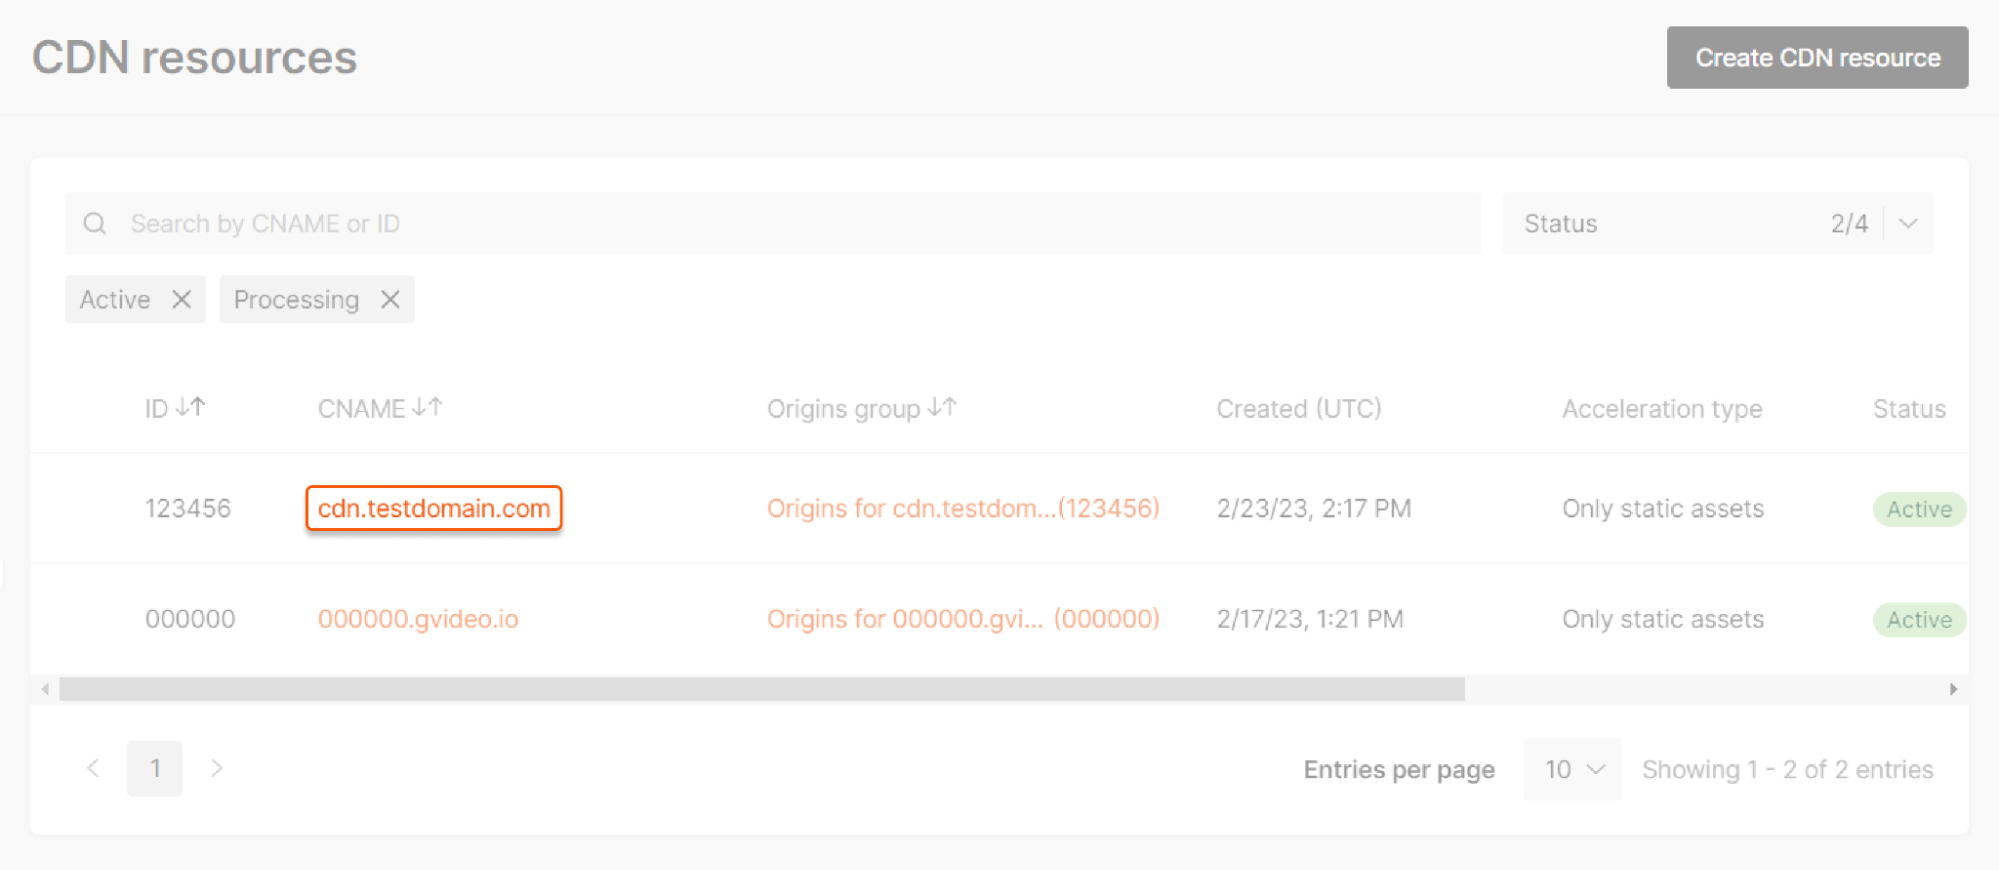
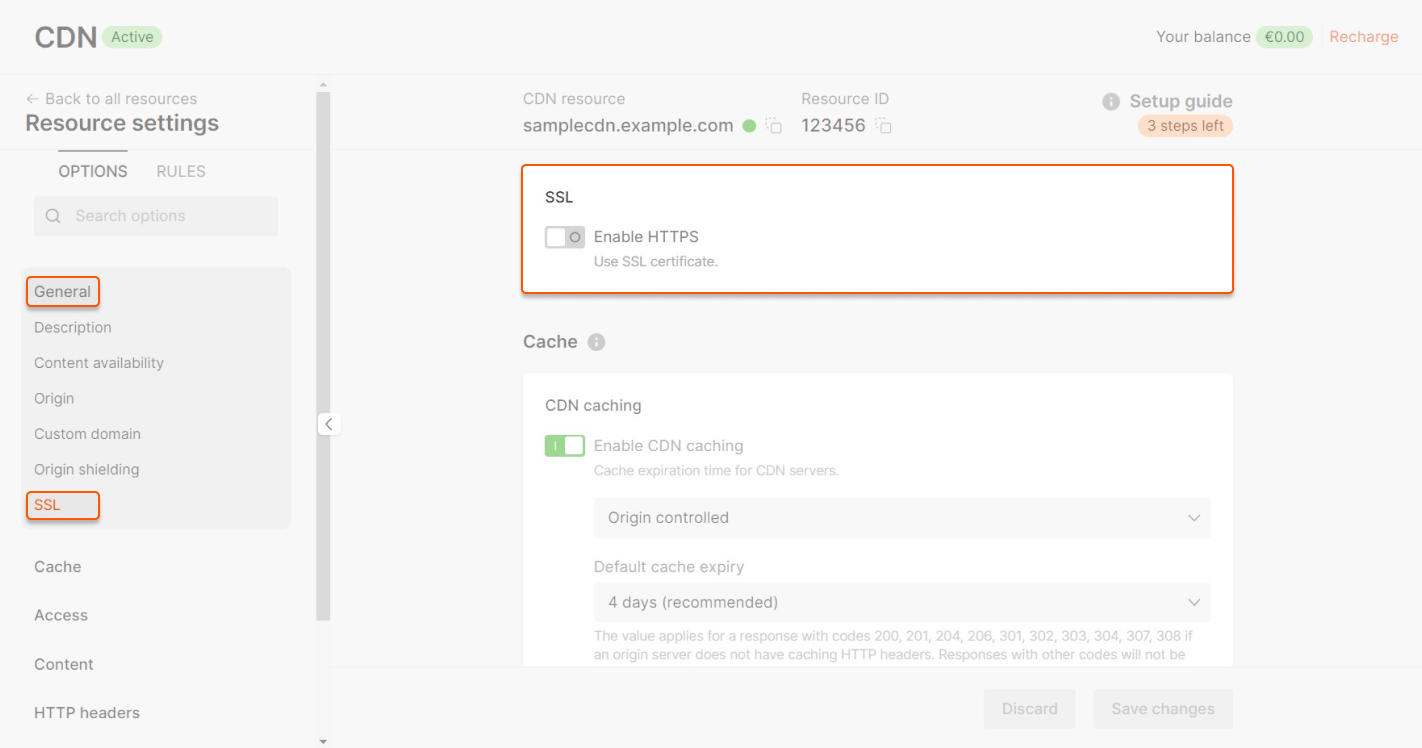
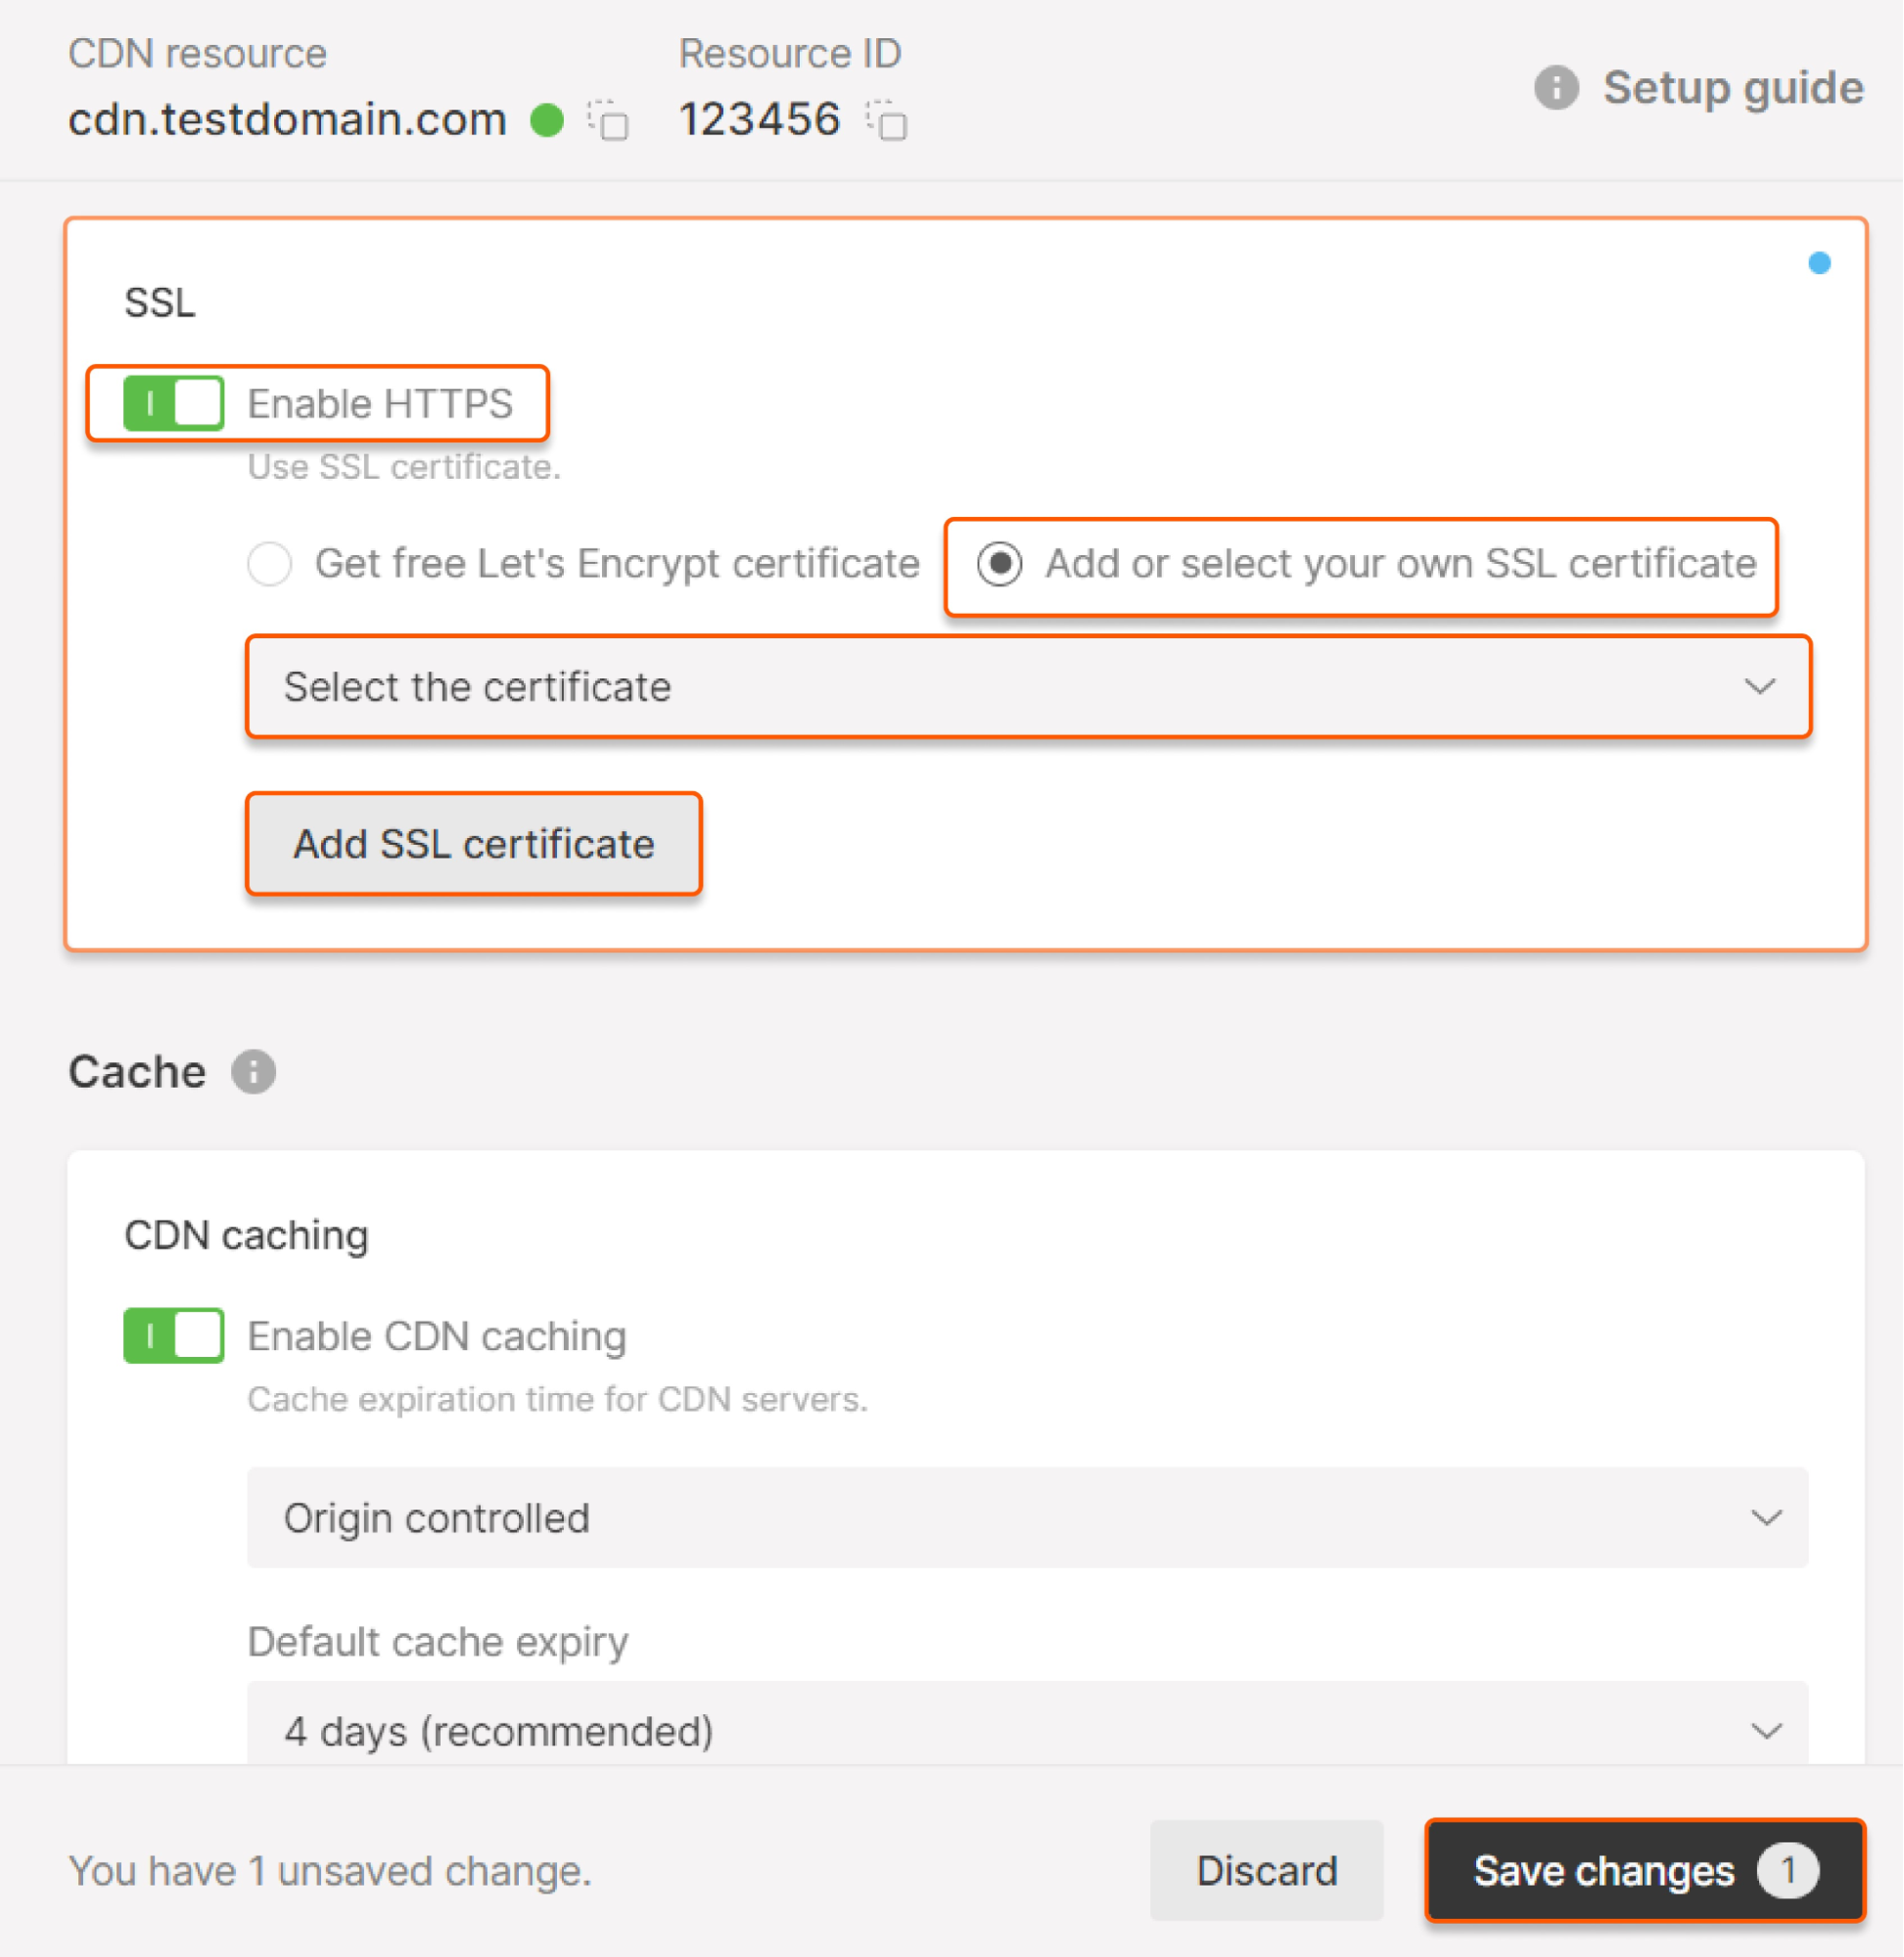
If you haven't uploaded the SSL certificate
If you haven't uploaded the SSL certificate
If you haven’t yet added a certificate or want to upload a new one for this resource, click Add SSL certificate. Specify your SSL certificate’s data in the pop-up window. Review our guide for help inserting the certificate and key contents. After pasting the data, сlick Add SSL certificate.

Certificate management
SSL certificates overview
The certificate will be displayed in the SSL certificates section in the Gcore Customer Portal. This page contains a table that lists your personal certificates and associated information, such as the ID, name, CDN resources connected to the certificate, and expiration date.
Renew an SSL certificate
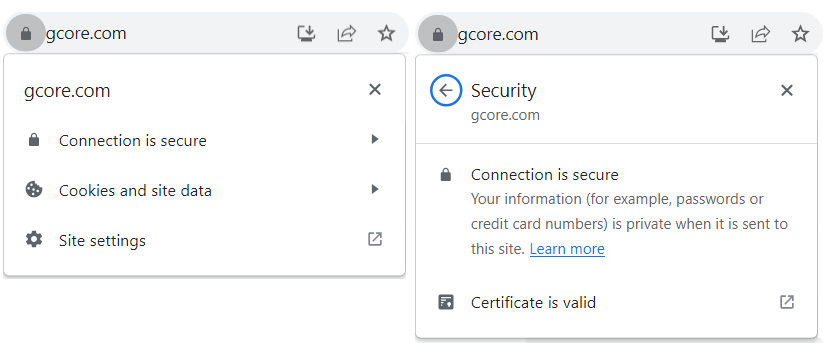
There is no way to change a certificate’s data once the certificate has been added. When the certificate is nearing its expiration date, follow these steps: 1. Go to the SSL Certificates page and upload a new certificate. 2. Go to the settings of the CDN resource you want to configure. 3. Select the new certificate from the dropdown menu in the SSL section. 4. Click Save changes and allow at least fifteen minutes for the changes to take effect. 5. To verify that the SSL certificate has been correctly installed and bound to the resource, enter your CNAME into the browser (e.g.,https://example.com). Click the lock icon in the address bar, navigate to Connection is secure, and click Certificate is valid.
SSL certificate expiration notifications
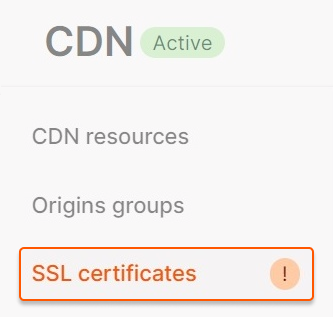
When your added certificates are about to expire, a notification is displayed in your account and is sent to the email addresses of the administrator and engineer. Users are notified by email:- Fourteen days before the certificate expires
- Seven days before the certificate expires
- On the day of the certificate’s expiration


Delete an SSL certificate
To delete a certificate, click the three dots next to the certificate, then click Delete.