Define where the issue is: the website or the CDN resource
Request any file that should be delivered via CDN from the source (your website) and ensure that you get an HTTP 200 response code. For example:- example.com is your website’s domain
- http is the protocol
- image.png is the path of the file you want to request to
Check the CDN’s settings
1. Check the configuration of the personal domain
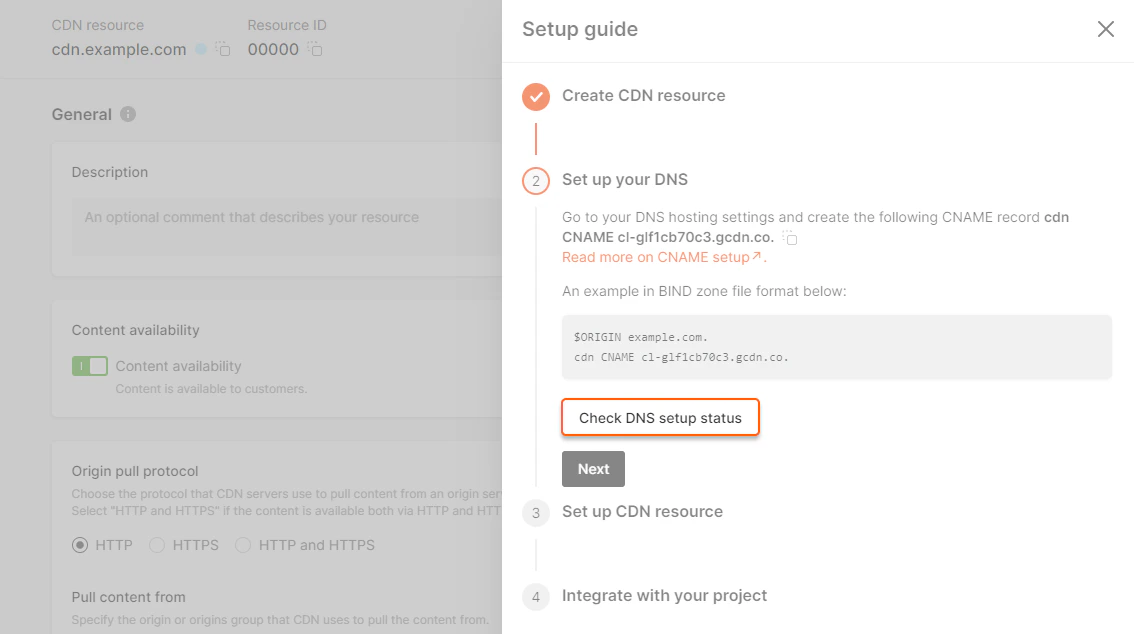
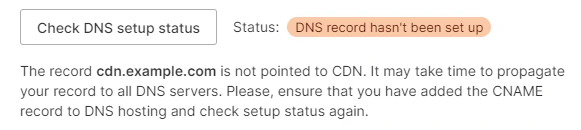
If the CNAME record of the personal domain isn’t configured or configured with mistakes, the content will be delivered from the source and not via CDN. To check the CNAME record and set it up correctly: 1. Go to the Resource settings and look at the Setup guide. If there is the x steps left label, click on it. If there is no label, go to the next section.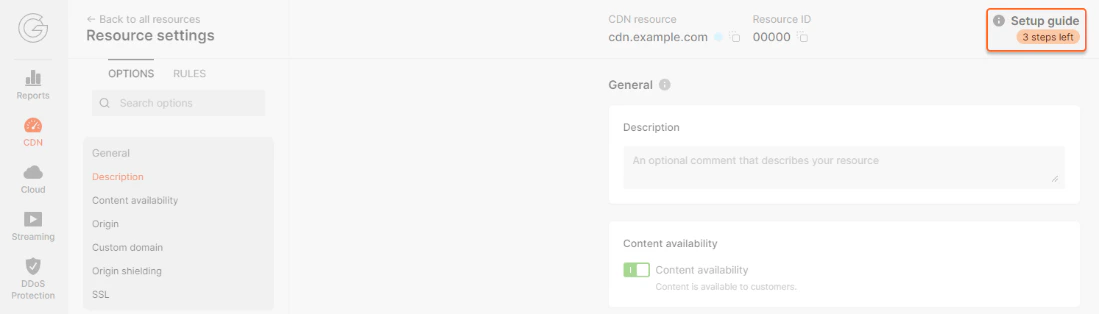
2. Check the host header option
If the Host header does not match the website source, your website won’t be able to process requests from the CDN, and the content won’t load. To check the Host header and set it up correctly: 1. Go to the Resource settings and find the Host header option.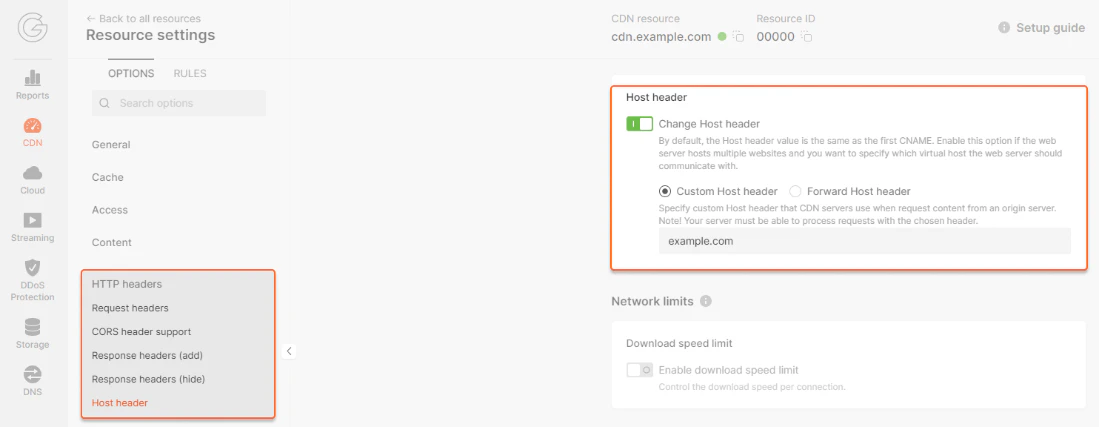
- example.com is the value of the Host header
- http(s)://10.0.0.1/image.png the http(s) depends on the protocol used by the source, then the IP address of your website source and the path of the file that is delivered via the CDN without the domain.
- If you integrated only one website with the CDN, specify its actual domain name in the Host header option and then clear the CDN cache.
- If you integrated several websites or applications (origin group with several sources) with the CDN, each of them must accept the specified Host header. Manage the sources and clear the CDN cache.
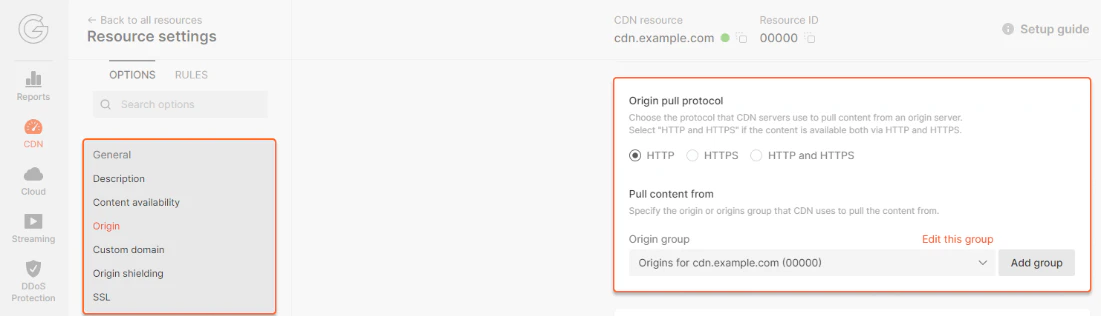
3. Check the origin pull protocol option
If you have chosen the inappropriate origin pull protocol (HTTP, HTTPS, or both), the CDN resource will request the content from your website with an error or a redirect. To check if the protocol was chosen properly and correct an error: 1. Find out which protocol your website uses. You can see the type of protocol at the left of the domain name in the browser address bar. If there is a padlock icon:
https://example.com.
If you see the Not secure label:

http://example.com.
It is also possible that the content on the origin is available both via HTTP and HTTPS. To check it, open your website using the protocols http://example.com and https://example.com.
2. Go to the Resource settings and find the Origin pull protocol option. You will see what protocol is selected.
4. Check the SSL option
If you enabled the SSL option, but the SSL certificate for your personal domain (e.g., cdn.example.com) isn’t added or is added with an error, the content won’t be available via the CDN, or you will see a notification that the connection isn’t secure in the browser.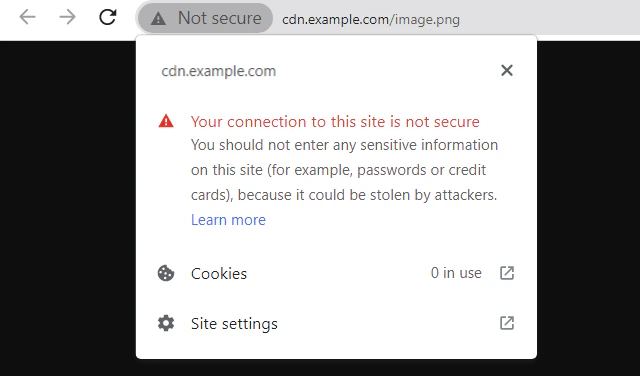
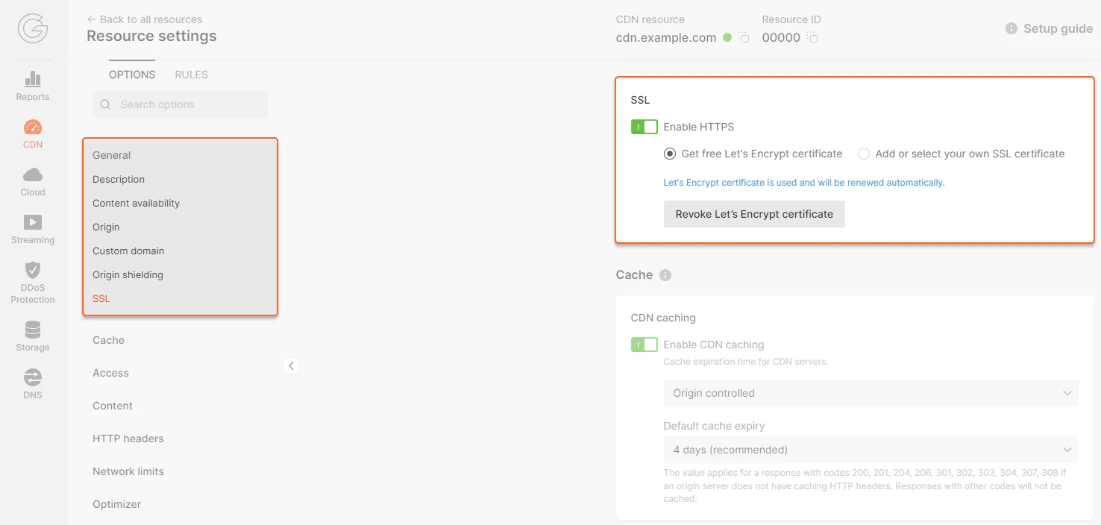
Free Let’s Encrypt certificate
1. Go back to the personal domain troubleshooting section and make sure that the CNAME record for the personal domain of your CDN resource exists. If not, add it. Otherwise, Let’s Encrypt won’t be able to issue a certificate. If so, go to the next step. 2. Go to the Resource settings and find the Rules section. If there are no rules, go to the next step.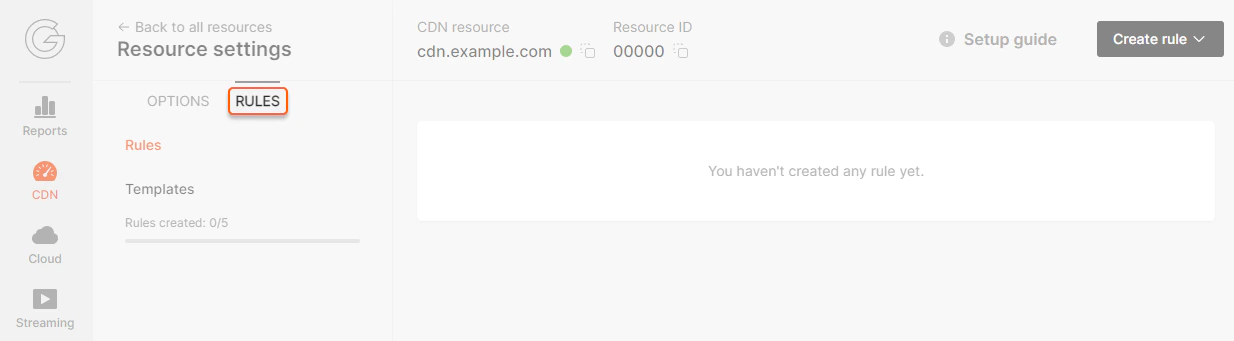
Personal SSL certificate
1. Run the following command in the terminal or console:- cdn.example.com is the personal domain (CNAME)
- image.png is the path of the file that is delivered via the CDN without the domain
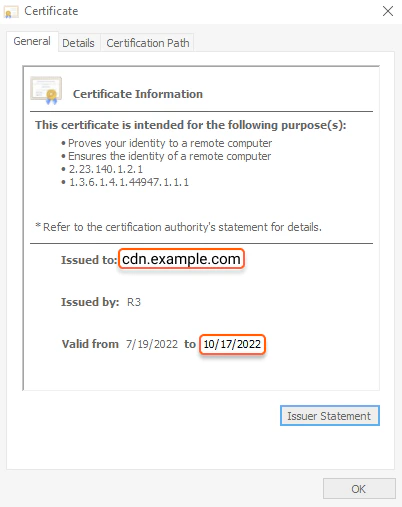
- What domain the certificate is valid for
- Expiration date
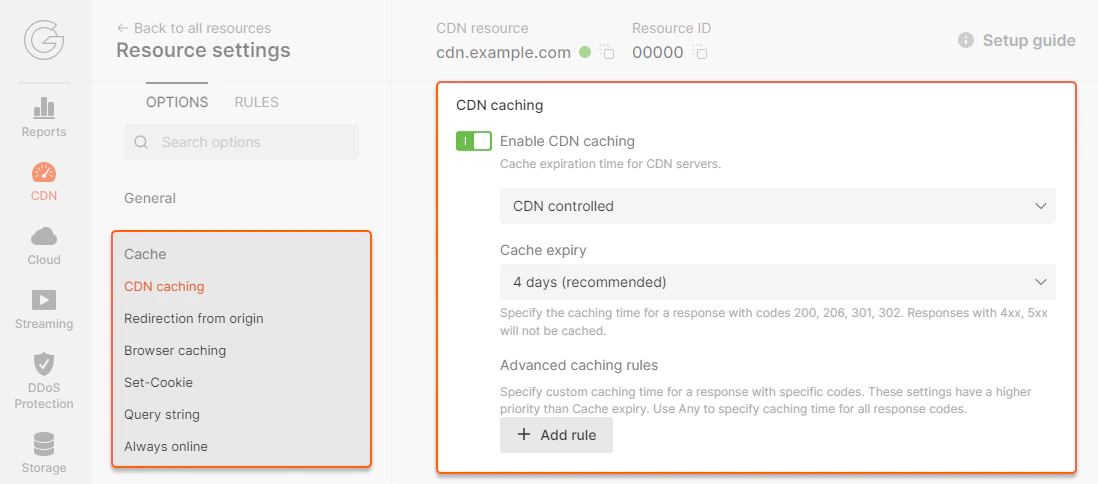
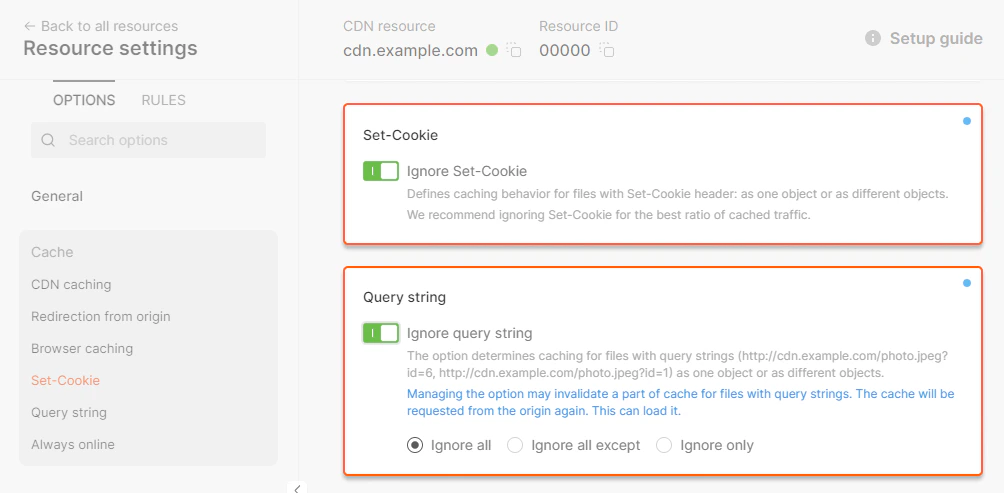
5. Check the cache options
If the cache options were configured with mistakes, you will see a low percentage of cache traffic or content will be loaded slowly. To check cache options and set them up correctly: 1. Go to the Dashboard section and click Total traffic.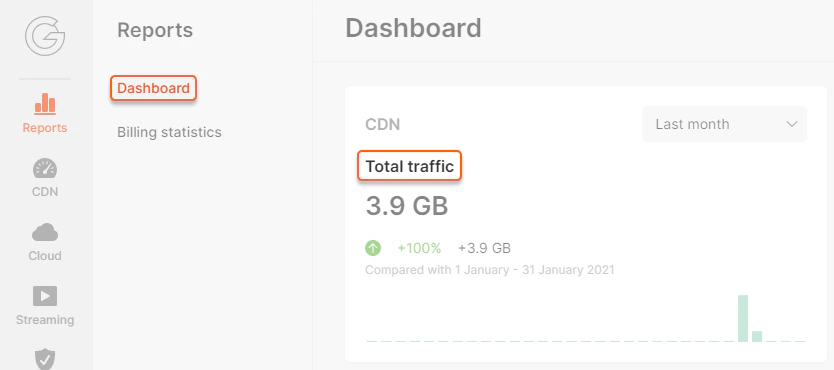
- Cache-Control: max-age=0
- Cache-Control: private
- Cache-Control: no-cache
- Cache: MISS
6. Check the purge option
There are two signs showing that there is an issue after cache clearing by the Purge option:- The CDN returns a wrong or outdated file to users’ requests.
- The file from the CDN cache and from the origin are mismatched.
- cdn.example.com is the personal domain of your CDN resource
- image.png is the path of the file that is delivered via the CDN
- http(s) depends on the protocol used by the source
- example.com is the value of the Host header
- 10.0.0.1 is the IP address of your website source
- Content-Length, which is the object size in bytes
- ETag, which is the character set that the CDN compares to know if the file was changed
- X-Cached-Since, which is the time in UTC format