About the crop feature
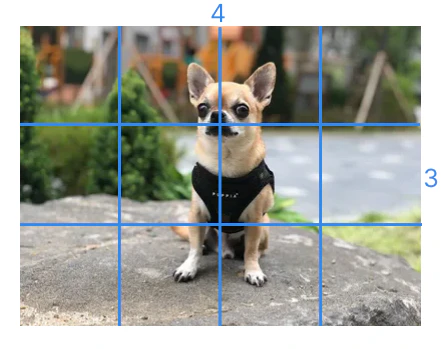
What is it? Crop is a feature that crops an original JPG or PNG image before it is delivered over the CDN. You specify cropping parameters in the settings (a target area and its location). Example. an origin server hosts a 750×1150 px image, but with Crop, you set 500×400 as the dimensions of a new image to be cropped at its center. When the CDN delivers the image, it gets automatically cropped—the tool cuts off everything except for the 500x400 area at the center. The origin still has the 750×1150 image, but end users get the 500×400 cropped version.- Original image
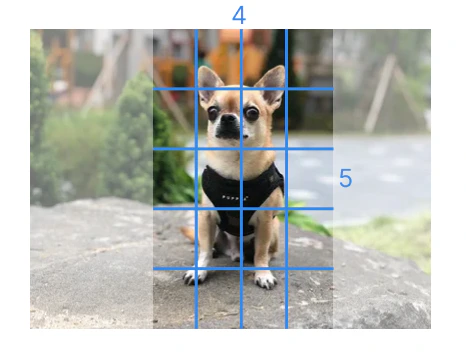
- Cropped image


Enable the crop feature
Crop is included in the paid Image Stack option. This option helps optimize images, such as by converting them to WebP or AVIF format, cropping them, or changing their quality and size. To use Crop, you need to activate Image Stack according to the Enable Image Stack guide.Use crop
1. Open the website source code. 2. Find the strings with the URLs of the images you want to crop. 3. Add the query strings to the URLs of the images as follows:Crop parameters
With Crop, you can cut out a section of an original image. This is the section that your users will receive. You add a query string with a target area and its location. There are three configuration options. Each of them is described below.Crop an image by customizing its aspect ratio
Parameter: ?crop=16:9 where:- 16 = the ratio of the target width to its height
- 9 = the ratio of the target height to its width
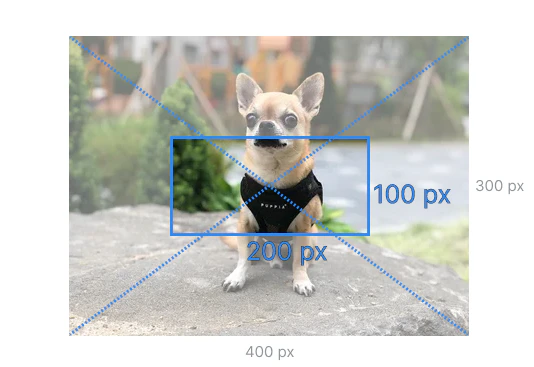
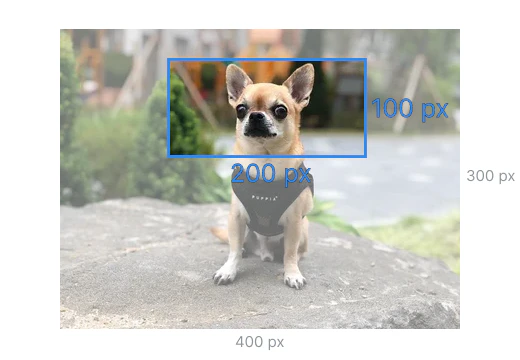
Crop an image at its center
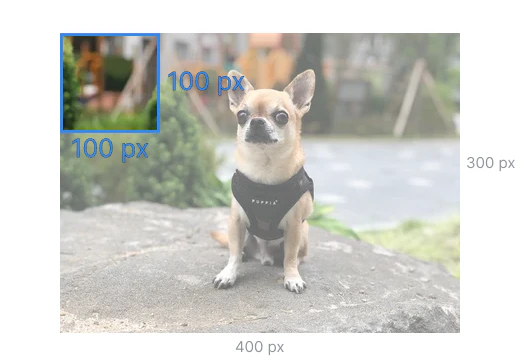
Parameter: ?crop=300,200 where:- 300 = the target width
- 200 = the target height

Crop a section of an original image from a specific location
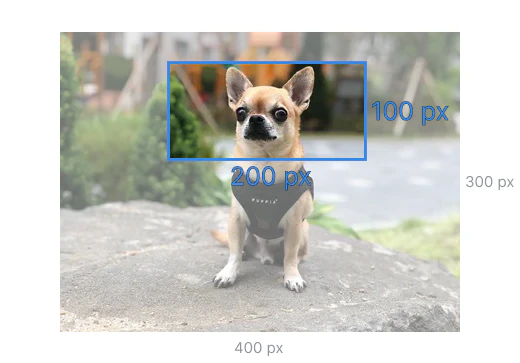
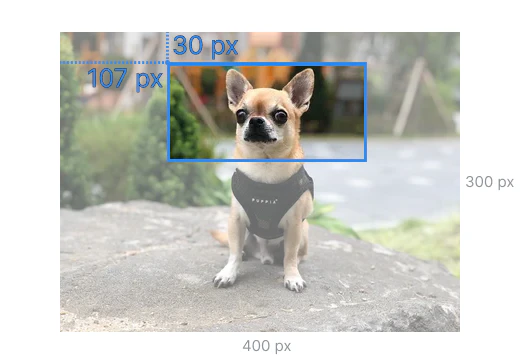
To cut out a section from a specific location, first add the target width and height parameters (?crop=(width),(height)) and then the location of the section. The location can be specified in four ways. We describe them below.Specify a location with two offsets measured in pixels
Parameter: ?crop=300,200,x100,y50 where:- 300 = the target width
- 200 = the target height
- 100 = the number of pixels to offset from the original left side
- 50 = the number of pixels to offset from the original top
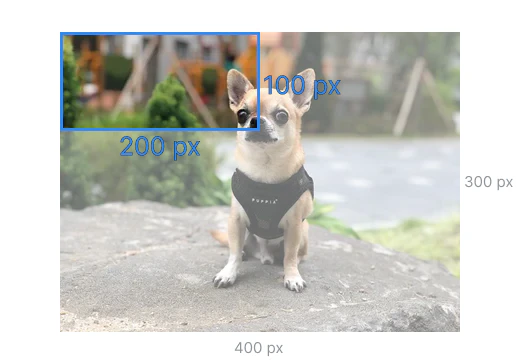

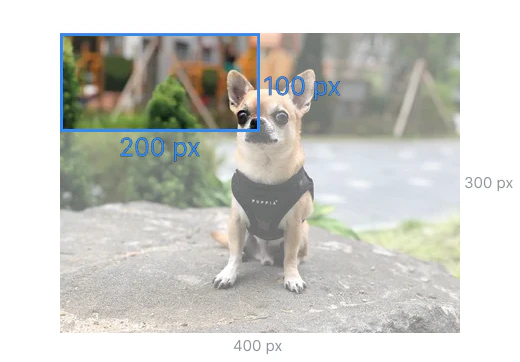
Specify a location using two coordinates measured as a percentage of the original image
Parameter: ?crop=300,200,x25p,y10p where:- 300 = the target width
- 200 = the target height
- 25 = the percent of the original width to offset from the left side
- 10 = the percent of the original height to offset from the top

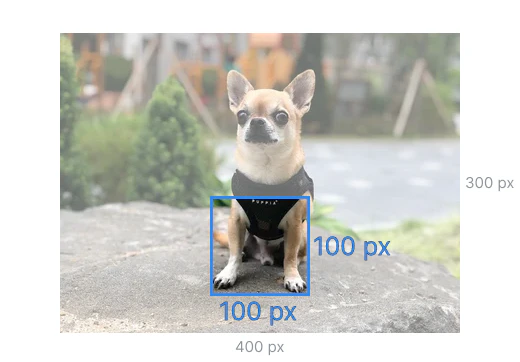
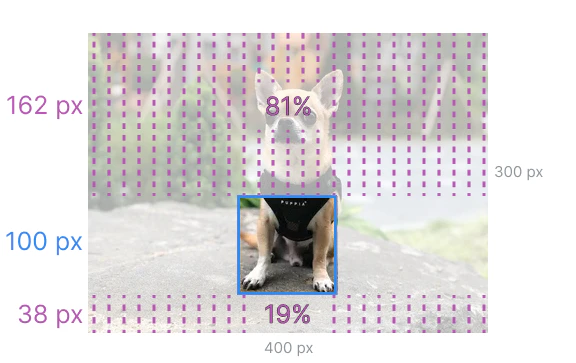
Specify a location using the ratio of unwanted areas
Parameter: ?crop=300,200,offset-x20,offset-y40 where:- 300 = the target height
- 200 = the target width
- 20 = the percent of the unwanted width that should be cropped from the left side
- 20 = the percent of the unwanted height that should be cropped from the top


Specify a location using one offset measured in pixels and one coordinate measured as a percentage of the original image
You can combine the previous options to crop an original image from a specific place. For example, you can set the horizontal coordinate in pixels and the percentage of unwanted vertical area. Examples of combined query parameters:- ?crop=width,height,x(x-axis value),offset-y(percentage of unwanted area to be cropped from the top)
- ?crop=width,height,offset-x(percentage of unwanted area to be cropped from the left),y(y-axis value)
- ?crop=width,height,x(percentage of unwanted area on the x axis),offset-y(percentage of unwanted area to be cropped from the top)
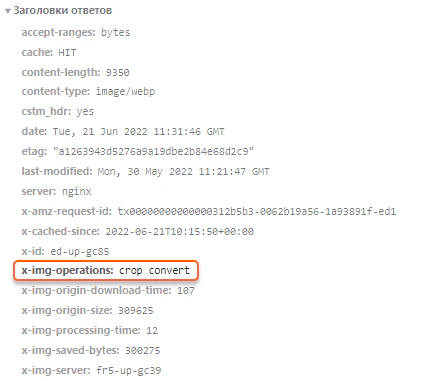
Check HTTP headers
You can use the HTTP header value of the image to check if the changes have been applied. The X-Img-Operations header reflects all the conversions performed. If the value includes “crop”, the image has been cropped.