What is CORS and how does it work
CORS (Cross-Origin Resource Sharing) is a mechanism that uses the HTTP headerAccess-Control-Allow-Origin to allow or deny end-user browsers from accessing a domain other than the one from which the browser sent the request.
For example, if a user visits the website http://site-a.com and requests an image, but the image is hosted on another server and has the path http://cdn.site-b.com/image.jpg, the user’s browser sends a request to the server http://cdn.site-b.com/:
Origin, which tells the server that the request was sent from http://site-a.com. The http://cdn.site-b.com server checks the Origin header and decides whether to accept or deny the request.
- If the
http://cdn.site-b.comserver is configured for cross-platformed requests, it will add the CORS header with the allowing value (e.g., Access-Control-Allow-Origin: *) to the response. In this case, the requested image will be displayed athttp://site-a.com. - If the
http://cdn.site-b.comserver isn’t configured for cross-platformed requests, the response will have noAccess-Control-Allow-Originheader or won’t have permission forhttp://site-a.com, and the requested image will not be displayed.
Purpose of the CORS header support feature
Gcore has the CORS header support feature, which allows the CDN to add theAccess-Control-Allow-Origin header to a response to a browser.
It can be used for several purposes, such as protecting content from use at third-party sites or in third-party applications and preventing errors (such as _XMLHttpRequest cannot load http://domain.com and No Access-Control-Allow-Origin header is present on the requested resource that can appear when web fonts are loaded in Firefox or Internet Explorer from the CDN servers).
Configure the CORS header support feature
There are three methods to configure CORS header supports: in the resource settings, over the rule creation, and on the origin server.Configure CORS in the resource settings
If you want to apply the configuration to all files sent over the CDN, use the resource settings method: 1. Go to the CDN section in the Gcore Customer Portal and click the custom domain of the resource for which you want to configure CORS to open the resource settings.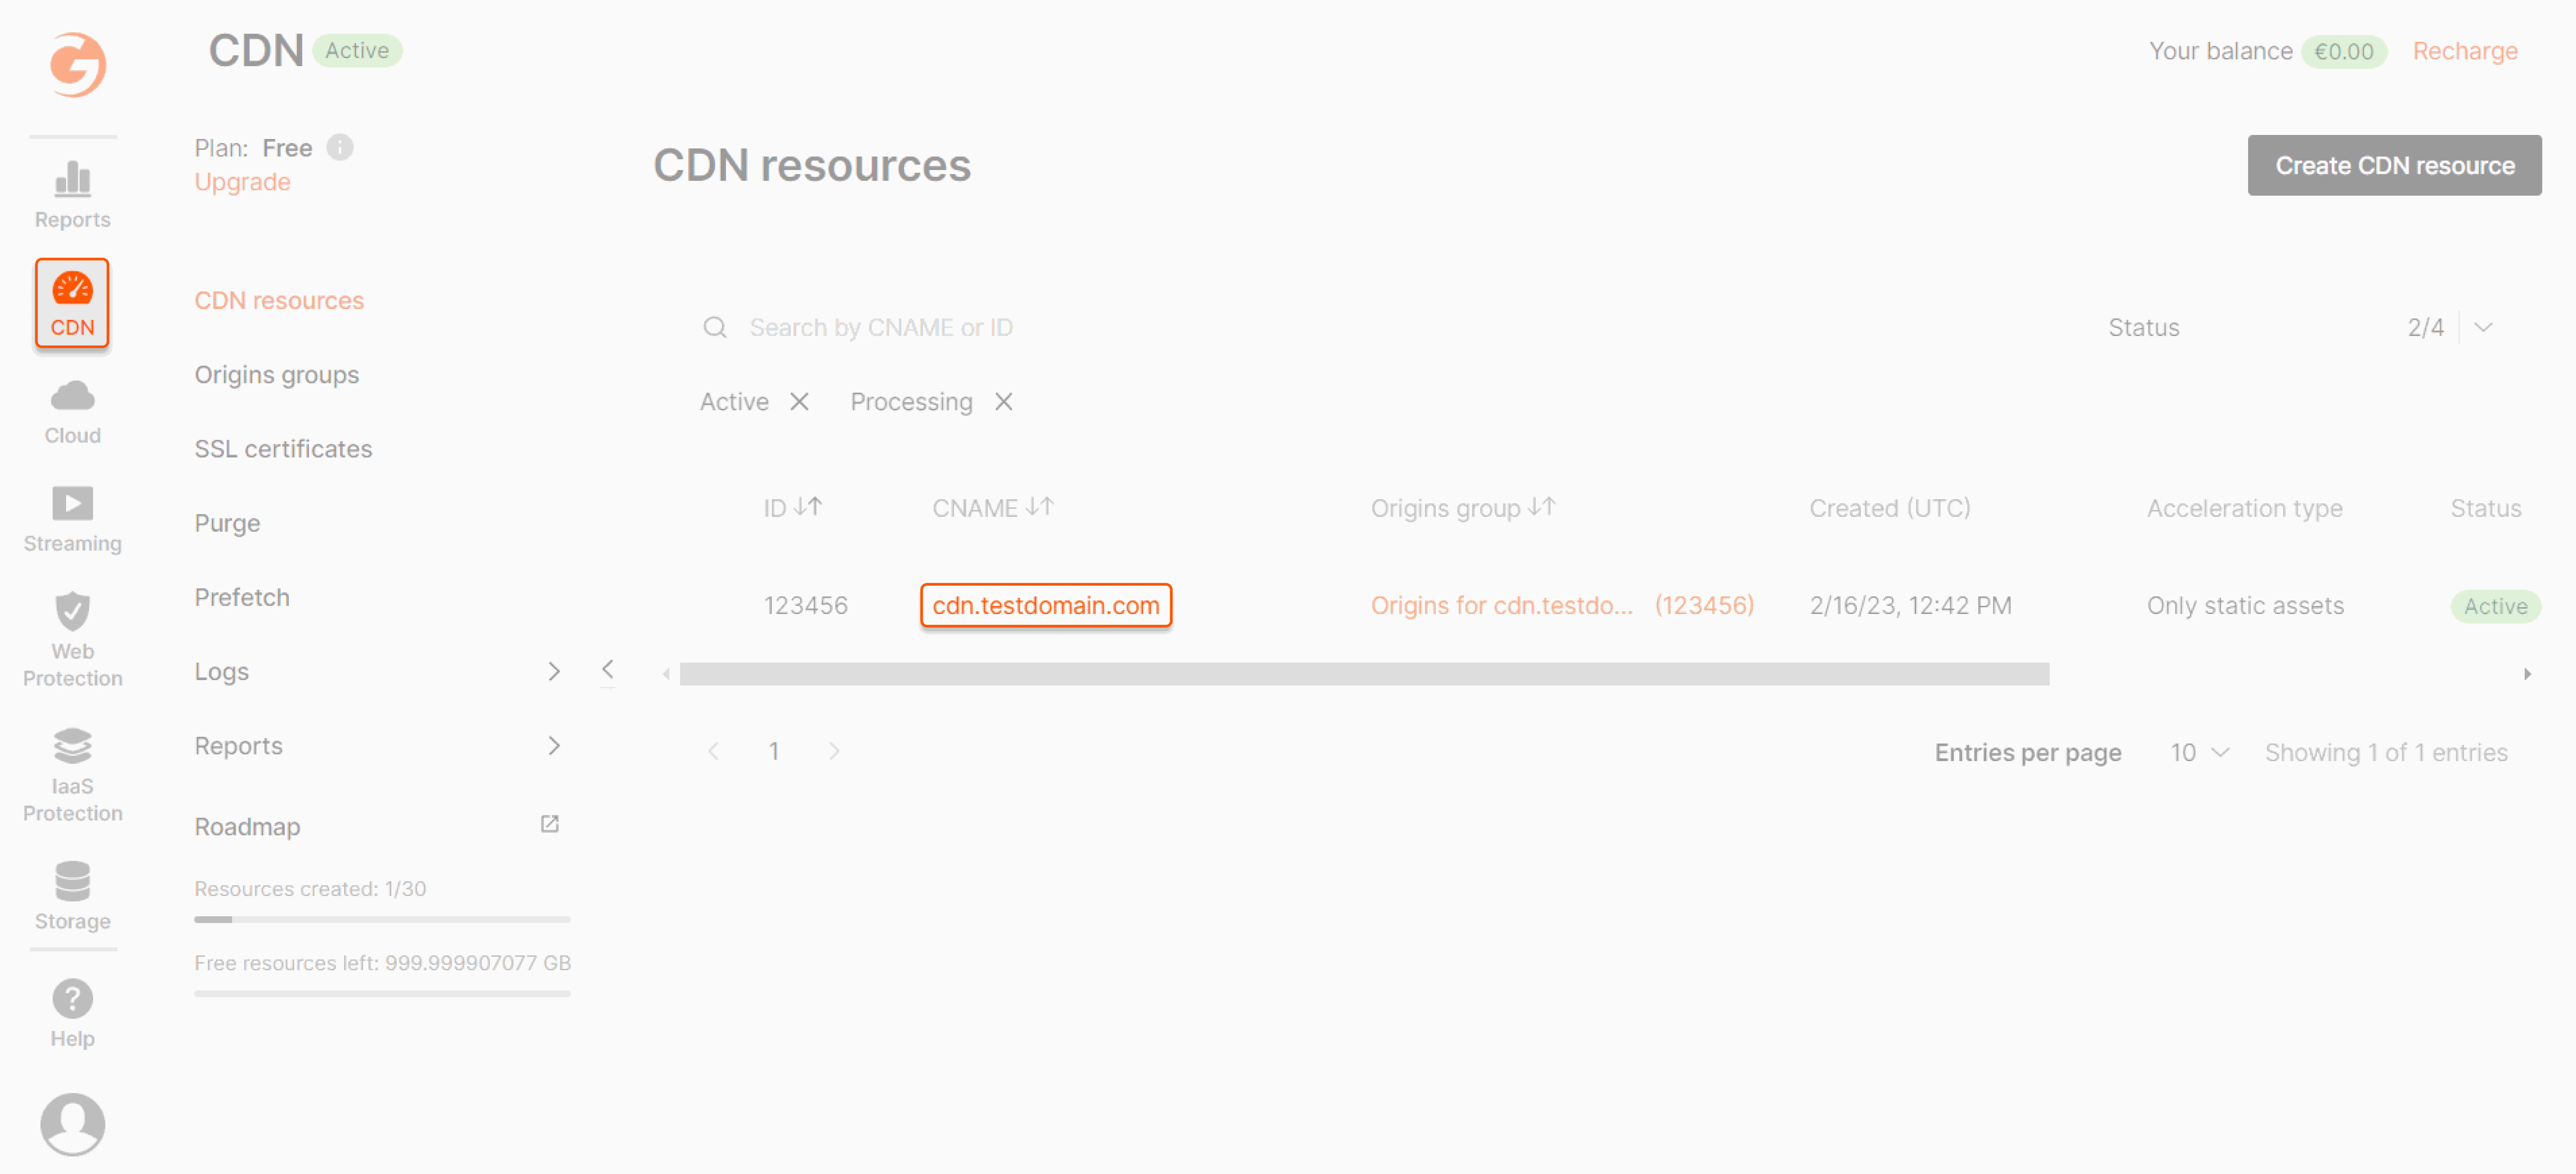
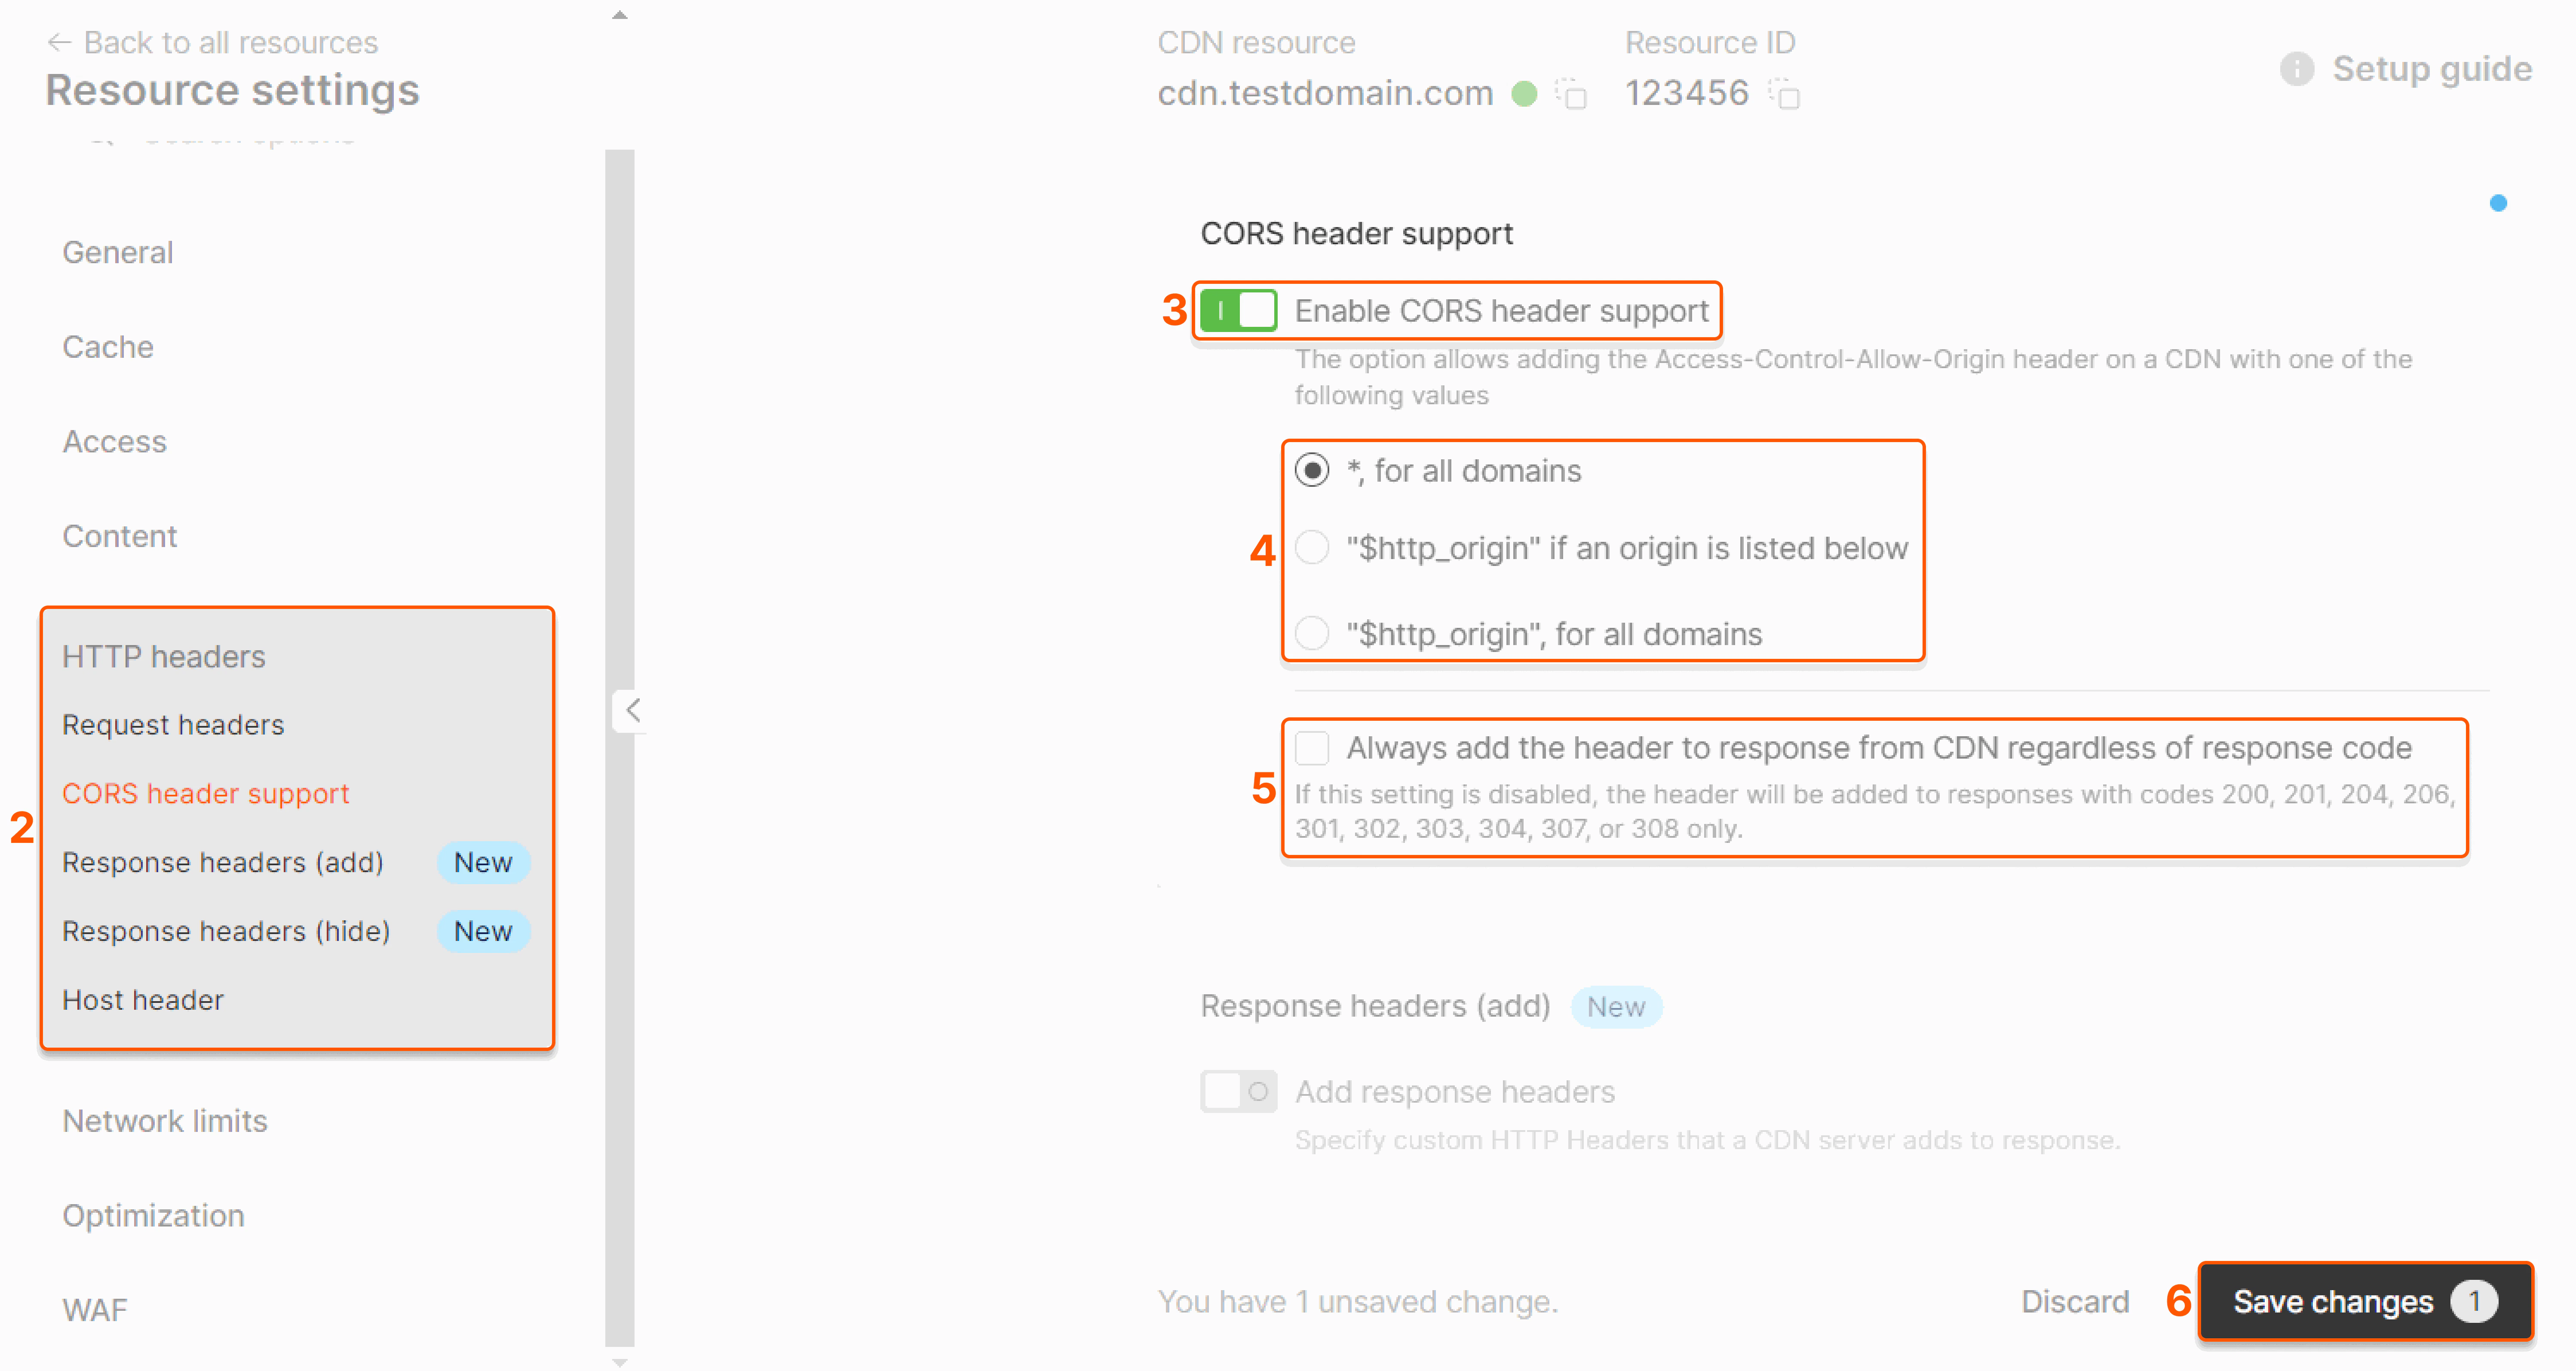
*, for all domains
*, for all domains
Content will be uploaded for requests from any domain. The highlighted line will be added to the response header.
'$http_origin' if an origin is listed below
'$http_origin' if an origin is listed below
“$http_origin” if an origin is listed below | Specify the domain name from which requests are allowed in the field, e.g., site-a.com.
Note : You can specify up to 20 domains. Content will be uploaded only for requests from the domains specified in the field. When the CDN servers receive a request, they check the value of the
Note : You can specify up to 20 domains. Content will be uploaded only for requests from the domains specified in the field. When the CDN servers receive a request, they check the value of the
Origin header to determine which site the request came from.-
If it matches any of the domains specified in the feature, the content will be uploaded, and the response will contain the highlighted line:
-
If it doesn’t match, the
Access-Control-Allow-Originheader will not be added to a response, and the content will not be uploaded.
'$http_origin', for all domains
'$http_origin', for all domains
Note : This option is similar to the first one, but you can use it if the ”*” parameter is unsuitable for certain filters configured on a server.Content will be uploaded for requests from any domain, and the domain from which the request was sent will be added to the
Access-Control-Allow-Origin header in the response. For example, if a user requests content from http://site-b.com, the response will look as follows:Access-Control-Allow-Origin header to responses with any status code, even for those when content is not available. If you leave the box unchecked, the header will be added only to responses with specific status codes.
6. Save changes.
Configure CORS over the rule creation
If you want to apply the configuration only to particular files, use the “Rules” method: 1. Go to the CDN section in the Gcore Customer Portal and click the custom domain of the resource for which you want to configure CORS to open the resource settings.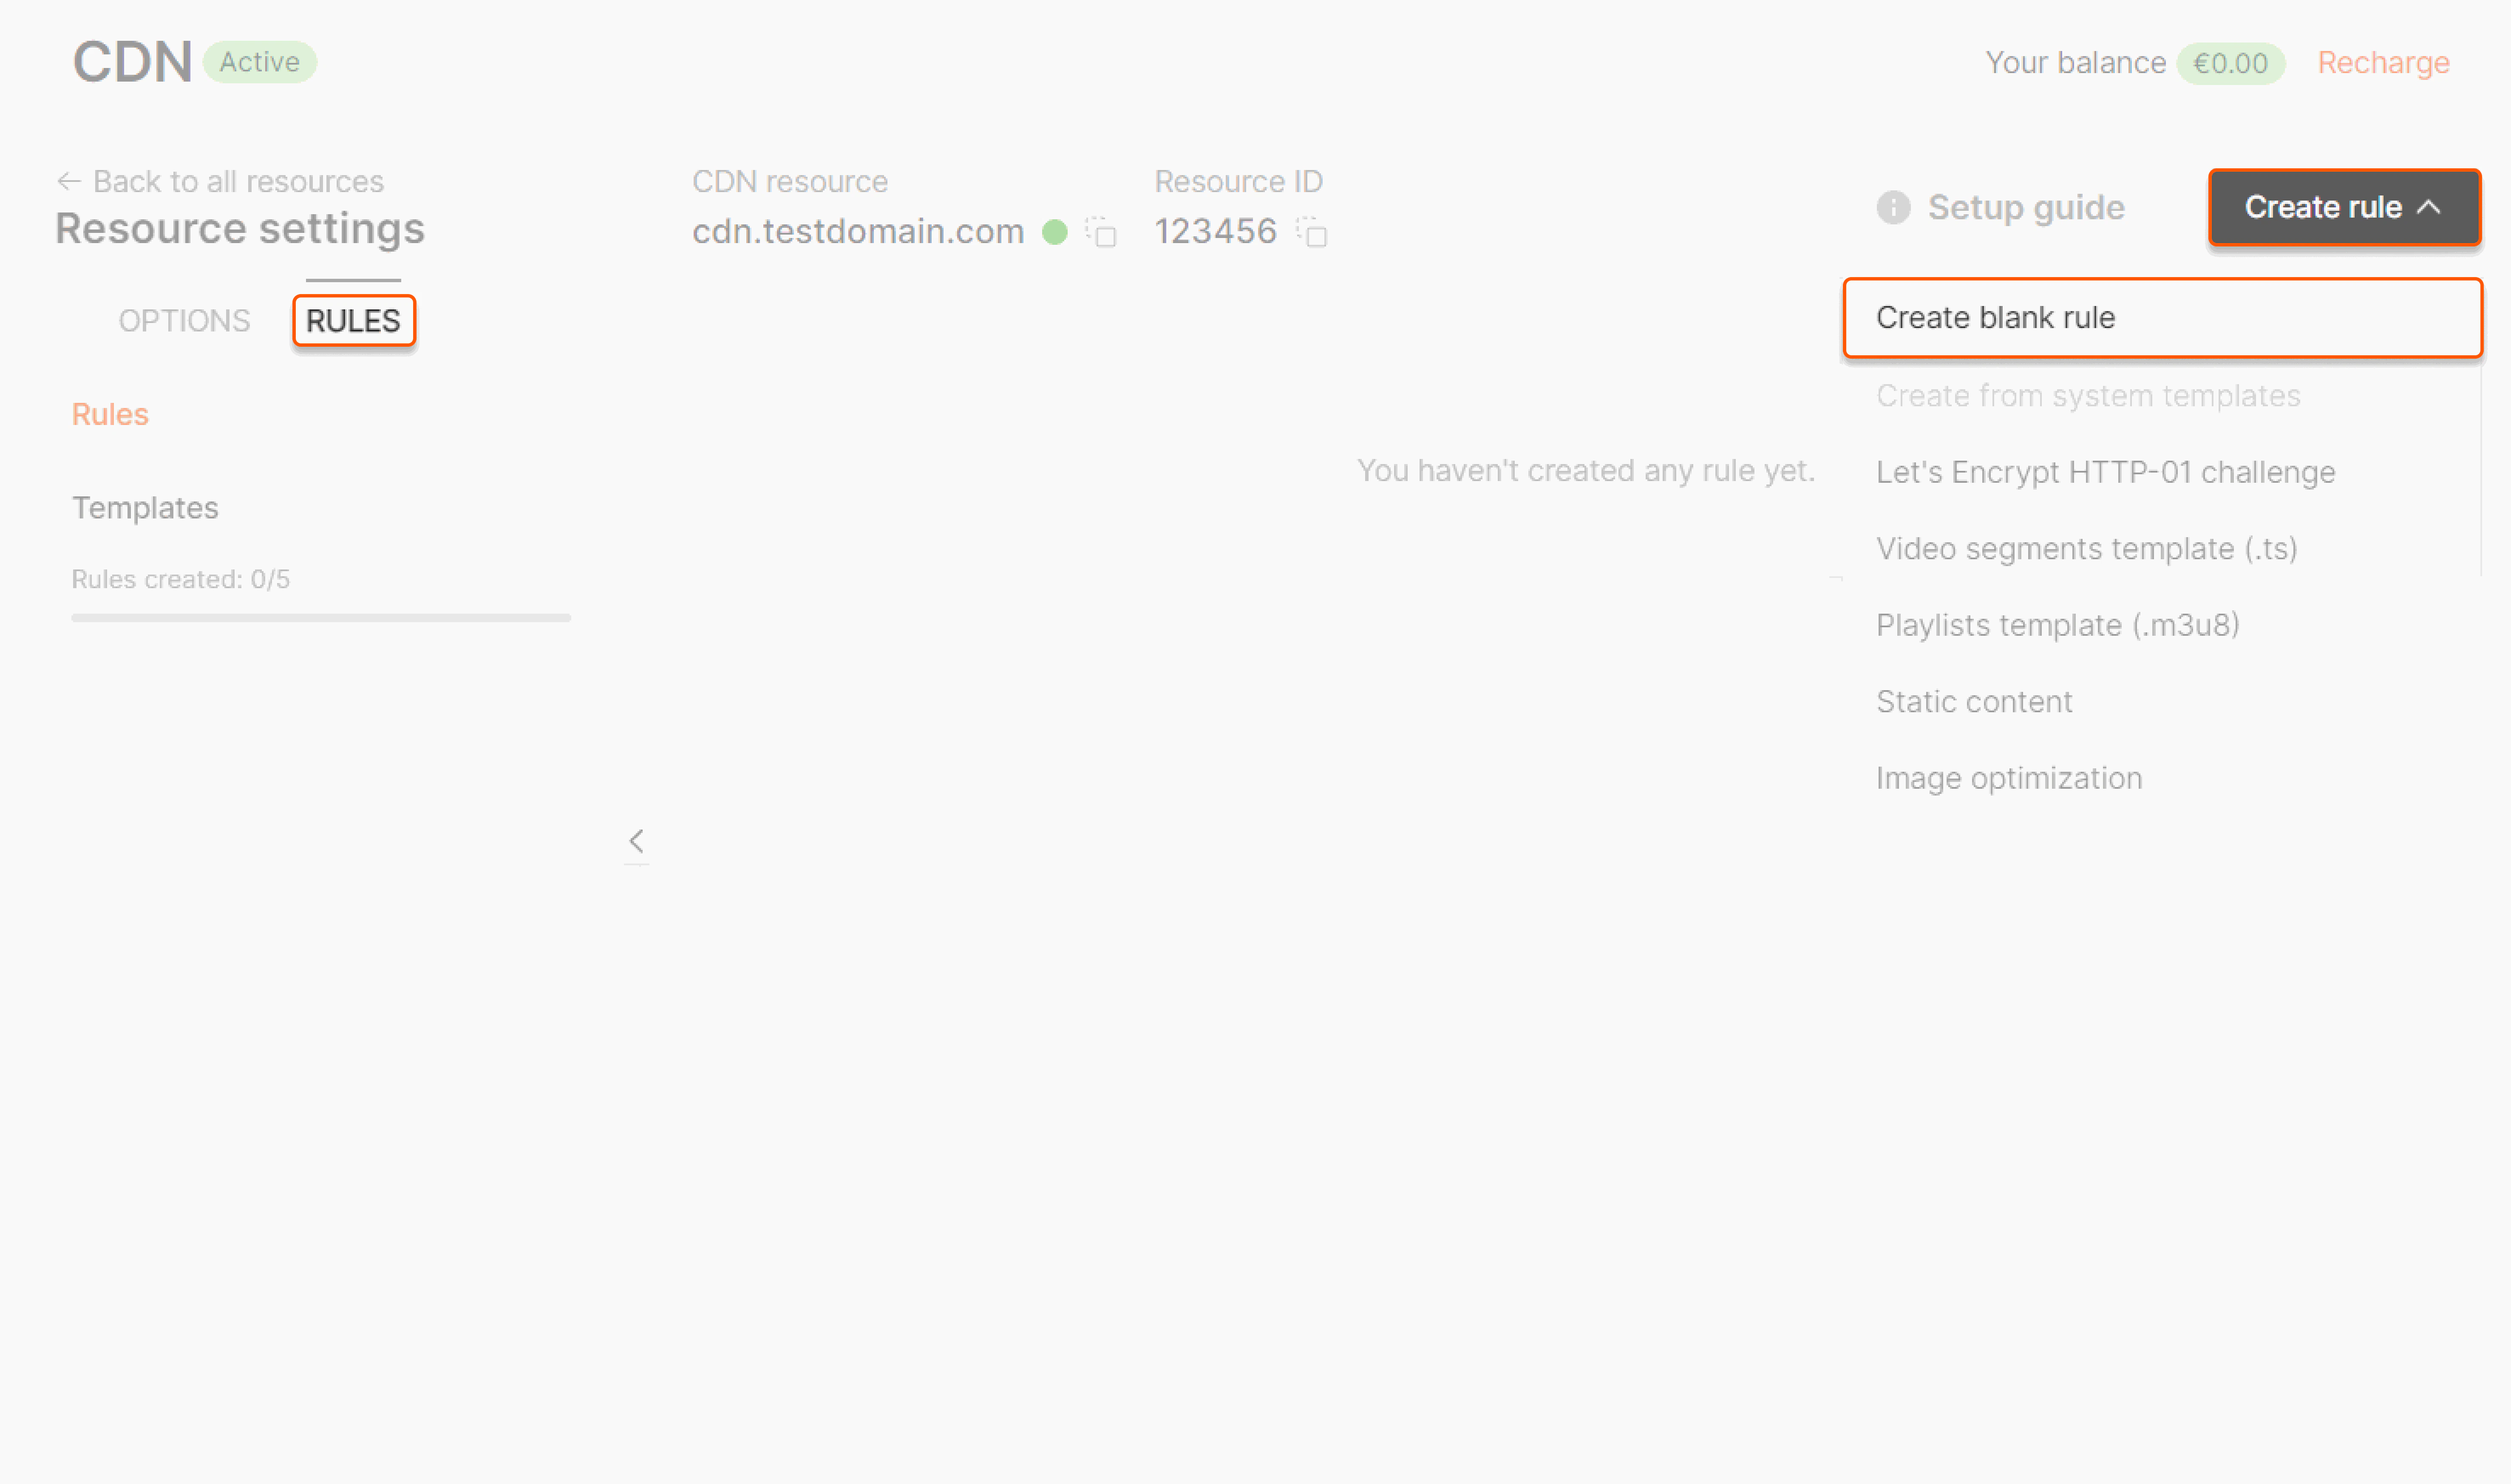
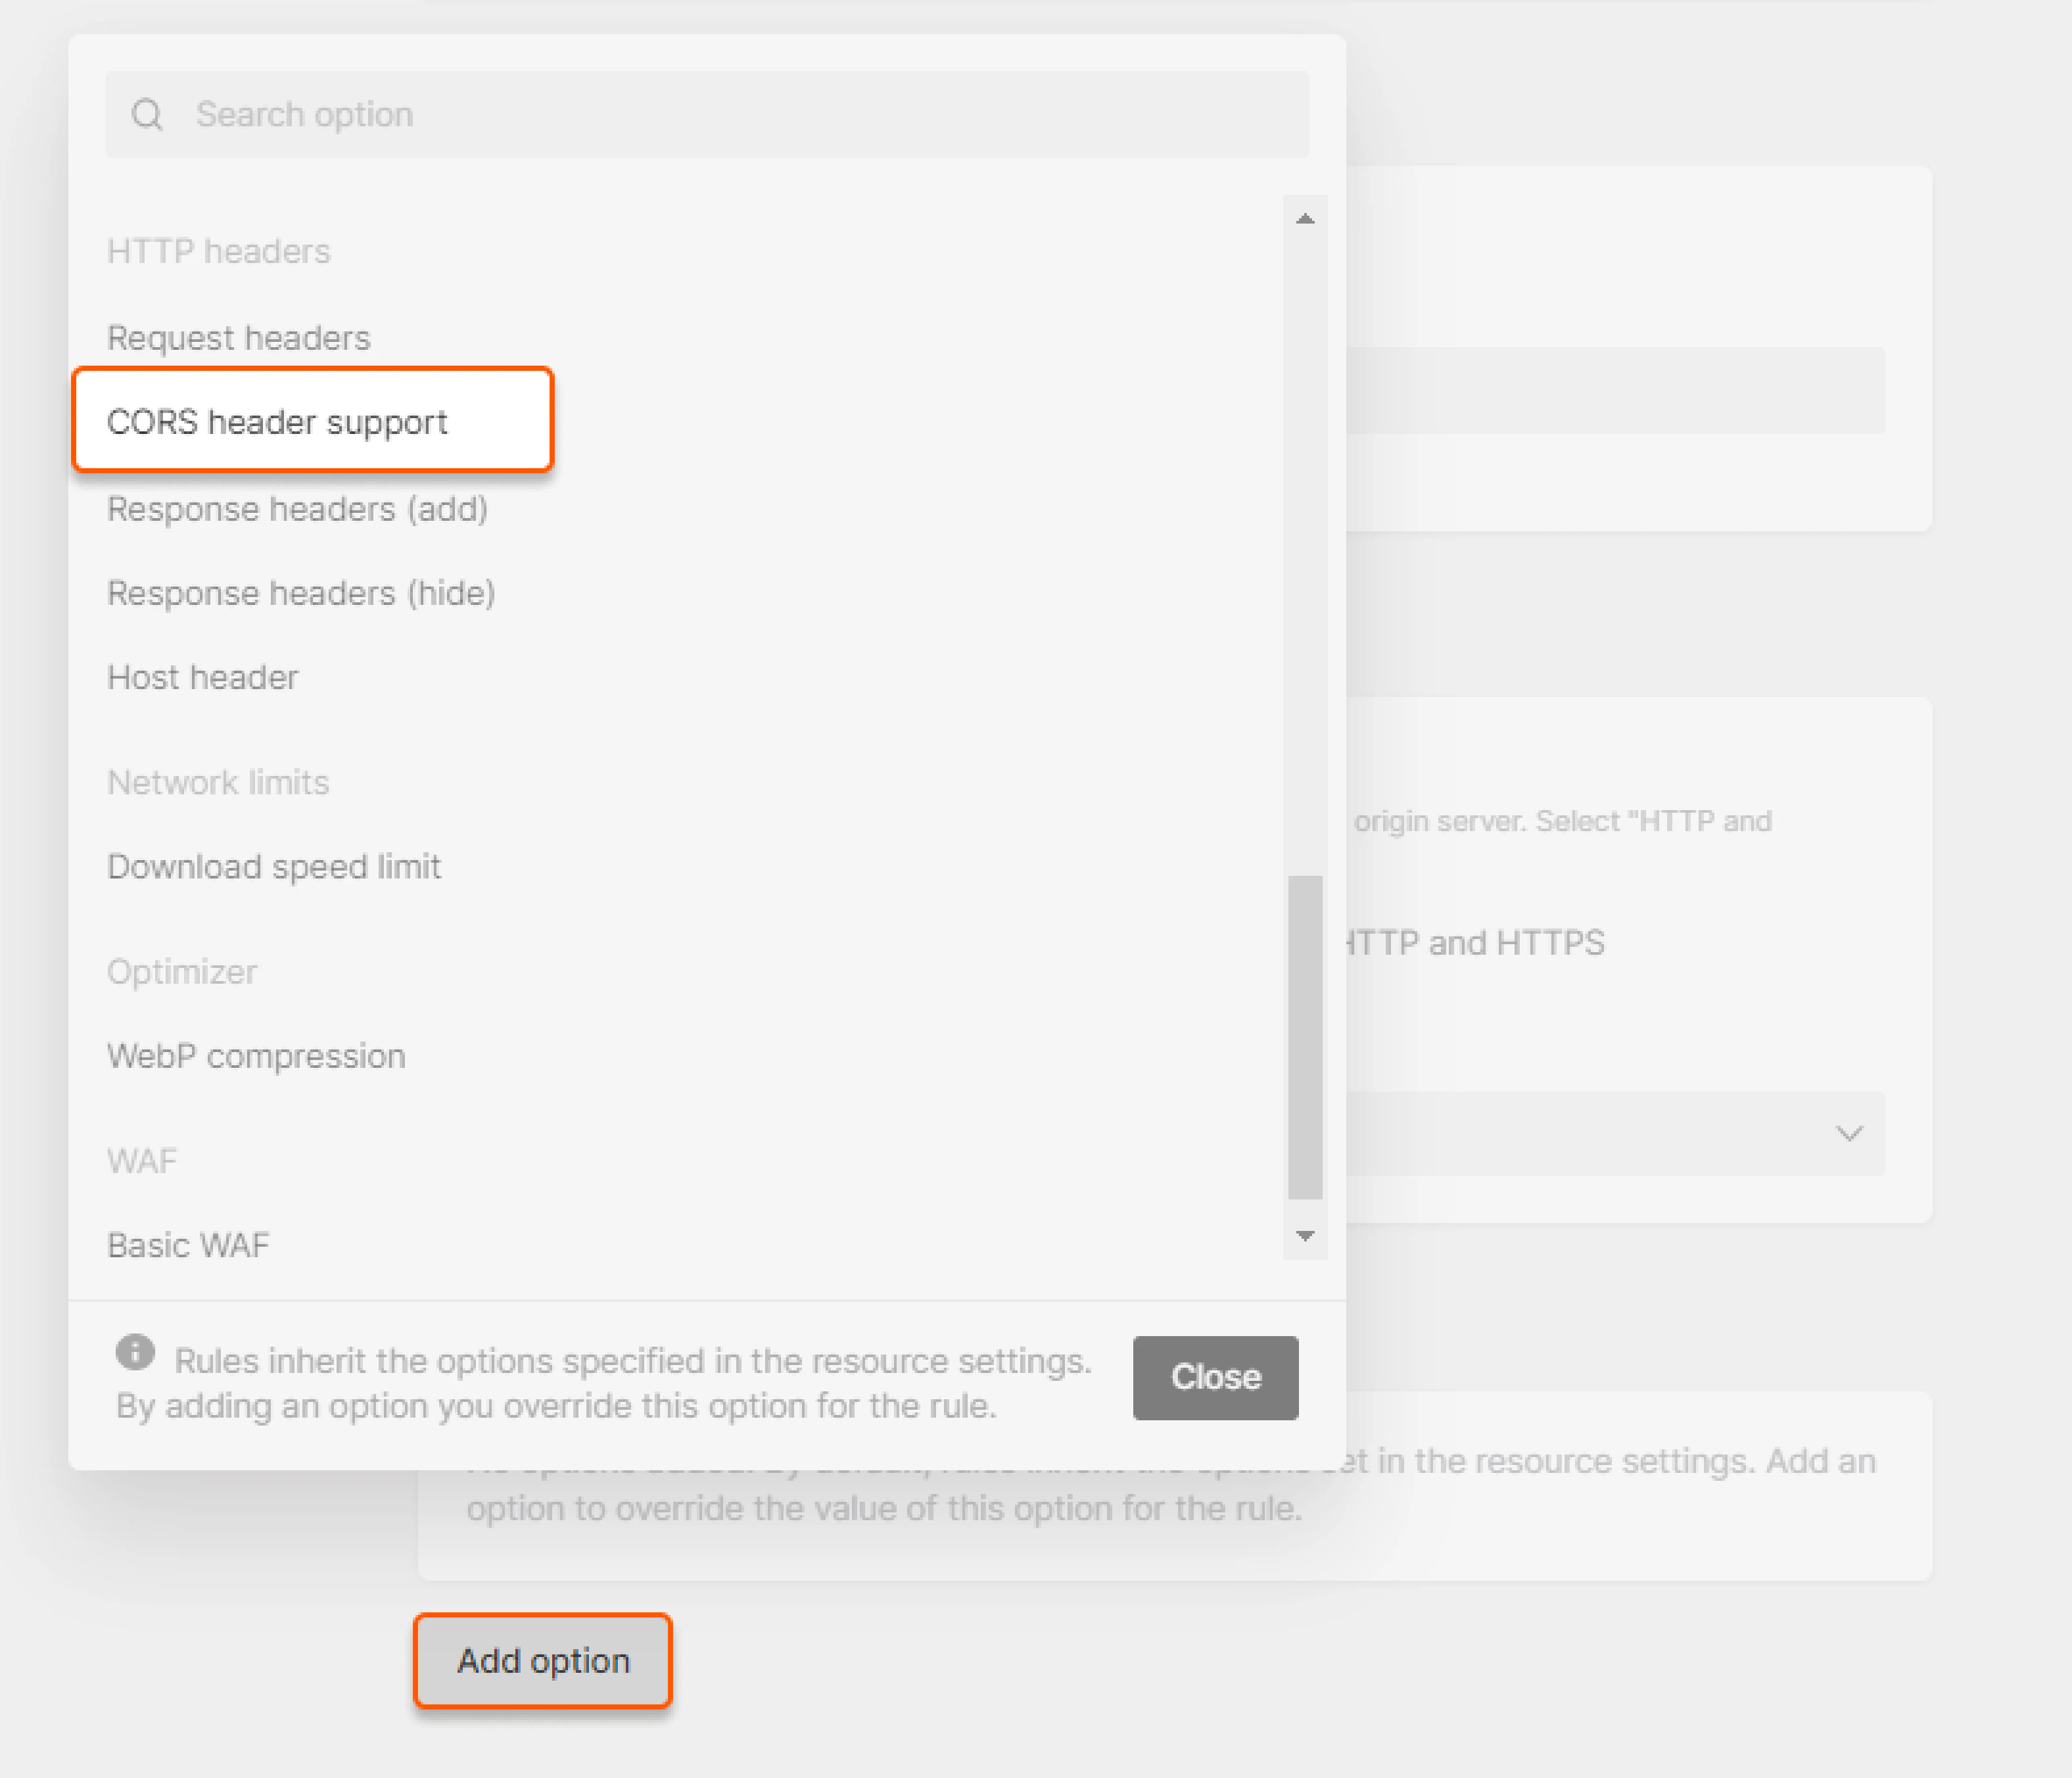
Access-Control-Allow-Origin header will be added. If you add an option but leave it disabled, the Access-Control-Allow-Origin header will not be added.
6. Click Create rule to save the changes.
Configure CORS on the Origin Server
We have provided an example of how to set up CORS for Apache and Nginx web servers. Apache Configuration :Check CORS
Clear the cache of the CDN resource or files for which CORS was enabled according to the Clear CDN resource cache by URL, pattern or all guide, and use one of the methods below.Check CORS through cURL
1. Open the terminal on macOS or command prompt (cmd) on Windows. 2. Run the following command:http://cdn.testdomain.com/assets/image.jpg is a link to your file delivered via CDN.
3. In the output, check whether the Access-Control-Allow-Origin header is present. If you see the Access-Control-Allow-Origin header in the response, the configuration was successful.
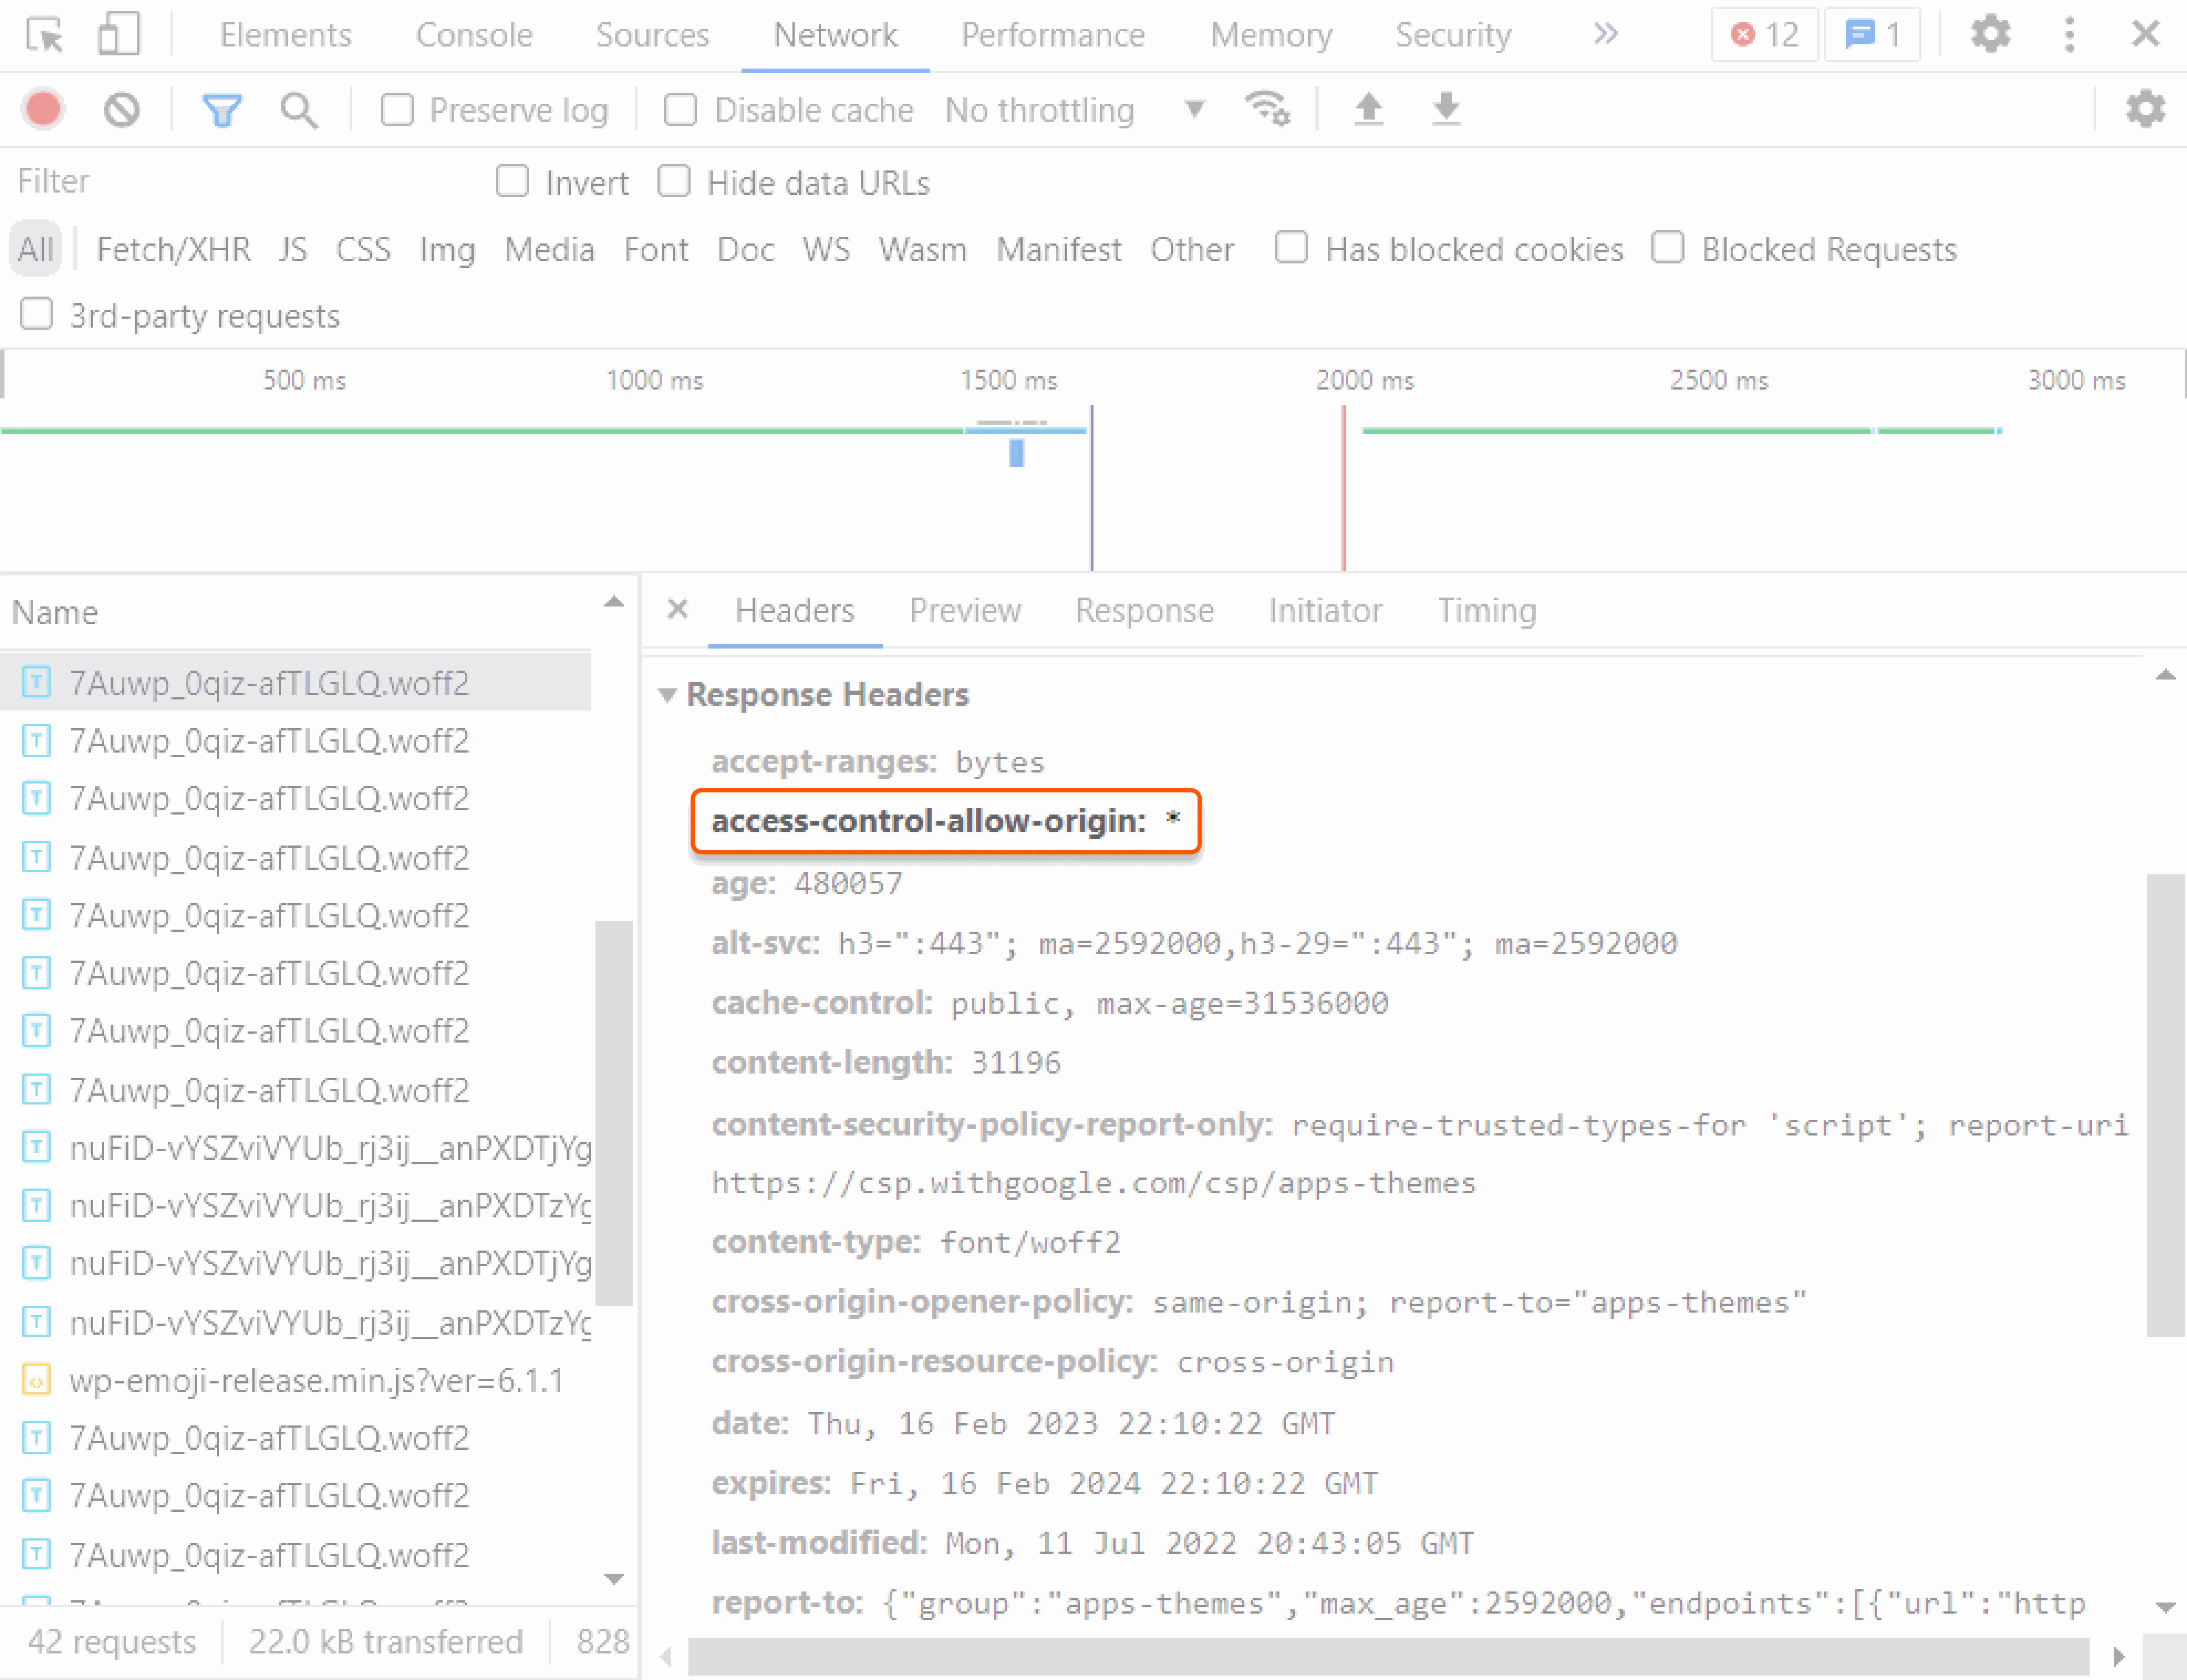
Check CORS with DevTools in a browser
1. Open any internet browser (for example, Google Chrome). 2. Go to your website. 3. Right-click and select Inspect to open the DevTools (Developer Toolbar). 4. Select the “Network” tab. 5. Refresh the page. 6. You will get a list of all files retrieved from your website. 7. Find any file (e.g., JPEG, PNG, IMG, CSS, etc.) integrated with the CDN and select it. 8. On the “Headers” tab on the right, you will see the headers configured on your server. If you see theAccess-Control-Allow-Origin header, the configuration was successful.