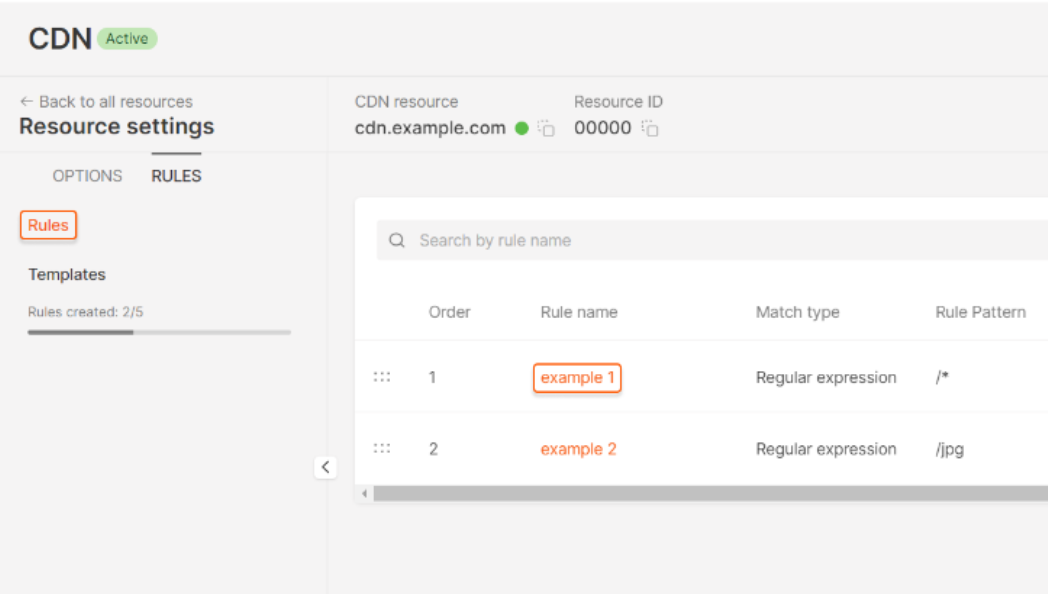
What is the rules section?
The Rules section is where you can set CDN options for specified files (unlike in the Resource Settings tab, where you can set options for all files). For example, you have enabled CDN caching settings for your resource and set the CDN-controlled option. These settings apply to all files. But for some files, you need to select the Origin-Controlled option. To do that, you need to create the corresponding rule, specifying the paths of these files and adding the Origin-Controlled option. In this case, CDN-Controlled will apply to all files except those specified, where Origin-Controlled will apply. There is one limitation for the Rules feature: You can add only five custom rules for a CDN resource. You can see how many rules you’ve created in the Rules section.
Add rules in the customer portal
Create a rule manually
1. Open the Resource settings and go to the Rules tab. Click the Create rule button and select Create blank rule from the drop-down list.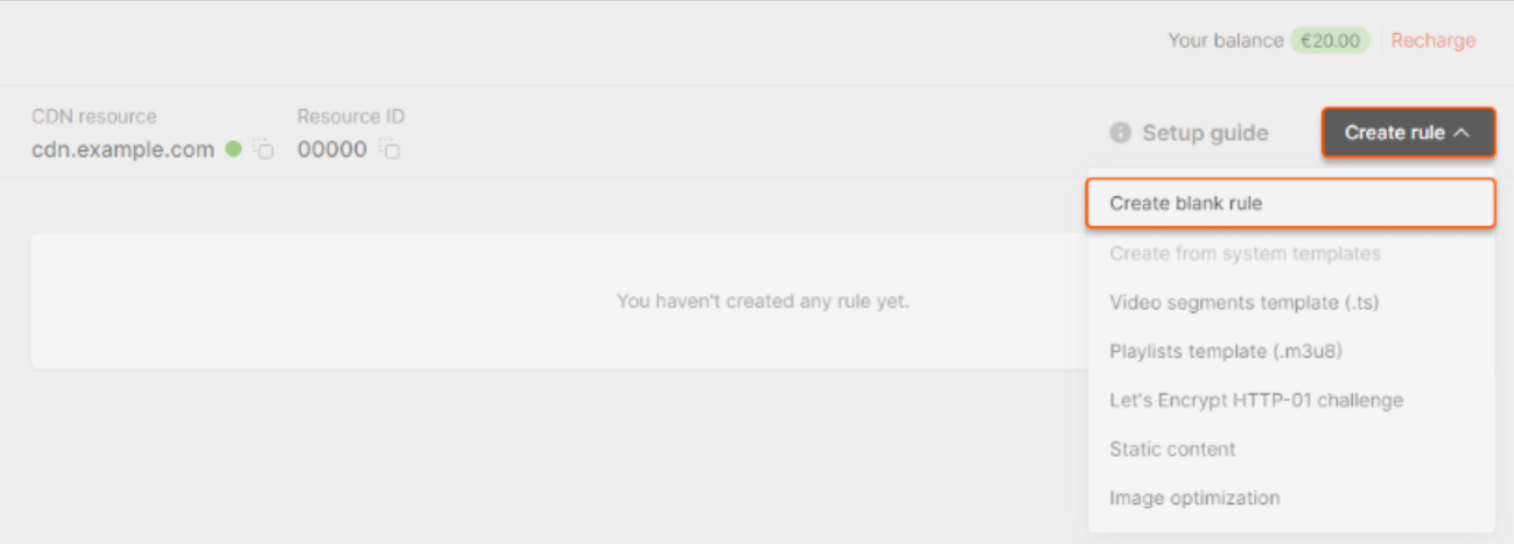
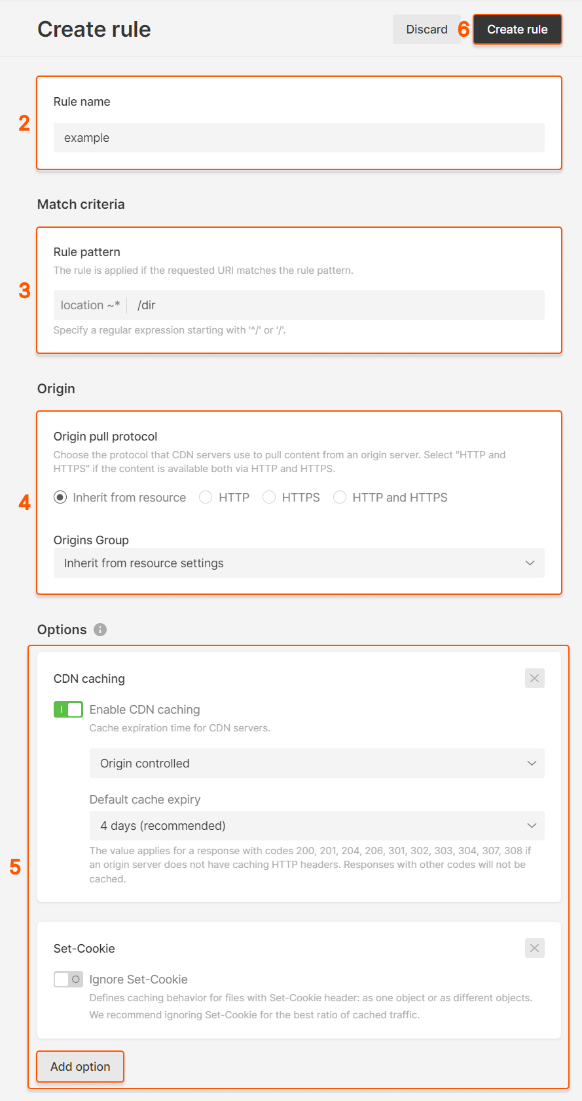
/folder/.* (the first rule) and /folder/image.jpg (the second rule). The first rule will be applied to the /folder/image file.jpg file.
4. Select the protocol that the CDN resource will use to pull the files specified in step 4. If files are accessible over the same protocol as the origin, select “Inherit from resource”. If not, select the appropriate option: HTTP, HTTPS, or both protocols at once.
5. Click the Add option button to configure options if necessary. This will bring up the list of options. Click on the options needed (they will be added on the rule creation page), and then click Close.
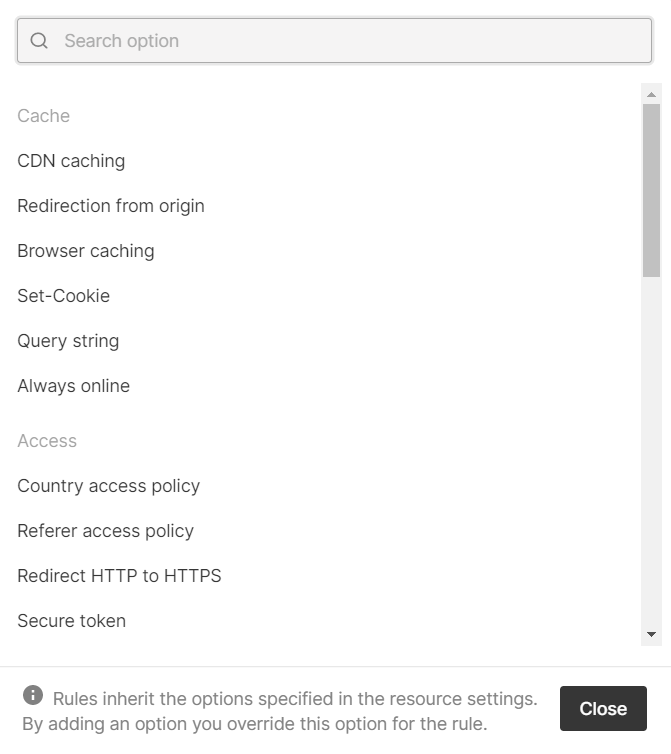
| Variant | Interaction method | Example |
|---|---|---|
| Options are not added to the rule | Option parameters will be inherited from the Resource settings | You enable the CDN caching option in the Resource settings and then create a rule where you don’t add the CDN caching option. In this case, the caching parameters for the files specified in the rule will be inherited from the appropriate option in the Resource settings. |
| An option is added to the rule, but is disabled | Option parameters from the Resource Settings will be disabled | You enable the Country access policy option with the Allow by default and DE values in the Resource settings. It means that access to all content is restricted in Germany. Then, you add a rule with the disabled Country access policy option. In this case, the option parameters from the Resource Settings will not be considered for the content specified in the rule. This means that files specified in the rule will be available in Germany. |
| An option is added to the rule and enabled | Option parameters from the Resource Settings will be overridden | You enable the Browser caching option with the CDN-Controlled and 4 days values in the Resource Settings. Then, you add a rule with the enabled Browser caching option and 30 minutes value. In this case, the files specified in the rule will be cached in the browser for 30 minutes. The rest of the files will be cached for 4 days. |
Create a rule from a template
You can use a template to create rules. This is helpful in two cases:- When you have several resources that require the same kind of rules. You can create one template and use it to add rules for all of your resources.
- When you need to use standard rules for some options (Image Optimization, Streaming via CDN) or operations (Let’s Encrypt issuing by HTTP-01 challenge). You can use our system templates for these purposes.
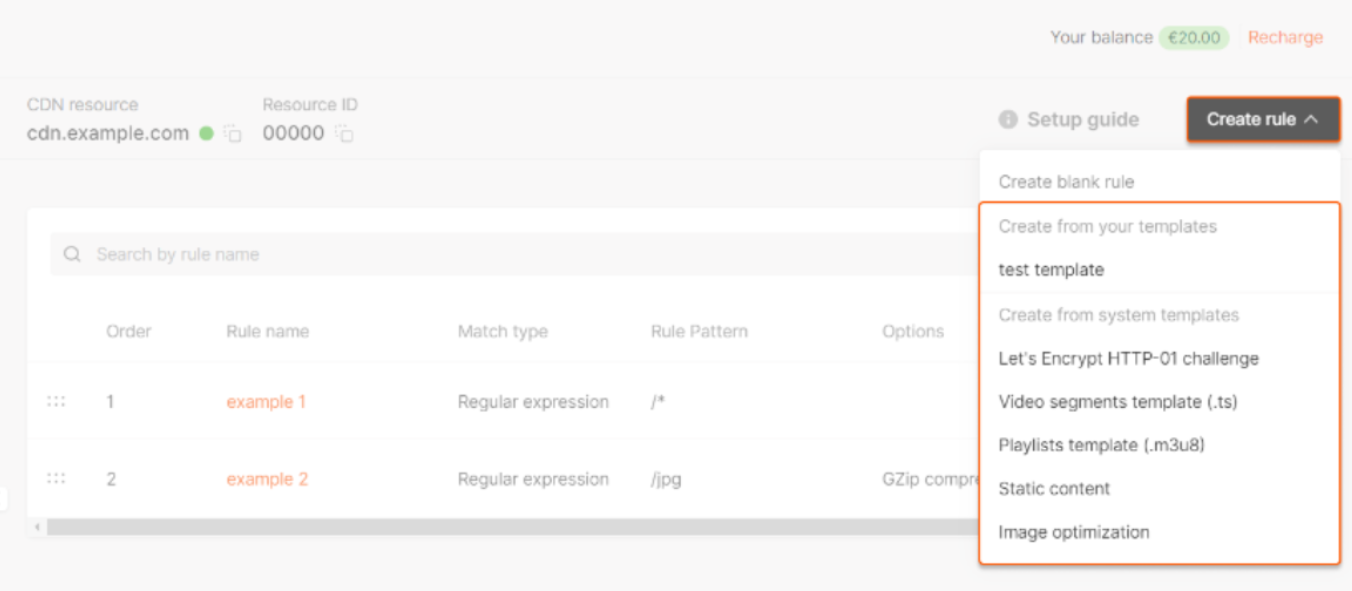
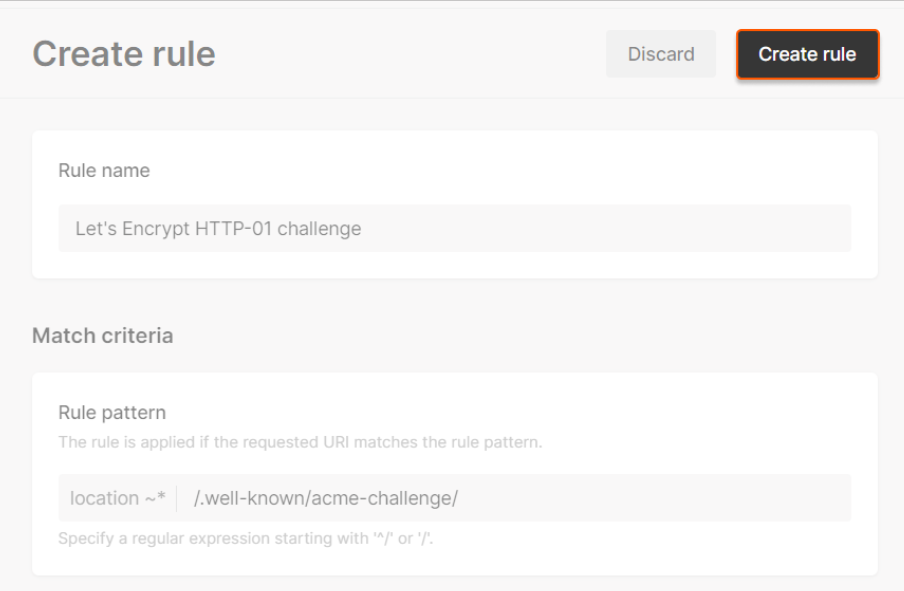
Examples of rules
Prohibit image caching in CDN
To prohibit image caching in CDN:- Enter ^/.(jpg|css|js)$ to the Rule pattern field.
- Add the CDN caching option with the “CDN Controlled” and “Do not cache” values.
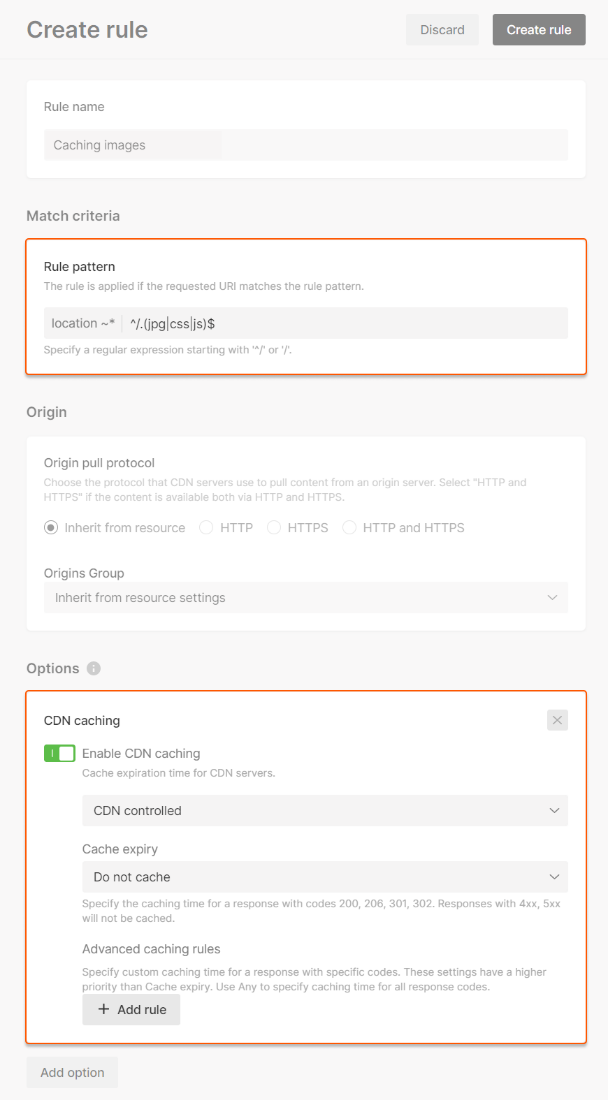
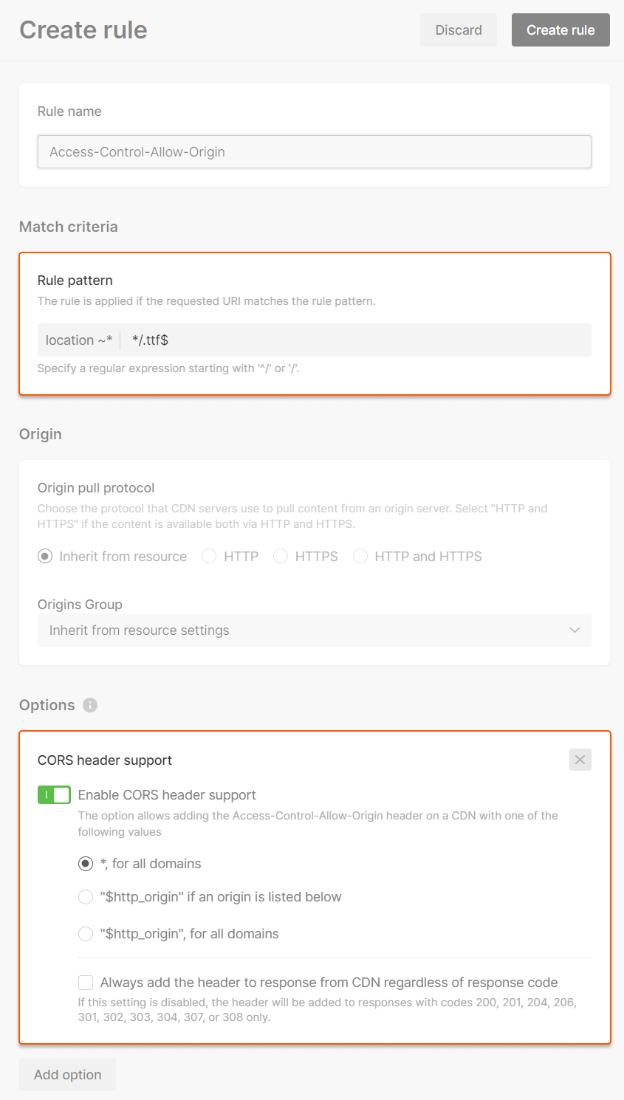
Set Access-Control-Allow-Origin for .ttf files
To set up the Access-Control-Allow-Origin HTTP header only for files with the .ttf extension:- Enter /.ttf$ to the Rule pattern field to the Rule pattern field.
- Add the CORS header support option.
- Configure which domains to add the header for. You can find more information about configuring in the “Enable CORS header support” guide.
Disable or enable a rule
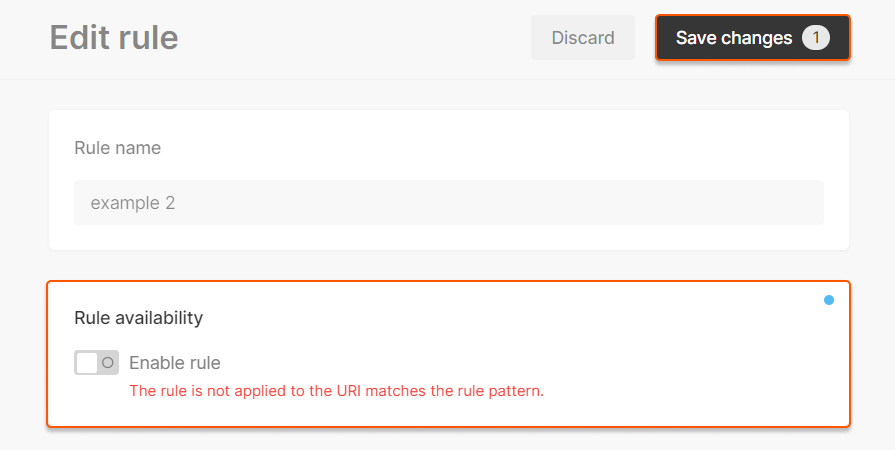
In some cases, you might want to disable the rules you’ve created. For instance, you can do it for testing purposes or if you want to delete a rule. When disabled, the rule will not apply to the specified files but will still count toward the rule limit. To disable or enable a rule: 1. Go to the Rules section and open the page for the desired rule.