API
The Gcore Customer Portal is being updated. Screenshots may not show the current version.
Edge Cloud
Edge Cloud
OverviewBillingTerraform
API
Chosen image
Home/Edge Cloud/Networking/Load Balancers/Add certificates to a Load Balancer

Add multiple certificates to a Load Balancer

You can configure multiple TLS (Transport Layer Security) certificates for a single Load Balancer, which allows you to host several secure websites on a single IP address.

Instead of configuring separate Load Balancers for each website, you can configure just one Load Balancer and add multiple TLS certificates to it. The Load Balancer will serve the correct certificate based on the requested domain name, and everything will be managed in one place.

How it works

Our listeners support Server Name Indication (SNI) extension to handle multiple TLS certificates. Based on the SNI information provided by the client, the listener selects the appropriate TLS certificate for encrypting the connection. Once the TLS connection is terminated at the listener, the Load Balancer inspects the decrypted traffic and routes it to the proper server.

Each listener can also be configured with its own TLS certificate, corresponding to a specific hostname or domain.

Add multiple certificates

You can add multiple certificates to listeners that use the Terminated HTTPS and Prometheus protocols.

1. Add certificates to the Secrets Manager

To get started, you need to add the required certificates to Gcore Secrets Manager. If you don’t have any certificates created, follow the instructions from this guide: Upload a PKCS12 file.

2. Add certificates to a listener

After you configure the certificates, you need to add them to the relevant listener. This can be done during Load Balancer creation or in the settings of an existing Load Balancer.

During Load Balancer creation

Create a new Load Balancer according to the instructions. In step 5, configure a new listener as follows:

1. Give your listener a name.

2. Select a protocol with the supported TLS encryption: Terminated HTTPS or Prometheus.

3. Use a default port or specify a custom port from 1 to 65535.
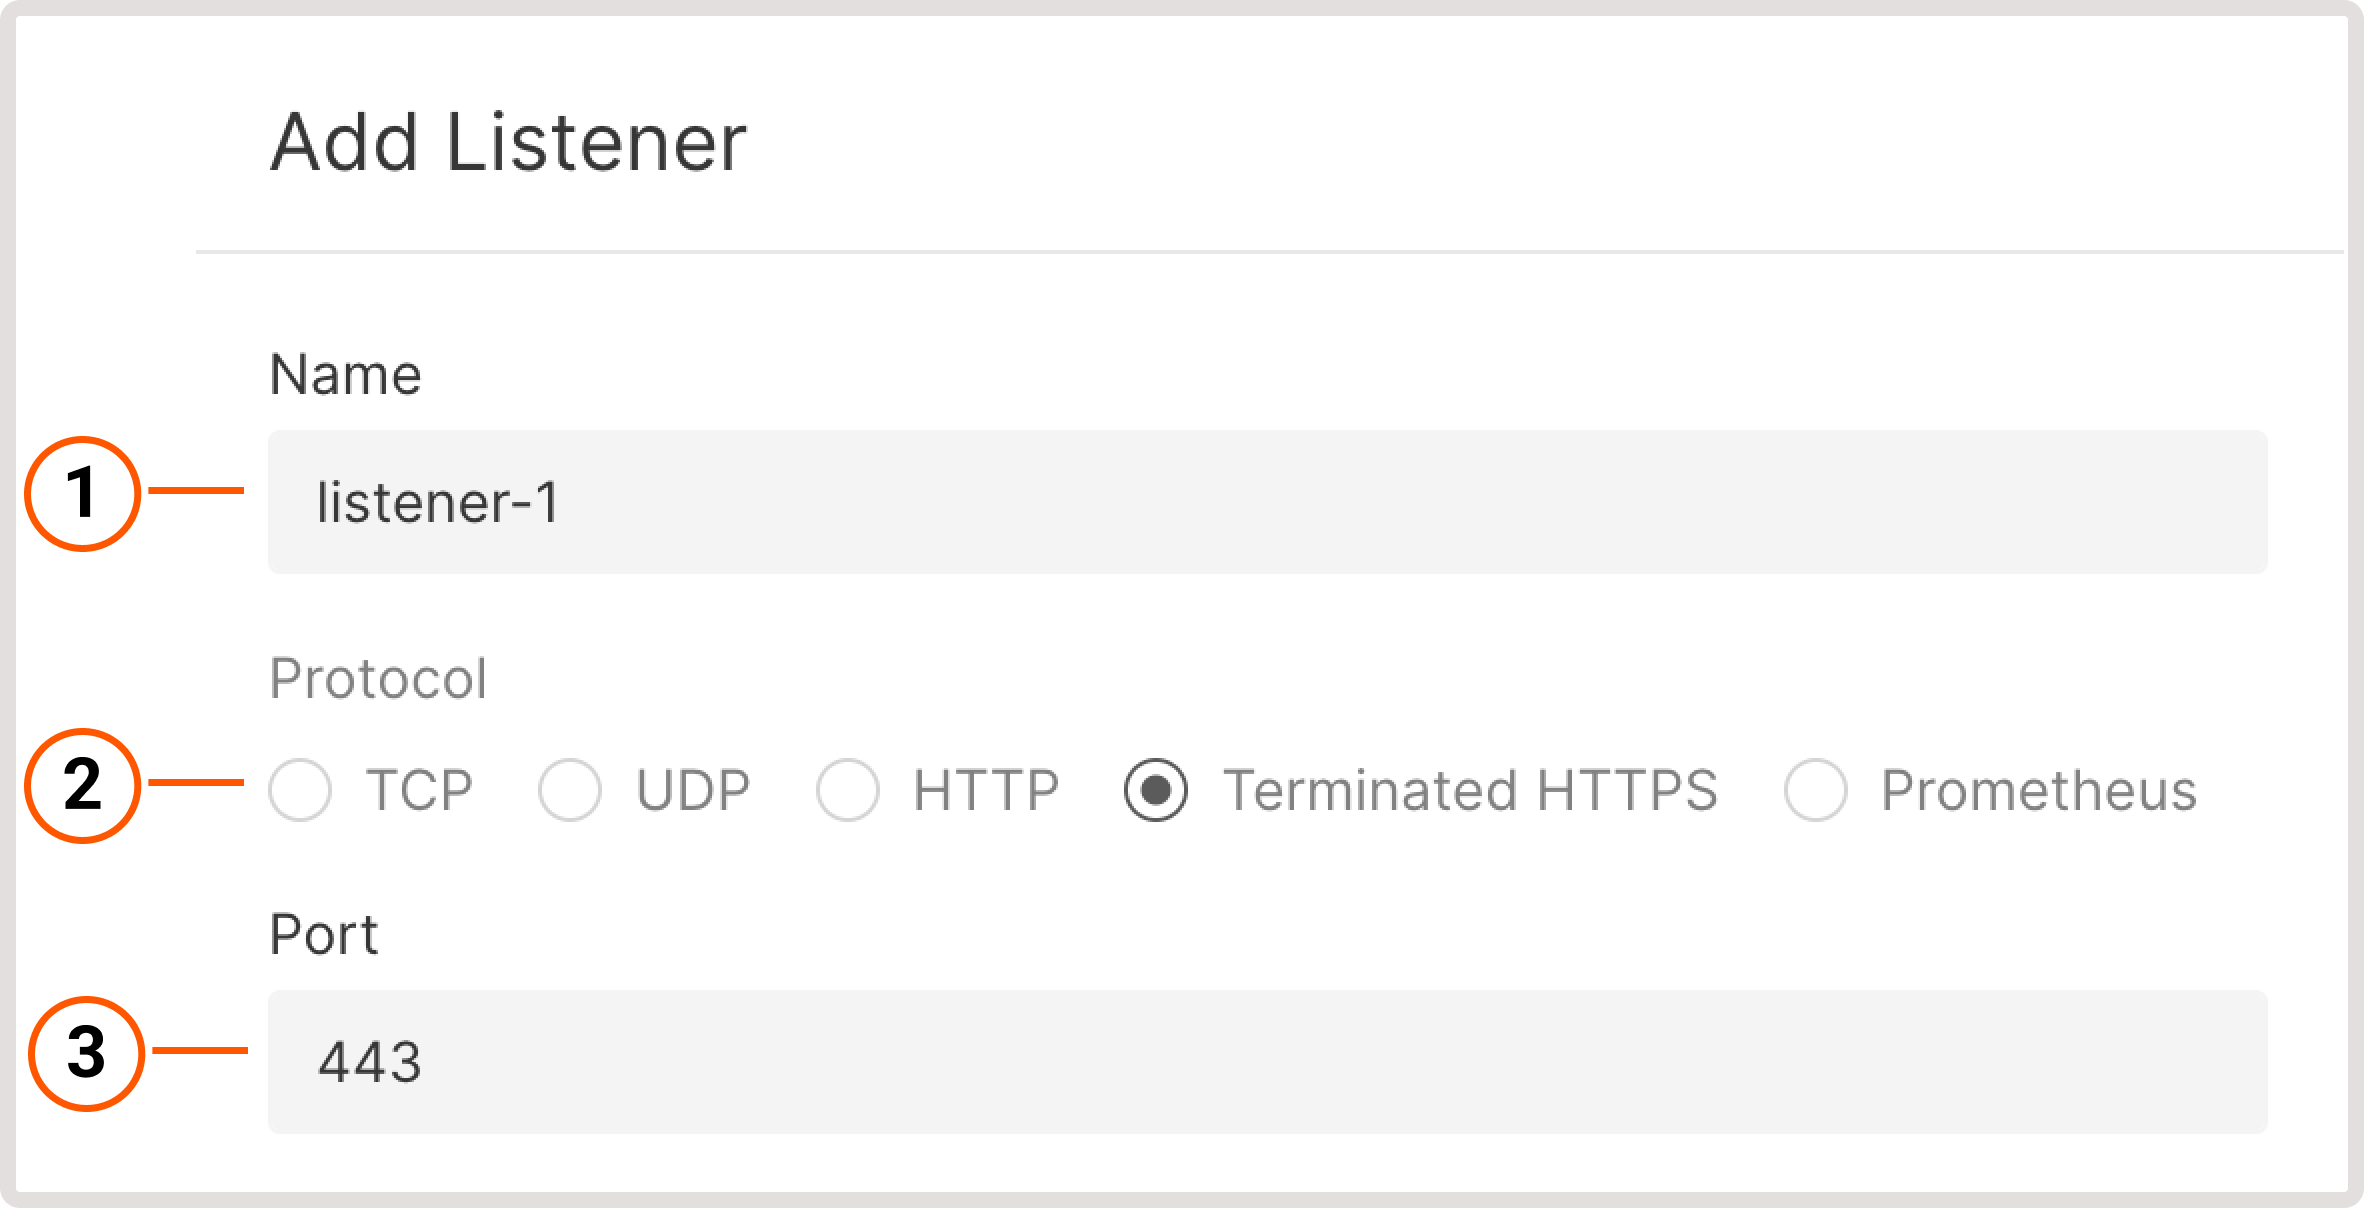
Create a listener dialog

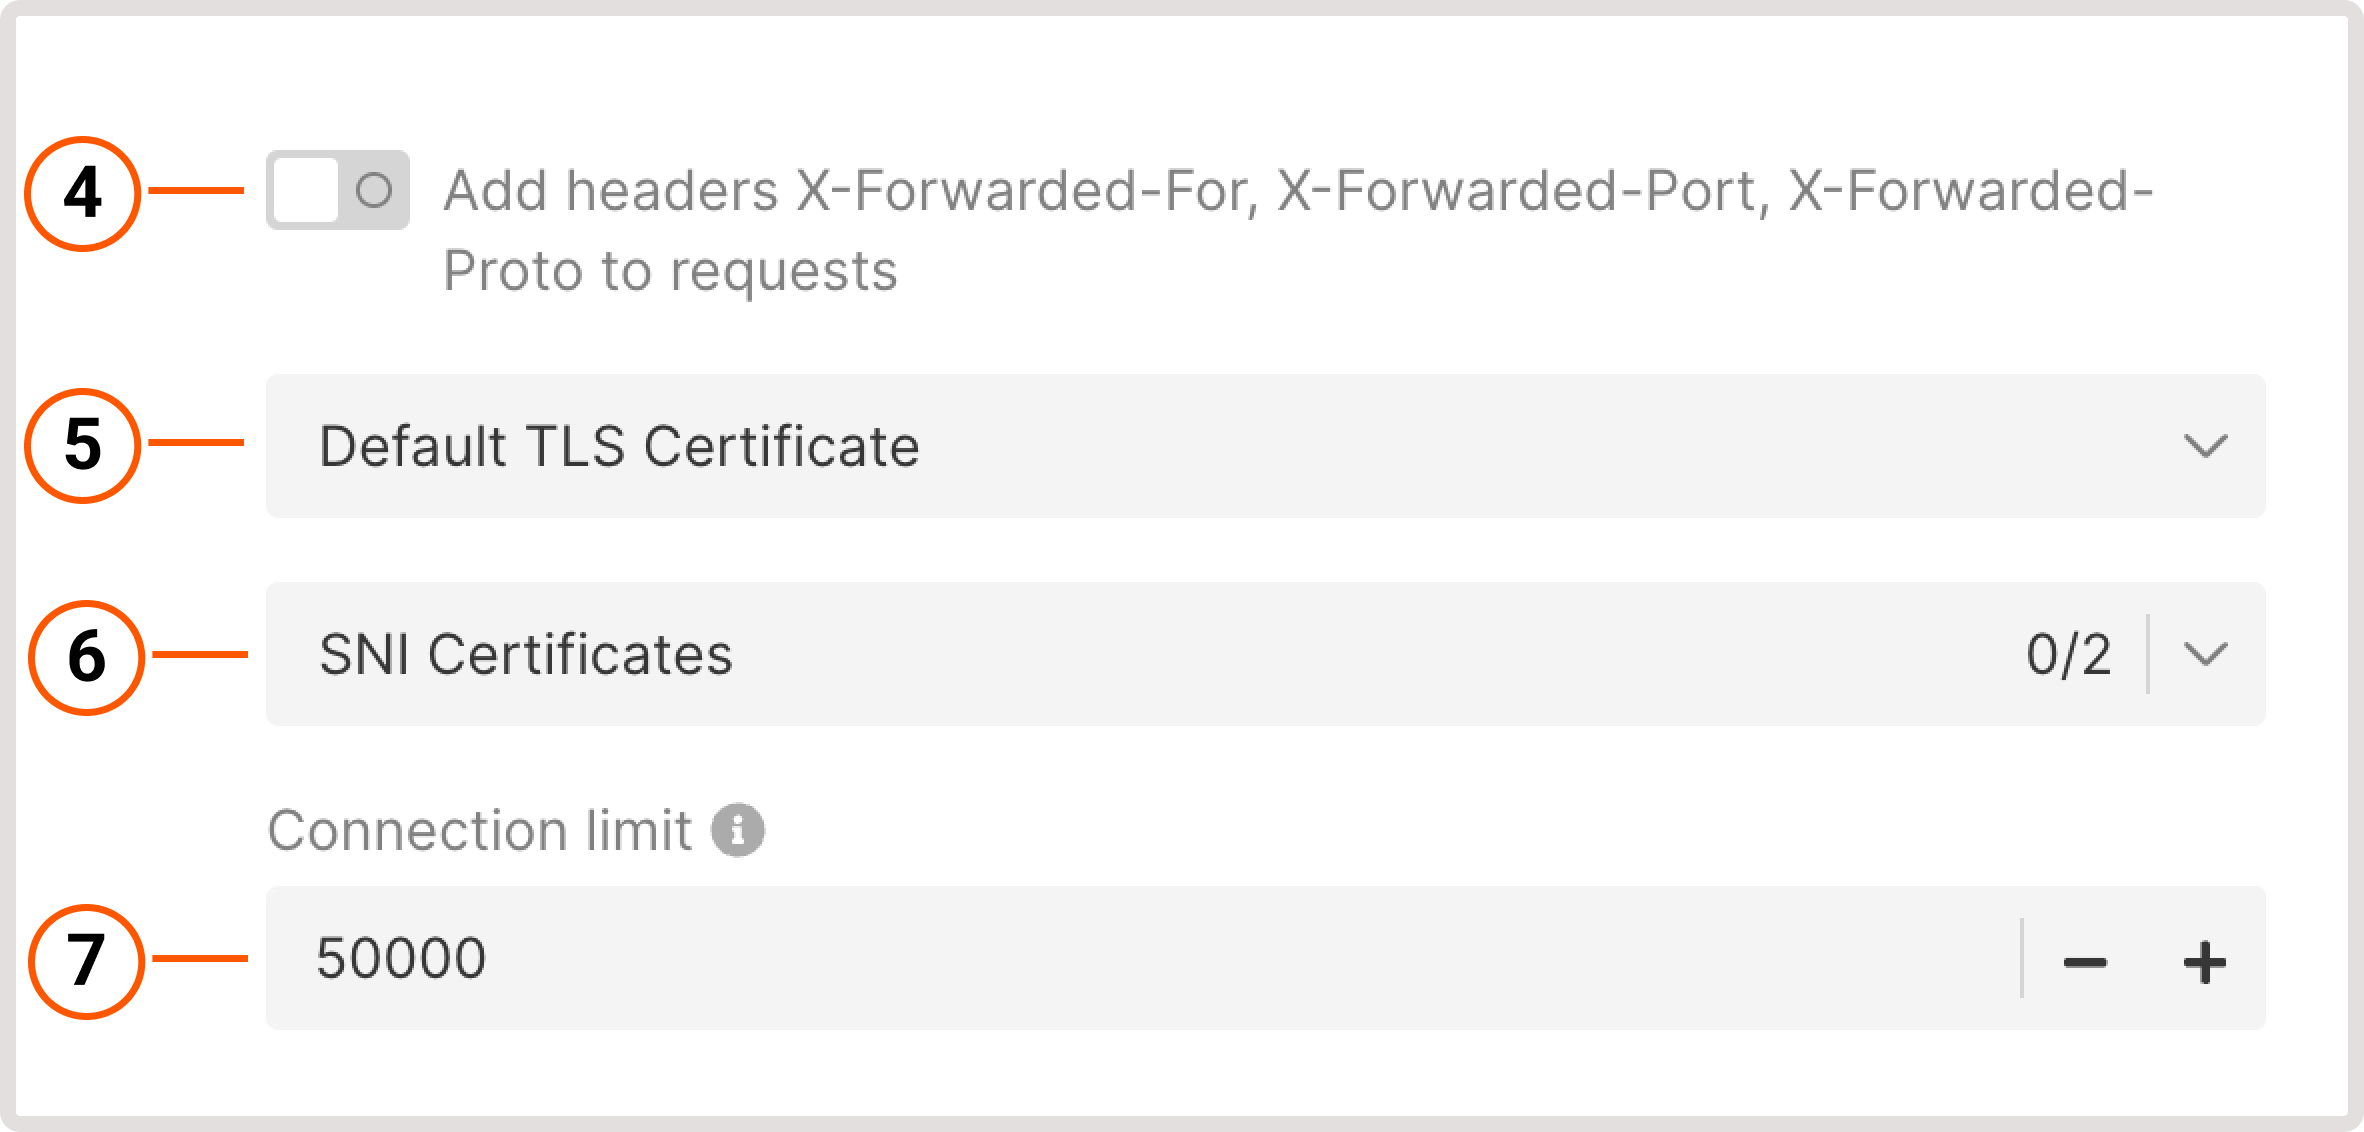
4. (Optional) To identify the origin of the user's IP address connecting to a web server via a Load balancer, enable the Add headers X-Forwarded-For, X-Forwarded-Port, X-Forwarded-Proto to requests toggle.

5. Choose the default TLS Certificate. It’s the main certificate that will be used when there’s no configured certificate for a domain.

6. Select the CNI Certificates stored in the Secret Manager.

7. Set the connection limit - a maximum number of simultaneous connections that can be handled by the listener.

Create a listener dialog

8. (Optional) Add allowed CIDR ranges to define which IP addresses can access your content. All IP addresses that don’t belong to the specified range will be denied access.

9. (Optional) Configure Basic Authentication for HTTP traffic to protect your resource from unauthorized access. Click Add user to specify who can access your resource only by logging in with the following credentials:

  • Enter username: specify a username that needs to be entered on the login screen.

  • Password: specify a password or provide an encrypted password.
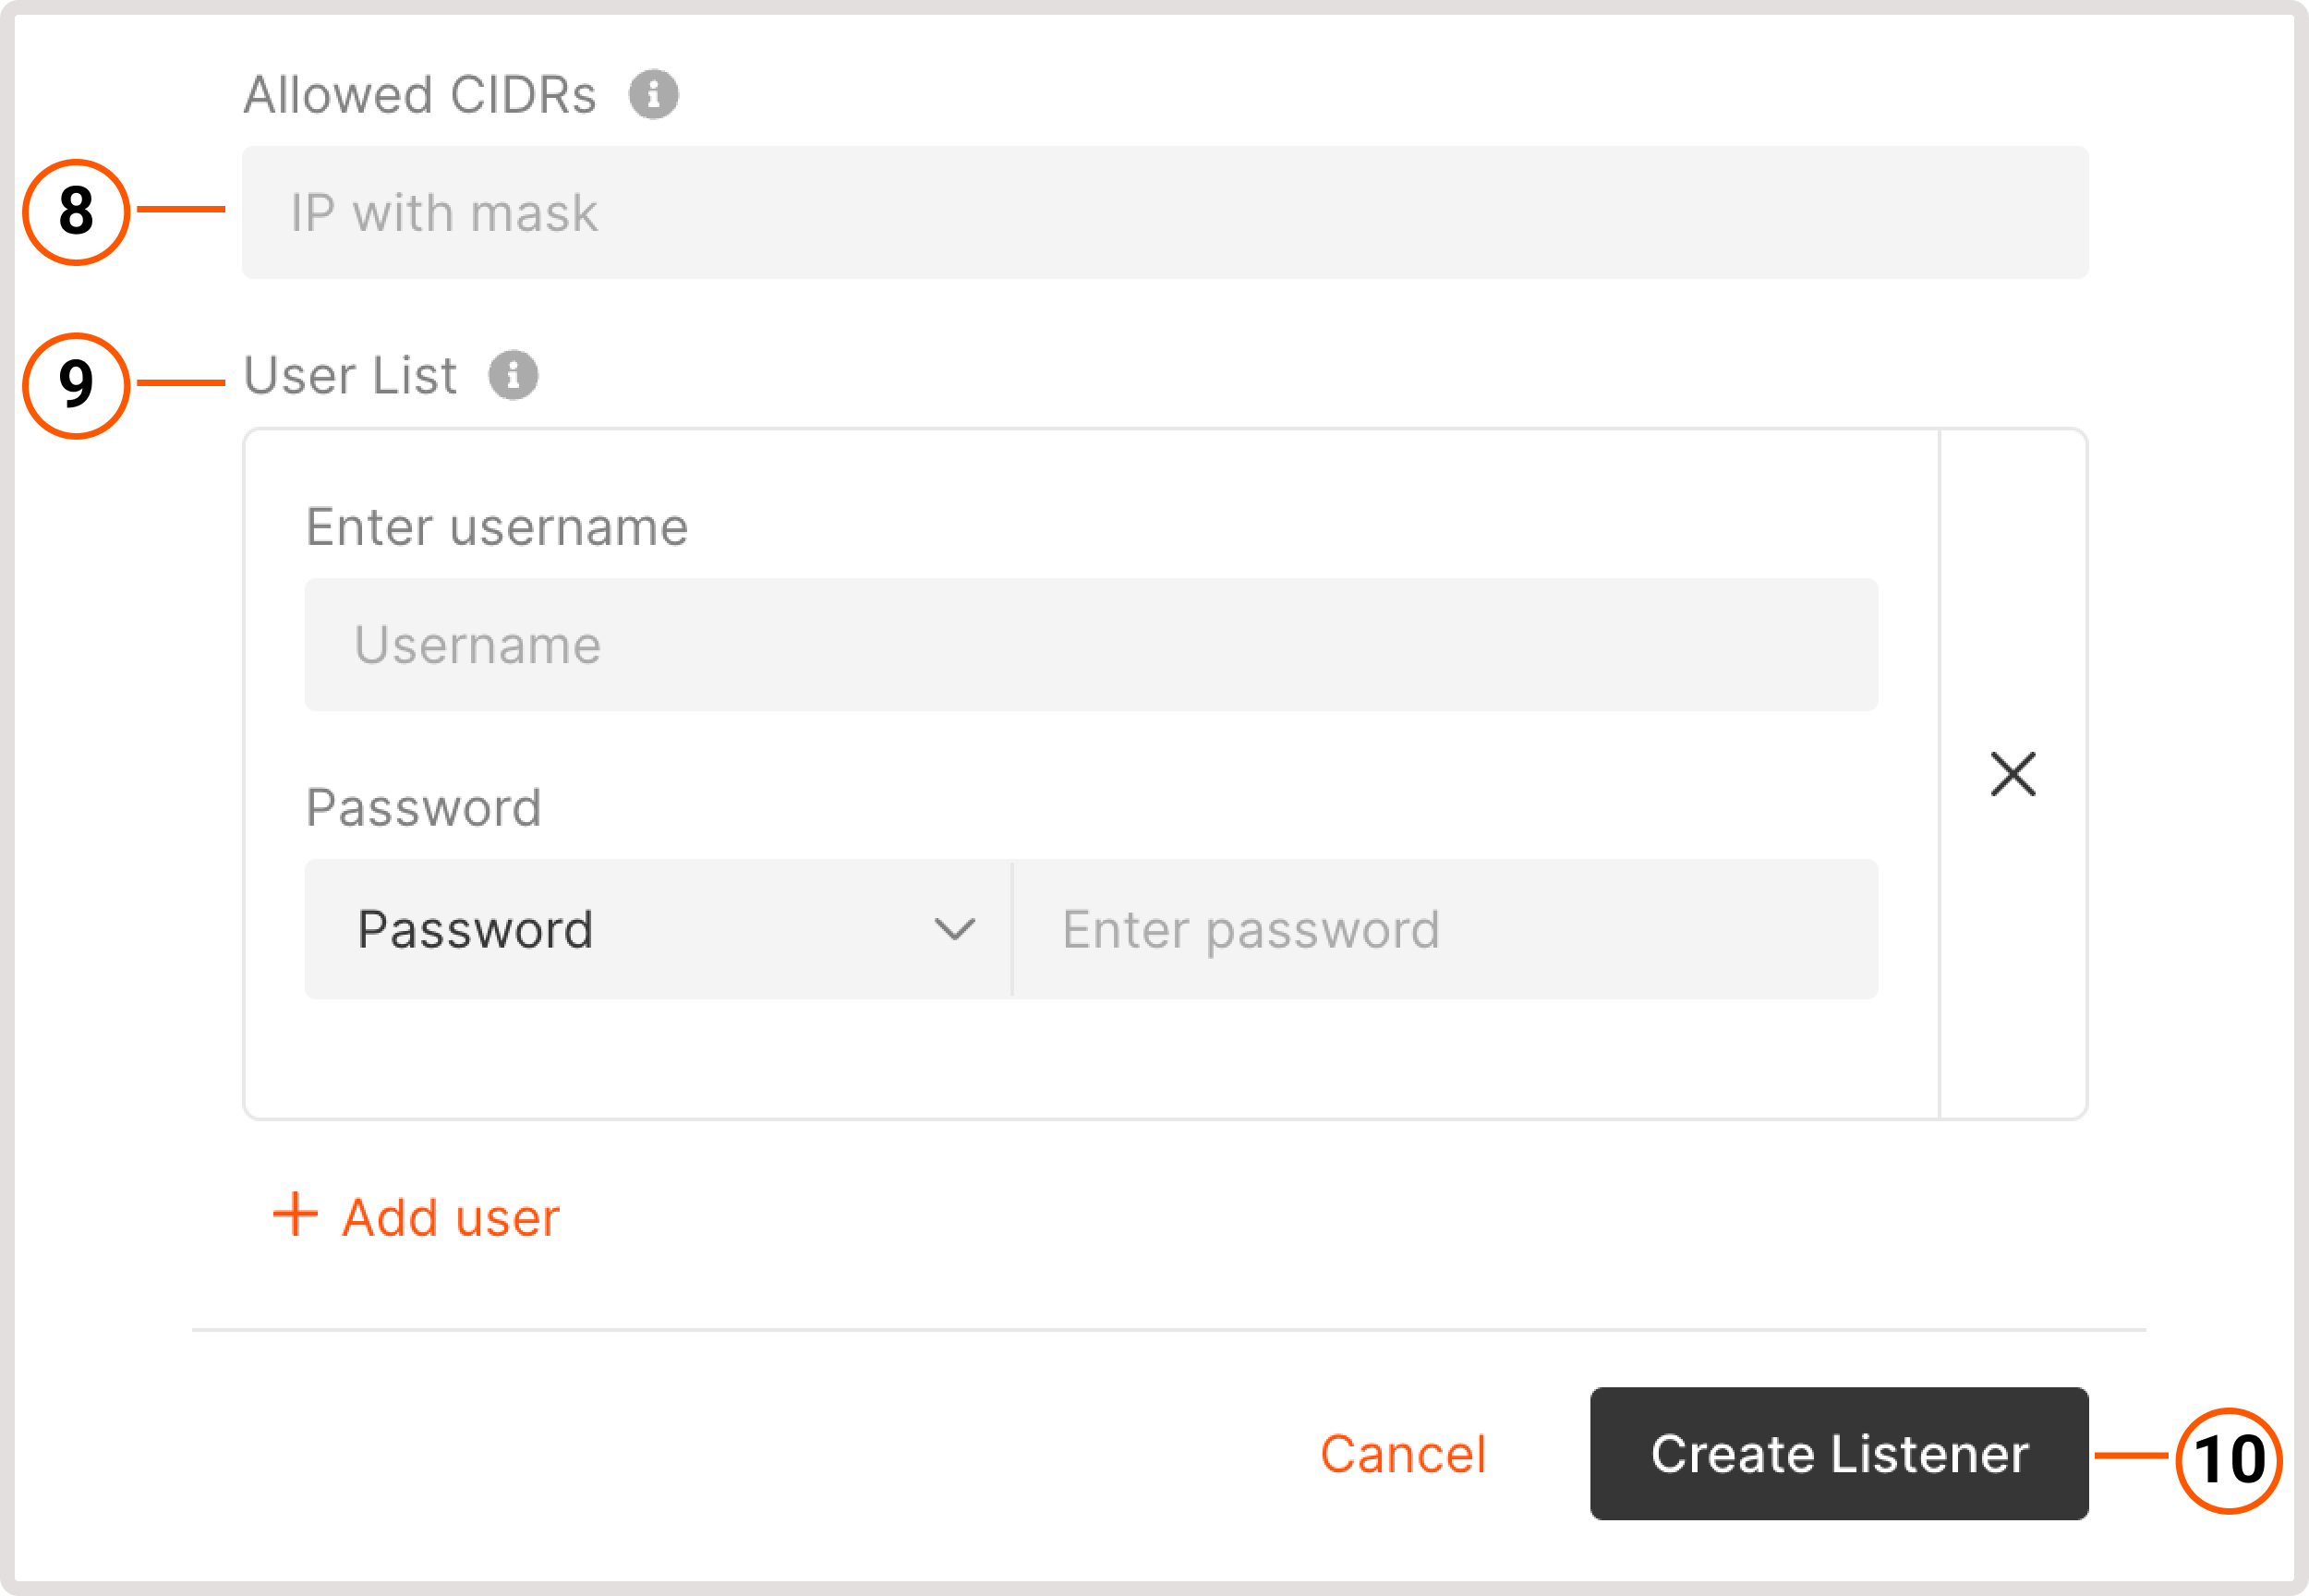
10. Click Create Listener.

After you configure the listener, proceed with the rest of the steps described in the Create a Load Balancer guide to finish the balancer’s creation.

Create a listener dialog

From the Load Balancer settings

If you already have a Load Balancer and don’t want to create a new one to terminate SSL connections, update the existing Load Balancer as follows:

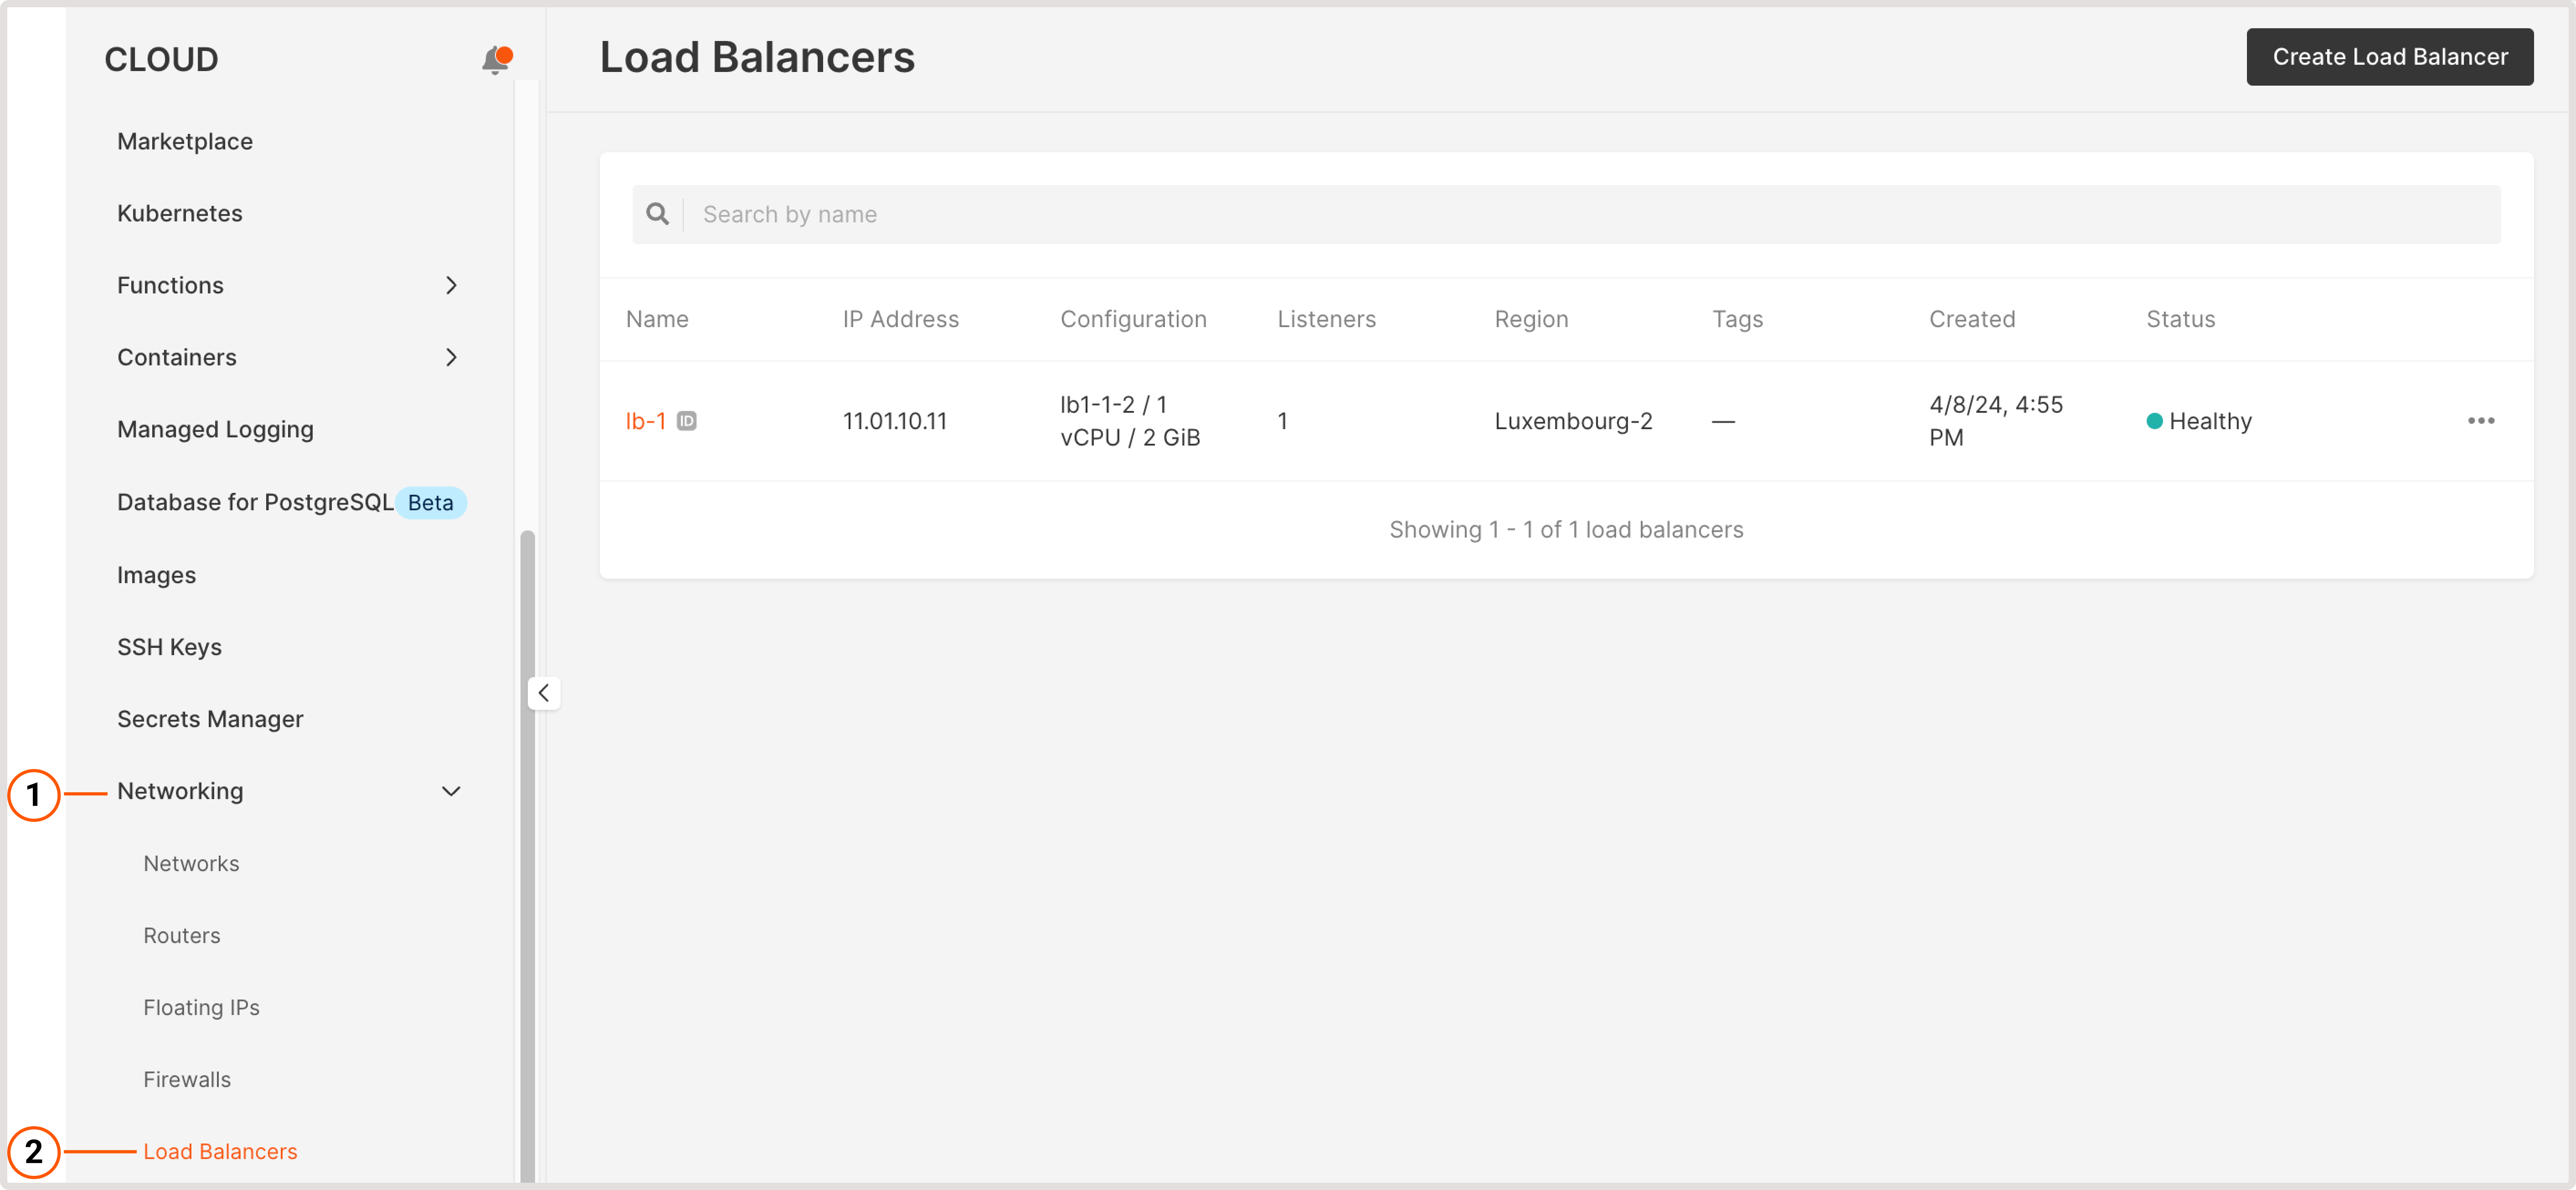
1. In the Gcore Customer Portal, navigate to the Cloud page and click Networking.

2. Open the Load Balancers page.

Load Balancers page in Customer Portal

3. Find the Load Balancer you want to configure and click its name to open it.

4. Navigate to the Listeners tab and click Add listener.

Listener tab in the Load Balancer settings

5. To configure a new listener, follow the same instructions as in the "Add certificates during Load Balancer creation" step.

Create an encrypted password

When configuring basic authentication for HTTP traffic, you have the option to specify an encrypted password for a user.

You can use any preferred encryption method or generate a hashed password using the MKPasswd utility.

To generate a password hash using a dockerized version of MKPasswd:

1. Check the available encryption types:
docker run --rm yardalgedal/mkpasswd -m help 

2. Choose your preferred encryption method and generate the password hash. For example, to create a password hash using the bcrypt method, run:

docker run --rm yardalgedal/mkpasswd -m bcrypt mypassword 

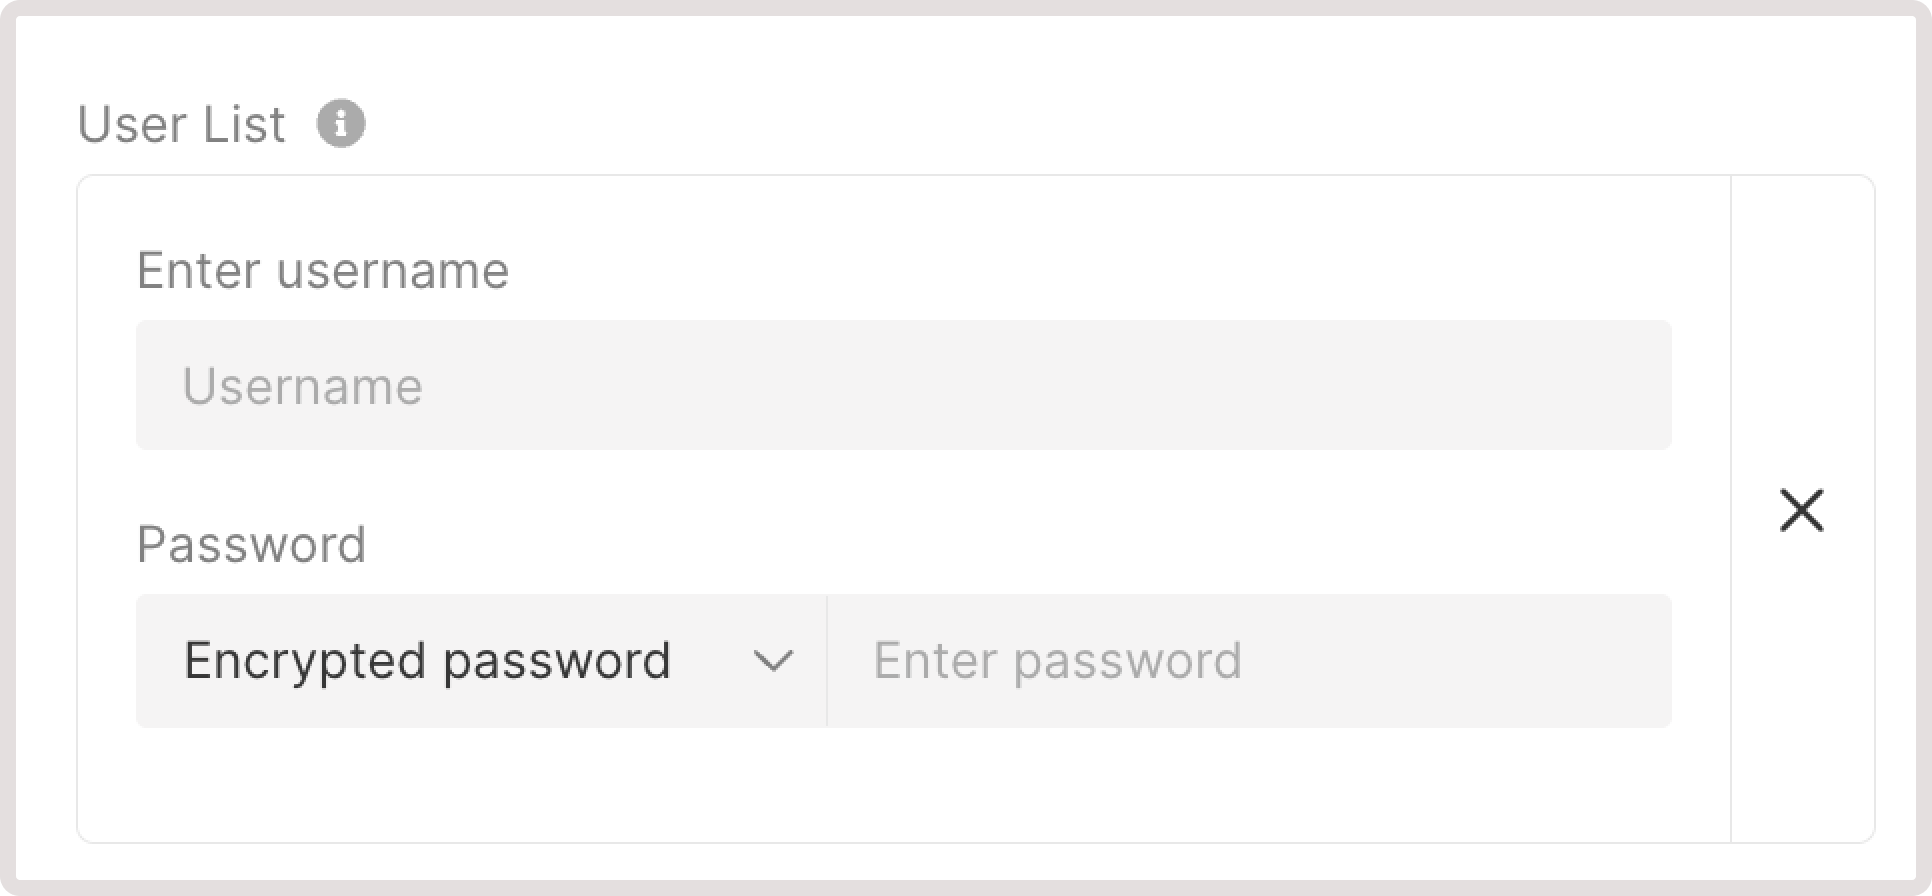
3. Insert the hash into the Encrypted password field:

Encrypted password in listener settings

Was this article helpful?

Not a Gcore user yet?

Discover our offerings, including virtual instances starting from 3.7 euro/mo, bare metal servers, AI Infrastructure, load balancers, Managed Kubernetes, Function as a Service, and Centralized Logging solutions.

Go to the product page