Monitoring network traffic has become crucial in today’s digital age to ensure optimal system performance and security. Linux, being a versatile operating system, provides various tools for this purpose. Out of all the available options, Nethogs is a particularly user-friendly tool with real-time traffic monitoring capabilities. In this guide, we will explore the nuances of using Nethogs to keep a close eye on your Linux system’s network activity.
Importance of Monitoring Linux Network Traffic
Monitoring network traffic in Linux (or any operating system) is crucial for several reasons. Here are at least four key reasons:
- Security and Threat Detection. Monitoring allows for the early identification of unauthorized access, malware activities, and potential cyberattacks, enabling timely interventions.
- Performance Assessment. By observing network traffic, you can pinpoint bandwidth-intensive applications, helping in the effective allocation of resources and ensuring a seamless user experience.
- Troubleshooting. Real-time monitoring provides insights into network anomalies, aiding in diagnosing and rectifying connectivity issues, slow speeds, or application failures.
- Capacity Planning. By understanding network usage patterns, administrators can make informed decisions about infrastructure upgrades, expansions, or adjustments, ensuring that the system is scaled appropriately for future demands.
- Compliance and Audit. For businesses that need to adhere to specific regulations regarding data transmission and storage, monitoring ensures that all network activities align with these standards, simplifying audit processes.
Ensuring a reliable, streamlined, and secure Linux setting requires monitoring network traffic. In the following section, we will explore how to do so with using nethogs command.
Process to Monitor Network Traffic in Linux Using Nethogs
Nethogs is a handy terminal-based tool that allows users to monitor real-time network traffic, grouped by process or application. Unlike other tools that only display total traffic, Nethogs presents traffic per process, making it easier to identify which applications are consuming the most bandwidth.
#1 Installation
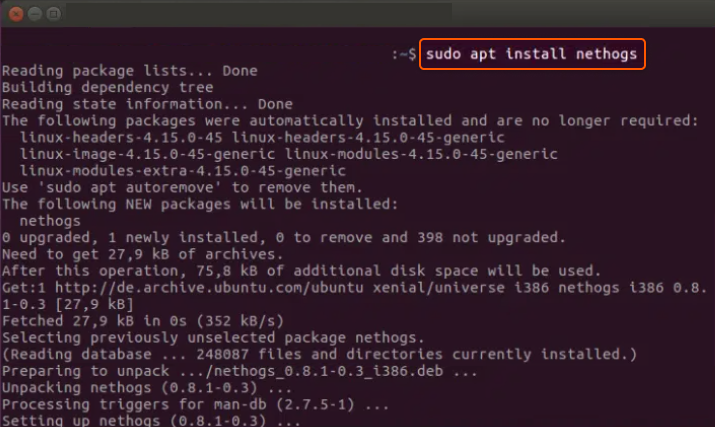
On Debian-based distributions (like Ubuntu):
sudo apt update
sudo apt install nethogs
Sample Output:

On Red Hat-based distributions (like Fedora):
sudo dnf install nethogs
#2 Using Usage
After installing, you can start monitoring network traffic by simply entering the command:
sudo nethogs
This will display a real-time list of all active processes and their respective network usage.
#3 Understanding the Display
When you run Nethogs, you will see an output similar to:
NetHogs version 0.8.6

    PID USER    PROGRAM                          DEV        SENT      RECEIVED
  1234 user1   /usr/bin/firefox                 eth0       2.1KB/s   20.2KB/s
  2345 user2   /usr/lib/slack                   eth0       1.2KB/s   1.1KB/s
  3456 user1   /usr/bin/dropbox                 eth0       0.1KB/s   0.7KB/s

  TOTAL                                                3.4KB/s     22.0KB/s
In this display:
- PID refers to the Process ID.
- USER is the username running the process.
- PROGRAM denotes the path to the application or process responsible for the network activity.
- DEV shows the network device being used.
- SENT and RECEIVED columns display the current upload and download speeds of that process respectively.
#4 Navigating Nethogs
While in Nethogs:
- Use the m key to switch between KB/s, KB, B, and MB.
- Press q or Ctrl + C to quit the application.
That’s it! You can now monitor network traffic in Linux using Nethogs. This tool is invaluable for identifying unexpected network activity from specific applications and is particularly useful for detecting rogue processes or malware.
Conclusion
Looking to deploy Linux in the cloud? With Gcore Cloud, you can choose from Basic VM, Virtual Instances, or VPS/VDS suitable for Linux:
- Gcore Basic VM offers shared virtual machines from €3.2 per month
- Virtual Instances are virtual machines with a variety of configurations and an application marketplace
- Virtual Dedicated Servers provide outstanding speed of 200+ Mbps in 20+ global locations


