
In this guide, you’ll learn how to install Nethogs on Ubuntu, a powerful network monitoring tool that allows you to track network bandwidth usage on a per-process basis. Whether you’re a system administrator, a network enthusiast, or simply curious about your network activity, Nethogs can provide valuable insights into your network’s data consumption. We’ll walk you through the installation process step by step, so you can start using Nethogs to monitor and manage your network more effectively.
What Is Nethogs and Its Key Features
Nethogs is a network monitoring tool for Linux that allows you to track bandwidth usage on a per-process basis. Its key features include:
- Real-Time Monitoring. Nethogs provides real-time data on network usage, helping you identify bandwidth-hungry processes.
- Process-Specific Data. You can see which processes are using the most network resources, making troubleshooting and optimization easier.
- Easy Installation. Nethogs is straightforward to install and use, making it accessible to both beginners and experienced users.
- Clear Interface. Its simple and intuitive interface displays network usage in a readable format.
- Resource Efficiency. Nethogs itself consumes minimal system resources, ensuring it doesn’t impact your network performance.
Procedure for Installing NetHogs
To install NetHogs on Ubuntu, follow these steps. This process assumes you have sudo privileges on your Ubuntu system. Open a terminal and execute these commands step by step:
1. Update Package Lists. Update your package list to ensure you get the latest version of NetHogs available in the repositories.
sudo apt-get update
The command will list various URLs from which it’s fetching package information. Once completed, it returns to the command prompt.
2. Install NetHogs. Install NetHogs using the apt-get command.
sudo apt-get install nethogs
Sample Output:
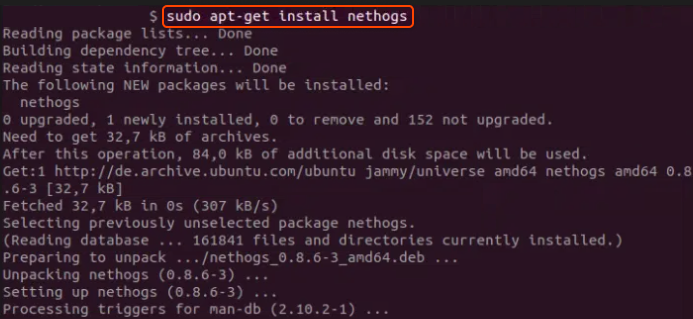
You will see a progress bar indicating the installation process. You might be prompted to confirm the disk space usage; press Y to continue.
3. Verify Installation. After installation, you can verify it by checking the version of NetHogs installed.
nethogs -V
This will display the version of NetHogs installed on your system.
4. Running NetHogs. To start NetHogs, use the following command. You might need to run it with sudo since NetHogs requires root privileges to monitor network traffic.
sudo nethogs
NetHogs will open in the terminal, displaying real-time network usage per process. Remember, NetHogs shows real-time network traffic and updates dynamically. To exit NetHogs, press q.
Congratulations, now you’re able to install NetHogs on Ubuntu, empowering you with the ability to monitor your network traffic effectively. By following the simple steps outlined, you have added a vital tool to your system’s utility belt, giving you real-time insights into bandwidth usage by each process.
Conclusion
Looking to deploy Linux in the cloud? With Gcore Cloud, you can choose from Basic VM, Virtual Instances, or VPS/VDS suitable for Linux:
- Gcore Basic VM offers shared virtual machines from €3.2 per month
- Virtual Instances are virtual machines with a variety of configurations and an application marketplace
- Virtual Dedicated Servers provide outstanding speed of 200+ Mbps in 20+ global locations


