
Managing your files and directories is an essential skill for Ubuntu users, regardless of their experience level. Our guide covers everything you need to know about organizing your files, from using the graphical user interface to executing terminal commands. With this guide, you can effectively manage your files and become more proficient in using the Linux ecosystem.
Using the File Manager
Learn how to create a folder in Ubuntu using the File Manager with step-by-step instructions.
#1 Open File Manager
The File Manager, also known as Nautilus in Ubuntu, provides a graphical interface to interact with your files and directories. You’ll see a window displaying your folders, files, and locations on the left sidebar.

#2 Navigate to the Desired Location
Before creating a folder, decide where you want it. Maybe it’s in the “Documents” directory or perhaps on the Desktop. As you click through directories, the main pane of the File Manager updates to show the contents of the current location.
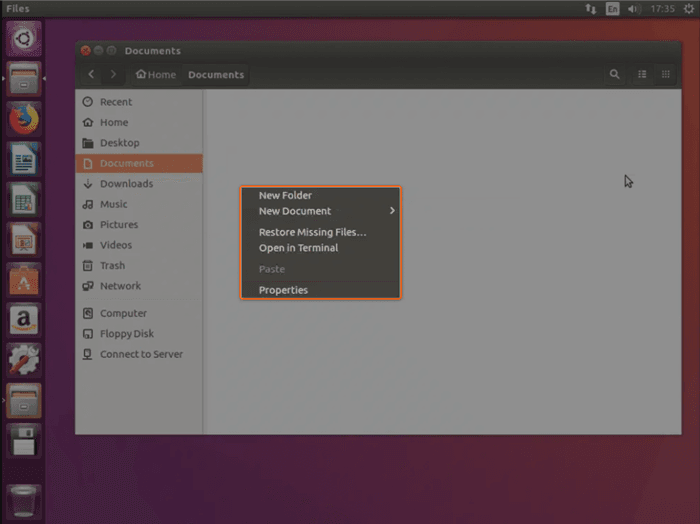
#3 Right-Click for Context Menu
Right-clicking in an empty space of the directory will bring up a context menu with several options. Select “New Folder” this option allows you to create a new directory within your current location. An icon representing a new folder appears in your current location with the placeholder’s name “Untitled Folder” highlighted.
#4 Name Your Folder
While the name “Untitled Folder” is highlighted, you can type to replace it with your desired folder name. After naming the folder, pressing the “Enter” key will finalize the folder creation.

Using the Terminal
For beginners, the terminal can seem like a complicated tool, leading them to avoid using it to solve problems. However, eventually, one may need to start working with it. In such cases, creating a folder through the terminal can be a more suitable method. Below are the steps for creating a folder via the terminal.
#1 Open the Terminal
You can launch the Terminal in Ubuntu by pressing Ctrl + Alt + T. Alternatively, you can search for “Terminal” in the application menu and click on it.
#2 Navigate to the Directory
Before creating a folder, you should navigate to the location where you want the new folder. Use the command below:
cd path/to/your/directoryFor instance, if you wish to navigate to the Desktop, you’d use:
cd ~/Desktop#3 Create the Folder
To create a new folder, use the mkdir command followed by the desired folder name.
mkdir YourFolderNameReplace “YourFolderName” with whatever you’d like to name your folder.
#4 Verify the Folder’s Creation
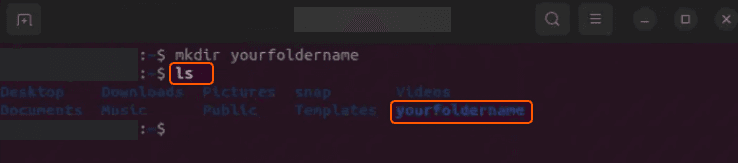
After creating the folder, it’s good practice to ensure it was successfully made. Use the command:
lsThe output will list all items in the current directory. You should see your new folder listed among them. Here’s a sample output:
#5 Exit the Terminal
Once you’ve created your folder and verified it, you can exit the terminal by simply closing the terminal window or using this command:
exit
Well done! After completing these steps, you now have a freshly created folder in your chosen directory. While the Terminal can initially appear daunting, consistent use transforms it into a powerful asset for numerous Ubuntu tasks.
Conclusion
Want to run Ubuntu in a virtual environment? With Gcore Cloud, you can choose from Basic VM, Virtual Instances, or VPS/VDS suitable for Ubuntu:
- Gcore Basic VM offers shared virtual machines from €3.2 per month
- Virtual Instances are virtual machines with a variety of configurations and an application marketplace
- Virtual Dedicated Servers provide outstanding speed of 200+ Mbps in 20+ global locations
Related articles


Imagine discovering that migrating your company's data to a new cloud provider will cost hundreds of thousands of dollars in egress fees alone, before you've even touched the re-engineering work. Or worse, picture being in Synapse Financial

Subscribe to our newsletter
Get the latest industry trends, exclusive insights, and Gcore updates delivered straight to your inbox.